一:spring源码介绍和编译
目录
Spring体系架构(基于4.x)
1、Core Container(核心容器)
2、AOP and Instrumentation
3、Messaging
4、Data Access/Integration
5、Web
6、Test
Spring最新源码编译
准备工作
环境准备
源码下载
构建工具准备:
编译工作
编译compileTestJava模块
导入项目到idea中
添加测试模块代码:
编写代码测试ioc功能
spring-source-master.zip
spring中文文档地址
Spring体系架构(基于4.x)
1、Core Container(核心容器)
该模块主要包含Core、Beans、Context和SpEL模块。其中Core和Beans是整个框架最基础的部分,提供IOC和依赖注入特性。这里最重要的概念就是BeanFactory,提供了以Factory模式的实现来消除对程序性
单例模式。
- Core:模块主要包含Spring框架最基本的核心工具类,Core是其他组件的基础核心。
- Beans:模块主要包含访问配置文件、创建/管理Bean以及IOC/DI相关的类。
- Context:继承了Beans的特性,主要为Spring提供大量的扩展,如国际化、事件机制、资源加载等待。ApplicationContext接口是Context模块的关键。
- SpEL:模块提供了一个强大的语言表达式。
2、AOP and Instrumentation
提供符合AOP Alliance标准的面向切面编程的实现,可以让你定义如方法拦截器和切点,从而降低程序之间的耦合性。
- AspectJ模块:提供了与AspectJ的集成 。
- Instrumentation模块:提供用于某些应用程序服务器的类工具支持和类加载器实现 。
3、Messaging
该模块具有来自Spring Integration项目的关键抽象,如Message,MessageChannel,MessageHandler等。它们构成基于消息的应用程序的基础。该模块还包括一组注释,用于将消息映射到方法,类似于基于Spring MVC注释的编程模型。
4、Data Access/Integration
数据访问/集成层由JDBC,ORM,OXM,JMS和事务模块组成。
- JDBC模块:提供了JDBC抽象层,从而无需进行繁琐的JDBC编码和数据库特定错误代码(不同数据代码可能不同)的解析。
- 事务模块:支持对实现特殊接口的类以及所有POJO(普通Java对象)进行编程和声明式事务管理。
- ORM模块:该模块为当前流行的ORM(包括JPA,JDO和Hibernate)提供了集成层。使用ORM模块,可以将所有这些O/R映射框架与Spring提供的所有功能结合使用,如前面提到的事务管理功能。
- OXM模块:提供了一个抽象层,该抽象层支持Object/ XML映射实现,例如JAXB,Castor,XMLBeans,JiBX和XStream。
- JMS模块(Java Messaging Service):包含用于生成和使用消息的功能。从Spring Framework 4.1开始,提供了与Spring-Messaging模块集成。
5、Web
Web上下文模块建立在应用程序上下文模块之上,为基于Web的应用程序提供上下文支持。该模块包含Web、WebMVC、Web Socket和Web-Porlet模块。
- Web模块:提供了基本的面向Web的集成功能,如文件上传功能以及使用Servlet监听器和面向Web的应用程序上下文对IoC容器的初始化。
- WebMVC模块(也称为Web-Servlet模块):包含基于Spring的Model-View-Controller(MVC)支持和针对Web应用程序的Rest Web服务实现。
- Web-Portlet 模块(也称为Web-Portlet模块):提供Portlet环境中的MVC实现。
6、Test
该模块支持使用JUnit或TestNG对Spring组件进行单元测试和集成测试。
Spring最新源码编译
准备工作
本示例基于 SpringV5.2.7RELEASE+GradleWapper+jdk1.8.0_131编译
环境准备
- maven
- idea
- jdk8+
源码下载
进入https://github.com/spring-projects/spring-framework
Spring的源码是发布在github上面的
下载最新版发布版源码
不要太纠结版本区别,无需刻意保证跟我一样的版本,只要5.x的正式发布(RELEASE)版本就行, 因为Spring中Ioc AOP核心分支是不会有变化的, 变的只有微小的细节。
稍微介绍版本代号
M:
M1,M2,…中的M是milestone的简写,意思是里程碑,代表着有重大改进的版本。
构建工具准备:
安装源码对应的gradle版本(也可不安装),建议使用gradleWraper中的gradle。
Gadle介绍:
Gradle是个构建系统,能够简化你的编译、打包、测试过程。熟悉Java的同学,可以把Gradle类比成Maven。
Gradle Wrapper的作用是简化Gradle本身的安装、部署。不同版本的项目可能需要不同版本的Gradle,手工部署的话比较麻烦,而且可能产生冲突,所以需要Gradle Wrapper帮你搞定这些事情。Gradle Wrapper是Gradle项目的一部分。
Gradle无需花时间去深入学习,因为我们在学习源码的过程不会过多涉及到gradle,当然有兴趣可以去学习, 相当于后起之秀,但是maven已经够优秀了,暂时应该也没有办法替代maven。
gradleWraper在该文件中有体现,相当于远程自动下载gradle到本地(所以你可以下载gradle,也可以不下,因为可以使用gradleWraper远程的统一版本):spring-framework-5.2.7.RELEASE\gradle\wrapper\gradle-wrapper.properties
所以如果你需要下载也最好下载该链接对应的gradle版本
修改build.gradle
这个文件就相当于我们Maven的pom.xml 管理项目的依赖等信息...
设置镜像
repositories {
			maven{ url 'https://maven.aliyun.com/nexus/content/groups/public/'}
            	maven{ url 'https://maven.aliyun.com/nexus/content/repositories/jcenter'}
			mavenCentral()
			maven { url "https://repo.spring.io/libs-spring-framework-build" }
		}
编译工作
按照官网的方式编译:
使用gradlew(gradle-wrapper命令) 先编译oxm:compileTest Java: Precompile spring-oxm with ./gradlew :spring-oxm:compileTestJava
编译compileTestJava模块
打开源码所在文件夹,在windows cmd命令中输入,在windows中当前目录无需输入“./”。
gradlew :spring-oxm:compileTestJava配置了镜像很快(一两分钟)就能编译完成, 如果要很久说明你的镜像没起作用,如果编译异常请自行百度,每个人的电脑及环境产生的异常都有可能。
导入项目到idea中
导入项目到idea中:Import into IntelliJ (File -> New -> Project from Existing Sources -> Navigate to directory -> Select build.gradle)
将项目导入到idea中提示配置gradle,按照如下配置
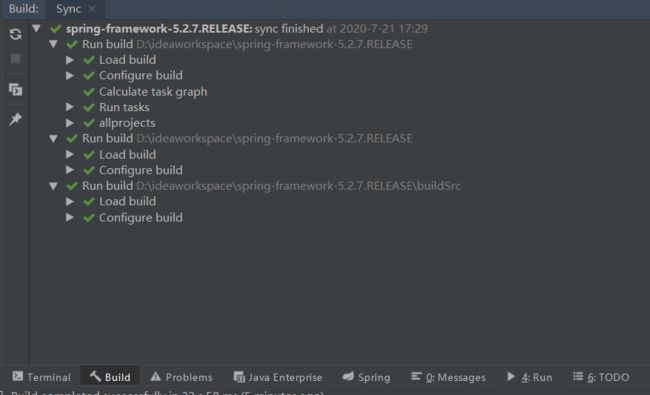
导入后等待编译,莫急,需要一点点时间,编译完成:
添加测试模块代码:
添加测试代码:Code away
new->model->gradle-->输入模块名称
编写代码测试ioc功能
添加依赖
dependencies {
    testCompile group: 'junit', name: 'junit', version: '4.12'
    compile(project(":spring-context"))
}
compile(project(":spring-context")) 代表本项目的
随意添加任意bean:
package cn.tulingxueyuan.beans;

import org.springframework.stereotype.Service;


@Service
public class UserServiceImpl {

    public void sayHi(){
        System.out.println("Hello Spring!");
    }
}
添加启动配置类:
import cn.tulingxueyuan.beans.UserServiceImpl;
import javafx.application.Application;
import org.springframework.context.ApplicationContext;
import org.springframework.context.annotation.AnnotationConfigApplicationContext;
import org.springframework.context.annotation.ComponentScan;
import org.springframework.context.annotation.Configuration;


@Configuration
@ComponentScan("cn.tulingxueyuan")
public class MainStat {

    public static void main(String[] args) {
        ApplicationContext context=new AnnotationConfigApplicationContext(MainStat.class);
        UserServiceImpl bean = context.getBean(UserServiceImpl.class);
        bean.sayHi();

    }

}
正确输出,大功告成!


