电商项目4:全栈之前端
全栈之前端
- 1、技术栈
- 2、es6
-
- 跨域
- 声明变量
- 变量提升
- const
- 数组解构
- 对象解构
- 字符串扩展
- 字符串插入变量表达式
- 调用方法
- 函数参数默认值传递
- 不定参数
- 箭头函数
- 箭头函数结合解构表达式
- 对象优化
- 对象复制
- 声明对象简写
- 对象的函数属性简写
- 深拷贝
- 合并对象
- map和reduce方法
- promise异步编排
- 模块化
- 3、vue
-
- 1、声明式渲染(new Vue({}))
- 2、双向绑定 (v-model)
- 3、事件处理(v-on:)
- 4、调用方法(methods)
- 5、指令
-
- 5.1、v-text v-html
- 5.2、插值表达式
- 5.3、v-bind(单向绑定)
- 5.4、v-model(双向绑定)
- 5.5、事件修饰符
- 5.6、按键修饰符
- 5.7、v-for
- 5.8、v-if v-show
- 5.9、v-else,v-else-if
- 5.10 v-if和v-for结合使用
- 6、计算属性
- 7、监听器
- 8、过滤器
-
- 8.1、局部过滤器
- 8.2、全局过滤器
- 9、组件化
-
- 9.1、全局申明组件
- 9.2、局部申明组件
- 10、生命周期和钩子函数
- 11、vue脚手架
- 12、vue整合ElementUI快速开发
1、技术栈
技术栈介绍:前端主要是6部分
1、vscode:最好用的前端编程工具
2、es6:可理解为后端的jdk8新特性之类
3、node.js主要使用里面的npm
4、vue:前端框架
5、babel:javascript编译器。可以使用es最新的语法进行编程,而不用考虑浏览器兼容问题
6、webpack:打包前端项目工具

2、es6


#前端工程创建
1、文件->新建文件夹(es6)->打开文件夹

2、新建let.html

3、编写第一段前端代码
!+回车
Document
4、let特性
跨域
var声明的变量可以在代码块外使用。但是let声明在代码块外使用会报错
![]()
多行注释:alt+shift+a
声明变量
 // var 可以声明多次
 // let 只能声明一次
        var m = 1
        var m = 2
        let n = 3
        let n = 4
        console.log(m) // 2
        console.log(n) // Identifier 'n' has already been declared

live server插件安装之后保存vscode则页面不用每次打开
自己会更新页面内容
变量提升
// var 会变量提升
// let 不存在变量提升
        console.log(x); // undefined
        var x = 10;
        console.log(y); //ReferenceError: y is not defined
        let y = 20;

const
 // 1. 声明之后不允许改变
 // 2. 一但声明必须初始化,否则会报错
        const a = 1;
        a = 3; //Uncaught TypeError: Assignment to constant variable.

数组解构
以前
Document

现在
 let arr = [1,2,3];
 let [a,b,c] = arr;
 console.log(a,b,c);
对象解构
以前
		const person = {
            name: "jack",
            age: 21,
            language: ['java', 'js', 'css']
        }

        const name = person.name;
        const age = person.age;
        const language = person.language;
        console.log(name,age,language);

现在:
		 const person = {
            name: "jack",
            age: 21,
            language: ['java', 'js', 'css']
        }
        const{name,age,language} = person
        console.log(name,age,language);
		const{name:abc,age,language} = person;
        console.log(abc,age,language);
字符串扩展
       let ss = `
hello world
`

        console.log(ss);

字符串插入变量表达式


调用方法
function getSame(){
            return `想说话`;
        }
let info = `我是${name},今年${age + 20}了,我${getSame()}`;
console.log(info);

函数参数默认值传递
//在 ES6 以前,我们无法给一个函数参数设置默认值,只能采用变通写法:
        function add(a, b) {
            // 判断 b 是否为空,为空就给默认值 1
            b = b || 1;
            return a + b;
        }
        // 传一个参数
        console.log(add(10));
 //现在可以这么写:直接给参数写上默认值,没传就会自动使用默认值
        function add2(a, b = 1) {
            return a + b;
        }
        // 传一个参数
        console.log(add2(10));
不定参数
 function fun(...values) {
            console.log(values.length)
        }
        fun(1, 2) //2
        fun(1, 2, 3, 4) //4

箭头函数
一个参数:
      // 箭头函数
        //以前声明一个方法
// var print = function (obj) {
// console.log(obj);
// }

var print = obj => console.log(obj);
print("hello");
多个参数:
// 多个参数以前
    var sum = function(a,b){
        return a+b;
    }
    console.log(sum(1,2));
    // 箭头函数

    var sum2 = (a,b) => a+b;
    console.log(sum2(20,30));
复杂方法体:
// 多个参数以前
    var sum = function(a,b){
        c = a+b
        return a+c;
    }
    console.log(sum(1,2));
    /* // 箭头函数

    var sum2 = (a,b) => a+b;
    console.log(sum2(20,30)); */


    var sum3 = (a,b) => {
        c = a+b;
        return a+c;
    }
    console.log(sum3(10,20));

箭头函数结合解构表达式
//以前的方式:
const person = {
name: "jack",
age: 21,
language: ['java', 'js', 'css']
}

function hello(person) {
console.log("hello," + person.name)

}

hello(person);


//箭头函数
const param = (param) => (console.log("hello,"+param.name));

param(person);


//箭头函数+解构

const param1 = ({name}) => (console.log("hello,"+name));
param1(person);

对象优化
const person = {
name: "jack",
age: 21,
language: ['java', 'js', 'css']
}
console.log(Object.keys(person));//["name", "age", "language"]
console.log(Object.values(person));//["jack", 21, Array(3)]
console.log(Object.entries(person));//[Array(2), Array(2), Array(2)]
Object.keys获得对象的键
Object.values获得对象的值
Object.entries获得对象键值对

对象复制
Object.assgin方法
// 对象复制
const target = { a: 1 };
const source1 = { b: 2 };
const source2 = { c: 3 };
//Object.assign 方法的第一个参数是目标对象,后面的参数都是源对象。
Object.assign(target, source1, source2);
console.log(target)//{a: 1, b: 2, c: 3}

声明对象简写
// 声明对象简写
const age = 23
const name = "张三"

// 传统
const person1 = { age: age, name: name }
console.log(person1)
// ES6:属性名和属性值变量名一样,可以省略
const person2 = { age, name }
console.log(person2) //{age: 23, name: "张三"}

对象的函数属性简写
let person = {
name: "jack",
// 以前:
eat: function (food) {
console.log(this.name + "在吃" + food);
},
// 箭头函数版:这里拿不到 this
eat2: food => console.log(person.name + "在吃" + food),
// 简写版:
eat3(food) {
console.log(this.name + "在吃" + food);
}
}

person.eat("apple");
person.eat2("banana");
person.eat3("pear");

简写版不用写function了
深拷贝
 // 1、拷贝对象(深拷贝)
let person1 = { name: "Amy", age: 15 }
let someone = { ...person1 }
console.log(someone) //{name: "Amy", age: 15}

合并对象
  // 2、合并对象
let age = { age: 15 }
let name = { name: "Amy" }
let person2 = { ...age, ...name } //如果两个对象的字段名重复,后面对象字段值会覆盖前面对象的字段值
console.log(person2) //{age: 15, name: "Amy"}

map和reduce方法
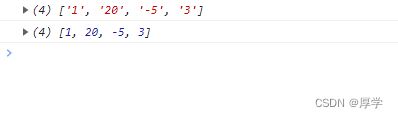
map():接收一个函数,将原数组中的所有元素用这个函数处理后放入新数组返回。
 let arr = ['1', '20', '-5', '3'];
console.log(arr)
arr = arr.map(s => parseInt(s));
console.log(arr)
reduce():
语法:
arr.reduce(callback,[initialValue])
reduce 为数组中的每一个元素依次执行回调函数,不包括数组中被删除或从未被赋值的元
素,接受四个参数:
初始值(或者上一次回调函数的返回值),
当前元素值,
当前索引,
调用 reduce 的数组
const arr = [1,20,-5,3];
//没有初始值:
console.log(arr.reduce((a,b)=>a+b));//19
console.log(arr.reduce((a,b)=>a*b));//-300

//指定初始值:
console.log(arr.reduce((a,b)=>a+b,1));//20
console.log(arr.reduce((a,b)=>a*b,0));//-0

无初始值调用reduce方法则数组中所有元素从左到右进行函数运算
有初始值调用reduce方法则初始值与元素第一个值进行函数运算后,再从左到右进行函数运算
promise异步编排
user.json
{
    "id": 1,
    "name": "zhangsan"
}
user_corse_1.json
{
    "id": 10,
    "name": "chinese"
}
corse_score_10.json
{
    "id": 100,
    "score": 90
}
promise.html
Document

但是这种嵌套方式太复杂
用企业进阶版封装
 // promise异步处理
        // 1、封装方法
        let get = function(url,data){
            return new Promise((resorve,reject) => {
                $.ajax({
                url:url,
                data:data,
                success:function(data){
                    resorve(data)
                },
                error:function(err){
                    reject(err)
                }

              })
            })
        }
        // 2、发起请求
        get(`mock/user.json`).then((data)=>{
            // 1、获取用户信息
            console.log("当前用户信息为:",data)
            return get(`mock/user_corse_${data.id}.json`);
        }).then((data) => {
            // 2、获取课程信息
            console.log("当前课程信息为:",data)
            return get(`mock/corse_score_${data.id}.json`);
        }).then((data) =>{
            // 3、获取分数信息
            console.log("当前分数信息为:",data)
        }).catch(() => {
            console.log("错误信息为:",err)
        })
模块化
模块化就是把代码进行拆分,方便重复利用。类似 java 中的导包:要使用一个包,必须先
导包。而 JS 中没有包的概念,换来的是模块

user.js
var name = "jack"
var age = 21
export {name,age}
hello.js
export const util = {
    sum(a, b) {
        return a + b;
    }
}
aaa.js
import util from `./hello.js`;
import {name,age} from `./user.js`;

console.log(name)
util.sum(1,2);
3、vue
https://v2.cn.vuejs.org/v2/guide/
根据官方文档学习vue2.0
1、新建一个文件夹
2、初始化项目
npm init -y
会生成一个

3、安装vue依赖
npm install vue@2
4、新建一个index.html测试
1、声明式渲染(new Vue({}))
Document
{{name}},你好帅

2、双向绑定 (v-model)
Document
{{name}},你好帅,有{{num}}个人给他点赞
3、事件处理(v-on:)
Document
{{name}},你好帅,有{{num}}个人给他点赞


4、调用方法(methods)
Document
{{name}},你好帅,有{{num}}个人给他点赞

##可以装一个vue2的语法提示插件

##装一个浏览器插件
vue-devtool

5、指令
5.1、v-text v-html
Document
{{msg}}
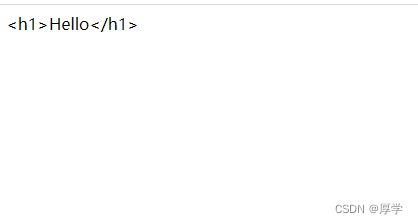
v-html 和v-text与{{}}相比好处是:可以避免插值闪烁
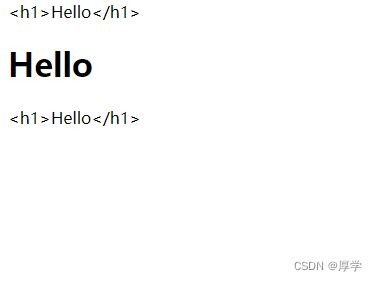
5.2、插值表达式
Document
{{msg}} {{1+11}} {{sayHello()}}
![]()
###插值表达式只能写在标签体内。不能写在属性中
需要写到属性中必须使用v-bind
5.3、v-bind(单向绑定)
Document


v-bind可以动态绑定class或者style
Document
gogogo
你好

##以前的写法:
你好
##绑定style写法
可以v-bind:style,也可以:style


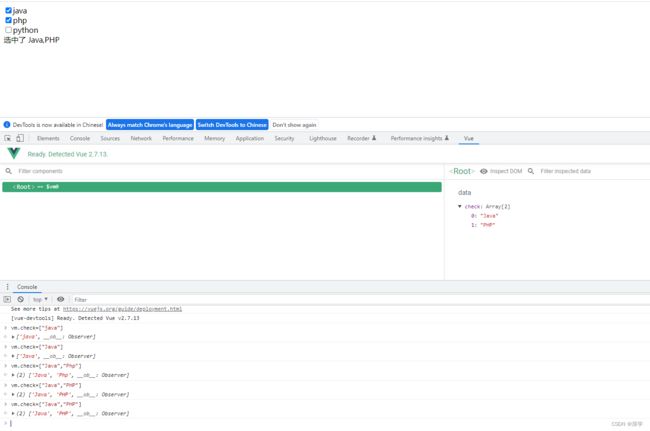
5.4、v-model(双向绑定)
Document
java
php
python
选中了
{{check.join(",")}}
5.5、事件修饰符
##阻止事件冒泡到父元素(click.stop)
Document
点击小div会出现弹窗2次

加上click.stop以后

点击小div只弹窗一次
##阻止默认行为(@click.prevent)
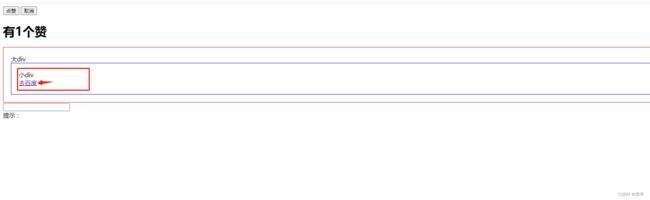
点击小div中的去百度会先弹窗,再跳转去百度
@click.prevent
点击小div中的去百度会只弹窗,不跳转去百度。
@click.prevent=“hello”
点击小div中的去百度弹两次弹窗,不跳转去百度。
@click.prevent.stop=“hello”
点击小div中的去百度弹一次弹窗,不跳转去百度。
##只被点击一次(v-on:click.once)
v-on:click.once
只会被点击一次

5.6、按键修饰符
v-on:keyup.up :跟键盘上键绑定事件
@keyup.down:跟键盘下键绑定事件
@click.ctrl=“num=10” :绑定组合按键:ctrl+鼠标左键单击时触发num=10
5.7、v-for
Document
-
{{user.name}} ===> {{user.gender}} ===> {{user.age}}
遍历:

遍历下标


遍历span

对一般数组的遍历:
Document
-
当前下标:{{index}} {{user.name}} ===> {{user.gender}} ===> {{user.age}}
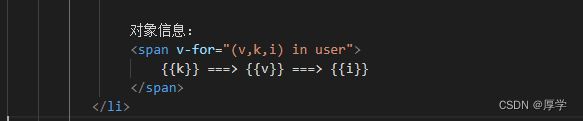
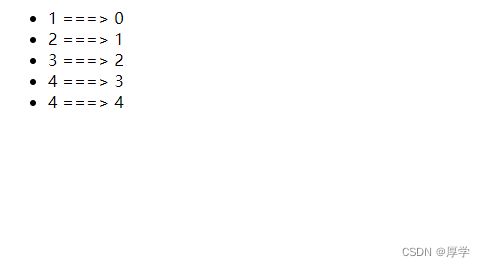
对象信息:
{{k}} ===> {{v}} ===> {{i}}
-
{{num}} ===> {{index}}
5.8、v-if v-show
Document
if=看到我
show=看到我

==》

v-if整个标签消失了
v-show是加了隐藏的样式

5.9、v-else,v-else-if
Document
{{random}}
>=0.75
>=0.5
>=0.2
<0.2

5.10 v-if和v-for结合使用


过滤掉了张三男
6、计算属性
Document
- 西游记:价格:{{xyjPrice}} 数量:
- 水浒传:价格:{{sfzPrice}} 数量:
- 总价:{{totalPrice}}

7、监听器
Document
- 西游记:价格:{{xyjPrice}} 数量:
- 水浒传:价格:{{sfzPrice}} 数量:
- 总价:{{totalPrice}}
{{msg}}

8、过滤器
8.1、局部过滤器
Document
-
{{user.id}}===>{{user.name}}===>{{user.gender == 1 ? '男' : '女'}} ===>{{user.gender | genderFilter}}
8.2、全局过滤器
Document
-
{{user.id}}===>{{user.name}}===>{{user.gender == 1 ? '男' : '女'}} ===>{{user.gender | genderFilter}}
===> {{user.gender | gFilter}}

9、组件化
9.1、全局申明组件
Document


9.2、局部申明组件
// 局部申明组件
const buttonCounter = {
template: ``,
data(){
return{
count: 1
}
}
}
new Vue({
el : '#app',
data:{
count: 1
},
components:{
'button-counter':buttonCounter
}
})

10、生命周期和钩子函数
每个 Vue 实例在被创建时都要经过一系列的初始化过程 :创建实例,装载模板,渲染模
板等等。Vue 为生命周期中的每个状态都设置了钩子函数(监听函数)。每当 Vue 实例处于
不同的生命周期时,对应的函数就会被触发调用。
生命周期:你不需要立马弄明白所有的东西。

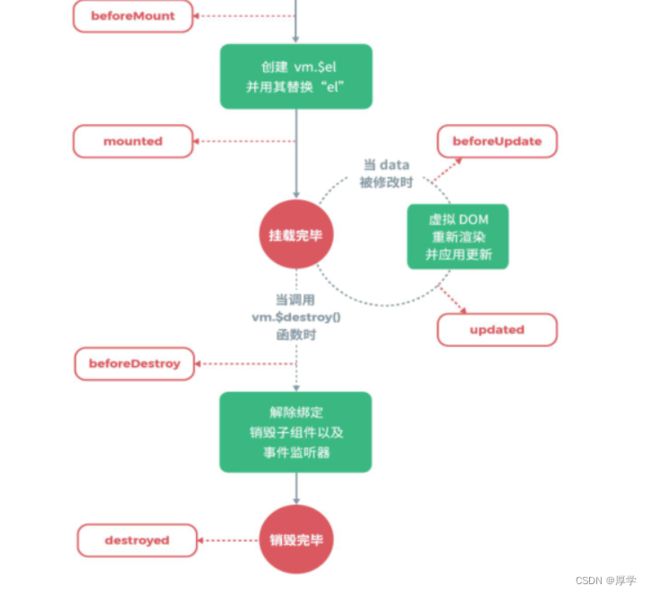
##钩子函数
beforeCreated:我们在用 Vue 时都要进行实例化,因此,该函数就是在 Vue 实例化时调
用,也可以将他理解为初始化函数比较方便一点,在 Vue1.0 时,这个函数的名字就是
init。
created:在创建实例之后进行调用。
beforeMount:页面加载完成,没有渲染。如:此时页面还是{{name}}
mounted:我们可以将他理解为原生 js 中的 window.οnlοad=function({.,.}),或许大家也在
用 jquery,所以也可以理解为 jquery 中的$(document).ready(function(){….}),他的功能就
是:在 dom 文档渲染完毕之后将要执行的函数,该函数在 Vue1.0 版本中名字为
compiled。 此时页面中的{{name}}已被渲染成张三
beforeDestroy:该函数将在销毁实例前进行调用 。
destroyed:改函数将在销毁实例时进行调用。
beforeUpdate:组件更新之前。
updated:组件更新之后。
Document
{{num}}
{{name}},非常帅!!!有{{num}}个人点赞。