Spring cloud Alibaba 分布式微服务,配置 nacos + gateway + feign + hystrix
Spring cloud Alibaba 分布式微服务,配置 nacos + gateway + feign + hystrix - 根目录97 - 博客园
Spring cloud Alibaba 分布式微服务,配置 nacos + gateway + feign + hystrix
这篇随笔本人2021/04/09 原创,应该目前看了这篇博客的人都能搭成功。
环境:IDEA ,JDK 1.8, Mysql 5.*
项目配置:nacos + gateway + feign + hystrix + mybatis plus
mybatis plus 我有在另一篇博文里写过,有兴趣的可以去看:https://www.cnblogs.com/anpieBlog/p/14607131.html
很多初学者被网上各种博文搞得头昏眼花,从第一步就开始创建项目,搞到最后也没搞出来。
第一步:搭建Spring cloud Alibaba 需要先装nacos服务。这里我使用的1.4.1
nacos服务下载地址:https://github.com/alibaba/nacos/releases/tag/1.4.1
下载完成后,不能直接双击startup.cmd运行,会报错,需要进入cmd命令,使用命令行启动
这个样子就算成功了。
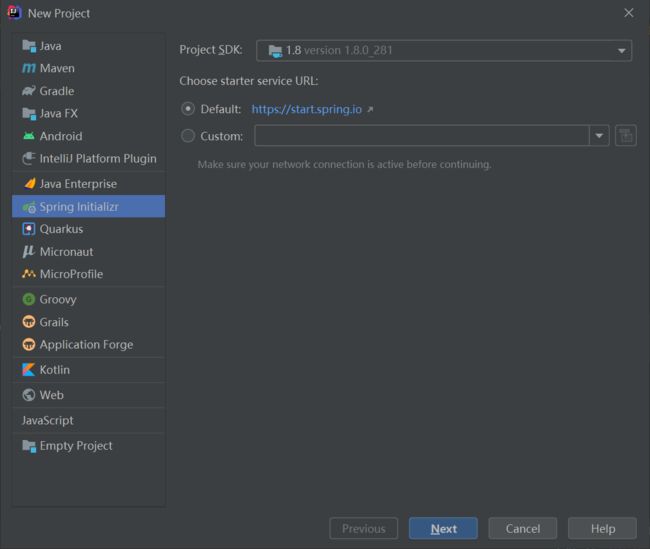
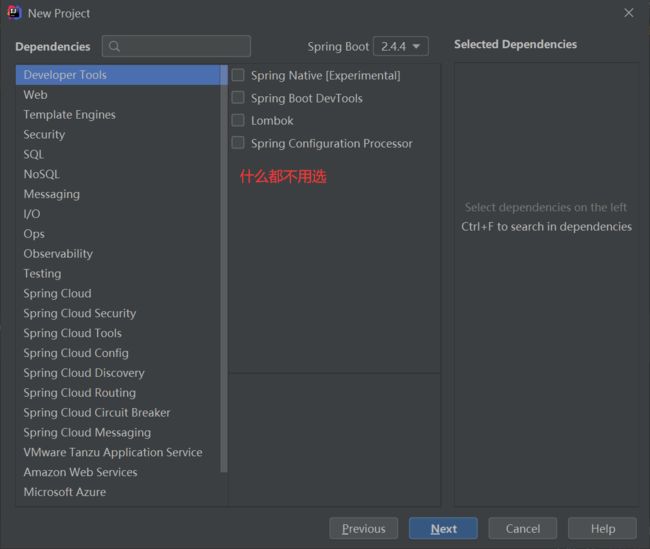
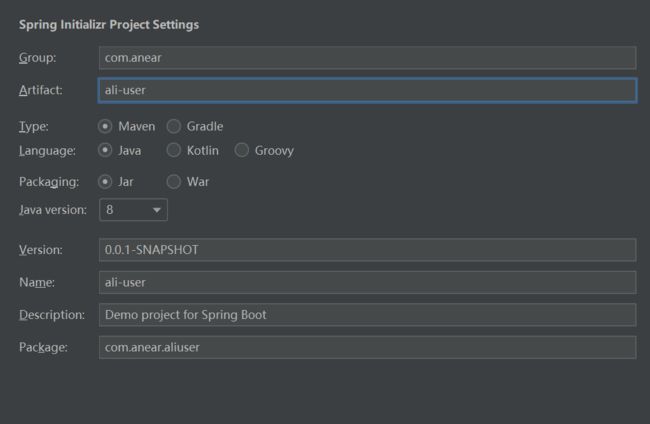
第二步:创建父项目
ali-nacos的pom
![]()
4.0.0 com.anear ali-nacos 0.0.1-SNAPSHOT pom ** ** -->studycloud Demo project for Spring Boot 1.8 UTF-8 1.8 1.8 4.12 1.2.17 1.16.18 8.0.23 1.1.16 1.3.0 org.springframework.boot spring-boot-dependencies 2.2.2.RELEASE pom import org.springframework.cloud spring-cloud-dependencies Hoxton.SR1 pom import com.alibaba.cloud spring-cloud-alibaba-dependencies 2.1.0.RELEASE pom import mysql mysql-connector-java ${mysql.version} com.alibaba druid ${druid.version} org.mybatis.spring.boot mybatis-spring-boot-starter ${mybatis.spring.boot.version} junit junit ${junit.version} log4j log4j ${log4j.version} org.projectlombok lombok ${lombok.version} true org.springframework.boot spring-boot-maven-plugin true true
![]()
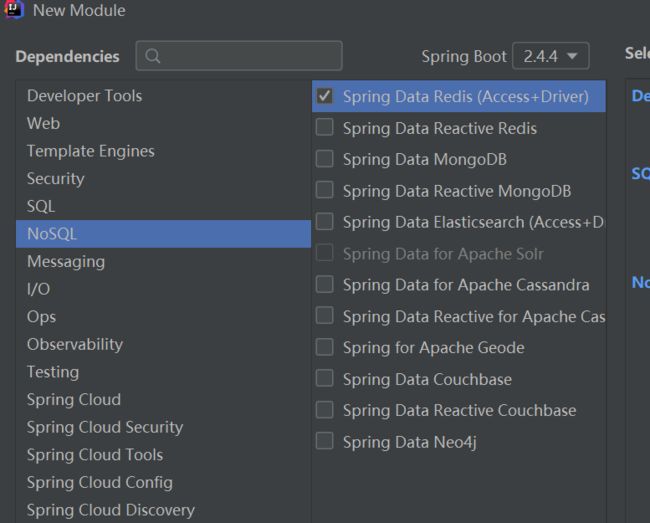
第三步:创建子项目
创建完之后,打开子项目user的pom 修改如下,指向父项目
同事父项目的pom里配置子项目
对父项目和子项目的pom文件分别右击对maven进行reload
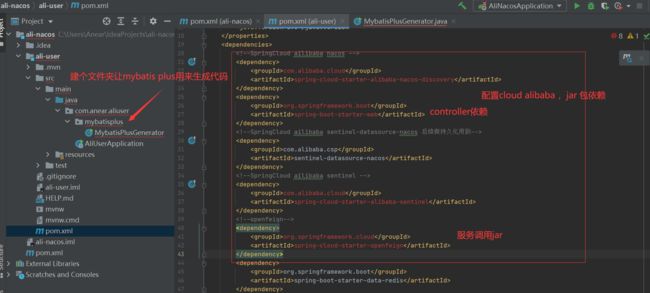
这里的user项目就是一个服务,可以选择用它来处理业务也可以选择用它提供调用的接口。
![]()
            com.alibaba.cloud
            spring-cloud-starter-alibaba-nacos-discovery


            org.springframework.boot
            spring-boot-starter-web


            com.alibaba.csp
            sentinel-datasource-nacos


            com.alibaba.cloud
            spring-cloud-starter-alibaba-sentinel


            org.springframework.cloud
            spring-cloud-starter-openfeign
![]()
![]()
            com.baomidou
            mybatis-plus-generator
            3.1.2


            com.baomidou
            mybatis-plus-boot-starter
            2.2.0


            org.freemarker
            freemarker


            com.baomidou
            mybatis-plus-core
            3.0.7.1


            com.baomidou
            mybatis-plus-extension
            3.0.7.1
![]()
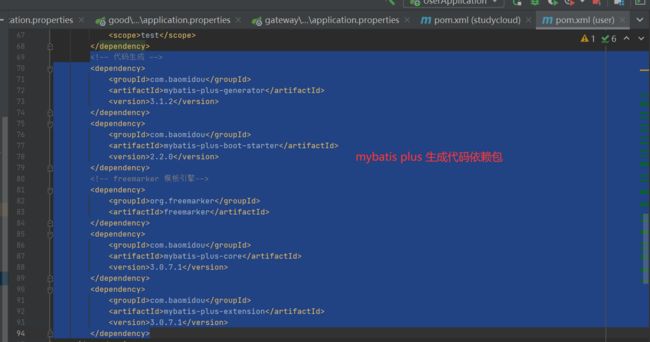
继续对user的maven pom进行reload,jar就引进去了,下面开始自动生成,在这里我假设你已经建立好了mybatisplus文件夹,在其文件夹下创建一个类用来执行生成代码。将下面代码拷贝的类里,按照各自情况微调生成路径以及数据库连接信息。
![]()
package com.anear.aliuser.mybatisplus;

import com.baomidou.mybatisplus.annotation.DbType;
import com.baomidou.mybatisplus.annotation.IdType;
import com.baomidou.mybatisplus.core.exceptions.MybatisPlusException;
import com.baomidou.mybatisplus.core.toolkit.StringUtils;
import com.baomidou.mybatisplus.generator.AutoGenerator;
import com.baomidou.mybatisplus.generator.InjectionConfig;
import com.baomidou.mybatisplus.generator.config.*;
import com.baomidou.mybatisplus.generator.config.po.TableInfo;
import com.baomidou.mybatisplus.generator.config.rules.NamingStrategy;
import com.baomidou.mybatisplus.generator.engine.FreemarkerTemplateEngine;

import java.util.*;

//演示例子,执行 main 方法控制台输入模块表名回车自动生成对应项目目录中
public class MybatisPlusGenerator {

    /**
     *
     * 读取控制台内容
     *
     */
    public static String scanner(String tip) {
        Scanner scanner = new Scanner(System.in);
        StringBuilder help = new StringBuilder();
        help.append("请输入" + tip + ":");
        System.out.println(help.toString());
        if (scanner.hasNext()) {
            String ipt = scanner.next();
            if (StringUtils.isNotEmpty(ipt)) {
                return ipt;
            }
        }
        throw new MybatisPlusException("请输入正确的" + tip + "!");
    }

    public static void main(String[] args) {
        AutoGenerator mpg = new AutoGenerator(); //整合配置 全局配置+数据源配置+策略配置+包名策略配置
        // 选择 freemarker 引擎,默认 Velocity 需要在配置文件引入依赖
        mpg.setTemplateEngine(new FreemarkerTemplateEngine());
        // 1全局配置
        GlobalConfig gc = new GlobalConfig();
        gc.setAuthor("Anear");
        gc.setOutputDir("C://Users//Anear//IdeaProjects//ali-nacos//ali-user//src//main//java");
        gc.setFileOverride(false);// 是否覆盖同名文件,默认是false
        gc.setIdType(IdType.AUTO);// 主键策略
        gc.setActiveRecord(true);// 不需要ActiveRecord特性的请改为false
        gc.setEnableCache(false);// XML 二级缓存
        gc.setBaseResultMap(true);// XML ResultMap 生成基本的resultmap
        gc.setBaseColumnList(false);// XML columList 生成基本的sql片段
        /* 自定义文件命名,注意 %s 会自动填充表实体属性! */
        gc.setMapperName("%sMapper");
        gc.setXmlName("%sMapper");
        gc.setServiceName("%sService");
        gc.setServiceImplName("%sServiceImpl");
        gc.setControllerName("%sController");
        mpg.setGlobalConfig(gc);

        // 2数据源配置
        DataSourceConfig dsc = new DataSourceConfig();
        dsc.setDbType(DbType.MYSQL);
        dsc.setDriverName("com.mysql.cj.jdbc.Driver");
        dsc.setUsername("root");
        dsc.setPassword("123456");
        dsc.setUrl("jdbc:mysql://localhost:3306/anear?serverTimezone=Hongkong&useUnicode=true&characterEncoding=utf8");
        mpg.setDataSource(dsc);

        // 3策略配置globalConfiguration中
        StrategyConfig strategy = new StrategyConfig();
        strategy.setEntityLombokModel(true);//实体类以lombok注解氏生产
        strategy.setRestControllerStyle(true);//controller以restFule风格
        // strategy.setCapitalMode(true);// 全局大写命名 ORACLE 注意
        strategy.setNaming(NamingStrategy.underline_to_camel);// 表名生成策略 此处可以更换为underline_to_camel 下滑线转驼峰
        strategy.setInclude(new String[]{"user"}); // 需要生成的表
        // strategy.setExclude(new String[]{"test"}); // 排除生成的表
        // 自定义实体父类
        // strategy.setSuperEntityClass("com.baomidou.demo.TestEntity");
        // 自定义实体,公共字段
        // strategy.setSuperEntityColumns(new String[] { "test_id", "age" });
        // 自定义 mapper 父类
        // strategy.setSuperMapperClass("com.baomidou.demo.TestMapper");
        // 自定义 service 父类
        // strategy.setSuperServiceClass("com.baomidou.demo.TestService");
        // 自定义 service 实现类父类
        // strategy.setSuperServiceImplClass("com.baomidou.demo.TestServiceImpl");
        // 自定义 controller 父类
        // strategy.setSuperControllerClass("com.baomidou.demo.TestController");
        // 【实体】是否生成字段常量(默认 false)
        // public static final String ID = "test_id";
        // strategy.setEntityColumnConstant(true);
        // 【实体】是否为构建者模型(默认 false)
        // public User setName(String name) {this.name = name; return this;}
        // strategy.setEntityBuilderModel(true);
        mpg.setStrategy(strategy);

        // 4包配置 修改包生成的名称
        //pkConfig.setParent("com.imooc")
        //                          .setMapper("dao")//dao
        //                          .setService("service")//servcie
        //                          .setController("controller")//controller
        //                          .setEntity("entity")
        //                           .setXml("resource");//mapper.xml
        PackageConfig pc = new PackageConfig();
        pc.setParent("com.springboot.study").setController("controller").setMapper("dao");
        // pc.setModuleName("test");
        pc.setParent("com.anear.aliuser.mybatisplus");
        pc.setEntity("entity");
        pc.setMapper("mapper");
        pc.setController("controller");
        mpg.setPackageInfo(pc);

        // 注入自定义配置,可以在 VM 中使用 cfg.abc 【可无】
        InjectionConfig cfg = new InjectionConfig() {
            @Override
            public void initMap() {
                Map map = new HashMap();
                map.put("abc", this.getConfig().getGlobalConfig().getAuthor() +
                        "-mp");
                this.setMap(map);
            }
        };

        // 自定义 xxList.jsp 生成
        List focList = new ArrayList<>();

         /*focList.add(new FileOutConfig("/template/list.jsp.vm") {
             @Override
             public String outputFile(TableInfo tableInfo) {
                // 自定义输入文件名称
                 return "D://workspace/study/springboot_mybatisplus_lombok/src/main/webapp/" + tableInfo.getEntityName() + ".jsp";
             }
         });
         cfg.setFileOutConfigList(focList);
         mpg.setCfg(cfg);*/


        // 调整 xml 生成目录演示
        // 如果模板引擎是 freemarker
        String templatePath = "/templates/mapper.xml.ftl";
        // 如果模板引擎是 velocity
        // String templatePath = "/templates/mapper.xml.vm";
        focList.add(new FileOutConfig(templatePath) {
            @Override
            public String outputFile(TableInfo  tableInfo) {
                return "C://Users//Anear//IdeaProjects//ali-nacos//ali-user//src/main/resources/mybatis/" + tableInfo.getEntityName()+"Mapper" + ".xml";
            }
        });
        cfg.setFileOutConfigList(focList);
        mpg.setCfg(cfg);
        // 关闭默认 xml 生成,调整生成 至 根目录
        TemplateConfig tc = new TemplateConfig();
        tc.setXml(null);
        mpg.setTemplate(tc);

        // 自定义模板配置,可以 copy 源码 mybatis-plus/src/main/resources/templates 下面内容修改,
        // 放置自己项目的 src/main/resources/templates 目录下, 默认名称一下可以不配置,也可以自定义模板名称
        // TemplateConfig tc = new TemplateConfig();
        // tc.setController("...");
        // tc.setEntity("...");
        // tc.setMapper("...");
        // tc.setXml("...");
        // tc.setService("...");
        // tc.setServiceImpl("...");
        // 如上任何一个模块如果设置 空 OR Null 将不生成该模块。
        // mpg.setTemplate(tc);

        // 执行生成
        mpg.execute();

        // 打印注入设置【可无】
        // System.err.println(mpg.getCfg().getMap().get("abc"));
    }
}
![]()
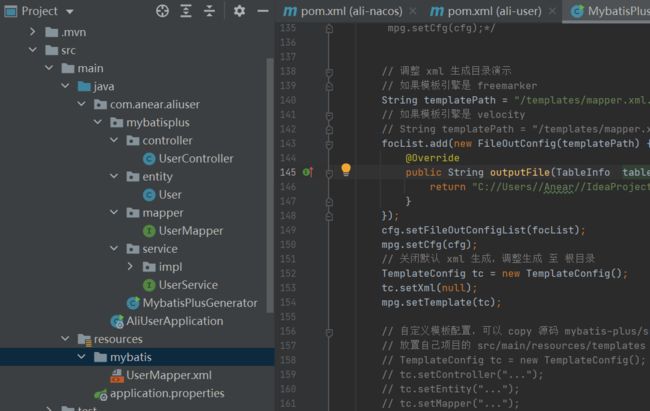
修改完后右键执行,你会看到.xml到controller它都自动帮你生成了,文件夹也帮你生成了
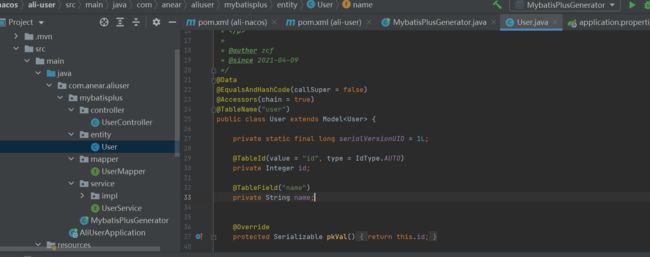
为了使用它提供的CRUD,需要修改entity类与数据库表名和字段对应。
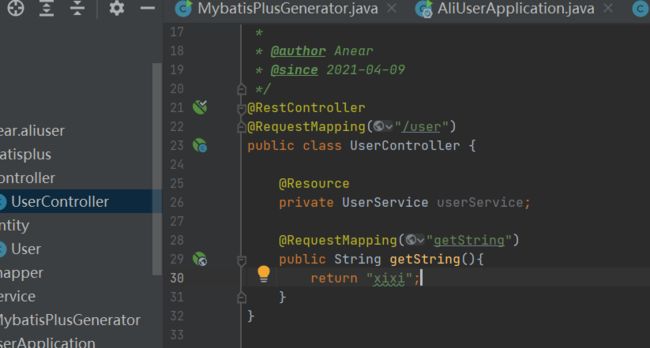
随便在controller里写个接口,获取数据。
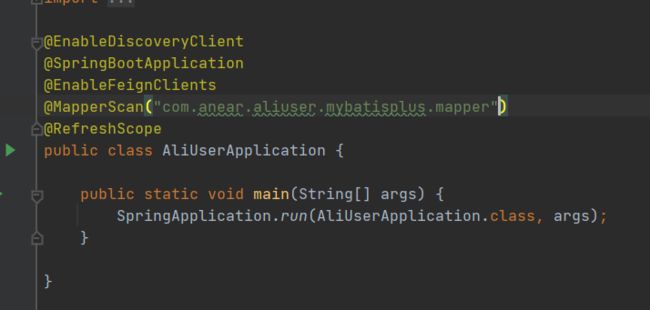
启动类里配置这五个注解,有开启Feign,设置mapper映射,开始注册与发现等,设置mapper映射时,建议自己先点出来mapper路径,再加引号,防止路径出错。
在配置文件里配置数据库连接,开始启动子项目ali-user
![]()
server.port=6001

spring.datasource.url=jdbc:mysql://localhost:3306/anear?useUnicode=true&characterEncoding=utf-8
spring.datasource.driverClassName=com.mysql.jdbc.Driver
spring.datasource.username=root
spring.datasource.password=123456
#mybatis-plus
# 如果是放在src/main/java目录下 classpath:/com/yourpackage/*/mapper/*Mapper.xml
# 如果是放在resource目录 classpath:/mapper/*Mapper.xml
#mybatis-plus.mapper-locations=classpath:mybatis/*.xml
#实体扫描,多个package用逗号或者分号分隔
mybatis-plus.type-aliases-package=com.anear.aliuser.mybatisplus.entity
![]()
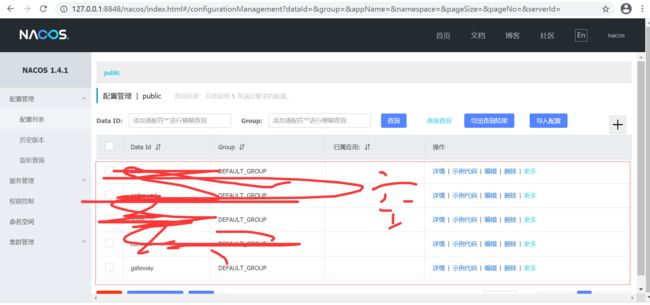
还记得你刚启动的nacos服务吗,它会给你个提示,访问http://127.0.0.1:8848/ ,默认用户名和密码都是nacos,登陆进去配置列表是空的,请忽略我原先的配置
新建一个配置
可以看到我们添加了一个配置,回到我们的子项目ali-user,添加配置文件,配置对应内容,设置注册到我们本机的nacos,重新启动服务,会发现服务已经注册到nacos上了。
mybatis:
  mapper-locations: classpath:mybatis/*.xml
#补上xml映射
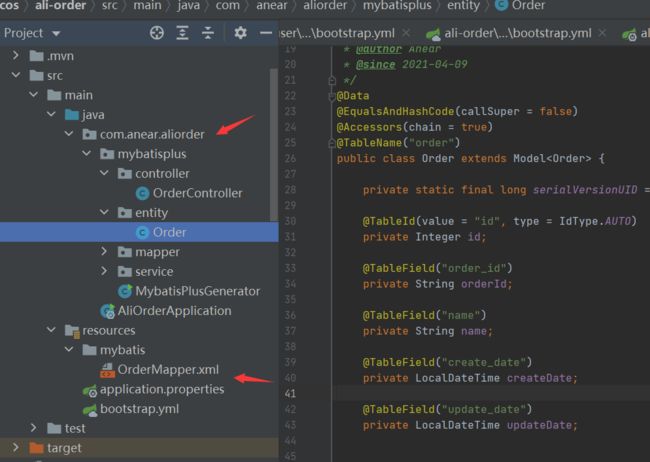
用刚才创建子项目的步骤继续创建一个子项目,名叫ali-order,一样使用mybatis plus进行自动生成
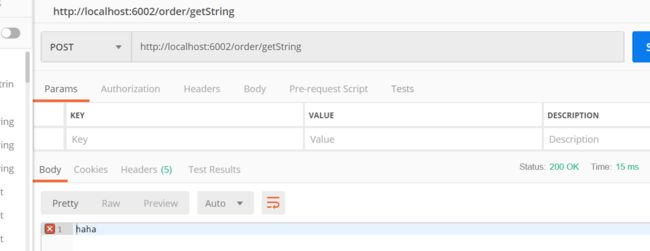
像下面这张图,建个一样的项目,在controller 里面 return “haha”;
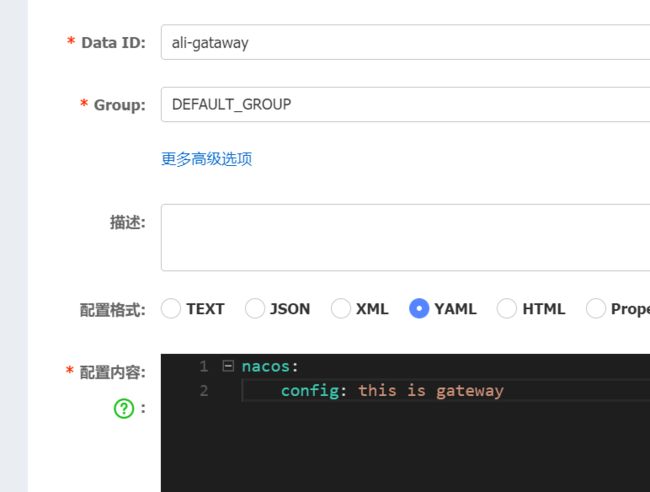
不要忘记在nacos服务上建个配置,再启动项目
我本地已经起了两个子服务,测试一下吧
到目前我们发现每个服务都可以用,并且这两个服务都注册到了nacos,分布式特点在于根据请求转发选择对应实例服务进行处理,来完成处理并发等等的能力,这里的网关采用gate way。
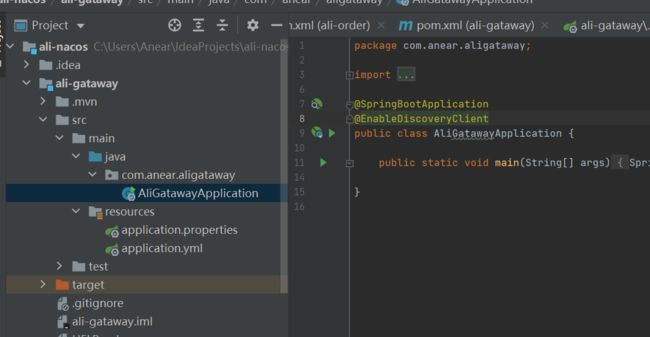
创建一个新的子项目,里面是空的,pom我会贴上,什么依赖都不要。单词拼错,懒得改了。
pom依赖:
![]()
    4.0.0

        com.anear
        ali-nacos
        0.0.1-SNAPSHOT


    com.anear
    ali-gateway
    0.0.1-SNAPSHOT
    gateway
    Demo project for Spring Boot

        1.8


            org.springframework.cloud
            spring-cloud-starter-gateway


            com.alibaba.cloud
            spring-cloud-starter-alibaba-nacos-discovery


            org.springframework.boot
            spring-boot-starter-actuator


            org.springframework.boot
            spring-boot-starter


            org.springframework.boot
            spring-boot-starter-test
            test


                org.springframework.boot
                spring-boot-maven-plugin
![]()
另外不要忘记配置ali-gateway
还要配置各服务的网关:新建application.yml,将下面代码贴进去。
![]()
spring:
  application:
    name: ali-gateway
  cloud:
    nacos:
      discovery:
        server-addr: http://127.0.0.1:8848/
    gateway:
      discovery:
        locator:
          enabled: true
      routes:
        - id: ali-user
          uri: http://localhost:6001
          predicates:
            - Path=/user/**
        - id: ali-order
          uri: http://localhost:6002
          predicates:
            - Path=/order/**
![]()
下面这是我启动的三个服务,user>6001,order>6002,gateway>6003,测试转发是否可以
我们用相同的6003接口,user 和 order 接口都能请求到,这说明我们的两个服务成功被gateway代理了。
转发代理可以,负载均衡和熔断器在分布式里是必不可少的,下面配置熔断器和服务调用feign。
由于我们再user和order里都在启动类里添加了开启feign注解,所以接下来将非常简单就是先。
太累了,我不适合写这么长的博客,我直接贴代码吧。
调用方新建feign文件夹,专门用来调用其他服务的接口,再配一个实现类包。fallback是发生熔断去的地方
熔断发生处理类
修改controller,调用ali-user的接口
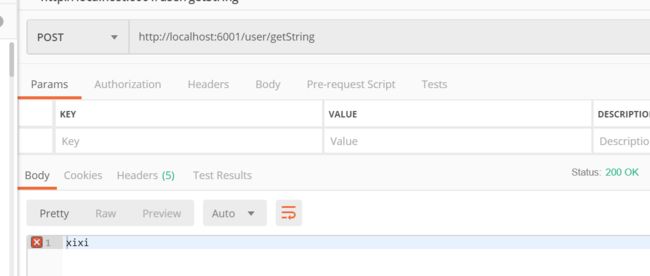
测试:
我们通过6003 gateway网关服务请求ali-order服务,ali-order服务调用了ali-user服务,所以返回了user里面的xixi。
结束,下班。
对了,开启熔断的开关在配置文件里打开,
# open hystrix
feign.hystrix.enabled=true
你可以关掉被调用的服务,再次请求,程序请求超市会根据熔断机制返回你配置的熔断处理。is Feign error.
这里面涉及很多原理,有时间且不明白的朋友有必要去了解了解,这篇博客只教你如何搭建。

