springboot整合spring-security并修改默认登录页面,添加验证码功能(实现方法一)
文章目录
前言
一、环境搭建
1.创建springboot项目, 导入依赖
2.springboot启动器及application.yml配置文件创建
3.resources目录下建一个static文件夹, 存放自定义的登录界面login.html
4.用户实体类及数据库表
5.UserDao操作数据库, 整合了mybatis-plus
二、spring-security相关配置
1.拓展验证方式, 添加一个验证码
2.实现自定义相关的接口,返回MyWebAuthenticationDetails资源替换原有的登录参数接收类(原有只接收username和password)
3.提供一个service , 需要实现UserDetailsService接口, 里面有一个方法的参数是框架传来的username, 通过username查询数据库, 返回该用户的数据库信息(类型必须是UserDetails), 用于和用户输入进行比对
4. 自定义校验方法, 判断该用户的密码和验证码是否正确
5. 配置controller处理请求
6. spring-security核心配置类
三. 测试
总结
前言
在使用spring-security做登录的时候, 为了增强安全性能, 添加一个验证码校验的功能, 接下来我将使用一个简单的登录页面来粗略的实现一下.项目结构如下:
一、环境搭建
1.创建springboot项目, 导入依赖
        spring-boot-starter-parent
        org.springframework.boot
        2.3.4.RELEASE


            org.springframework.boot
            spring-boot-starter-web


            org.springframework.boot
            spring-boot-starter-security


            org.springframework.boot
            spring-boot-starter-test


            com.baomidou
            mybatis-plus-boot-starter
            3.4.0


            mysql
            mysql-connector-java
            5.1.47


            org.projectlombok
            lombok
2.springboot启动器及application.yml配置文件创建
package com.lbhstudy;

import org.mybatis.spring.annotation.MapperScan;
import org.springframework.boot.SpringApplication;
import org.springframework.boot.autoconfigure.SpringBootApplication;

@SpringBootApplication
@MapperScan(basePackages = "com.lbhstudy.dao")
public class MainApplication {
    public static void main(String[] args) {
        SpringApplication.run(MainApplication.class, args);
    }
}
server:
  port: 80
  servlet:
    context-path: /

spring:
  datasource:
    url: jdbc:mysql://localhost:3306/security_test?characterEncoding=utf-8
    password: root
    username: root
    driver-class-name: com.mysql.jdbc.Driver
3.resources目录下建一个static文件夹, 存放自定义的登录界面login.html
Title
4.用户实体类及数据库表
package com.lbhstudy.entity;

import lombok.AllArgsConstructor;
import lombok.Data;
import lombok.NoArgsConstructor;

/**
 * @author LiaoBaohong 2021/7/13
 */
@Data
@AllArgsConstructor
@NoArgsConstructor
public class User {

    private Integer id;
    private String username;
    private String password;
}
数据库表设计简单, 实际业务需要多张表多个字段 , 这里只模拟登录验证需要的字段
5.UserDao操作数据库, 整合了mybatis-plus
package com.lbhstudy.dao;

import com.baomidou.mybatisplus.core.mapper.BaseMapper;
import com.lbhstudy.entity.User;
import org.springframework.stereotype.Repository;

/**
 * @author LiaoBaohong 2021/7/14
 */
@Repository
public interface UserDao extends BaseMapper {
}
二、spring-security相关配置
1.拓展验证方式, 添加一个验证码
package com.lbhstudy.config;

import org.springframework.security.web.authentication.WebAuthenticationDetails;

import javax.servlet.http.HttpServletRequest;
import java.io.Serializable;

/**
 * 拓展验证方式,自定义一个验证码
 *
 * @author LiaoBaohong 2021/7/14
 */

public class MyWebAuthenticationDetails extends WebAuthenticationDetails implements Serializable {

    /**
     * 这边前三个参数是从页面的login请求中传过来的,
     */

    private String username;
    private String password;
    private String validcode;
    /**
     * 这个参数是在页面上请求生成验证码的时候我们设置到session里面去,以便于后续的验证
     */
    private String sessionCodeValue;


    public MyWebAuthenticationDetails(HttpServletRequest request) {
        super(request);
        username = request.getParameter("username");
        password = request.getParameter("password");
        validcode = request.getParameter("validcode");
        sessionCodeValue = (String) request.getSession().getAttribute("codeValue");

    }

    public String getUsername() {
        return username;
    }

    public void setUsername(String username) {
        this.username = username;
    }

    public String getPassword() {
        return password;
    }

    public void setPassword(String password) {
        this.password = password;
    }

    public String getValidcode() {
        return validcode;
    }

    public void setValidcode(String validcode) {
        this.validcode = validcode;
    }

    public String getSessionCodeValue() {
        return sessionCodeValue;
    }

    public void setSessionCodeValue(String sessionCodeValue) {
        this.sessionCodeValue = sessionCodeValue;
    }

}
2.实现自定义相关的接口,返回MyWebAuthenticationDetails资源替换原有的登录参数接收类(原有只接收username和password)
package com.lbhstudy.config;

import org.springframework.security.authentication.AuthenticationDetailsSource;
import org.springframework.security.web.authentication.WebAuthenticationDetails;
import org.springframework.stereotype.Component;

import javax.servlet.http.HttpServletRequest;

/**
 * 这个类实现了一个自定义的接口,返回我们刚才定义的MyWebAuthenticationDetails资源
 *
 * @author LiaoBaohong 2021/7/14
 */
@Component
public class MyAuthenticationDetailsSource implements AuthenticationDetailsSource {
    @Override
    public WebAuthenticationDetails buildDetails(HttpServletRequest request) {
        return new MyWebAuthenticationDetails(request);
    }
}
3.提供一个service , 需要实现UserDetailsService接口, 里面有一个方法的参数是框架传来的username, 通过username查询数据库, 返回该用户的数据库信息(类型必须是UserDetails), 用于和用户输入进行比对
package com.lbhstudy.service;

import com.baomidou.mybatisplus.core.conditions.query.QueryWrapper;
import com.lbhstudy.dao.UserDao;
import com.lbhstudy.entity.User;
import org.springframework.beans.factory.annotation.Autowired;
import org.springframework.security.core.GrantedAuthority;
import org.springframework.security.core.authority.AuthorityUtils;
import org.springframework.security.core.userdetails.UserDetails;
import org.springframework.security.core.userdetails.UserDetailsService;
import org.springframework.security.core.userdetails.UsernameNotFoundException;
import org.springframework.stereotype.Service;

import java.util.List;

/**
 * @author LiaoBaohong 2021/7/14
 */
@Service
public class MyUserDetailService implements UserDetailsService {

    @Autowired
    private UserDao userDao;

    /**
     * 这里通过框架传过来的username可以在数据库查询到用户信息,用于与用户输入的密码匹配
     */
    @Override
    public UserDetails loadUserByUsername(String username) throws UsernameNotFoundException {
        //查询条件
        QueryWrapper wrapper = new QueryWrapper<>();
        wrapper.eq("username", username);
        //查询用户
        User user = userDao.selectOne(wrapper);

        if (user == null) {
            //用户不存在(实际业务在验证码发送时就校验, 这里暂时这样写)
            throw new UsernameNotFoundException("用户名不存在");
        } else {
            // 用户存在
            String password = user.getPassword();
            // 赋予用户的权限 @TODO 这里也是需要数据库查询才能赋予权限,暂时写死
            List auths =
                    AuthorityUtils.commaSeparatedStringToAuthorityList("role");
            // 第二个参数是数据库被加密后的密码 @TODO 后期改为自定义的MD5加密(这里因为数据库数据没有加密,所以暂时不管)
            return new org.springframework.security.core.userdetails.User(username,
                    user.getPassword(), auths);
        }
    }
}
4. 自定义校验方法, 判断该用户的密码和验证码是否正确
package com.lbhstudy.config;

import com.lbhstudy.service.MyUserDetailService;
import lombok.extern.slf4j.Slf4j;
import org.springframework.beans.factory.annotation.Autowired;
import org.springframework.security.authentication.AuthenticationProvider;
import org.springframework.security.authentication.BadCredentialsException;
import org.springframework.security.authentication.UsernamePasswordAuthenticationToken;
import org.springframework.security.core.Authentication;
import org.springframework.security.core.AuthenticationException;
import org.springframework.security.core.GrantedAuthority;
import org.springframework.stereotype.Component;

import java.util.Collection;

/**
 * 这里自定义了一个AuthenticationProvider来处理实际的认证业务逻辑,在这里可以方便的根据我们需要来进行自定义,
 * 做验证码校验、效期校验和验密,可以根据需要定制。认证成功就返回一个UsernamePasswordAuthenticationToken对象并配置好合适的权限
 * 如果认证失败,只需要抛出一个异常(AuthenticationException的子类),
 * @author LiaoBaohong 2021/7/14
 */
@Component
@Slf4j
public class MyAuthenticationProvider implements AuthenticationProvider {

    @Autowired
    private MyUserDetailService myUserDetailService;

    @Override
    public Authentication authenticate(Authentication authentication) throws AuthenticationException {
        // 获取用户的输入
        MyWebAuthenticationDetails details = (MyWebAuthenticationDetails) authentication.getDetails();

        // 校验验证码
        String validcode = details.getValidcode();
        String sessionCodeValue = details.getSessionCodeValue();
        if (sessionCodeValue == null) {
            log.info("验证码过期或失效");
            throw new BadCredentialsException("验证码过期或失效");
        }
        if (!sessionCodeValue.equals(validcode)) {
            log.info("验证码错误");
            throw new BadCredentialsException("验证码错误");
        }
        // @TODO 验证密码,实际需要加密
        String username = details.getUsername();
        String dbPassword = myUserDetailService.loadUserByUsername(username).getPassword();
        System.out.println("dbPassword = " + dbPassword);

        String password = details.getPassword();
        System.out.println("用户输入password = " + password);

        if (!dbPassword.equals(password)) {
            log.info("密码错误");
            throw new BadCredentialsException("密码错误");
        }

        // @TODO 赋予权限,后期改成数据库权限
        Collection auths =
                (Collection) myUserDetailService.loadUserByUsername(username).getAuthorities();
        return new UsernamePasswordAuthenticationToken(details.getUsername(), details.getPassword(), auths);

    }

    @Override
    public boolean supports(Class authentication) {
        return authentication.equals(UsernamePasswordAuthenticationToken.class);
    }
}
5. 配置controller处理请求
package com.lbhstudy.controller;

import org.springframework.security.core.AuthenticationException;
import org.springframework.web.bind.annotation.GetMapping;
import org.springframework.web.bind.annotation.RequestMapping;
import org.springframework.web.bind.annotation.RestController;

import javax.servlet.http.HttpServletRequest;
import javax.servlet.http.HttpServletResponse;
import javax.servlet.http.HttpSession;
import java.io.IOException;

/**
 * @author LiaoBaohong 2021/7/17
 */
@RestController
@RequestMapping("/login")
public class LoginController {


    /**
     * 处理发送验证码的请求
     */
    @RequestMapping("/sendValidcode")
    public void sendValidcode(HttpSession session) {
        // 模拟一个验证码
        Integer codeValue = 123456;
        // 存到session, 实际业务场景应该是用户必须输入用户名, session存储用户名, redis存储验证码方便控制验证码失效时间
        session.setAttribute("codeValue", codeValue);
    }

    /**
     * 登录失败异常的处理
     */
    @RequestMapping("/error")
    public void loginError(HttpServletRequest request, HttpServletResponse response) {
        response.setContentType("text/html;charset=utf-8");

        AuthenticationException exception =
                (AuthenticationException)request.getSession().getAttribute("SPRING_SECURITY_LAST_EXCEPTION");
        try {
            response.getWriter().write(exception.toString());
        }catch (IOException e) {
            e.printStackTrace();
        }
    }

    /**
     * 下面两个请求用来测试
     * @return
     */
    @GetMapping("/hello")
    public String hello() {
        return "hello,security";
    }

    @GetMapping("/index")
    public String index() {
        return "index,security";
    }
}
6. spring-security核心配置类
package com.lbhstudy.config;

import com.lbhstudy.service.MyUserDetailService;
import lombok.extern.slf4j.Slf4j;
import org.springframework.beans.factory.annotation.Autowired;
import org.springframework.context.annotation.Bean;
import org.springframework.context.annotation.Configuration;
import org.springframework.security.authentication.AuthenticationDetailsSource;
import org.springframework.security.config.annotation.authentication.builders.AuthenticationManagerBuilder;
import org.springframework.security.config.annotation.web.builders.HttpSecurity;
import org.springframework.security.config.annotation.web.configuration.EnableWebSecurity;
import org.springframework.security.config.annotation.web.configuration.WebSecurityConfigurerAdapter;
import org.springframework.security.crypto.bcrypt.BCryptPasswordEncoder;
import org.springframework.security.crypto.password.PasswordEncoder;
import org.springframework.security.web.authentication.WebAuthenticationDetails;

import javax.servlet.http.HttpServletRequest;

/**
 * 这是spring-security的核心配置类
 *
 * @author LiaoBaohong 2021/7/14
 */
@Slf4j
@Configuration
@EnableWebSecurity
public class MyWebSecurityConfigurerAdapter extends WebSecurityConfigurerAdapter {

    @Autowired
    private MyAuthenticationProvider myAuthenticationProvider;

    @Autowired
    private MyUserDetailService myUserDetailService;

    @Autowired
    private AuthenticationDetailsSource authenticationDetailsSource;


    /**
     * 这里用来验证权限
     *
     * @param auth
     * @throws Exception
     */
    @Override
    protected void configure(AuthenticationManagerBuilder auth) throws Exception {
        super.configure(auth);
        // 这里需要把我们自定义的核心验证方法装配进去使用
        auth.authenticationProvider(myAuthenticationProvider);
        //将自定的UserDetailsService装配到AuthenticationManagerBuilder
        auth.userDetailsService(myUserDetailService).passwordEncoder(password());
    }

    /**
     * 这里用来配置我们自定义的登录页面
     *
     * @param http
     * @throws Exception
     */
    @Override
    protected void configure(HttpSecurity http) throws Exception {
        //super.configure(http);
        http.formLogin()
                .loginPage("/login.html")   //自定义登录页面
                .loginProcessingUrl("/user/login") // 登录访问路径
                .failureUrl("/login/error") // 处理异常的controller
                .authenticationDetailsSource(authenticationDetailsSource)  //自定义的资源要配置进去
                .defaultSuccessUrl("/login/index").permitAll()  // 登录成功后默认页面
                .and().authorizeRequests()
                .antMatchers("/", "/login/hello", "/login/sendValidcode", "/user/login").permitAll()  //设置哪些页面和请求不需要登录就能访问
                .anyRequest().authenticated()
                .and().csrf().disable();  //关闭csrf防护
    }

    @Bean
    PasswordEncoder password() {
        // 前端传来的秘密通过这个加密方式加密后与数据库被加密的密码匹配 如果匹配, 那么就是登录成功 @TODO
        return new BCryptPasswordEncoder();
    }
}
三、测试
不需要登录就能访问的页面
没有登录去访问登录才能访问的请求与页面(/login/index), 直接跳转到登录页面
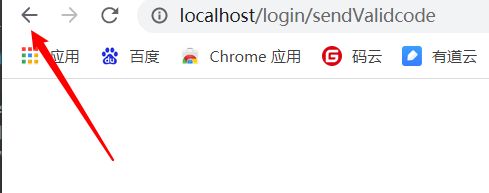
登录有一个小bug, 因为发送验证码使用的a标签会跳转 , 所以要手动返回登录页面去登录
登录后:
总结
这个方法相对复杂, spring-security是基于拦截器的, 所以可以通过添加一个验证码的拦截器来实现同样的功能.


