Debian 10 手动安装 Kubernetes (k8s)
Decker 安装
参见 Debian 10 手动安装 Docker。
Kubernetes 安装 (master&node)
这里没有用 Debian 发行版包管理自动安装,而是手动安装。
官方文档:安装 kubeadm
允许 iptables 检查桥接流量
cat <<EOF | sudo tee /etc/modules-load.d/k8s.conf
br_netfilter
EOF

cat <<EOF | sudo tee /etc/sysctl.d/k8s.conf
net.bridge.bridge-nf-call-ip6tables = 1
net.bridge.bridge-nf-call-iptables = 1
EOF

sudo sysctl --system
安装 CNI 插件(大多数 Pod 网络都需要)
# 定义变量 CNI_VERSION 和 ARCH
CNI_VERSION="v0.8.2"
ARCH="amd64"

# 创建 /opt/cni/bin 文件夹
sudo mkdir -p /opt/cni/bin

# 由于网络原因,这里没有直接使用 github.com 的压缩包地址,而是使用镜像代理下载压缩包。
# curl -L "https://github.com/containernetworking/plugins/releases/download/${CNI_VERSION}/cni-plugins-linux-${ARCH}-${CNI_VERSION}.tgz" | sudo tar -C /opt/cni/bin -xz
curl -L "https://mirror.ghproxy.com/https://github.com/containernetworking/plugins/releases/download/${CNI_VERSION}/cni-plugins-linux-${ARCH}-${CNI_VERSION}.tgz" | sudo tar -C /opt/cni/bin -xz
安装 crictl(kubeadm/kubelet 容器运行时接口(CRI)所需)
# 定义要下载命令文件的目录
DOWNLOAD_DIR=/usr/local/bin
sudo mkdir -p $DOWNLOAD_DIR

# 定义变量 CRICTL_VERSION 和 ARCH
CRICTL_VERSION="v1.22.0"
ARCH="amd64"

# 由于网络原因,这里没有直接使用 github.com 的压缩包地址,而是使用镜像代理下载压缩包。
# curl -L "https://github.com/kubernetes-sigs/cri-tools/releases/download/${CRICTL_VERSION}/crictl-${CRICTL_VERSION}-linux-${ARCH}.tar.gz" | sudo tar -C $DOWNLOAD_DIR -xz
curl -L "https://mirror.ghproxy.com/https://github.com/kubernetes-sigs/cri-tools/releases/download/${CRICTL_VERSION}/crictl-${CRICTL_VERSION}-linux-${ARCH}.tar.gz" | sudo tar -C $DOWNLOAD_DIR -xz
安装 kubeadm、kubelet、kubectl 并添加 kubelet 系统服务
# 定义变量 RELEASE 和 ARCH
RELEASE="$(curl -sSL https://dl.k8s.io/release/stable.txt)"
ARCH="amd64"

# 进入下载文件夹
cd $DOWNLOAD_DIR

# 下载压缩包
sudo curl -C - -L --remote-name-all https://storage.googleapis.com/kubernetes-release/release/${RELEASE}/bin/linux/${ARCH}/{kubeadm,kubelet,kubectl}

# 授予权限
sudo chmod +x {kubeadm,kubelet,kubectl}

# 定义变量 RELEASE_VERSION
RELEASE_VERSION="v0.4.0"

# 由于网络原因,这里没有直接使用 raw.githubusercontent.com 的服务文件地址,而是使用镜像代理下载服务文件。
# curl -sSL "https://raw.githubusercontent.com/kubernetes/release/${RELEASE_VERSION}/cmd/kubepkg/templates/latest/deb/kubelet/lib/systemd/system/kubelet.service" | sed "s:/usr/bin:${DOWNLOAD_DIR}:g" | sudo tee /etc/systemd/system/kubelet.service
curl -sSL "https://cdn.jsdelivr.net/gh/kubernetes/release@${RELEASE_VERSION}/cmd/kubepkg/templates/latest/deb/kubelet/lib/systemd/system/kubelet.service" | sed "s:/usr/bin:${DOWNLOAD_DIR}:g" | sudo tee /etc/systemd/system/kubelet.service

# 创建文件夹
sudo mkdir -p /etc/systemd/system/kubelet.service.d

# 由于网络原因,这里没有直接使用 raw.githubusercontent.com 的配置文件地址,而是使用镜像代理下载配置文件。
# curl -sSL "https://raw.githubusercontent.com/kubernetes/release/${RELEASE_VERSION}/cmd/kubepkg/templates/latest/deb/kubeadm/10-kubeadm.conf" | sed "s:/usr/bin:${DOWNLOAD_DIR}:g" | sudo tee /etc/systemd/system/kubelet.service.d/10-kubeadm.conf
curl -sSL "https://cdn.jsdelivr.net/gh/kubernetes/release@${RELEASE_VERSION}/cmd/kubepkg/templates/latest/deb/kubeadm/10-kubeadm.conf" | sed "s:/usr/bin:${DOWNLOAD_DIR}:g" | sudo tee /etc/systemd/system/kubelet.service.d/10-kubeadm.conf

# 激活并启动 kubelet
sudo systemctl enable --now kubelet
Debian 10.2 系统必要配置
由于系统缺少一些软件和配置,会导致k8s不能正常运行,所以先安装必要的软件和配置。
# 编辑 /etc/apt/sources.list
sudo nano /etc/apt/sources.list
在文件末尾处添加 deb http://ftp.cn.debian.org/debian buster main ,保存并退出。
# 更新源
sudo apt-get update -y

# 安装 ethtool
sudo apt-get install -y ethtool

# 安装 socat
sudo apt-get install -y socat

# 安装 conntrack
sudo apt-get install -y conntrack
# 编辑 /proc/sys/net/ipv4/ip_forward
sudo nano /proc/sys/net/ipv4/ip_forward
将文件中的 0 改成 1 。
# 编辑 /etc/docker/daemon.json
sudo nano /etc/docker/daemon.json
添加 exec-opts 节点,值为 native.cgroupdriver=systemd :
{
	"exec-opts": ["native.cgroupdriver=systemd"]
}
# 重启 docker 服务
sudo systemctl daemon-reload
sudo systemctl restart docker

# 重启网络服务
sudo service networking restart

# 重启 kubelet 服务
sudo systemctl restart kubelet
k8s 创建集群 (master)
# 初始化控制平面节点
sudo kubeadm init --apiserver-advertise-address 192.168.0.100 --service-cidr=10.96.0.0/16 --pod-network-cidr=192.168.0.100/200 --image-repository=registry.aliyuncs.com/google_containers

注意,保存好 kubeadm join 开头的最后两行,这是用于 node 加入集群的 token 。
要使非 root 用户可以运行 kubectl,请运行以下命令, 它们也是 kubeadm init 输出的一部分:
mkdir -p $HOME/.kube
sudo cp -i /etc/kubernetes/admin.conf $HOME/.kube/config
sudo chown $(id -u):$(id -g) $HOME/.kube/config
或者,如果你是 root 用户,则可以运行:
export KUBECONFIG=/etc/kubernetes/admin.conf
最后,添加kubectl提示功能:
# 添加kubectl提示功能
sudo echo "source <(kubectl completion bash)" >> ~/.bashrc
安装 Pod 网络附加组件 (master&node)
sudo kubectl apply -f https://cdn.jsdelivr.net/gh/coreos/flannel@master/Documentation/kube-flannel.yml
此时有可能报如下错误:
The connection to the server localhost:8080 was refused - did you specify the right host or port?
原因是我当前的用户可能没有运行 kubectl 的权限,之前复制 $HOME/.kube/config 可能没起效果。
在网上查找了N个解决方案都无济于事,于是我只好切换成 root 用户去执行。
# 切换成 root
su root

# 配置
export KUBECONFIG=/etc/kubernetes/admin.conf

# 重新安装 Pod 网络附加组件
kubectl apply -f https://cdn.jsdelivr.net/gh/coreos/flannel@master/Documentation/kube-flannel.yml
最后,切回 dev 用户。
su dev
加入 k8s 集群 (node)
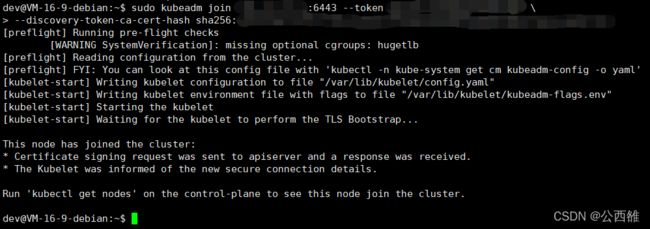
打开一个新的 shell 窗口,登录另一台服务器,安装 docker 和 k8s 后,加入集群。
# 加入集群
sudo kubeadm join 192.168.0.100:6443 --token xxx.xxxxxx \
	--discovery-token-ca-cert-hash sha256:xxxxxxxxxxxxx
查看节点
重新切回
master服务器的 shell 窗口查看集群的节点。
# 切换成 root
su root

# 查看节点
kubectl get nodes

# 切换成 dev
su dev


