【零基础入门SpringBoot2】——单元测试篇
1、JUnit5 的变化
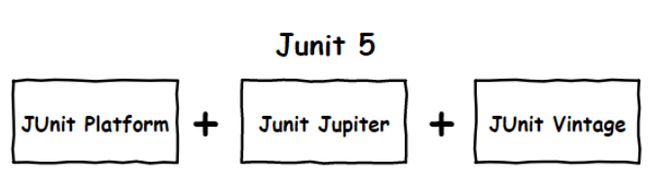
- SpringBoot 2.2.0 版本开始引入 JUnit5 作为单元测试默认库,与之前的框架存在很大不同,由三个模块组成
- JUnit Platform:是在JVM上启动测试框架的基础,不仅支持JUnit自制的测试引擎,也可以接入其他测试引擎【公共测试平台】
- JUnit Jupiter:是JUnit5新特性的核心,内部包含一个测试引擎,用于JUnit Platform 上运行 【核心测试引擎】
- JUnit Vintage:由于JUnit已经发展多年,其功能就是为了兼容JUnit4.x、JUnit5.x的测试引擎 【兼容老版本】
- 在SpringBoot 2.4 以上版本移除了默认对Vintage的依赖,也就是不兼容JUnit4了
- 需要使用JUnit4的功能,需要我们引入Vintage 的引擎依赖
<dependency>
    <groupId>org.junit.vintagegroupId>
    <artifactId>junit-vintage-engineartifactId>
    <scope>testscope>
    <exclusions>
        <exclusion>
            <groupId>org.hamcrestgroupId>
            <artifactId>hamcrest-coreartifactId>
        exclusion>
    exclusions>
dependency>
-
在SpringBoot中使用JUnit的方式也发生了改变
-
以前我们要在SpringBoot中使用JUnit:采用
@SpringBootTest + @RunWith(SpringTest.class)的方式 -
现在,在测试文件中通过@SpringBootTest注解标记一个SpringBoot的单元测试类
- 结合@Test注解定义测试方法
@SpringBootTest
class Boot05WebAdminApplicationTests {
    @Test
    void contextLoads() {
    }
}
-
-
总结一下新版本之后,SpringBoot整合JUnit的食用方法:
- 导入JUnit5的依赖
<dependency> <groupId>org.springframework.bootgroupId> <artifactId>spring-boot-starter-testartifactId> <scope>testscope> dependency> - 如果是快速生成的项目,可能已经包含了测试类,或者我们自己手动创建一下测试类
- 通过@Test注解编写测试方法 【注意是我们JUnit5的@Test注解】
- 导入JUnit5的依赖
-
此时,JUnit类具有Spring的功能
- @Autowired 自动注入
- @Transactional 测试完成后自动回滚 【用于标记测试方法】
2、JUnit5常用注解
- JUnit5注解与JUnit4注解有所变化,具体可以参考官方文档 点击跳转JUnit官方文档
- @Test: 用于标记测试方法,不能声明任何属性,拓展的测试由 Jupiter 提供额外的测试
- @ParameterizedTest:表示方法是参数化测试
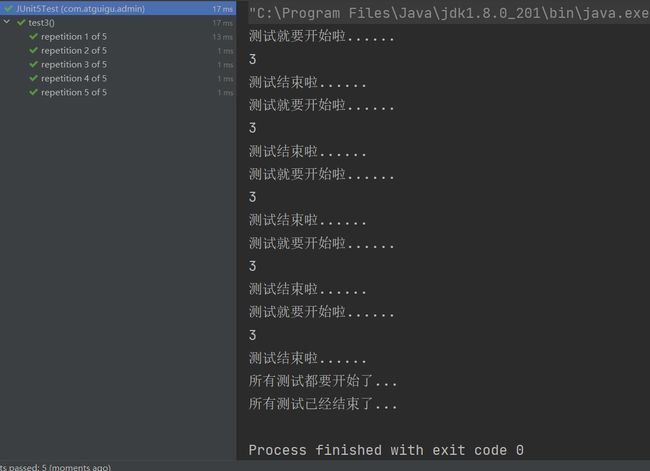
- @RepeatedTest:表示方法重复执行 value 次 【value为该注解的参数】
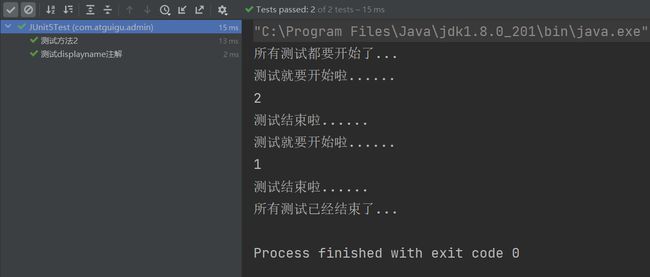
- @DisplayName:为测试类或测试方法设置展示名称
- @BeforeEach:表示在每个单元测试之前执行
- @AfterEach:表示在每个单元测试之后执行
- @BeforeAll:表示在所有单元测试之前执行
- @AfterAll:表示在所有单元测试之后执行
- @Tag:表示单元测试的类别 【类似于JUnit4中的@Categories】
- @Disabled:表示测试类或测试方法不执行
- @Timeout:表示如果测试方法运行时间超过了指定用时,那么就会抛出异常
- @ExtendWith:为测试类或测试方法提供扩展引用
通过代码及运行结果查看具体应用
package com.atguigu.admin;

import org.junit.jupiter.api.*;
import org.springframework.beans.factory.annotation.Autowired;
import org.springframework.boot.test.context.SpringBootTest;
import org.springframework.jdbc.core.JdbcTemplate;

import java.util.concurrent.TimeUnit;

/**
 * @author Bonbons
 * @version 1.0
 * @SpringBootTest相当于下面的两个注解
 * @BootstrapWith(SpringBootTestContextBootstrapper.class)
 * @ExtendWith({SpringExtension.class})
 */
@DisplayName("JUnit5功能测试类")
@SpringBootTest
public class JUnit5Test {

    @Test
    @DisplayName("测试displayname注解")
    void testDisplayName(){
        System.out.println(1);
        System.out.println(jdbcTemplate);
    }

    @BeforeEach
    void testBeforeEach(){
        System.out.println("测试就要开始啦......");
    }

    @AfterEach
    void testAfterEach(){
        System.out.println("测试结束啦......");
    }

    @Disabled
    @DisplayName("测试方法2")
    @Test
    void test2(){
        System.out.println(2);
    }

    @BeforeAll
    static void testBeforeAll(){
        System.out.println("所有测试都要开始了...");
    }

    @AfterAll
    static void testAfterAll(){
        System.out.println("所有测试已经结束了...");
    }

    @Timeout(value = 500, unit = TimeUnit.MILLISECONDS)
    @Test
    void testTimeout() throws InterruptedException{
        Thread.sleep(555);
    }

    @RepeatedTest(5)
    void test3(){
        System.out.println(3);
    }

    //自动装配:整合SpringBoot之后才能使用
    @Autowired
    JdbcTemplate jdbcTemplate;
}

3、断言
-
断言(assertions)是测试方法中的核心部分,用来测试需要满足的条件进行验证【可以理解为我们断定某个事件一定会发生】
- 断言方法为 org.junit.jupiter.api.Assertions 的静态方法
- 用于检查业务逻辑返回的数据是否合理
- 优点:
- 就是我们通过maven的快捷方式:clean + test,在所有的测试运行结束后,会有一个详细的报告
-
以下按不同类别的断言展开叙述
(1)简单断言
- 用来对单个值进行简单的验证
- 判断值是否相等、是否指向同一个对象、是否为真或假、是否为空或非空
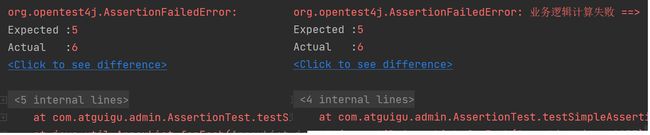
- 对于简单断言测试,还可以指定不匹配的信息
| 方法 | 功能 |
|---|---|
| assertEquals | 判断两个对象或两个原始类型是否相等 |
| assertNotEquals | 判断两个对象或两个原始类型是否不相等 |
| assertSame | 判断两个对象引用是否指向同一个对象 |
| assertNotSame | 判断两个对象引用是否指向不同的对象 |
| assertTrue | 判断给定的布尔值是否为 true |
| assertFalse | 判断给定的布尔值是否为 false |
| assertNull | 判断给定的对象引用是否为 null |
| assertNotNull | 判断给定的对象引用是否不为 null |
    @Test
    @DisplayName("简单断言测试")
    void testSimpleAssertions(){
        //调用函数完成两数相加运算
        int cal = cal(3, 3);
        //assertEquals 的第一个参数是期望值,第二个参数是真实值
        assertEquals(6, cal, "业务逻辑计算失败");
        assertNotEquals(2, 1, "两个属性值相等");

        //比较两个对象是不是指向同一个引用
        assertSame(new Object(), new Object(), "两个对象不一样");
        assertNotSame(new Object(), new Object(), "两个对象一样");

        //判断是否为True、False
        assertTrue(true, "布尔值为false,与期望值相反");
        assertFalse(false, "布尔值为true,与期望值相反");

        //判断是否为null、notNull
        assertNull(null, "对象的引用不为空");
        assertNotNull(null, "对象的引用为空");
    }
    int cal(int a, int b){
        return a + b;
    }
(2)数组断言
-
通过 assertArrayEquals 方法来判断两个对象或原始类型的数组是否相等【就是比较目标数组与实际数组是否每个索引位置对应的值是否完全相同】
@Test
@DisplayName("数组断言测试")
void array(){
  //判断两个数组是否相等 >> true 比较的是内容 [第一个数组是期望数组,第二个数组是实际数组]
  assertArrayEquals(new int[]{1, 2}, new int[]{1, 2}, "数组内容不一致");
}
(3)组合断言
-
assertAll 方法接收多个 org.junit.jupiter.api.Executable 函数式接口的实例作为要验证的断言,可以通过 lambda 表达式很容易提供这些断言 【就是以与的方式组合判断多个断言】
-
assertAll 的参数都代表什么呢?
- 第一个参数值 heading 代表我们自定义的错误信息
- 第二个参数值 executables:Executable 是个函数式接口,可以使用 lamda 表达式编写要测试的代码
-
存在多个断言,前面的断言失败,后面的代码不会执行
-
对于组合断言,要想添加断言失败的消息,也可以在每个子断言中添加 message
    @Test
    @DisplayName("组合断言测试")
    void all(){
        assertAll("test",
                () -> assertTrue(true & true),
                () -> assertEquals(1, 1));
    }
(4)异常断言
- 我们断定会抛出指定的异常,如果没抛出指定的异常,控制台就会抛异常报错
    @Test
    @DisplayName("测试异常断言")
    void testException(){
        assertThrows(ArithmeticException.class, () -> {
            int num = 10 / 2;
        }, "程序没抛出指定异常");
    }

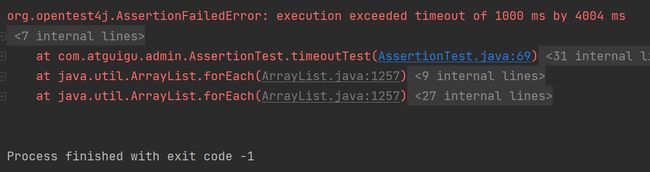
(5)超时断言
- 执行方法超时,则会导致断言失败
    @Test
    @DisplayName("超时测试")
    public void timeoutTest() {
        //如果测试方法时间超过1s将会异常
        Assertions.assertTimeout(Duration.ofMillis(1000), () -> Thread.sleep(5000));
    }
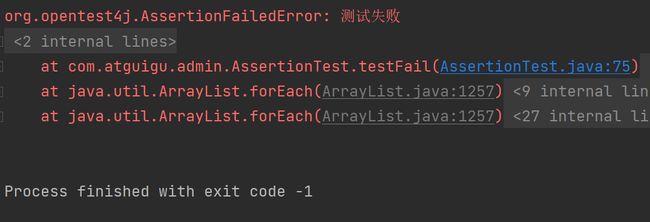
(6)快速失败
- 我们通过执行 fail(String message) 方法可以让测试方法立刻失败
@Test
    @DisplayName("测试快速失败")
    void testFail(){
        fail("测试失败");
    }
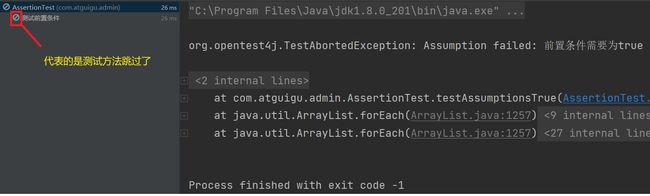
4、前置条件
- 前置条件 assumptions (假设)类似于断言
- 不满足断言会使测试方法失败
- 不满足前置条件会使得测试方法的执行终止 【效果等同于 @Disabled 注解,跳过当前测试方法执行】
    @Test
    @DisplayName("测试前置条件")
    void testAssumptionsTrue(){
        Assumptions.assumeTrue(false, "前置条件需要为true");
        System.out.println("前置条件通过");
    }
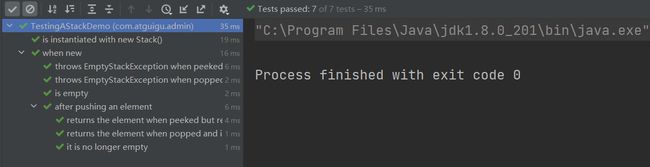
5、嵌套测试
-
通过@Nested 注解 + 内部类的形式实现嵌套测试
-
在内部类中可以使用 @BeforeEach、@AfterEach、@BeforeAll、@AfterAll,而且嵌套层数没有限制
-
我们需要知道:
- 外层Test不能驱动内层Test的上面四个注解标记的方法
- 但是内层Test可以驱动外层Test的上面四个注解标记的方法
@DisplayName("A stack")
class TestingAStackDemo {

    Stack<Object> stack;

    @Test
    @DisplayName("is instantiated with new Stack()")
    void isInstantiatedWithNew() {
        new Stack<>();
    }

    @Nested
    @DisplayName("when new")
    class WhenNew {

        @BeforeEach
        void createNewStack() {
            stack = new Stack<>();
        }

        @Test
        @DisplayName("is empty")
        void isEmpty() {
            assertTrue(stack.isEmpty());
        }

        @Test
        @DisplayName("throws EmptyStackException when popped")
        void throwsExceptionWhenPopped() {
            assertThrows(EmptyStackException.class, stack::pop);
        }

        @Test
        @DisplayName("throws EmptyStackException when peeked")
        void throwsExceptionWhenPeeked() {
            assertThrows(EmptyStackException.class, stack::peek);
        }

        @Nested
        @DisplayName("after pushing an element")
        class AfterPushing {

            String anElement = "an element";

            @BeforeEach
            void pushAnElement() {
                stack.push(anElement);
            }

            @Test
            @DisplayName("it is no longer empty")
            void isNotEmpty() {
                assertFalse(stack.isEmpty());
            }

            @Test
            @DisplayName("returns the element when popped and is empty")
            void returnElementWhenPopped() {
                assertEquals(anElement, stack.pop());
                assertTrue(stack.isEmpty());
            }

            @Test
            @DisplayName("returns the element when peeked but remains not empty")
            void returnElementWhenPeeked() {
                assertEquals(anElement, stack.peek());
                assertFalse(stack.isEmpty());
            }
        }
    }
}
6、参数化测试
-
将所有想测试的参数统一起来,会将这些参数挨个测试一遍 【属于JUnit5的新特性】
-
通过多种注解声明参数来源
- @ValueSource:为参数化测试指定入参来源,支持八大基础类以及String类型和Class类型
- @NullSource:表示为参数化测试提供一个 null 的入参
- @EnumSource:表示为参数化测试提供一个枚举入参
- @CsvFileSource:表示读取指定CSV文件内容作为参数化测试入参
- @MethodSource:表示读取指定方法的返回值作为参数化测试入参【方法的返回值必须是以流的形式】
-
只要实现 ArgumentsProvider 接口,任何外部文件都可以作为它的入参
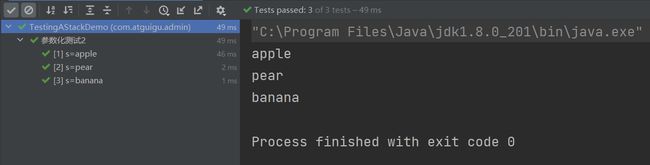
    @DisplayName("参数化测试")
    @ParameterizedTest
    @ValueSource(ints = {1, 2, 3})
    void testParameterized(int i){
        System.out.println(i);
    }

    static Stream<String> stringProvider(){
        return Stream.of("apple", "pear", "banana");
    }
    @ParameterizedTest
    @DisplayName("参数化测试2")
    @MethodSource("stringProvider")
    void testParameterized2(String s){
        System.out.println(s);
    }
7、迁移指南
- 原来使用的JUnit4,如何迁移到JUnit5呢?
- 首先要导入JUnit4兼容的引擎
- 注意要更新JUnit导入的包:
- 注解在 org.junit.jupiter.api 包中
- 断言在 org.junit.jupiter.api.Assertions 类中
- 前置条件在 org.junit.jupiter.api.Assumptions 类中
- 注解替换:
- 把@Before 和@After 替换成@BeforeEach 和@AfterEach
- 把@BeforeClass 和@AfterClass 替换成@BeforeAll 和@AfterAll
- 把@Ignore 替换成@Disabled
- 把@Category 替换成@Tag
- 把@RunWith、@Rule 和@ClassRule 替换成@ExtendWith