gitlab-cicd持续部署-保姆式基础教学
gitlab-cicd持续部署-保姆式基础教学
gitlab-cicd 是一个强大的自动化技术,支持任意规模的构建与测试
- 持续集成(CI) 由您开始。您在合并请求(MR)中共享新代码,并触发Pipeline。构建、测试和验证——极狐GitLab负责完成其余的工作。
- 持续交付 (CD) 将您的辛勤努力付诸实践,通过结构化部署Pipeline将经过CI验证的代码移交给您的应用程序。
环境:
linux centos7.9
基本配置
安装阿里云镜像源
[root@gitlab-cicd ~]# curl -o /etc/yum.repos.d/CentOS-Base.repo https://mirrors.aliyun.com/repo/Centos-7.repo
[root@gitlab-cicd ~]# yum clean all
[root@gitlab-cicd ~]# yum makecache
安装相关依赖
[root@gitlab-cicd ~]# yum -y install policycoreutils openssh-server openssh-clients postfix
[root@gitlab-cicd ~]# yum -y install  policycoreutils-python
[root@gitlab-cicd ~]# systemctl enable sshd && systemctl start sshd
[root@gitlab-cicd ~]# systemctl enable postfix && systemctl start postfix
关闭防火墙以及selinux
[root@gitlab-cicd ~]# systemctl stop firewalld && systemctl disable firewalld
[root@gitlab-cicd ~]# setenforce 0
[root@gitlab-cicd ~]# sed -i s/SELINUX=enforcing/SELINUX=disabled/g
gitlab-ce安装与操作
下载gitlab-ce软件
清华源包
https://mirrors.tuna.tsinghua.edu.cn/gitlab-ce/yum/el7/gitlab-ce-15.6.2-ce.0.el7.x86_64.rpm
packageCloud(快很多)
https://packages.gitlab.com/gitlab/gitlab-ce/packages/el/7/gitlab-ce-15.5.6-ce.0.el7.x86_64.rpm/download.rpm
[root@gitlab-cicd ~]# wget https://packages.gitlab.com/gitlab/gitlab-ce/packages/el/7/gitlab-ce-15.5.6-ce.0.el7.x86_64.rpm/download.rpm
安装gitlab-ce
[root@gitlab-cicd ~]# rpm -ivh download.rpm
#或
[root@gitlab-cicd ~]# yum install -y download.rpm
修改配置文件
[root@gitlab-cicd ~]# vim /etc/gitlab/gitlab.rb
修改 external_url(主机实例地址)和nginx['listen_port'](监听端口)的key
external_url 'http://10.0.54.200:80'
nginx['listen_port'] = 80
重启
#重新加载配置文件
[root@gitlab-cicd ~]# gitlab-ctl reconfigure
#重启gitlab-ce客户端
[root@gitlab-cicd ~]# gitlab-ctl restart
访问gitlab
用户为root
默认密码在文件/etc/gitlab/initial_root_password生成的初始密码在24小时过期
http://10.0.54.200:80/
修改root密码
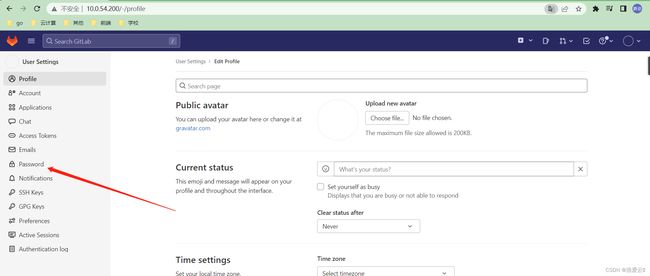
点击头像进入Edit profile
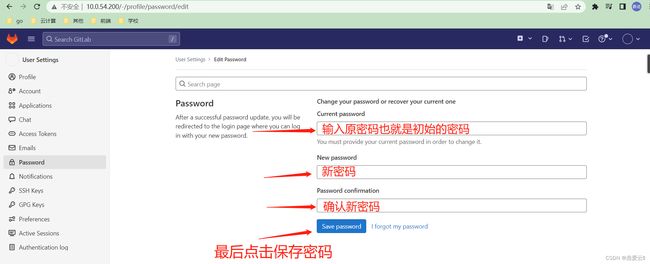
点击password
输入密码并修改
我这里设置成了123456asd
生产环境建议设置复杂一点
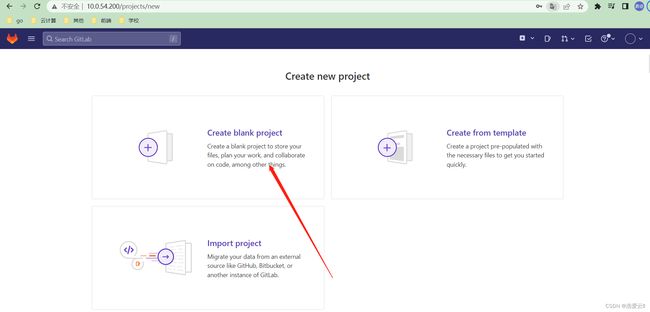
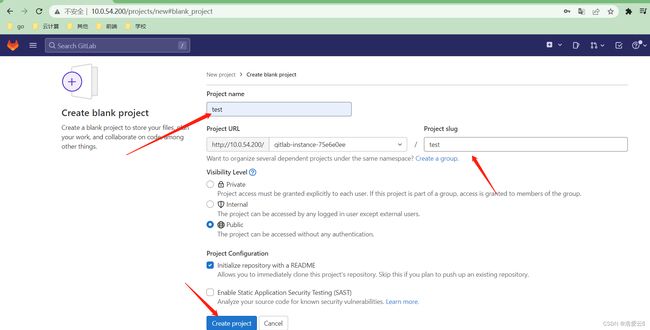
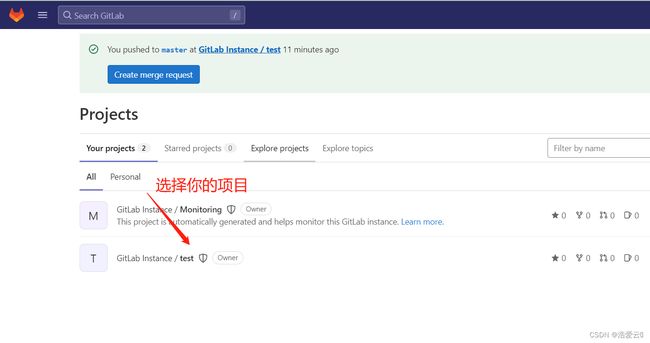
创建项目
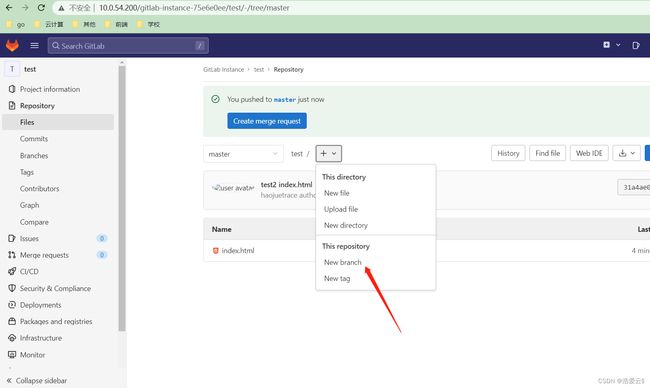
创建新分支
测试项目git相关操作
这里使用linux进行操作
安装git工具
[root@gitlab-cicd test]# yum install -y git
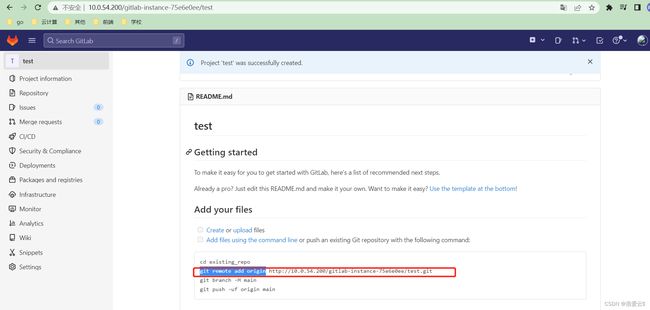
将本地仓库与远程仓库建立连接
[root@gitlab-cicd ~]# mkdir test
[root@gitlab-cicd ~]# cd test/
##设置邮箱
[root@gitlab-cicd test]# git config --global user.email "[email protected]"
##设置用户名
[root@gitlab-cicd test]# git config --global user.name "haojuetrace"
#初始化本地仓库
[root@gitlab-cicd test]# git init
#将本地仓库与远程仓库建立连接
[root@gitlab-cicd test]# git remote add origin http://10.0.54.200/gitlab-instance-75e6e0ee/test.git
创建测试文件
[root@gitlab-cicd test]# echo haojuetrace > index.html
将测试文件推送到远程仓库
##创建新分支
[root@gitlab-cicd test]# git branch main
#将所有文件添加到本地仓库
[root@gitlab-cicd test]# git add .
#提交所有更新过的文件
[root@gitlab-cicd test]# git commit -m "test index.html"
#将文件推送到远程仓库的master分支
[root@gitlab-cicd test]# git push -uf origin master
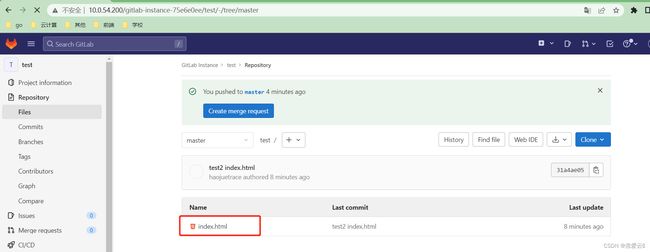
可以看到文件推送上来了
GitLab Runner安装与操作
添加gitlab-runner官方库:
[root@gitlab-cicd ~]# curl -O https://packages.gitlab.com/install/repositories/runner/gitlab-runner/script.rpm.sh
[root@gitlab-cicd ~]# bash script.rpm.sh
安装gitlab runner
[root@gitlab-cicd ~]# yum install -y gitlab-ci-multi-runner
gitlab-runner 注册
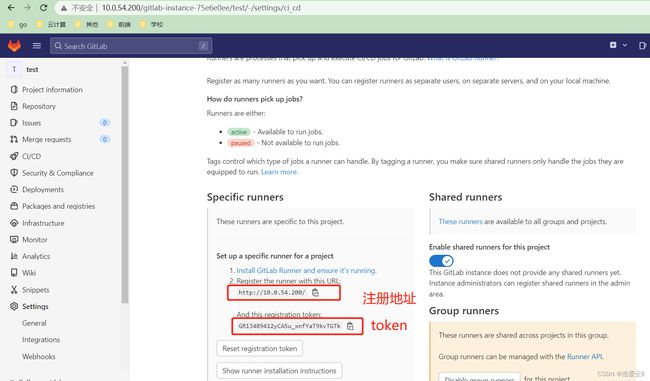
获取gitlab-ci的Token
- 项目主页 -> Sttings -> CI/CD -> Runners Expand
注册gitlab-runner
需要按照步骤输入:
- 输入gitlab的服务URL,这个使用的是https://gitlab.com/
- 输入gitlab-ci的Toekn,获取方式参考上图
- 关于集成服务中对于这个runner的描述
- 给这个gitlab-runner输入一个标记,这个tag非常重要,在后续的使用过程中需要使用这个tag来指定gitlab-runner
- 是否运行在没有tag的build上面。在配置gitlab-ci的时候,会有很多job,每个job可以通过tags属性来选择runner。这里为true表示如果job没有配置tags,也执行
- 是否锁定runner到当前项目
- 选择执行器,gitlab-runner实现了很多执行器,可用在不同场景中运行构建,详情可见GitLab Runner Executors,这里选用Shell模式
[root@gitlab-cicd ~]# gitlab-runner register
Runtime platform                                    arch=amd64 os=linux pid=41570 revision=133d7e76 version=15.6.1
WARNING: The 'register' command has been deprecated in GitLab Runner 15.6 and will be replaced with a 'deploy' command. For more information, see https://gitlab.com/gitlab-org/gitlab/-/issues/380872
Running in system-mode.

Enter the GitLab instance URL (for example, https://gitlab.com/):
http://10.0.54.200/   #刚查看到的实例地址
Enter the registration token:
GR13489412yCA5u_xnfYaT9kvTGTk    #刚查看的注册token
Enter a description for the runner:
[gitlab-cicd]: test    #描述
Enter tags for the runner (comma-separated):
test   #设置一个标记,具体看上面描述
Enter optional maintenance note for the runner:
true  #是否运行在没有tag的build上面  这里true代表没有tag也执行
Registering runner... succeeded                     runner=GR13489412yCA5u_x
Enter an executor: parallels, shell, virtualbox, docker-ssh+machine, custom, docker-ssh, docker+machine, instance, kubernetes, docker, ssh:
shell  #gitlab-runner执行器
Runner registered successfully. Feel free to start it, but if it's running already the config should be automatically reloaded!

Configuration (with the authentication token) was saved in "/etc/gitlab-runner/config.toml"
刷新刚才获取token的页面(可以看到新增的一个Runner)
cicd演示
测试演示
进入到项目目录
[root@gitlab-cicd ~]# cd test/
编写.gitlab-ci.yml配置文件
[root@gitlab-cicd test]# vim .gitlab-ci.yml
stages: # 分段
  - deploy

deploy-job:
  tags:
    - test
  stage: deploy
  script:
    - echo "hello world"
更新项目数据
[root@gitlab-cicd test]# echo test cicd >> index.html
将文件推送到远程仓库
[root@gitlab-cicd test]# git add .
[root@gitlab-cicd test]# git commit -m "cicd test"
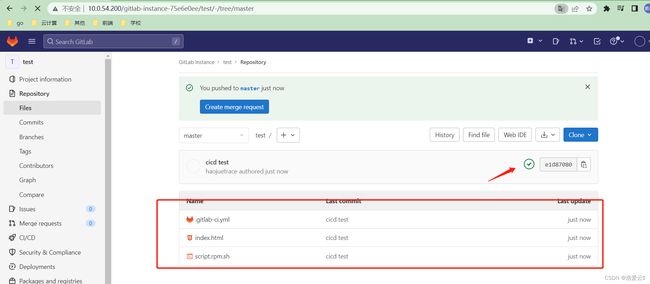
[root@gitlab-cicd test]# git push -uf origin master
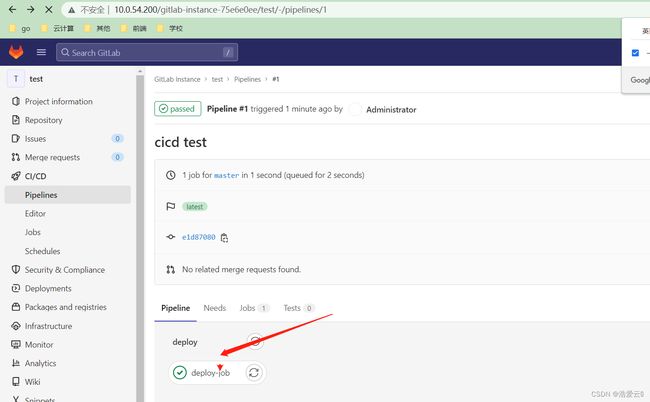
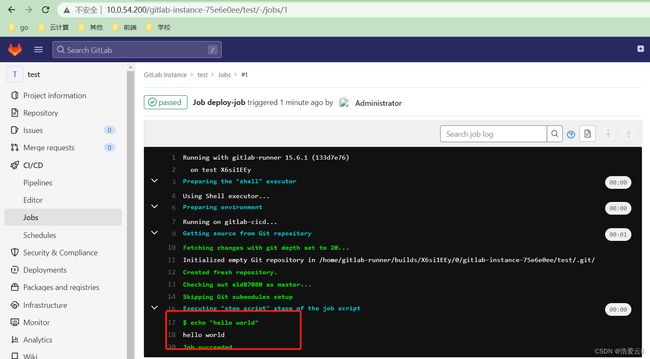
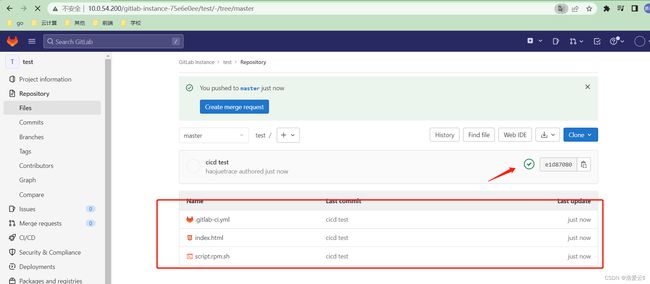
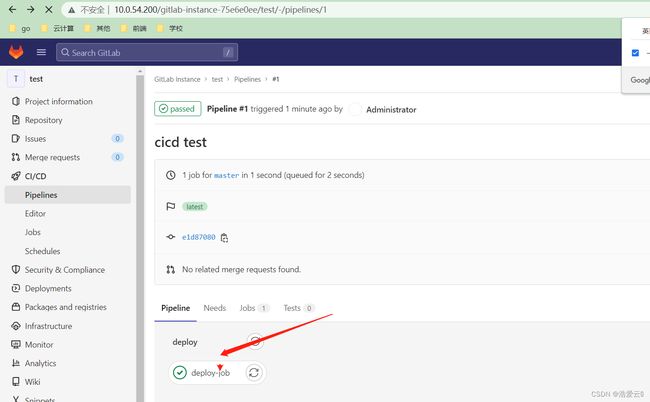
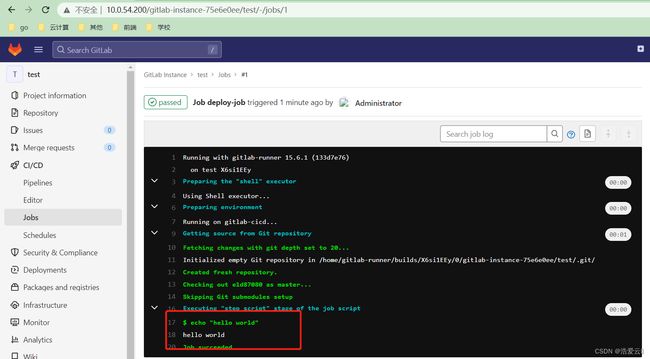
可以看到文件推送上来了并且gitlab-runner执行成功
[root@gitlab-cicd test]# it add .
[root@gitlab-cicd test]# git commit -m "cicd test"
[root@gitlab-cicd test]# git push -uf origin master
可以看到文件推送上来了并且gitlab-runner执行成功

