Zabbix探索(一):基于LAMP环境搭建Zabbix4.0监控系统
版权声明:欢迎转载与交流。https://blog.csdn.net/one2more/article/details/94619548
一、关闭防火墙和SELinux
[root@VM_0_16_centos ~]# systemctl stop firewalld
[root@VM_0_16_centos ~]# systemctl disable firewalld
[root@VM_0_16_centos ~]# setenforce 0
[root@VM_0_16_centos ~]# sed -i “s/SELINUX=enforcing/SELINUX=disabled/g” /etc/selinux/config
二、安装部署LAMP环境
1、安装LAMP基础环境
[root@VM_0_16_centos ~]# yum install -y httpd php php-mysql mariadb mariadb-server
2、启动相关服务、初始化数据库
①启动Apache和mariadb
[root@VM_0_16_centos ~]# systemctl start httpd mariadb
②设置Apache和mariadb开机自启动
[root@VM_0_16_centos ~]# systemctl enable httpd mariadb
③初始化数据库
[root@VM_0_16_centos ~]# mysql_secure_installation
Enter current password for root (enter for none):    #输入root密码。未设置,直接回车。
Set root password? [Y/n] y                           #是否现在设置root密码?
New password:                                        #输入root密码
Re-enter new password:                               #再次输入一遍root密码
Remove anonymous users? [Y/n] y                      #是否移除匿名用户?
Disallow root login remotely? [Y/n] y                #是否禁止root远程登录?
Remove test database and access to it? [Y/n] y       #是否现在移除测试数据库和数据?
Reload privilege tables now? [Y/n] y                 #是否现在重载特权表?
3、安装Zabbix
①安装Zabbix源
[root@VM_0_16_centos ~]# rpm -ivh http://repo.zabbix.com/zabbix/4.0/rhel/7/x86_64/zabbix-release-4.0-1.el7.noarch.rpm
②导入Zabbix源的秘钥
[root@VM_0_16_centos ~]# rpm --import /etc/pki/rpm-gpg/RPM-GPG-KEY-ZABBIX
③安装Zabbix相关服务
[root@VM_0_16_centos ~]# yum -y install zabbix-server-mysql zabbix-web-mysql zabbix-agent
★如果zabbix源访问异常,请尝试一下方法:
①安装下载上传工具lrzsz,上传所需软件包
[root@VM_0_16_centos ~]# yum -y install lrzsz
[root@VM_0_16_centos ~]# rz
②解压软件包
[root@VM_0_16_centos ~]# tar -xzf zabbix-4.0-rpms.tar.gz
③修改配置yum源配置文件
[root@VM_0_16_centos yum.repos.d]# mv zabbix.repo zabbix.repo.bak
[root@VM_0_16_centos yum.repos.d]# vim zabbix-install.repo    (写入一下内容)
[zabbix4.0]
name="zabbix4.0-install-rpms"
baseurl=file:///root/zabbix-4.0-rpms
enabled=1
gpgcheck=0
④再尝试yum安装即可
[root@VM_0_16_centos ~]# yum install -y zabbix-server-mysql zabbix-web-mysql zabbix-agent
4、创建和读入数据库
①创建数据库并授权
[root@VM_0_16_centos ~]# mysql -u root -p
MariaDB [(none)]> CREATE DATABASE zabbix DEFAULT CHARACTER SET utf8 COLLATE utf8_bin;
MariaDB [(none)]> grant all privileges on zabbix.* to zabbix@localhost identified by 'zabbix';
②读入数据库
[root@VM_0_16_centos ~]# cd /usr/share/doc/zabbix-server-mysql-4.0.10/
[root@VM_0_16_centos zabbix-server-mysql-4.0.10]# zcat create.sql.gz | mysql -uroot -p zabbix
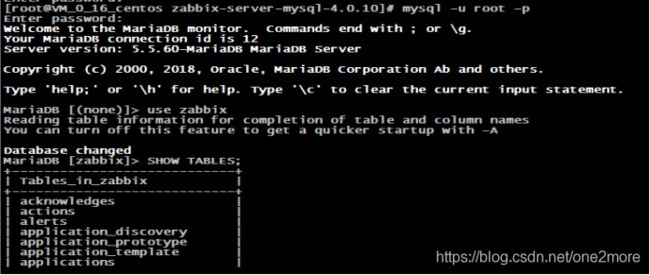
③检查导入的数据库
[root@VM_0_16_centos zabbix-server-mysql-4.0.10]# mysql -u root -p
MariaDB [(none)]> use zabbix
MariaDB [zabbix]> SHOW TABLES;
三、启动Zabbix服务
1、配置Zabbix服务端主配置文件、并开启Zabbix服务
①编辑/etc/zabbix/zabbix_server.conf
[root@VM_0_16_centos ~]# vim /etc/zabbix/zabbix_server.conf         #仅需修改以下列出部分
DBHost=localhost
DBName=zabbix
DBUser=zabbix
DBPassword=zabbix
②开启zabbix-server服务,并设置为开机自启动
[root@VM_0_16_centos ~]# systemctl start zabbix-server.service
[root@VM_0_16_centos ~]# systemctl enable zabbix-server.service
2、编辑Zabbix前端PHP配置文件
[root@VM_0_16_centos ~]# vim /etc/httpd/conf.d/zabbix.conf
        php_value max_execution_time `300`
        php_value memory_limit `128M`
        php_value post_max_size `16M`
        php_value upload_max_filesize `2M`
        php_value max_input_time `300`
        php_value max_input_vars `10000`
        php_value always_populate_raw_post_data `-1`
        php_value date.timezone `Asia/Shanghai`
3、重启Apache服务,同步更新一下系统时间
[root@VM_0_16_centos ~]# systemctl restart httpd
[root@VM_0_16_centos ~]# ntpdate ntp.sjtu.edu.cn        #或者使用cn.pool.ntp.org这个时间同步服务器
3 Jul 18:53:36 ntpdate[5330]: the NTP socket is in use, exiting
注意:生产中往往自行搭建内网时间同步服务器,通过定时任务定期同步时间,从而保证和实现各集群主机的时间一致性
四、安装Zabbix Web
1、浏览器访问你的Zabbix服务器IP(http://IP地址/zabbix),然后点击“Next step”

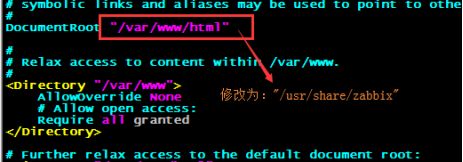
扩展:修改Apache网站跟目录为Zabbix网页目录(/usr/share/zabbix),实现直接输入IP地址就能访问

①编辑Apache配置文件
[root@VM_0_16_centos ~]# vim /etc/httpd/conf/httpd.conf
②重启Apache服务
[root@VM_0_16_centos ~]# systemctl restar httpd #网页直接访问IP地址即可,省去了IP地址后再输入`/zabbix`的麻烦。
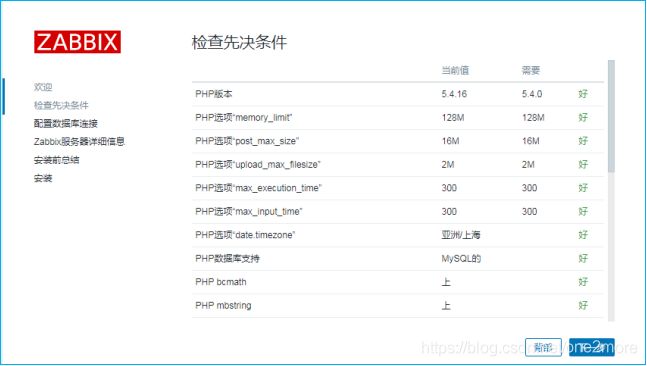
2、安装程序检查相关环境,没有问题的话,点击“下一步”(我这里的中文是Google浏览器自动翻译的)
3、设置数据库连接参数
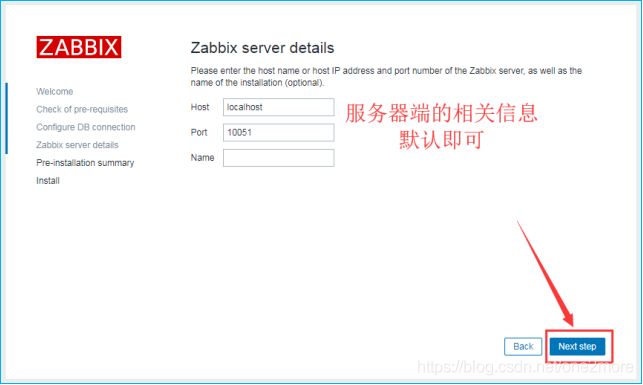
4、设置服务器端的相关信息(默认即可)
5、安装前对设置参数的概览,直接点击“下一步”
6、安装成功,点击“Finish”
7、弹出登录界面
五、Zabbix相关配置
1、修改显示语言
①依次点击:Administration >>> Users >>> Admin
②点击“Language”选择“Chinese(zh_CN)”>>> 点击“Update”>>>然后“刷新页面”即可
2、配置Zabbix监控本机
①修改配置文件:/etc/zabbix/zabbix_agentd.conf(修改一下三项内容)
[root@VM_0_16_centos ~]# vim /etc/zabbix/zabbix_agentd.conf
Server=152.16.19.63                 #指定zabbix服务器地址
ServerActive=152.16.19.63           #指定zabbix服务器地址
Hostname=152.16.19.63               #被监控主机的主机名或IP地址
②重启zabbix-agent服务,并设置为开机自启动
[root@VM_0_16_centos ~]# systemctl restart zabbix-agent.service
[root@VM_0_16_centos ~]# systemctl enable zabbix-agent.service
[root@VM_0_16_centos ~]# netstat -luntap | grep zabbix


