学习笔记:基于SpringBoot的牛客网社区项目实现(五)之登陆模块
一、发送邮件
发送邮件主要使用JavaMailSender类,使用send方法,send方法需要MimeMessage类型的参数。
void send(MimeMessage var1)
使用createMimeMessage()方法并用MimeMessage类型接收。再创建MimeMessageHelper()对象,添加一些数据。
MimeMessage message = mailSender.createMimeMessage();
MimeMessageHelper helper = new MimeMessageHelper(message);
helper.setFrom(from);
helper.setTo(to);
helper.setSubject(subject);
helper.setText(content, true);
最后发送邮件
mailSender.send(helper.getMimeMessage());
二、Cookie和Session的使用
Cookie
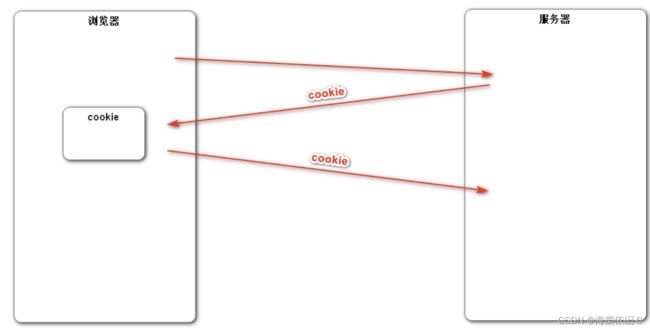
因为是服务器发送给浏览器的,所以加上HttpServletResponse对象,给浏览器返回数据。创建cookie直接new Cookie对象就可以了,然后设置cookie的内容,生效范围,生存时间,最后通过response发送cookie。得到cookie直接使用注解@CookieValue,很方便。
//cookie示例
    @RequestMapping(path = "/cookie/set", method = RequestMethod.GET)
    @ResponseBody
    public String setCookie(HttpServletResponse response) {
        //创建cookie
        Cookie cookie = new Cookie("code", CommunityUtil.generateUUID());
        //设置cookie生效的范围
        cookie.setPath("/community/alpha");
        //设置cookie生存时间
        cookie.setMaxAge(60 * 10);//10min
        //发送cookie
        response.addCookie(cookie);

        return "set cookie";
    }
    @RequestMapping(path = "/cookie/get", method = RequestMethod.GET)
    @ResponseBody
    public String getCookie(@CookieValue("code") String code) {

        System.out.println(code);
        return "get cookie";
    }
Session
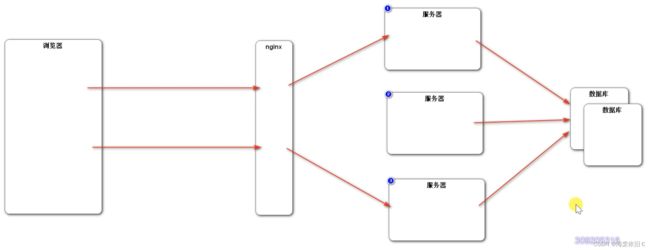
Session是存在服务端的,使用HttpSession对象创建,然后setAttribute信息。
//session示例
    @RequestMapping(path = "/session/set", method = RequestMethod.GET)
    @ResponseBody
    public String setSession(HttpSession session) {
        session.setAttribute("id", 1);
        session.setAttribute("name", "Test");
        return "set session";
    }

    @RequestMapping(path = "/session/get", method = RequestMethod.GET)
    @ResponseBody
    public String getSession(HttpSession session) {

        System.out.println(session.getAttribute("id"));
        System.out.println(session.getAttribute("name"));
        return "get session";
    }
三、生成验证码
package com.nowcoder.community.config;

import com.google.code.kaptcha.Producer;
import com.google.code.kaptcha.impl.DefaultKaptcha;
import com.google.code.kaptcha.util.Config;
import org.springframework.context.annotation.Bean;
import org.springframework.context.annotation.Configuration;

import java.util.Properties;

@Configuration
public class KaptchaConfig {

    @Bean
    public Producer kaptchaProducer() {
        Properties properties = new Properties();
        properties.setProperty("kaptcha.image.width", "100");
        properties.setProperty("kaptcha.image.height", "40");
        properties.setProperty("kaptcha.textproducer.font.size", "32");
        properties.setProperty("kaptcha.textproducer.font.color", "0,0,0");
        properties.setProperty("kaptcha.textproducer.char.string", "0123456789ABCDEFGHIJKLMNOPQRSTUVWXYAZ");
        properties.setProperty("kaptcha.textproducer.char.length", "4");
        properties.setProperty("kaptcha.noise.impl", "com.google.code.kaptcha.impl.NoNoise");

        DefaultKaptcha kaptcha = new DefaultKaptcha();
        Config config = new Config(properties);
        kaptcha.setConfig(config);
        return kaptcha;
    }

}
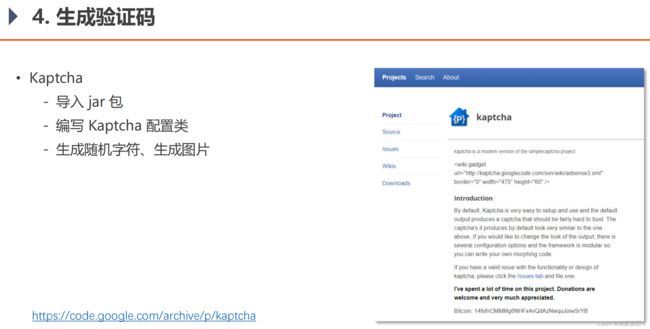
生成文字的验证码放入session中,方便后续登录输入的验证码是否正确,最后生成图片验证码输出到浏览器中。
@RequestMapping(path = "/kaptcha", method = RequestMethod.GET)
    public void getKaptcha(HttpServletResponse response, HttpSession session) {
        // 生成验证码
        String text = kaptchaProducer.createText();
        BufferedImage image = kaptchaProducer.createImage(text);

        // 将验证码存入session
        session.setAttribute("kaptcha", text);

        // 将图片输出给浏览器
        response.setContentType("image/png");
        try {
            OutputStream os = response.getOutputStream();
            ImageIO.write(image, "png", os);//image:图片对象,"bmg" :图片格式, filWriterOne 需要写入的地方
        } catch (IOException e) {
            logger.error("响应验证码失败:" + e.getMessage());
        }
    }
ServletOutputStream getOutputStream()
获得字节流,通过该字节流的write(byte[] bytes)可以向response缓冲区中写入字节,再由Tomcat服务器将字节内容组成Http响应返回给浏览器。
response.getWriter().write("字符串"),这个方法只能写字符串。如果要写字节,比如,传个图片,怎么办呢?就要靠response.getOutputStream()
四、登录功能实现
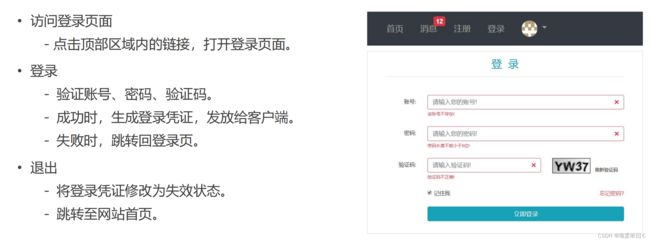
 @RequestMapping(path = "/login", method = RequestMethod.POST)
    public String login(String username, String password, String code, boolean rememberme,
                        Model model, HttpSession session, HttpServletResponse response) {
        // 检查验证码
        String kaptcha = (String) session.getAttribute("kaptcha");
        if (StringUtils.isBlank(kaptcha) || StringUtils.isBlank(code) || !kaptcha.equalsIgnoreCase(code)) {
            model.addAttribute("codeMsg", "验证码不正确!");
            return "/site/login";
        }

        // 检查账号,密码
        int expiredSeconds = rememberme ? REMEMBER_EXPIRED_SECONDS : DEFAULT_EXPIRED_SECONDS;
        Map map = userService.login(username, password, expiredSeconds);
        if (map.containsKey("ticket")) {
            Cookie cookie = new Cookie("ticket", map.get("ticket").toString());
            cookie.setPath(contextPath);
            cookie.setMaxAge(expiredSeconds);
            response.addCookie(cookie);
            return "redirect:/index";
        } else {
            model.addAttribute("usernameMsg", map.get("usernameMsg"));
            model.addAttribute("passwordMsg", map.get("passwordMsg"));
            return "/site/login";
        }
    }
@RequestMapping(path = "/logout", method = RequestMethod.GET)
public String logout(@CookieValue("ticket") String ticket) {
userService.logout(ticket);
return "redirect:/login";
}五、拦截器的应用
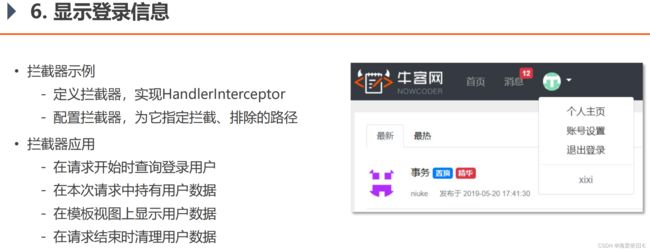
有许多请求同一个方法,统一对这些请求处理,比如访问账号设置一定要在用户登录的情况下才能访问,那么访问用户是否登录这个功能便可以使用拦截器进行实现。
package com.nowcoder.community.controller.interceptor;

import com.nowcoder.community.annotation.LoginRequired;
import com.nowcoder.community.util.HostHolder;
import org.springframework.beans.factory.annotation.Autowired;
import org.springframework.stereotype.Component;
import org.springframework.web.method.HandlerMethod;
import org.springframework.web.servlet.HandlerInterceptor;

import javax.servlet.http.HttpServletRequest;
import javax.servlet.http.HttpServletResponse;
import java.lang.reflect.Method;

@Component
public class LoginRequiredInterceptor implements HandlerInterceptor {

    @Autowired
    private HostHolder hostHolder;

    @Override
    public boolean preHandle(HttpServletRequest request, HttpServletResponse response, Object handler) throws Exception {
        if (handler instanceof HandlerMethod) {
            HandlerMethod handlerMethod = (HandlerMethod) handler;
            Method method = handlerMethod.getMethod();
            LoginRequired loginRequired = method.getAnnotation(LoginRequired.class);
            if (loginRequired != null && hostHolder.getUser() == null) {
                response.sendRedirect(request.getContextPath() + "/login");
                return false;
            }
        }
        return true;
    }
}
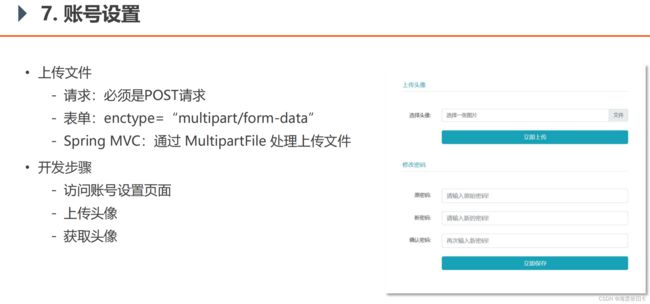
六、账号设置
@LoginRequired
    @RequestMapping(path = "/upload", method = RequestMethod.POST)
    public String uploadHeader(MultipartFile headerImage, Model model) {
        if (headerImage == null) {
            model.addAttribute("error", "您还没有选择图片!");
            return "/site/setting";
        }

        String fileName = headerImage.getOriginalFilename();
        String suffix = fileName.substring(fileName.lastIndexOf("."));
        if (StringUtils.isBlank(suffix)) {
            model.addAttribute("error", "文件的格式不正确!");
            return "/site/setting";
        }

        // 生成随机文件名
        fileName = CommunityUtil.generateUUID() + suffix;
        // 确定文件存放的路径
        File dest = new File(uploadPath + "/" + fileName);
        try {
            // 存储文件
            headerImage.transferTo(dest);
        } catch (IOException e) {
            logger.error("上传文件失败: " + e.getMessage());
            throw new RuntimeException("上传文件失败,服务器发生异常!", e);
        }

        // 更新当前用户的头像的路径(web访问路径)
        // http://localhost:8080/community/user/header/xxx.png
        User user = hostHolder.getUser();
        String headerUrl = domain + contextPath + "/user/header/" + fileName;
        userService.updateHeader(user.getId(), headerUrl);

        return "redirect:/index";
    }

    @RequestMapping(path = "/header/{fileName}", method = RequestMethod.GET)
    public void getHeader(@PathVariable("fileName") String fileName, HttpServletResponse response) {
        // 服务器存放路径
        fileName = uploadPath + "/" + fileName;
        // 文件后缀
        String suffix = fileName.substring(fileName.lastIndexOf("."));
        // 响应图片
        response.setContentType("image/" + suffix);
        try (
                FileInputStream fis = new FileInputStream(fileName);//需要自己关闭
                OutputStream os = response.getOutputStream();//SpringMVC会自动关闭
        ) {
            byte[] buffer = new byte[1024];
            int b = 0;
            while ((b = fis.read(buffer)) != -1) {
                os.write(buffer, 0, b);
            }
        } catch (IOException e) {
            logger.error("读取头像失败: " + e.getMessage());
        }
    }

