若依后端管理系统学习日志
文章目录
-
- 遇到的问题
-
- 1. 自定义模块404
- 解决方案
-
- 1. 自定义后台异常返回
- 2. 添加导入按钮
- 3. 树形列表搜索
遇到的问题
1. 自定义模块404
idea没有报错,但是点击进去页面显示404。
F12查看错误信息,原来是访问后端controller接口没有成功,找不到导致404。
那么肯定是controller的问题,我的包结构是这样的:

competiton是我自定义的模块,那么很有可能是controlle没有被扫描到。
尝试在启动类添加包扫描注解没有解决,反而导致mapper找不到。
解决方案:
在启动类上添加:
@MapperScan(value = {"cn.sd.*.mapper","com.ruoyi.*.*.mapper"})
@ComponentScan(value = {"cn.sd.bzu","com.ruoyi"} )
参考连接:
- https://gitee.com/y_project/RuoYi/issues/I121LM
- https://blog.csdn.net/weixin_44248755/article/details/110450972
根本原因:
SpringBootApplication注解和ComponentScan注解生效关系和范围的问题

解决方案
1. 自定义后台异常返回
如下,在catch中抛出异常
    public long selectDeptHigh(String deptName) {
        try {
            SysDept dept = new SysDept();
            dept.setDeptName(deptName);
            return sysDeptMapper.selectDept(dept).getDeptId();
        } catch (Exception e) {
            throw new RuntimeException("检查学院/年级/专业/班级是否已提前导入");
        }
    }
2. 添加导入按钮
虽然官方文档有写,但是直接弄下来有些地方有会问题。
1. controller
解释:两个方法,第一个是接收导入操作,第二个是下载导入模板。根据需要更换实体类即可
    /**
     * 批量新增部门
     */
    @Log(title = "部门管理", businessType = BusinessType.IMPORT)
    @PreAuthorize("@ss.hasPermi('system:student:import')")
    @PostMapping("/importData")
    public AjaxResult importData(MultipartFile file, boolean updateSupport) throws Exception {
        ExcelUtil<StudentInfo> util = new ExcelUtil<StudentInfo>(StudentInfo.class);
        List<StudentInfo> studentInfoList = util.importExcel(file.getInputStream());
        String operName = getUsername();
        String message = studentInfoService.importStudent(studentInfoList, updateSupport, operName);
        return success(message);
    }

    @PostMapping("/importTemplate")
    public void importTemplate(HttpServletResponse response)
    {
        ExcelUtil<StudentInfo> util = new ExcelUtil<StudentInfo>(StudentInfo.class);
        util.importTemplateExcel(response, "用户数据");
    }
2. 服务层
接口
public String importStudent(List<StudentInfo> StudentInfoList, Boolean isUpdateSupport, String operName);
实现类
其中的一些判断逻辑根据需要修改即可
 /**
     * 导入用户数据
     *
     * @param isUpdateSupport 是否更新支持,如果已存在,则进行更新数据
     * @param operName        操作用户
     * @return 结果
     */
    @Override
    public String importStudent(List<StudentInfo> studentList, Boolean isUpdateSupport, String operName) {
        if (StringUtils.isNull(studentList) || studentList.size() == 0) {
            throw new ServiceException("导入部门数据不能为空!");
        }
        int successNum = 0;
        int failureNum = 0;
        StringBuilder successMsg = new StringBuilder();
        StringBuilder failureMsg = new StringBuilder();
        StudentInfo s = new StudentInfo();
        for (StudentInfo studentInfo : studentList) {
            try {
                s.setStudentNo(studentInfo.getStudentNo()); // 学号是唯一的
                // 验证是否存在这个用户
                StudentInfo u = studentInfoMapper.selectOneStudentInfo(s);
                if (StringUtils.isNull(u)) {
                    studentInfo.setCreateBy(operName);
                    insertStudentInfo(studentInfo);
                    successNum++;
                    successMsg.append("
" + successNum + "、学生 " + studentInfo.getName() + " 导入成功");
                } else if (isUpdateSupport) {

                    studentInfo.setCreateBy(operName);
                    updateStudentInfo(studentInfo);

                    successNum++;
                    successMsg.append("
" + successNum + "、学生 " + studentInfo.getName() + " 更新成功");
                } else {
                    failureNum++;
                    failureMsg.append("
" + failureNum + "、学生 " + studentInfo.getName() + " 已存在");
                }
            } catch (Exception e) {
                failureNum++;
                String msg = "
" + failureNum + "、学生 " + studentInfo.getName() + " 导入失败:";
                failureMsg.append(msg + e.getMessage());
            }
        }
        if (failureNum > 0) {
            failureMsg.insert(0, "很抱歉,导入失败!共 " + failureNum + " 条数据格式不正确,错误如下:");
            throw new ServiceException(failureMsg.toString());
        } else {
            successMsg.insert(0, "恭喜您,数据已全部导入成功!共 " + successNum + " 条,数据如下:");
        }
        return successMsg.toString();
    }
3. 前端
3.1 放到data-return中
  data() {
    return {放这里面}
url根据需要修改
   // 用户导入参数
      upload: {
        // 是否显示弹出层(用户导入)
        open: false,
        // 弹出层标题(用户导入)
        title: "",
        // 是否禁用上传
        isUploading: false,
        // 是否更新已经存在的用户数据
        updateSupport: 0,
        // 设置上传的请求头部
        headers: {Authorization: "Bearer " + getToken()},
        // 上传的地址
        url: process.env.VUE_APP_BASE_API + "/user/student/importData"
      },
3.2 放在methods中
/** 导入按钮操作 */
handleImport() {
this.upload.title = "用户导入";
this.upload.open = true;
},
/** 下载模板操作 */
importTemplate() {
this.download('user/student/importTemplate', {}, `student_template_${new Date().getTime()}.xlsx`)
},
// 文件上传中处理
handleFileUploadProgress(event, file, fileList) {
this.upload.isUploading = true;
},
// 文件上传成功处理
handleFileSuccess(response, file, fileList) {
this.upload.open = false;
this.upload.isUploading = false;
this.$refs.upload.clearFiles();
this.$alert("", "导入结果", {dangerouslyUseHTMLString: true});
this.getList();
},
// 提交上传文件
submitFileForm() {
this.$refs.upload.submit();
}
3.3 按钮
注意修改: v-hasPermi="['system:student:import']"
  <el-col :span="1.5">
        <el-button
          type="info"
          plain
          icon="el-icon-upload2"
          size="mini"
          @click="handleImport"
          v-hasPermi="['system:student:import']"
        >导入
        </el-button>
      </el-col>
3.4 用户导入对话框
放到这个位置正好(都可以)

最后引入一个东西:
import {getToken} from "@/utils/auth";

<el-dialog :title="upload.title" :visible.sync="upload.open" width="400px" append-to-body>
      <el-upload
        ref="upload"
        :limit="1"
        accept=".xlsx, .xls"
        :headers="upload.headers"
        :action="upload.url + '?updateSupport=' + upload.updateSupport"
        :disabled="upload.isUploading"
        :on-progress="handleFileUploadProgress"
        :on-success="handleFileSuccess"
        :auto-upload="false"
        drag
      >
        <i class="el-icon-upload"></i>
        <div class="el-upload__text">将文件拖到此处,或<em>点击上传</em></div>
        <div class="el-upload__tip text-center" slot="tip">
          <div class="el-upload__tip" slot="tip">
            <el-checkbox v-model="upload.updateSupport"/>
            是否更新已经存在的用户数据
          </div>
          <span>仅允许导入xls、xlsx格式文件。</span>
          <el-link type="primary" :underline="false" style="font-size:12px;vertical-align: baseline;"
                   @click="importTemplate">下载模板
          </el-link>
        </div>
      </el-upload>
      <div slot="footer" class="dialog-footer">
        <el-button type="primary" @click="submitFileForm">确 定</el-button>
        <el-button @click="upload.open = false">取 消</el-button>
      </div>
    </el-dialog>
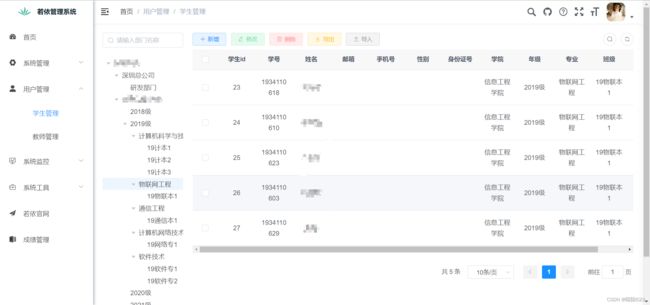
3. 树形列表搜索
在其他模块实现部门树形展示图
为了布局,需要下注意结构:
最外面放一个el-row, 里面是两个el-col

结构分析
 <el-row :gutter="20">

      <el-col :span="4" :xs="24">
      el-col>
      <el-col :span="20" :xs="24">
      之前的页面内容
      el-col>
el-row>
树形结构代码
      <el-col :span="4" :xs="24">
        <div class="head-container">
          <el-input
            v-model="deptName"
            placeholder="请输入部门名称"
            clearable
            size="small"
            prefix-icon="el-icon-search"
            style="margin-bottom: 20px"
          />
        div>
        <div class="head-container">
          <el-tree
            :data="deptOptions"
            :props="defaultProps"
            :expand-on-click-node="false"
            :filter-node-method="filterNode"
            ref="tree"
            node-key="id"
            default-expand-all
            highlight-current
            @node-click="handleNodeClick"
          />
        div>
      el-col>
在data()中加入:
	deptOptions: undefined,
      deptName: undefined,
      defaultProps: {
        children: "children",
        label: "label"
      },
在methods中加入
记得deta里边queryParams中要有deptId定义
    // 筛选节点
    filterNode(value, data) {
      if (!value) return true;
      return data.label.indexOf(value) !== -1;
    },
    // 节点单击事件
    handleNodeClick(data) {
      this.queryParams.deptId = data.id;
      this.handleQuery();
    },
    /** 查询部门下拉树结构 */
    getDeptTree() {
      deptTreeSelect().then(response => {
        this.deptOptions = response.data;
      });
    },
在created()方法中加入:
  created() {
    this.getDeptTree();
  },
加入依赖
import {deptTreeSelect} from "@/api/system/user";
搜索过程简单分析:
监听鼠标点击操作,获取dept_id,调用handleQuery进行查询,记得sql中得写上dept_id的条件哦
树状图初始化简单分析:
在生命周期函数created()中调用getDeptTree()方法,而getDeptTree()方法是调用了原本user的API"@/api/system/user",在这个api中,继续去调用user的controller…