使用docker-compose部署最新版Harbor v2.3.4
目录
Harbor 安装环境说明
获取安装包(离线安装方式)
安装harbor
用docker-compose查看Harbor容器的运行状态
Harbor访问测试
上传镜像到Harbor服务器
Harbor配置HTTPS
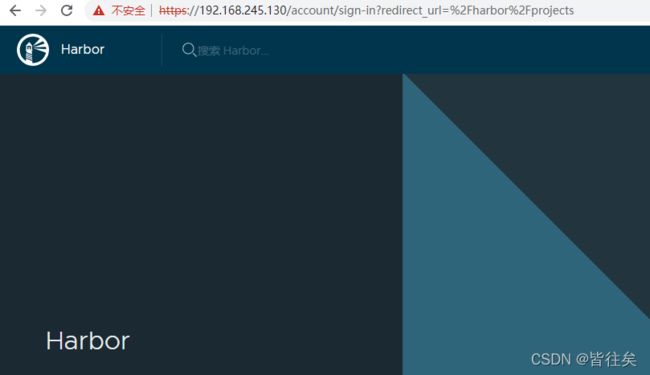
浏览器访问Harbor,通过HTTPS协议访问
通过Docker命令来访问
LDAP认证
Harbor 安装环境说明
- Linux:CentOS Linux release 7.9.2009 (Core)
- docker :20.10.11
- docker-compose :version 1.18.0, build 8dd22a9
- harbor:2.3.4
获取安装包(离线安装方式)
Releases · goharbor/harbor · GitHub
https://github.com/goharbor/harbor/releases/download/v2.3.4/harbor-offline-installer-v2.3.4.tgz
安装harbor
wget https://github.com/goharbor/harbor/releases/download/v2.3.4/harbor-offline-installer-v2.3.4.tgz
tar xf harbor-offline-installer-v2.3.4.tgz -C /usr/local/
cd /usr/local
#修改配置文件
cd harbor/
cp harbor.yml.tmpl harbor.yml
#修改hostname、harbor登录密码、关闭https。
vim harbor.yml
hostname: yzg02.com
harbor_admin_password: yzg
#https:
  # https port for harbor, default is 443
  #  port: 443
  # The path of cert and key files for nginx
  #  certificate: /your/certificate/path
  # private_key: /your/private/key/path
data_volume: /data
完成以上操作后,保存退出
#执行安装程序
./install.sh

[root@yzg harbor]# ll
总用量 596300
drwxr-xr-x. 3 root root        20 12月  2 17:00 common
-rw-r--r--. 1 root root      3361 11月  9 19:01 common.sh
-rw-r--r--. 1 root root      6066 12月  2 17:00 docker-compose.yml
-rw-r--r--. 1 root root 610560420 11月  9 19:01 harbor.v2.3.4.tar.gz
-rw-r--r--. 1 root root      7849 12月  2 16:41 harbor.yml
-rw-r--r--. 1 root root      7838 12月  2 16:36 harbor.yml.tmpl
-rwxr-xr-x. 1 root root      2500 11月  9 19:01 install.sh
-rw-r--r--. 1 root root     11347 11月  9 19:01 LICENSE
-rwxr-xr-x. 1 root root      1881 11月  9 19:01 prepare
这时候已经安装完成了!
用docker-compose查看Harbor容器的运行状态
[root@yzg harbor]# docker-compose ps
      Name                     Command               State                  Ports
-------------------------------------------------------------------------------------------------
harbor-core         /harbor/entrypoint.sh            Up
harbor-db           /docker-entrypoint.sh 96 13      Up
harbor-jobservice   /harbor/entrypoint.sh            Up
harbor-log          /bin/sh -c /usr/local/bin/ ...   Up      127.0.0.1:1514->10514/tcp
harbor-portal       nginx -g daemon off;             Up
nginx               nginx -g daemon off;             Up      0.0.0.0:80->8080/tcp,:::80->8080/tcp
redis               redis-server /etc/redis.conf     Up
registry            /home/harbor/entrypoint.sh       Up
registryctl         /home/harbor/start.sh            Up
docker-compose基本命令
# 启动Harbor容器
docker-compose start

# 停止Harbor容器
docker-compose stop

# 暂停Harbor容器
docker-compose pause

# 继续运行Harbor容器
docker-compose unpause

# 重启Harbor容器
docker-compose restart

# 停止并删除Harbor容器,加上-v参数可以同时移除挂载在容器上的目录
docker-compose down

# 创建并启动Harbo容器,参数“-d”表示后台运行命令
docker-compose up -d
Harbor访问测试
浏览器输入以下地址或者域名访问Harbor的Web界面,账号密码:admin/xxxxxxx
http://yzg02.com
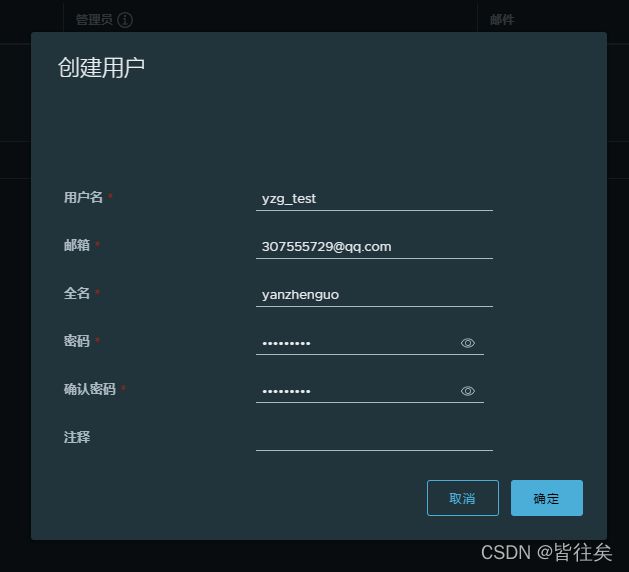
创建用户账号并测试上传镜像
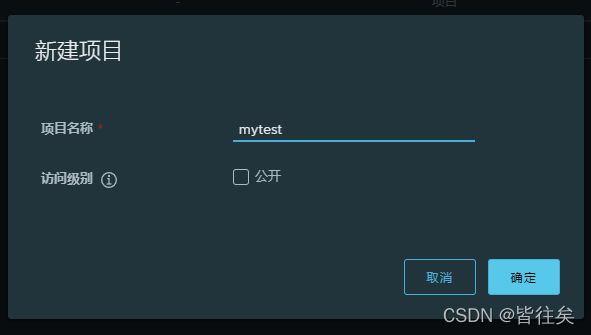
创建yzg_test用户,新建项目mytest
在docker客户端机器上设置/etc/docker/daemon.json文件,指向harbor服务器地址
#修改为http方式访问(非加密方式)
 "insecure-registries":["yzg02.com"]
上传镜像到Harbor服务器
#打标签
docker tag yzgtest:v1.1 yzg02.com/mytest/yzgtest:v1.1

#登录Harbor服务器
docker login yzg02.com
#输入我们在harbor新创建的用户名密码进行登录

#上传镜像
[root@yzg img]# docker push yzg02.com/mytest/yzgtest:v1.1
The push refers to repository [yzg02.com/mytest/yzgtest]
d94c78be1352: Pushed
v1.1: digest: sha256:303742664efb7dbcd27036a915e3bd9ff2df915d2e151c15cfe50106dd3df92a size: 527
在Harbor上可以看到我们上传的镜像
Harbor配置HTTPS
生成TSL证书
# 创建存放证书的临时目录
mkdir /data/harbor/cert
cd /data/harbor/cert

# 创建自签名根证书
openssl genrsa -out ca.key 4096
openssl req -x509 -new -nodes -sha512 -days 3650 -subj "/C=CN/ST=Beijing/L=Beijing/O=example/OU=Personal/CN=harbor.test.com" -key ca.key -out ca.crt

# 查看创建的证书
ca.crt  ca.key

# 产生证书签名请求
openssl genrsa -out harbor.test.com.key 4096
openssl req -sha512 -new -subj "/C=CN/ST=Beijing/L=Beijing/O=example/OU=Personal/CN=harbor.test.com" -key harbor.test.com.key -out harbor.test.com.csr

# 查看证书
ca.crt  ca.key  harbor.test.com.csr  harbor.test.com.key

# 为Registry主机产生证书
cat > v3.ext <<-EOF
authorityKeyIdentifier=keyid,issuer
basicConstraints=CA:FALSE
keyUsage = digitalSignature, nonRepudiation, keyEncipherment, dataEncipherment
extendedKeyUsage = serverAuth
subjectAltName = @alt_names

[alt_names]
DNS.1=yzg02.com
DNS.2=localhost
EOF

openssl x509 -req -sha512 -days 3650 -extfile v3.ext -CA ca.crt -CAkey ca.key -CAcreateserial -in harbor.test.com.csr -out harbor.test.com.crt
openssl x509 -inform PEM -in harbor.test.com.crt -out harbor.test.com.cert

# 查看证书
ca.crt  ca.key  ca.srl  v3.ext  harbor.test.com.cert  harbor.test.com.csr  harbor.test.com.key harbor.test.com.crt

# 创建Harbor的证书目录
mkdir /data/harbor/harbor-cert

# 拷贝harbor-registry证书到Harbor的证书目录
cp harbor.test.com.crt /data/harbor/harbor-cert
cp harbor.test.com.key /data/harbor/harbor-cert
# 进入Harbor的安装目录
cd /usr/local/harbor

# 停止并删除Harbor容器,加上-v参数可以同时移除挂载在容器上的目录
docker-compose down

# 修改harbor.yml配置文件
## 打开https配置
# https related config
https:
  # https port for harbor, default is 443
  port: 443
  # The path of cert and key files for nginx
  certificate: /data/harbor/harbor-cert/harbor.test.com.crt
  private_key: /data/harbor/harbor-cert/harbor.test.com.key
# 重新生成配置文件
 ./prepare
# 让Docker客户端默认使用Https协议访问Registry,需要去掉“insecure-registries”相关配置项
# 查看daemon.json文件中是否有"insecure-registries":["harbor.test.com"],如果有则将其删除掉

# 重新加载Docker的配置文件
systemctl daemon-reload

# 重启Docker
systemctl restart docker

# 创建并启动Harbor容器
docker-compose up -d
浏览器访问Harbor,通过HTTPS协议访问
通过Docker命令来访问
# 在harbor主机或内网其他机器上

mkdir -p /etc/docker/certs.d/harbor.test.com
scp harbor.test.com.cert [email protected]:///etc/docker/certs.d/harbor.test.com/
scp harbor.test.com.key [email protected]:///etc/docker/certs.d/harbor.test.com/
scp ca.crt [email protected]:///etc/docker/certs.d/harbor.test.com/

# 无需重启docker即可生效

[root@yzg harbor.test.com]# docker login yzg02.com
Authenticating with existing credentials...
Stored credentials invalid or expired
Username (yzg_test): yzgtest
Password:
WARNING! Your password will be stored unencrypted in /root/.docker/config.json.
Configure a credential helper to remove this warning. See
https://docs.docker.com/engine/reference/commandline/login/#credentials-store

Login Succeeded
LDAP认证
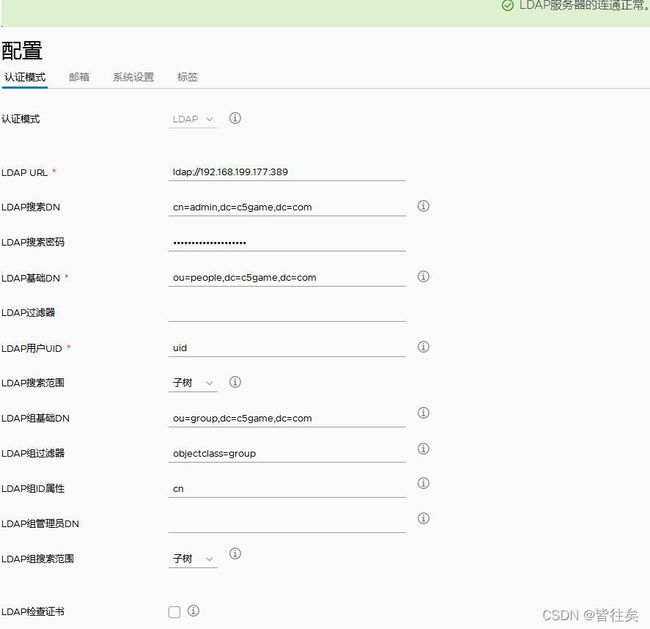
harbor默认链接的是db_auth,如果想使用ldap_auth,
1,在默认情况下第一次登陆的时候在页面的设置里将认证方式改为ldap_auth,一定要将各个配置设置正确;
2,想使用ldap_auth的话,也可以在最初设置认证模式的时候设置为ldap模式,选项设置不正确可以在UI页面设置。
提醒:不管你设置为哪一种模式,只要用户中添加了除管理员的其他用户之后,认证模式就不能再更改;


