seata 1.2 版本分布式事务的配置使用
本篇分析 seata 分布式事务的配置使用:
一、服务端配置:
seata-server-1.2.0.zip 程序(打过报的服务端程序,而非源代码!)解压,放在一个固定目录里,启动包: seata-->conf-->fifile.conf,fifile.conf文件的默认配置是 file 格式,为了方便开发观察我们修改store.mode="db",然后修改自己的db连接信息,seata在启动的时候会去读取这个配置文件。如同目录:
内容如下:
## transaction log store, only used in seata-server
store {
  ## store mode: file、db
  mode = "db"

  ## database store property
  db {
    ## the implement of javax.sql.DataSource, such as DruidDataSource(druid)/BasicDataSource(dbcp) etc.
    datasource = "druid"
    ## mysql/oracle/postgresql/h2/oceanbase etc.
    dbType = "mysql"
    driverClassName = "com.mysql.jdbc.Driver"
    url = "jdbc:mysql://10.130.16.2466:305199/ZIPKIN"
    user = "mysql"
    password = "mysql"
    minConn = 5
    maxConn = 30
    globalTable = "global_table"
    branchTable = "branch_table"
    lockTable = "lock_table"
    queryLimit = 100
    maxWait = 5000
  }
}
3、配置服务注册信息:
如果我们使用nacos做注册中心和配置中心,可以把这些信息放到nacos的配置中心,从而实现动态更新。这时你就需要修改seata-->conf-->registy.conf文件当中的注册中心和配置中心的信息,修改成为nacos;(为什么需要修改config和register呢?因为如果你的seata服务器想要去配置中心读取配置,那么首先要把自己注册到nacos;所以registy.conf当中需要配置注册中心的地址也需要配置配置中心的地址)这样我们后面启动seata就可以看到他是作为了一个nacos的客户端注册到了nacos里,核心配置如下:
registry {
  # file 、nacos 、eureka、redis、zk、consul、etcd3、sofa   这里type 选 nacos类型
  type = "nacos"

  nacos {
    application = "seata-server"
    serverAddr = "http://172.21.2.72:8849"
    namespace = ""   #注册到哪个命名空间,默认public
    cluster = "default"
    username = "nacos"
    password = "nacos"
  }

  consul {
    cluster = "default"
    serverAddr = "127.0.0.1:8500"
  }

  file {
    name = "file.conf"
  }
}

config {
  # file、nacos 、apollo、zk、consul、etcd3  这里type 选 nacos类型
  type = "nacos"

  nacos {
    serverAddr = "http://172.21.2.72:8849"
    namespace = "23d0f9d9-096e-4fea-a548-e3ba778a6b83"  #去哪个命名空间取配置信息
    group = "SEATA_GROUP"  #对应的组别
    username = "nacos"
    password = "nacos"
  }
  consul {
    serverAddr = "127.0.0.1:8500"
  }

  file {
    name = "file.conf"
  }
}
此时seata已经可以作为客户端注册到nacos了:先启动nacos 在启动Seata :双击bat文件
启动成功页面:
启动后访问nacos页面,看到seata 已经成功注册到 nacos 注册中心了。
参考官网:seata注册到nacos
4、把配置信息上传到nacos配置中心
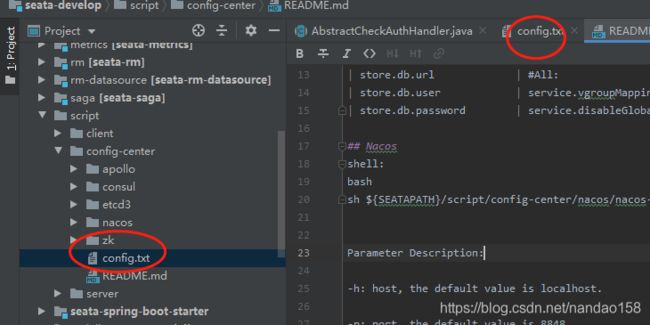
到源码这个目录去信息:seata-develop\script\config-center 获取config.txt,
然后把config.txt用idea编辑;保留自己想要的信息,我这里给出的是精简后的,你们需要自己对应修改自己的信息;主要是数据库配置信息,注意这些信息是服务器端和客户端都要使用的;由于上面我们已经把seata注册到了nacos;所以他的file.conf当中的信息可以直接从nacos读取(下面我们配置的信息);换句话说如果你配置了seata作为nacos的一个客户端去读取配置,那么 file.conf可以不用配置了;因为这两步是重复的。换成大白话的意思就是你如果配置了registy.conf,那么file.conf当中的信息基本无效(都是从nacos配置中心读取);甚至可以删了file.conf;如果你不配置registy.conf,那么seata就会从file.conf当中读取配置;所以file.conf和registy.conf其实只需要配置一个。这些问题大家可以亲测一下!
精简总结:前提registy.conf 配置了,这是file.conf 配置了,nacos里也有相关配置信息,此时file.conf里的配置优先级高于nacos;如果 file.conf 文件删除了,那么nacos里的配置信息生效;两者只需要配置一个,如果都配置了, file.conf 优先级会更高!
精简后的配置如下:
#事务分组——my_test_tx_group 这值会在我们客户端对应,需要注意
service.vgroupMapping.my_test_tx_group=default
service.default.grouplist=127.0.0.1:8091
store.mode=db
store.db.datasource=druid
store.db.dbType=mysql
store.db.driverClassName=com.mysql.jdbc.Driver
store.db.url=jdbc:mysql://199.130.16.66:399/ZIPKIN?useUnicode=true
store.db.user=mysql
store.db.password=mysql
store.db.minConn=5
store.db.maxConn=30
store.db.globalTable=global_table
store.db.branchTable=branch_table
store.db.queryLimit=100
store.db.lockTable=lock_table
store.db.maxWait=5000#!/usr/bin/env bash
# Copyright 1999-2019 Seata.io Group.
#
# Licensed under the Apache License, Version 2.0 (the "License");
# you may not use this file except in compliance with the License.
# You may obtain a copy of the License at、
#
# http://www.apache.org/licenses/LICENSE-2.0
#
# Unless required by applicable law or agreed to in writing, software
# distributed under the License is distributed on an "AS IS" BASIS,
# WITHOUT WARRANTIES OR CONDITIONS OF ANY KIND, either express or implied.
# See the License for the specific language governing permissions and
# limitations under the License.
while getopts ":h:p:g:t:u:w:" opt
do
case $opt in
h)
host=$OPTARG
;;
p)
port=$OPTARG
;;
g)
group=$OPTARG
;;
t)
tenant=$OPTARG
;;
u)
username=$OPTARG
;;
w)
password=$OPTARG
;;
?)
echo " USAGE OPTION: $0 [-h host] [-p port] [-g group] [-t tenant] [-u username] [-w password] "
exit 1
;;
esac
done
if [[ -z ${host} ]]; then
host=172.21.2.72
fi
if [[ -z ${port} ]]; then
port=8849
fi
if [[ -z ${group} ]]; then
group="SEATA_GROUP"
fi
if [[ -z ${tenant} ]]; then
tenant="23d0f9d9-096e-4fea-a548-e3ba778a6b83"
fi
if [[ -z ${username} ]]; then
username="nacos"
fi
if [[ -z ${password} ]]; then
password="nacos"
fi
nacosAddr=$host:$port
contentType="content-type:application/json;charset=UTF-8"
echo "set nacosAddr=$nacosAddr"
echo "set group=$group"
failCount=0
tempLog=$(mktemp -u)
function addConfig() {
curl -X POST -H "${contentType}" "http://$nacosAddr/nacos/v1/cs/configs?dataId=$1&group=$group&content=$2&tenant=$tenant&username=$username&password=$password" >"${tempLog}" 2>/dev/null
if [[ -z $(cat "${tempLog}") ]]; then
echo " Please check the cluster status. "
exit 1
fi
if [[ $(cat "${tempLog}") =~ "true" ]]; then
echo "Set $1=$2 successfully "
else
echo "Set $1=$2 failure "
(( failCount++ ))
fi
}
count=0
for line in $(cat $(dirname "$PWD")/config.txt | sed s/[[:space:]]//g); do
(( count++ ))
key=${line%%=*}
value=${line#*=}
addConfig "${key}" "${value}"
done
echo "========================================================================="
echo " Complete initialization parameters, total-count:$count , failure-count:$failCount "
echo "========================================================================="
if [[ ${failCount} -eq 0 ]]; then
echo " Init nacos config finished, please start seata-server. "
else
echo " init nacos config fail. "
fi进入源码目录 /seata-develop/script/config-center/nacos 执行 sh nacos-config.sh 命令
如果是win环境,而且安装了本地安装了git 直接点击就行
点击:
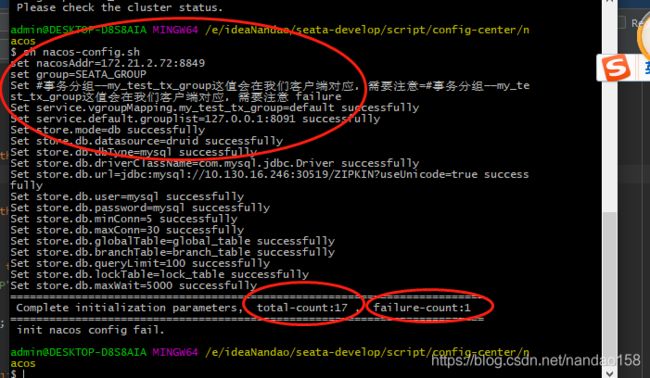
执行后:
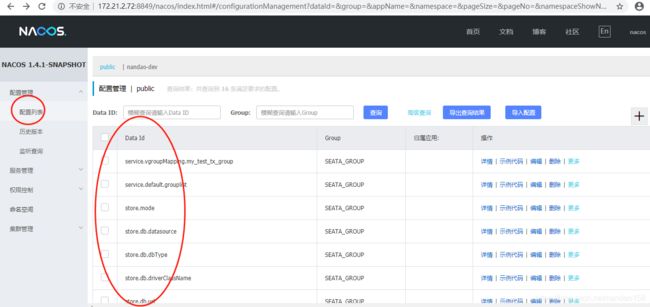
结果显示;总共执行17个配置 成功16个 ,失败一个(首行是注释,所以会失败),此时nacos配置列表新增16个配置,均为seata相关配置信息。
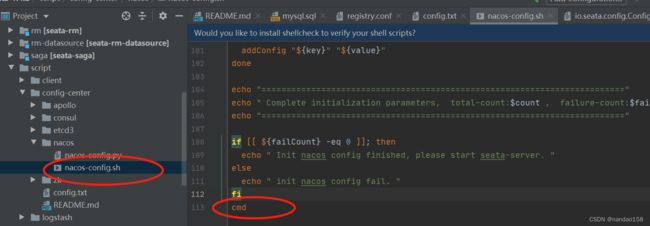
默认情况执行完立刻关闭窗口,如果想执行完不关闭,需要在idea编辑一下该文件,最后一行加上cmd,如下操作:
然后去nacos 查看生成的配置信息。
此时重新启动seata服务:
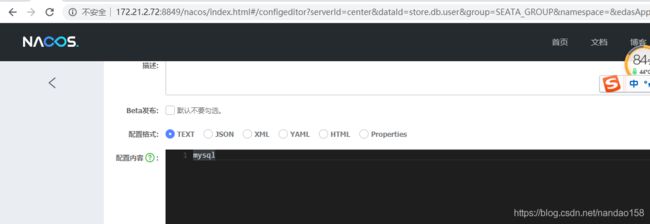
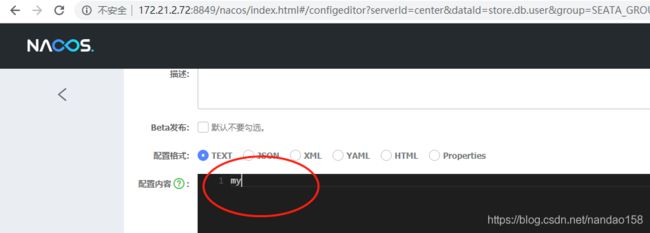
5、如果改seata 配置了,重启后会报错,比如修改:
把数据库的用户名改一下:
改成:
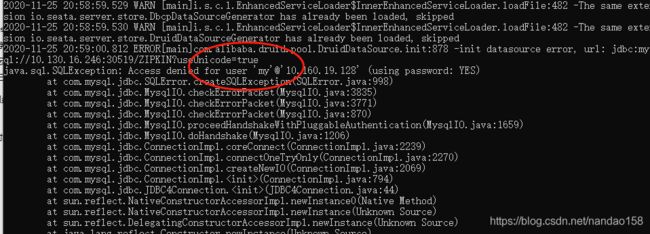
重启seata 会报错,证明配置中心生效:
二、客户端配置
在你的客户端操作的数据库当中建立undo_log表,每个微服务的客户端均需要创建这张表;这个表用作用是来实现sql反向补偿也就是回滚的信息 。
            com.alibaba.cloud
            spring-cloud-starter-alibaba-seata


                    io.seata
                    seata-all


                    io.seata
                    seata-spring-boot-starter


            io.seata
            seata-spring-boot-starter
            1.2.0
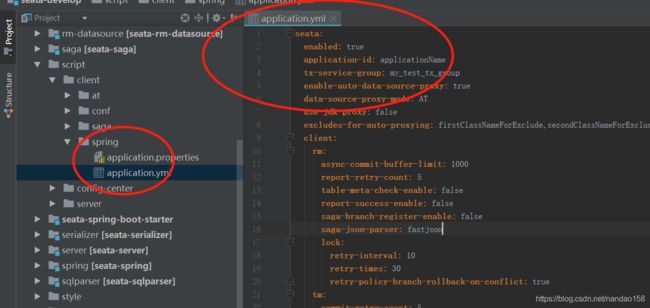
3、yml配置文件信息参考目录 seata-develop\script\client\spring 源码:
spring:
  profiles:
    active: dev
  application:
    name: power
  cloud:
    nacos:
      config:
        #自定义配置
        server-addr: 172.21.2.72:8849
        namespace: 23d0f9d9-096e-4fea-a548-e3ba778a6b83
        group: nmp-power
        file-extension: yml
        prefix: nmp-power

      discovery:
        server-addr: 172.21.2.72:8849
        namespace: 23d0f9d9-096e-4fea-a548-e3ba778a6b83


#seata分布式事务配置,此为精简后的配置,大家可根据实际场景适当选择添加修改等
seata:
  enabled: true
  application-id: power
#  tx-service-group: default
  tx-service-group: my_test_tx_group
  enable-auto-data-source-proxy: true
  use-jdk-proxy: false
  config:
    type: nacos
    nacos:
      namespace: 23d0f9d9-096e-4fea-a548-e3ba778a6b83
      serverAddr: 172.21.2.72:8849
      group: SEATA_GROUP
      userName: "nacos"
      password: "nacos"
  registry:
    type: nacos
    nacos:
      application: seata-server
      server-addr: 172.21.2.72:8849
      namespace: 23d0f9d9-096e-4fea-a548-e3ba778a6b83
      userName: "nacos"
      password: "nacos"
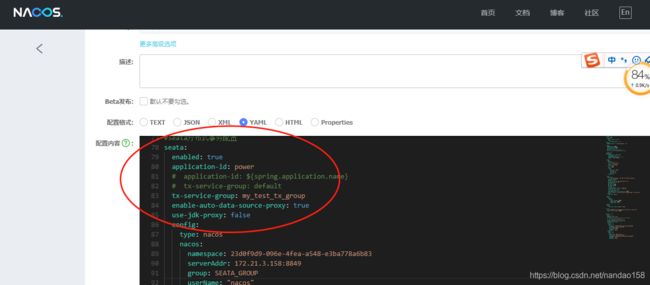
或者把seata的客户端配置和此微服务的其他配置信息一起配置到nacos配置中心里,这也是一种比较可取的方案,如下图:
4、客户端业务层代码加上分布式事务注解: //分布式事务注解
@GlobalTransactional(name = "default",rollbackFor = Exception.class)
@Override
public void saveCatAndDataRelations(ServiceSetCatModel setCatModel) {
//省略其他业务代码.....
saveCatAndDataRelation(setCatalogModel);
//省略其他业务代码.....
catInfoMapper.insertSelective(catalogInfo);
if(serviceDataRelation.getServiceId()>25){
throw new RuntimeException("出现异常");
}
}5、启动客户端微服务后,调用接口测试分布式事务功能
6、抛出异常前Seata服务端数据库生成的关于事务和锁的临时信息:
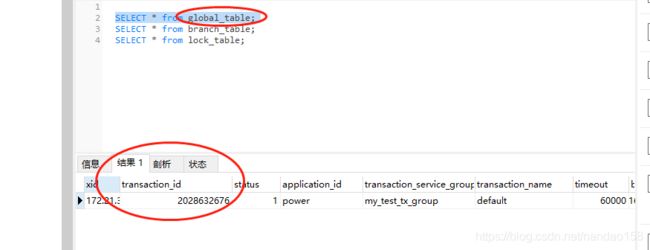
global_table 全局事务表一条信息
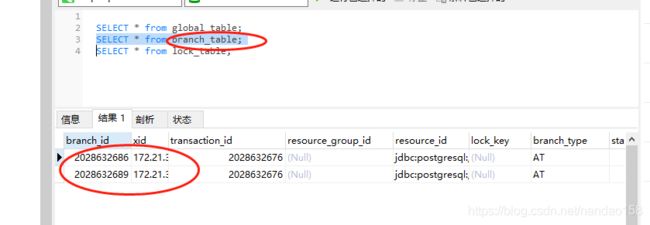
branch_table 分支事务表二条信息(执行了两次插入数据库操作)
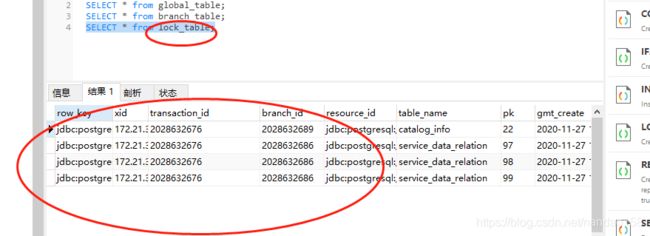
lock_table 全局锁表信息(两次插入四条数据,因此有四条锁信息)
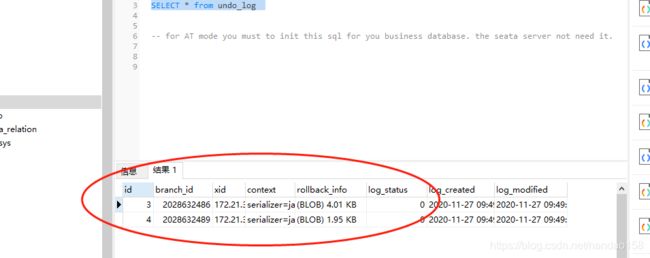
7、抛出异常之前客户端数据库 undo_log表 生成了两条反sql(两次插入数据库)
8、放开往下走,抛出异常 执行反sql:
执行反sql的日志:
9、执行反sql后客户端数据库的结果:如下图,说明反sql已经执行,回滚了事务。
seata服务端三张表信息也执行提交完成。
到此Seata服务端和客户端配置和使用流程均详细分析完成,下一篇我们分析seata源码的编译和启动,敬请期待!
