在这篇博文中,我们将向您展示如何使用 ChatGPT 这种强大的语言模型,在短短 5 分钟内创建一个个人简历网站。我们还将向您展示如何在 ChatGPT 的帮助下免费托管您的网站!
在当今的数字时代,拥有强大的在线形象至关重要,尤其是在寻找新工作时。展示您的技能和经验的最佳方式之一是创建个人简历网站。但是,从头开始构建网站可能既费时又费力,尤其是如果您没有 Web 开发经验。这就是 ChatGPT 的用武之地。使用 Windows 任务计划程序安排磁盘清理在 这篇博文中,我们将向您展示如何使用 ChatGPT 这一强大的语言模型在短短 5 分钟内创建个人简历网站。不仅如此,我们还将向您展示如何使用 GitHub Pages 免费托管您的网站。使用 ChatGPT,您可以创建一个具有专业外观的网站,突出您的成就并让您从其他求职者中脱颖而出。那么,让我们开始吧!
开始使用 ChatGPT
ChatGPT 基于 OpenAI 创建的大型语言模型。我接受了大量文本数据的培训,并使用深度学习算法对自然语言查询生成类似人类的响应。我可以帮助完成范围广泛的任务,从回答问题和提供建议到生成创意写作等等。它还可以直接编码。我们将在下一步要求 ChapGPT 为简历网站生成代码时使用此功能。
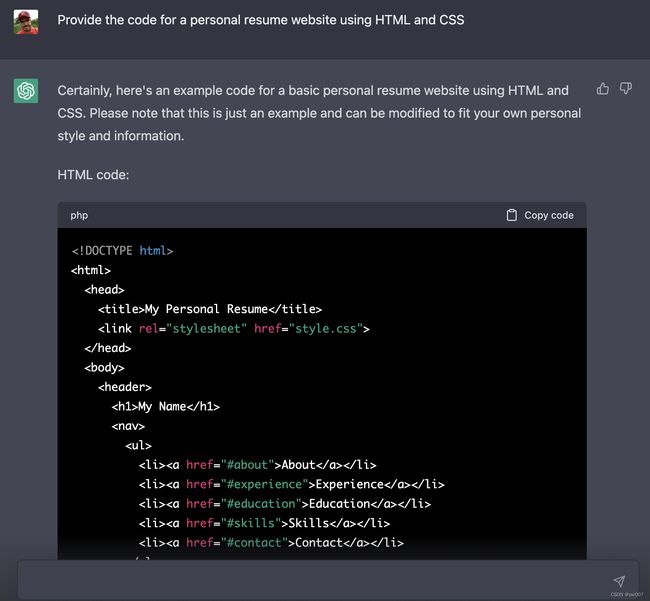
让我们去 https://chat.openai.com/chat 注册一个免费帐户并开始输入第一个提示:“使用 HTML 和 CSS 提供个人简历网站的代码”:
如您所见,ChatGPT 正在生成一个完整的响应,为我们提供了一个简单但有效的个人简历网站的 HTML 和 CSS 代码。
这是由 ChatGPT 生成的完整 HTML 代码:
My Personal Resume
About Me
Write a brief description of yourself and your career goals here.
以及对应的CSS代码:
body {
  font-family: Arial, sans-serif;
  margin: 0;
}

header {
  background-color: #333;
  color: #fff;
  padding: 20px;
}

header h1 {
  margin: 0;
}

nav {
  float: right;
}

nav ul {
  list-style: none;
  margin: 0;
  padding: 0;
}

nav li {
  display: inline-block;
  margin-left: 20px;
}

nav a {
  color: #fff;
  text-decoration: none;
}

nav a:hover {
  text-decoration: underline;
}

main {
  padding: 20px;
}

section {
  margin-bottom: 20px;
}

section h2 {
  margin-top: 0;
}

ul {
  list-style: none;
  margin: 0;
  padding: 0;
}

li {
  margin-bottom: 10px;
}

form {
  margin-top: 20px;
}

label {
  display: block;
  margin-bottom: 5px;
}

input[type="text"],
input[type="email"],
textarea {
  width: 100%;
  padding: 10px;
  margin-bottom: 10px;
  border: 1px solid #ccc;
  border-radius: 4px;
  box-sizing: border-box;
}

input[type="submit"] {
  background-color: #333;
  color: #fff;
  border: none;
  padding: 10px 20px;
  border-radius: 4px;
  cursor: pointer;
}

input[type="submit"]:hover {
  background-color: #444;
}
为了在浏览器中看到这个网站代码的结果,创建一个新的项目文件夹和两个新文件:
$ mkdir resume-website
$ cd resume-website
$ touch index.html
$ touch style.css
然后将 ChatGPT 响应中的 HTML 代码复制并粘贴到 index.html 中。将 CSS 代码复制并粘贴到 style.css 中。
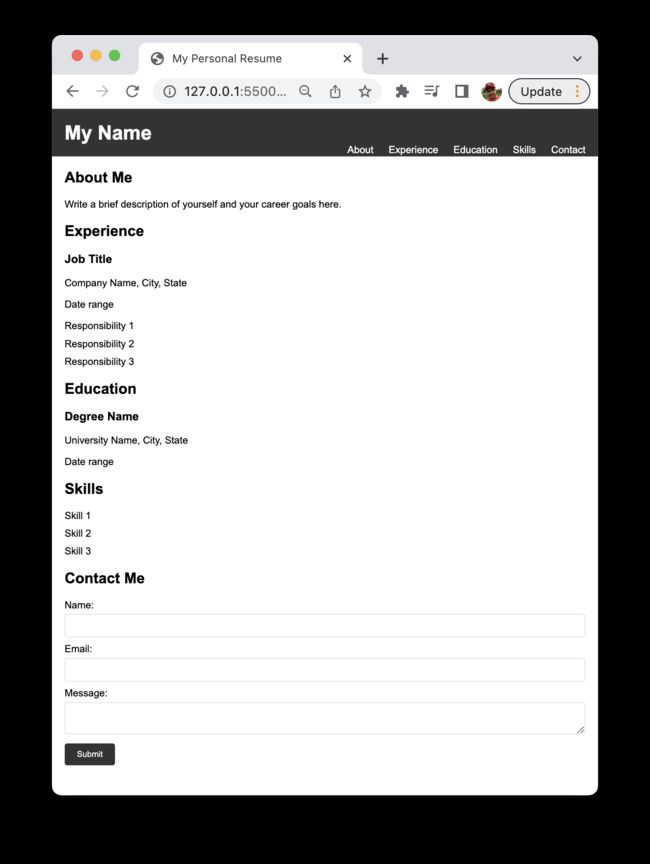
如果您随后在浏览器中打开 index.html,您应该能够看到以下结果:
这已经很不错了——一个完整的个人简历网站,由 ChatGPT 生成,无需编写一行代码。
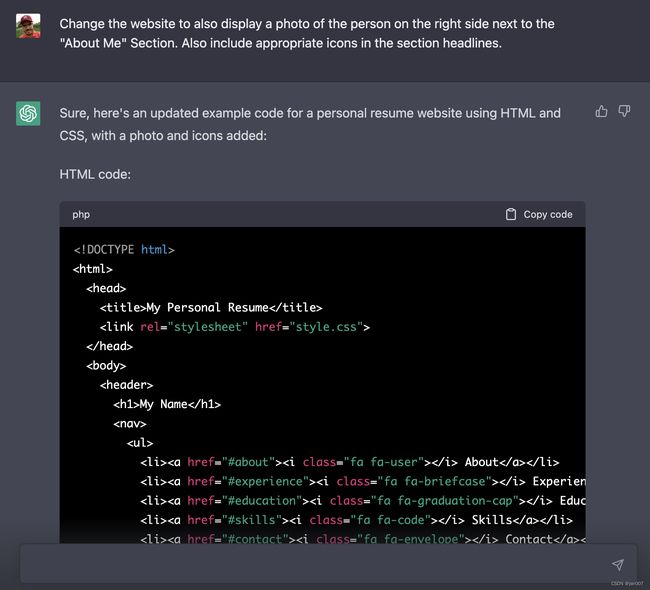
让我们看看是否可以更进一步,让 ChatGPT 进行一些修改。让我们要求在“关于我”部分旁边添加一张照片,并在各个部分的标题中添加一些图标:
同样,ChatGPT 为您提供了完整的 HTML 和 CSS 代码。您只需将此代码再次复制并粘贴到 index.html 和 style.css 中。
这是进入 index.html 的 HTML 代码:
My Personal Resume
Write a brief description of yourself and your career goals here.
这是进入 style.css 的 CSS 代码:
body {
  font-family: Arial, sans-serif;
  margin: 0;
}

header {
  background-color: #333;
  color: #fff;
  padding: 20px;
}

header h1 {
font-size: 32px;
margin: 0;
}

nav {
display: inline-block;
float: right;
}

nav ul {
margin: 0;
padding: 0;
}

nav li {
display: inline-block;
margin-left: 20px;
}

nav a {
color: #fff;
text-decoration: none;
}

nav a:hover {
color: #ccc;
}

main {
max-width: 800px;
margin: 0 auto;
padding: 20px;
}

section {
margin-top: 30px;
}

section h2 {
font-size: 24px;
margin: 0;
}

section ul {
margin: 10px 0;
}

section li {
margin-bottom: 10px;
}

section h3 {
font-size: 18px;
margin: 0;
}

section p {
margin: 0;
}

section img {
display: block;
float: right;
margin-left: 20px;
border-radius: 50%;
width: 200px;
height: 200px;
}

form {
margin-top: 20px;
}

label {
display: block;
margin-bottom: 5px;
}

input[type="text"],
input[type="email"],
textarea {
width: 100%;
padding: 10px;
margin-bottom: 10px;
border: 1px solid #ccc;
border-radius: 4px;
box-sizing: border-box;
}

input[type="submit"] {
background-color: #333;
color: #fff;
border: none;
padding: 10px 20px;
border-radius: 4px;
cursor: pointer;
}

input[type="submit"]:hover {
background-color: #444;
}

.fa {
display: inline-block;
font-size: 20px;
margin-right: 5px;
}

.fa-user:before {
content: "\f007";
}

.fa-briefcase:before {
content: "\f0b1";
}

.fa-graduation-cap:before {
content: "\f19d";
}

.fa-code:before {
content: "\f121";
}

.fa-envelope:before {
content: "\f0e0";
}
此外,ChatGPT 正在为您提供进一步的说明:
请注意,您需要提供自己的照片(在标签中img)和 Font Awesome 样式表(在head部分中),此代码才能正常工作。
因此,让我们首先将文件名为 my-photo.jpg 的图像文件添加到项目文件夹中。
其次,我们需要确保在代码中包含 Font Awesome 样式表。让我们再次请求 ChatGPT 为我们提供关于这一点的进一步说明:
让我们简单地使用 CGN 链接选项来包含 Font Awesome 样式表。从 ChatGPT 的答案中复制相应的链接元素,并将其插入文件 index.html 的头部部分。
如果我们现在再次检查浏览器中的结果,您应该能够看到类似于以下内容的内容:
伟大的!这是一个很棒的个人简历网站。剩下的唯一任务是填写简历各部分的详细信息。
免费托管简历网站
一旦个人简历网站填写了相应的内容,当然需要在互联网上提供。很棒的是,有可用的免费托管选项。为了获得初步概览,让我们请求 ChatGPT 为我们提供免费托管选项:
惊人的!所以假设我们想继续选项 1 并在 GitHub Pages 上免费托管网站。
同样,我们可以要求 ChatGPT 通过输入以下提示为我们提供选项 1 (GitHub Pages) 的详细说明:
提供选项 1 的说明
然后,ChatGPT 为我们提供了关于此托管选项的清晰且易于遵循的分步指南:
1.如果您还没有 GitHub 帐户,请创建一个。转到 https://github.com 并注册一个免费帐户。
创建一个新的存储库。转到 https://github.com/new 并创建一个名称类似于 username.github.io 的新存储库,其中 username 是您的 GitHub 用户名。确保存储库设置为“公共”。
将存储库克隆到本地计算机。打开终端或命令提示符并运行以下命令,将用户名替换为您的 GitHub 用户名:
git clone https://github.com/username/username.github.io.git
将您的网站文件复制到存储库中。将网站的所有 HTML、CSS、JavaScript 和图像文件复制到本地计算机上的 username.github.io 文件夹中。
提交更改并将更改推送到 GitHub。在终端中,导航到 username.github.io 文件夹并运行以下命令:
git add .
git commit -m "Initial commit"
git push origin main
这会将所有更改添加、提交并推送到您的 GitHub 存储库。
配置 GitHub Pages 的存储库设置。在 GitHub 上的存储库中,转到“设置”选项卡并向下滚动到“GitHub 页面”部分。在“来源”下,选择“主要”分支并单击“保存”。您的网站现在应该在 https://username.github.io 上线。
就是这样!您的网站现在托管在 GitHub Pages 上并且可以公开访问。您可以更改您的网站文件并将它们推送到 GitHub,GitHub Pages 将自动更新您的实时网站。
概括
创建个人简历网站是展示您在当今数字时代的技能和经验的好方法。使用 ChatGPT,您可以在短短 5 分钟内建立一个具有专业外观的网站,即使您没有 Web 开发经验。在 GitHub Pages 上托管您的网站也是与潜在雇主免费分享您的工作的好方法。那么为什么不试一试呢?使用 ChatGPT,这个过程从未如此简单。


