项目复现 | 基于FastSpeech2的语音中英韩文合成实现
环境:Ubuntu(docker),pytorch,
项目地址1(中英文)
https://github.com/ming024/FastSpeech2
环境配置
(进入docker容器内运行)
git clone https://github.com/ming024/FastSpeech2
cd FastSpeech2
pip3 install -r requirements.txt下载预训练模型并将它们存入新建文件夹,以下路径下output/ckpt/LJSpeech/、 output/ckpt/AISHELL3或output/ckpt/LibriTTS/。如果是docker容器的情况下,先下载到本地再复制到容器内,不是的话可忽略这步。
docker cp "/home/user/LJSpeech_900000.zip" torch:/workspace/tts-pro/FastSpeech2/output/ckpt/LJSpeech对于英语单扬声器 TTS,运行
python3 synthesize.py --text "YOUR_DESIRED_TEXT" --restore_step 900000 --mode single -p config/LJSpeech/preprocess.yaml -m config/LJSpeech/model.yaml -t config/LJSpeech/train.yaml可以改变文字,例如
python synthesize.py --text "There is nothing either good or bad, but thinking makes it so " --restore_step 900000 --mode single -p config/LJSpeech/preprocess.yaml -m config/LJSpeech/model.yaml -t config/LJSpeech/train.yaml提示错误,无'./output/ckpt/LJSpeech/900000.pth.tar',作者并没有上传此文件,所以在这里省略。
对于普通话多人 TTS,运行
python3 synthesize.py --text "大家好" --speaker_id SPEAKER_ID --restore_step 600000 --mode single -p config/AISHELL3/preprocess.yaml -m config/AISHELL3/model.yaml -t config/AISHELL3/train.yaml对于英语多人 TTS,运行前,需要把预训练模型,改为FastSpeech2/output/ckpt/LibriTTS/800000.pth.tar
要对FastSpeech2/hifigan/generator_universal.pth.tar.zip进行解压
unzip generator_universal.pth.tar.zip进行批量推理
python3 synthesize.py --source preprocessed_data/LJSpeech/val.txt --restore_step 900000 --mode batch -p config/LJSpeech/preprocess.yaml -m config/LJSpeech/model.yaml -t config/LJSpeech/train.yaml提示无RuntimeError: [enforce fail at inline_container.cc:110] . file in archive is not in a subdirectory: 900000.pth.tar
训练
数据预处理
下载数据集ljspeech,可下载到/home/ming/Data/LJSpeech-1.1路径
如果之前已经下载过数据集,可以打开FastSpeech2/config/LJSpeech/preprocess.yaml,修改数据集路径
dataset: "LJSpeech"

path:
  corpus_path: "/workspace/tts-pro/FastSpeech/data/LJSpeech-1.1"
  lexicon_path: "lexicon/librispeech-lexicon.txt"
  raw_path: "./raw_data/LJSpeech"
  preprocessed_path: "./preprocessed_data/LJSpeech"

preprocessing:
  val_size: 512
  text:
    text_cleaners: ["english_cleaners"]
    language: "en"
  audio:
    sampling_rate: 22050
    max_wav_value: 32768.0
  stft:
    filter_length: 1024
    hop_length: 256
    win_length: 1024
  mel:
    n_mel_channels: 80
    mel_fmin: 0
    mel_fmax: 8000 # please set to 8000 for HiFi-GAN vocoder, set to null for MelGAN vocoder
  pitch:
    feature: "phoneme_level" # support 'phoneme_level' or 'frame_level'
    normalization: True
  energy:
    feature: "phoneme_level" # support 'phoneme_level' or 'frame_level'
    normalization: True
然后运行
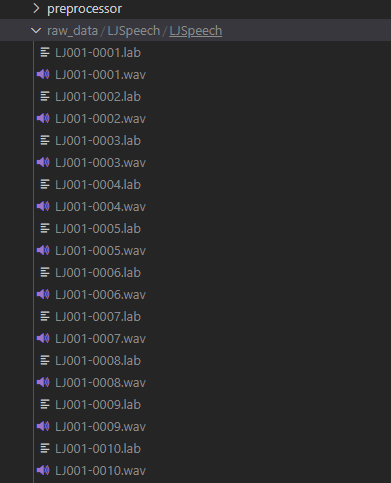
python3 prepare_align.py config/LJSpeech/preprocess.yaml运行后生成raw_data文件夹,数据如下
语音文件对应的标签文件。(.lab包含用于使用Corel WordPerfect显示和打印标签的信息;可以是Avery标签模板或其他自定义标签文件;包含定义标签在页面上的大小和位置的页面布局信息。)
如论文中所述,蒙特利尔强制对齐器(MFA) 用于获取话语和音素序列之间的对齐。此处提供了支持的数据集的比对。将文件解压缩到preprocessed_data/LJSpeech/TextGrid/.
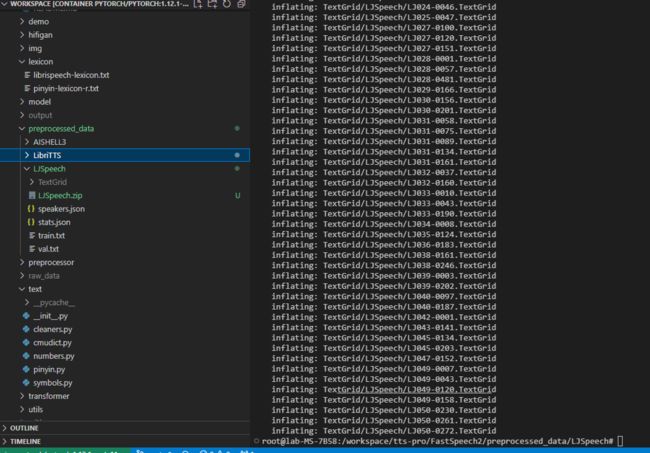
unzip LJSpeech.zip解压后如图
(如果训练的是别的数据集,修改下数据集名称及路径就可以)别的数据集同理,解压缩命令
unzip LibriTTS.zip解压后如图
接下来就是,对齐语料库,然后运行预处理脚本。
python3 preprocess.py config/LJSpeech/preprocess.yaml运行后如图(可能需要点时间,等着就可以啦)
正式训练
先解压预训练权重
cd FastSpeech2/hifigan
unzip generator_LJSpeech.pth.tar.zip
cd ..
训练命令
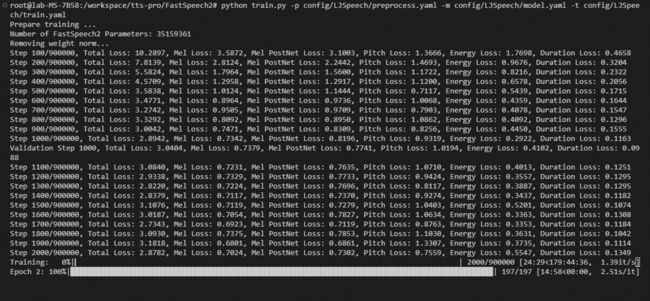
python train.py -p config/LJSpeech/preprocess.yaml -m config/LJSpeech/model.yaml -t config/LJSpeech/train.yaml训练过程
项目地址2(韩语)
HGU-DLLAB/Korean-FastSpeech2-Pytorch: Implementation of Korean FastSpeech2 (github.com)
环境设置
sudo apt-get install ffmpeg
pip install g2pk
cd Korean-FastSpeech2-Pytorch
PS
【1】ERROR: Could not install packages due to an OSError: [Errno 2] No such file or directory: '/workdir/conda-build/six_1593148849096/work'
在执行 pip install -r requirements.txt出现错误
解决
Getting weird OS Error when I try to import my repo into shar.streamlit - Deployment - Streamlit
附录
sudo docker cp /home/elena/LJSpeech.zip  torch_na:/workspace/tts-pro/FastSpeech2/preprocessed_data/LJSpeech/
sudo docker cp /home/elena/LibriTTS.zip  torch_na:/workspace/tts-pro/FastSpeech2/preprocessed_data/LibriTTS/TextGrid/


