SpringBoot (四) --------- ORM 操作 MySQL
目录
- 一、新建数据库表
- 二、创建 SpringBoot 项目
- 三、@ MapperScan
- 四、mapper 文件 和 Java 代码分开管理
- 五、事务支持
通过 SpringBoot + MyBatis 实现对数据库学生表的查询操作
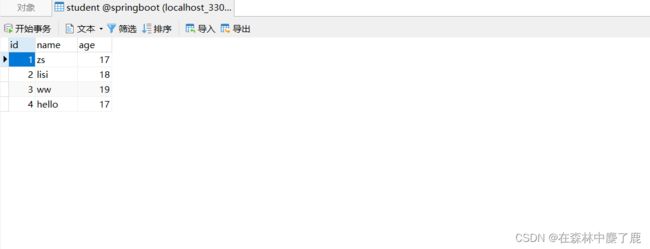
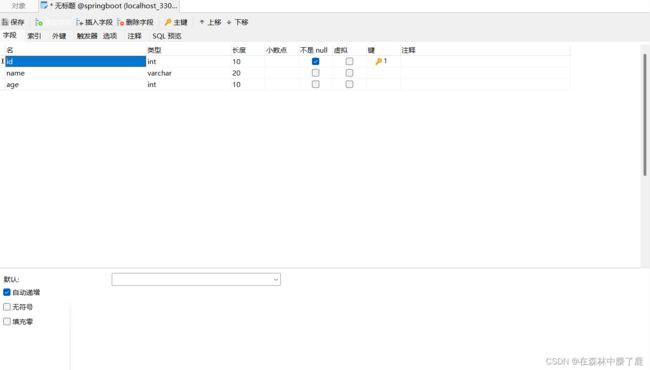
一、新建数据库表
我们首先来新建名为 SpringBoot 的数据库,在此数据库下建立 student 表,并插入数据

二、创建 SpringBoot 项目
- 新建 SpringBoot 项目

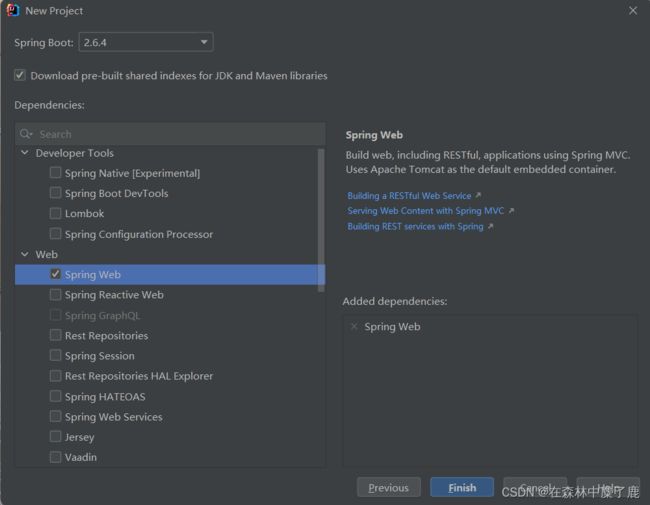
- pom.xml
MyBatis 依赖与 MySql 驱动
<dependency>
	<groupId>org.mybatis.spring.bootgroupId>
	<artifactId>mybatis-spring-boot-starterartifactId>
	<version>2.1.4version>
dependency>


<dependency>
	<groupId>mysqlgroupId>
	<artifactId>mysql-connector-javaartifactId>
	<scope>runtimescope>
dependency>
资源扫描器
<resources>
	<resource>
		<directory>src/main/javadirectory>
		<includes>
			<include>**/*.xmlinclude>
		includes>
	resource>
resources>
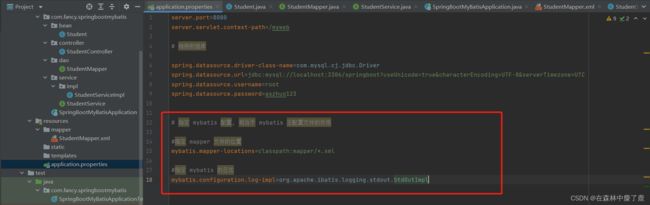
- 配置数据源 :application.properties
server.port=9090
server.servlet.context-path=/myweb

# 链接数据库

spring.datasource.driver-class-name=com.mysql.cj.jdbc.Driver
spring.datasource.url=jdbc:mysql://localhost:3306/springboot?useUnicode=true&characterEncoding=UTF-8&serverTimezone=UTC
spring.datasource.username=root
spring.datasource.password=password
- 创建实体类
package com.fancy.springbootmybatis.bean;

public class Student {
    private Integer id;
    private String name;
    private Integer age;

    public Student() {
    }

    public Student(Integer id, String name, Integer age) {
        this.id = id;
        this.name = name;
        this.age = age;
    }

    public Integer getId() {
        return id;
    }

    public void setId(Integer id) {
        this.id = id;
    }

    public String getName() {
        return name;
    }

    public void setName(String name) {
        this.name = name;
    }

    public Integer getAge() {
        return age;
    }

    public void setAge(Integer age) {
        this.age = age;
    }

    @Override
    public String toString() {
        return "Student{" +
                "id=" + id +
                ", name='" + name + '\'' +
                ", age=" + age +
                '}';
    }
}
- 创建 Dao 接口
package com.fancy.springbootmybatis.dao;

import com.fancy.springbootmybatis.bean.Student;
import org.apache.ibatis.annotations.Mapper;
import org.apache.ibatis.annotations.Param;


// @Mapper : 找到接口和他的 xml 文件
// 位置 : 在接口的上面
@Mapper
public interface StudentMapper {
    Student selectStudentById(@Param("id") Integer Id);
}
- mapper 文件
<mapper namespace="com.fancy.springbootmybatis.dao.StudentMapper">

    <select id="selectStudentById" resultType="com.fancy.springbootmybatis.bean.Student">
        select * from student where id=#{id};
    select>
mapper>
- service 接口
package com.fancy.springbootmybatis.service;

import com.fancy.springbootmybatis.bean.Student;

public interface StudentService {
    Student queryStudent(Integer id);
}
- service 接口实现类
package com.fancy.springbootmybatis.service.impl;

import com.fancy.springbootmybatis.bean.Student;
import com.fancy.springbootmybatis.dao.StudentMapper;
import com.fancy.springbootmybatis.service.StudentService;
import org.springframework.stereotype.Service;

import javax.annotation.Resource;

@Service
public class StudentServiceImpl implements StudentService {

    @Resource
    private StudentMapper studentMapper;

    @Override
    public Student queryStudent(Integer id) {
        Student student = studentMapper.selectStudentById(id);
        return student;
    }
}
- controller 类
package com.fancy.springbootmybatis.controller;
import com.fancy.springbootmybatis.bean.Student;
import com.fancy.springbootmybatis.service.StudentService;
import org.springframework.web.bind.annotation.RequestMapping;
import org.springframework.web.bind.annotation.ResponseBody;
import javax.annotation.Resource;
public class StudentController {
@Resource
private StudentService studentService;
@RequestMapping("/query")
@ResponseBody
public String queryStudent(Integer id) {
Student student = studentService.queryStudent(id);
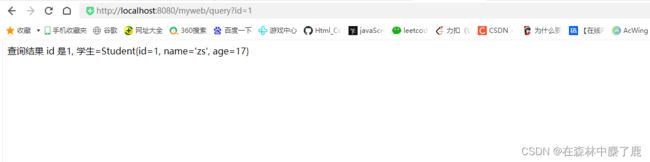
return "查询结果 id 是" + id + ", 学生=" + student.toString();
}
}
- 启动 Application 类 进行测试
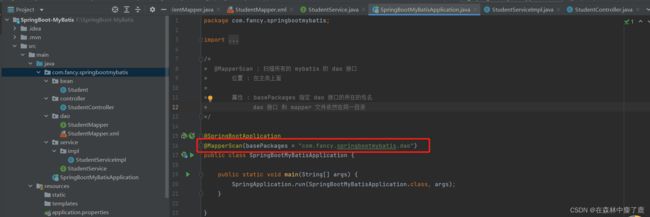
三、@ MapperScan
在 Dao 接口上面加入 @Mapper,需要在每个接口都加入注解,当 Dao 接口多的时候不方便。
可以使用如下的方式解决:
主类上添加注解包扫描:@MapperScan("dao包的全限定名称")
- 去掉 StudentMapper 接口的上面的@Mapper 注解
- 在主类上面加入 @MapperScan()

四、mapper 文件 和 Java 代码分开管理
这种方式比较推荐,mapper 文件放在 resources 目录下,java 代码放在 src/main/java
实现步骤:
➢ 在 resources 创建自定义目录,例如 mapper, 存放 xml 文件
➢ 把原来的 xml 文件剪切并拷贝到 resources/mapper 目录
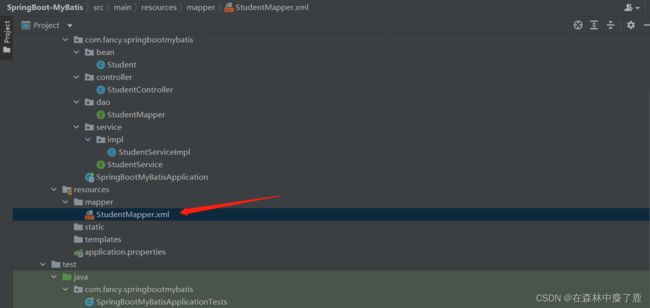
➢ 在 application.properties 配置文件中指定映射文件的位置,这个配置只有接口和映射文件不在同一个包的情况下,才需要指定。
五、事务支持
Spring Boot 使用事务非常简单,底层依然采用的是 Spring 本身提供的事务管理。
➢ 在入口类中使用注解 @EnableTransactionManagement 开启事务支持
➢ 在访问数据库的 Service 方法上添加注解 @Transactional 即可
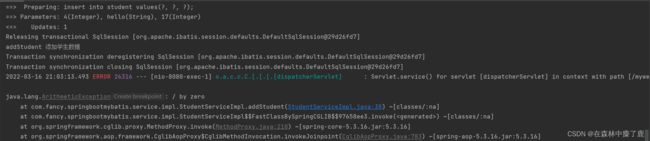
通过 SpringBoot +MyBatis 实现对数据库学生表的更新操作,在 service 层的方法中构建异常,查看事务是否生效。
- 在 StudentMapper 接口及 其 mapper 配置文件中添加 addStudent() 方法向表中添加数据
<insert id="addStudent" parameterType="com.fancy.springbootmybatis.bean.Student" >
    insert into students values(#{id}, #{name}, #{age});
insert>
- 修改 StudentService,在 addStudent() 方法中抛出异常
@Override
@Transactional
public int addStudent(Student student) {
    int rows = studentMapper.addStudent(student);
    System.out.println("addStudent 添加学生数据");
    //在此构造一个除数为 0 的异常,测试事务是否起作用
    int i = 10/0;
    return rows;
}
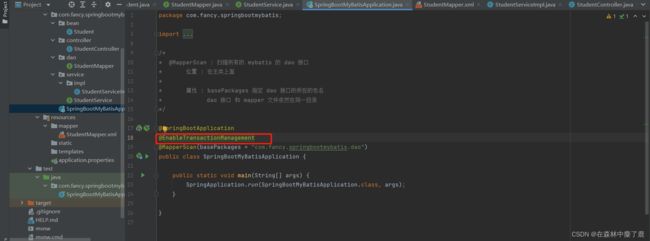
- 在 SpringBootMyBatisApplication 上 添加 @EnableTransactionManagement
在 Application 主类上,添加 @EnableTransactionManagement 开启事务支持@EnableTransactionManagement 可选,但是@Service 必须添加事务才生效
- 测试应用, 数据没有添加成功
- 注释掉 StudentServiceImpl 上的 @Transactional 测试,数据添加成功