SpringBoot+Vue搭建一个WebSocket的实时聊天室
首先搭建一个SpringBoot项目,其中各个文件:
pom.xml:
<project xmlns="http://maven.apache.org/POM/4.0.0" xmlns:xsi="http://www.w3.org/2001/XMLSchema-instance"
         xsi:schemaLocation="http://maven.apache.org/POM/4.0.0 https://maven.apache.org/xsd/maven-4.0.0.xsd">
    <modelVersion>4.0.0modelVersion>
    <parent>
        <groupId>org.springframework.bootgroupId>
        <artifactId>spring-boot-starter-parentartifactId>
        <version>2.5.4version>
        <relativePath/>
    parent>
    <groupId>love.xiaohhgroupId>
    <artifactId>websocket-demoartifactId>
    <version>0.0.1-SNAPSHOTversion>
    <name>websocket-demoname>
    <description>Demo project for Spring Bootdescription>
    <properties>
        <java.version>1.8java.version>
    properties>
    <dependencies>
        <dependency>
            <groupId>org.springframework.bootgroupId>
            <artifactId>spring-boot-starter-webartifactId>
        dependency>
        <dependency>
            <groupId>org.springframework.bootgroupId>
            <artifactId>spring-boot-starter-websocketartifactId>
        dependency>

        <dependency>
            <groupId>org.springframework.bootgroupId>
            <artifactId>spring-boot-starter-testartifactId>
            <scope>testscope>
        dependency>
    dependencies>

    <build>
        <plugins>
            <plugin>
                <groupId>org.springframework.bootgroupId>
                <artifactId>spring-boot-maven-pluginartifactId>
            plugin>
        plugins>
    build>

project>
love.xiaohh.websocket.WebsocketApplication,其中注册一个bean,使WebSocket的Endpoint生效
package love.xiaohh.websocket;

import org.springframework.boot.SpringApplication;
import org.springframework.boot.autoconfigure.SpringBootApplication;
import org.springframework.context.annotation.Bean;
import org.springframework.web.socket.config.annotation.EnableWebSocket;
import org.springframework.web.socket.server.standard.ServerEndpointExporter;

@EnableWebSocket // 开启websocket的注解,告诉Spring我们要使用WebSocket
@SpringBootApplication
public class WebsocketApplication {

    public static void main(String[] args) {
        SpringApplication.run(WebsocketApplication.class, args);
    }

    /**
     * 注册一个 ServerEndpointExporter,这样可以让注册到容器当中的WebSocket的Endpoint生效
     */
    @Bean
    public ServerEndpointExporter serverEndpointExporter() {
        return new ServerEndpointExporter();
    }

}
love.xiaohh.websocket.controllers.ws.WebSocketController,这是主角,也是websocket的控制器,有点像Controller
package love.xiaohh.websocket.controllers.ws;

import org.springframework.stereotype.Component;

import javax.websocket.OnClose;
import javax.websocket.OnMessage;
import javax.websocket.OnOpen;
import javax.websocket.Session;
import javax.websocket.server.ServerEndpoint;
import java.io.IOException;
import java.util.HashMap;
import java.util.Map;
import java.util.concurrent.atomic.AtomicLong;

/**
 *
 * WebSocket的控制器
 *
 * @author tanghai
 * @version 1.0
 * @date 2021-09-14 星期二 11:02:09
 */
@Component
@ServerEndpoint("/default/websocket")
public class WebSocketController {

    /**
     * 当前在线的总人数
     */
    private static final AtomicLong ONLINE_COUNT = new AtomicLong(0L);

    /**
     * 所有在线的人数的
     */
    private static final Map<String, Session> ALL_ONLINE_INFO = new HashMap<String, Session>();

    /**
     * websocket被打开的方法
     *
     * @param session 会话
     */
    @OnOpen
    public void open(Session session) {
        // 获取sessionId,让后将session存入到Map中
        final String id = session.getId();
        ALL_ONLINE_INFO.put(id, session);
        // 在线人数自加1并发送给所有的客户端
        final long onlineCount = ONLINE_COUNT.incrementAndGet();
        this.sendMessage(0, onlineCount + "");
    }

    /**
     * websocket被退出
     *
     * @param session 会话
     */
    @OnClose
    public void close(Session session) {
        // 将session从缓存当中移除
        final String id = session.getId();
        ALL_ONLINE_INFO.remove(id);
        // 在线人数自减1并发送给所有的客户端
        final long onlineCount = ONLINE_COUNT.decrementAndGet();
        this.sendMessage(0, onlineCount + "");
    }

    /**
     * 当收到客户端发送过来的消息时触发
     *
     * @param message 客户端发送过来的消息
     * @param session 客户端的session会话
     */
    @OnMessage
    public void message(String message, Session session) throws IOException {
        // 将消息发送到所有的客户端
        this.sendMessage(1, message);
    }

    /**
     * 发送消息给所有用户
     *
     * @param type    消息类型;0=更新在线人数,1=发送的消息
     * @param message 消息实体
     */
    private void sendMessage(int type, String message) {
        // 拼接成JSON,让后前端可以解析
        String targetMessage = "{\"type\":" + type + ",\"message\":\"" + message + "\"}";
        // 遍历并发给所有的客户端
        ALL_ONLINE_INFO.values().forEach(session -> {
            try {
                session.getBasicRemote().sendText(targetMessage);
            } catch (IOException e) {
                e.printStackTrace();
            }
        });
    }
}
后端的代码大功告成,然后我们搭建一个前端的Vue项目,搭建过程可参见Vue项目的搭建教程,搭建好后需要安装一个element-ui:
npm i element-ui -S
修改几个文件:
index.html:
DOCTYPE html>
<html>
  <head>
    <meta charset="utf-8">
    <meta name="viewport" content="width=device-width,initial-scale=1.0">
    <title>websocket-demo-uititle>
    <style type="text/css">
      body,#app {
        margin: 0;
        border: 0;
        padding: 0;
        height: 100%;
      }
    style>
  head>
  <body>
    <div id="app">div>

  body>
html>
src/main.js:
import Vue from 'vue'
import App from './App'
import ElementUI from 'element-ui'
import 'element-ui/lib/theme-chalk/index.css'
import router from './router'
// 引入并使用elementui
Vue.use(ElementUI)
Vue.config.productionTip = false
/* eslint-disable no-new */
new Vue({
el: '#app',
router,
components: { App },
template: 'src/App.vue:
src/router/index.js:
import Vue from 'vue'
import Router from 'vue-router'
import ChatRoom from '@/components/ChatRoom'

Vue.use(Router)

export default new Router({
  routes: [
    {
      // 根路径默认到聊天室
      path: '/',
      name: 'ChatRoom',
      component: ChatRoom
    }
  ]
})
src/components/ChatRoom.vue:
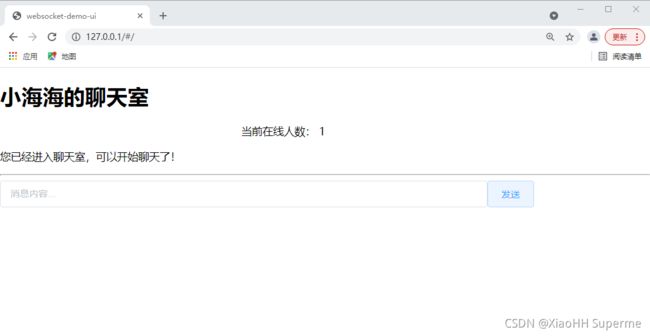
小海海的聊天室
当前在线人数: {{ onlineCount }}
发送
src/components/ChatItem.vue:
{{customerMessage}}
然后我们启动这两个程序:
# 打包maven项目
mvn clean package -Dmaven.test.skip

# 在打包好的好的target目录中启动Java程序
java -jar websocket-demo-0.0.1-SNAPSHOT.jar

# 在vue项目的根路径下下载所有依赖:
npm install
然后访问http://127.0.0.1:
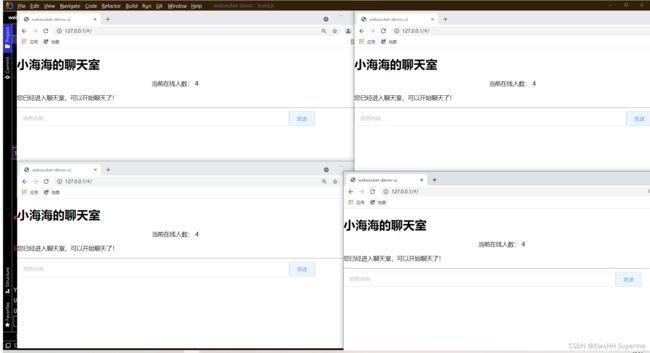
多开几个:
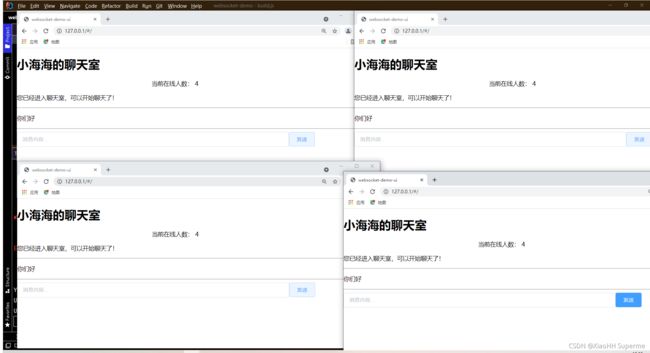
尝试发送消息发现同步接收:
现在你就可以叫上你们的小伙伴们一起聊天了!如果不行那么欢迎来到代码仓库克隆代码运行哦