ubuntu22.04安装kubernetes1.26 (使用containerd)
采用文章,借鉴下面几位大佬的文章
https://juejin.cn/post/7208088676853252156


https://www.aledk.com/2022/10/29/ubuntu-k8s/


https://blog.csdn.net/wanghui2087/article/details/129329357
设置主机名及解析
#master:
$ sudo hostnamectl set-hostname k8s-master
$ sudo vim /etc/hosts
192.168.1.200 k8s-master
192.168.1.201 k8s-node

#node:
$ sudo hostnamectl set-hostname k8s-node
$ sudo vim /etc/hosts
192.168.1.200 k8s-master
192.168.1.201 k8s-node
关闭swap
| ```
$ sudo swapoff -a
注释/etc/fstab文件的最后一行
$ sudo sed -i ‘/swap/s/^/#/’ /etc/fstab
 |
| --- |


### 开启IPv4转发
| ```
$ sudo cat <
|
| — |
基于containerd的k8s安装
安装containerd
这里推荐使用 containerd。
我使用的 Ubuntu 22.04,而 kubernetes 1.26 版本需要 containerd 1.6+。
直接使用sudo apt install containerd.io安装的 containerd 版本还是 1.5 的导致初始化集群失败(现在不知道更新到最新版没)。
所以推荐使用 Docker 源来安装 containerd。
# 使用 docker 源安装最新版本 containerd / docker
sudo apt install \
ca-certificates \
curl \
gnupg \
lsb-release
sudo mkdir -p /etc/apt/keyrings
curl -fsSL https://download.docker.com/linux/ubuntu/gpg | sudo gpg --dearmor -o /etc/apt/keyrings/docker.gpg
echo \
"deb [arch=$(dpkg --print-architecture) signed-by=/etc/apt/keyrings/docker.gpg] https://download.docker.com/linux/ubuntu \
$(lsb_release -cs) stable" | sudo tee /etc/apt/sources.list.d/docker.list > /dev/null
sudo apt update
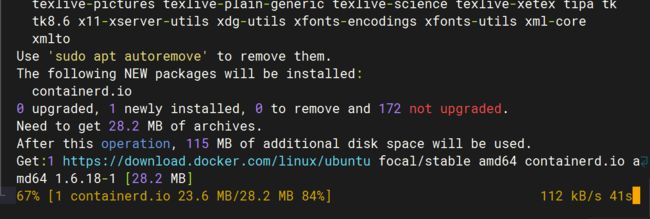
sudo apt install containerd.io
# sudo apt install docker-ce docker-ce-cli containerd.io docker-compose-plugin
配置containerd
● 首先生成默认配置
sudo mkdir -p /etc/containerd containerd config default | sudo tee /etc/containerd/config.toml 复制代码

● 配置使用 systemd cgroup 驱动并修改 sandbox 镜像地址
由于墙的关系国内网络无法拉取 gcr 的镜像,所以要修改为国内镜像地址。
不过 k8s.gcr.io 将在今年四月冻结,迁至 registry.k8s.io。
mkdir -p /etc/containerd				#创建一个目录用于存放containerd的配置文件
containerd config default | sudo tee /etc/containerd/config.toml	#把containerd配置导出到文件


vim /etc/containerd/config.toml			#修改配置文件
[plugins."io.containerd.grpc.v1.cri"]
..................................

#搜索sandbox_image,把原来的k8s.gcr.io/pause:3.6改为
"registry.aliyuncs.com/google_containers/pause:3.9"
sandbox_image = "registry.aliyuncs.com/google_containers/pause:3.9"
[plugins."io.containerd.grpc.v1.cri".containerd.runtimes.runc.options]
..........................

#搜索SystemdCgroup,把这个false改为true
SystemdCgroup = true


#搜索config_path,配置镜像加速地址(这是一个目录下面创建)
[plugins."io.containerd.grpc.v1.cri".registry]
     config_path = "/etc/containerd/certs.d"

#创建镜像加速的目录
mkdir /etc/containerd/certs.d/docker.io -pv
#配置加速
cat > /etc/containerd/certs.d/docker.io/hosts.toml << EOF
server = "https://docker.io"
[host."https://xxxxxx.mirror.aliyuncs.com"]
  capabilities = ["pull", "resolve"]
EOF

#加载containerd的内核模块
cat <<EOF | sudo tee /etc/modules-load.d/containerd.conf
overlay
br_netfilter
EOF
sudo modprobe overlay
sudo modprobe br_netfilter

#重启containerd
systemctl restart containerd
systemctl status containerd
拉取镜像,测试containerd是否能创建和启动成功
ctr i pull docker.io/library/nginx:alpine			#能正常拉取镜像说明没啥问题
ctr images ls										#查看镜像
ctr c create --net-host docker.io/library/nginx:alpine nginx #创建容器
ctr task start -d nginx								#启动容器,正常说明containerd没啥问题
ctr containers ls 									#查看容器
ctr tasks kill -s SIGKILL  nginx					#终止容器
ctr containers rm nginx								#删除容器
安装kubeadm、kubelet、kubectl
安装依赖组件
| ```
sudo apt-get install -y apt-transport-https ca-certificates curl
 |
| --- |


#### 安装GPG密钥
| ```
sudo curl -fsSLo /usr/share/keyrings/kubernetes-archive-keyring.gpg  https://mirrors.aliyun.com/kubernetes/apt/doc/apt-key.gpg
  sudo echo "deb [signed-by=/usr/share/keyrings/kubernetes-archive-keyring.gpg] http://mirrors.aliyun.com/kubernetes/apt kubernetes-xenial main" | sudo tee /etc/apt/sources.list.d/kubernetes.list
|
| — |
安装Kubernetes
| ```
#kubeadm:用来初始化集群的指令。
#kubelet:在集群中的每个节点上用来启动 Pod 和容器等。
#kubectl:用来与集群通信的命令行工具。
sudo apt-get update
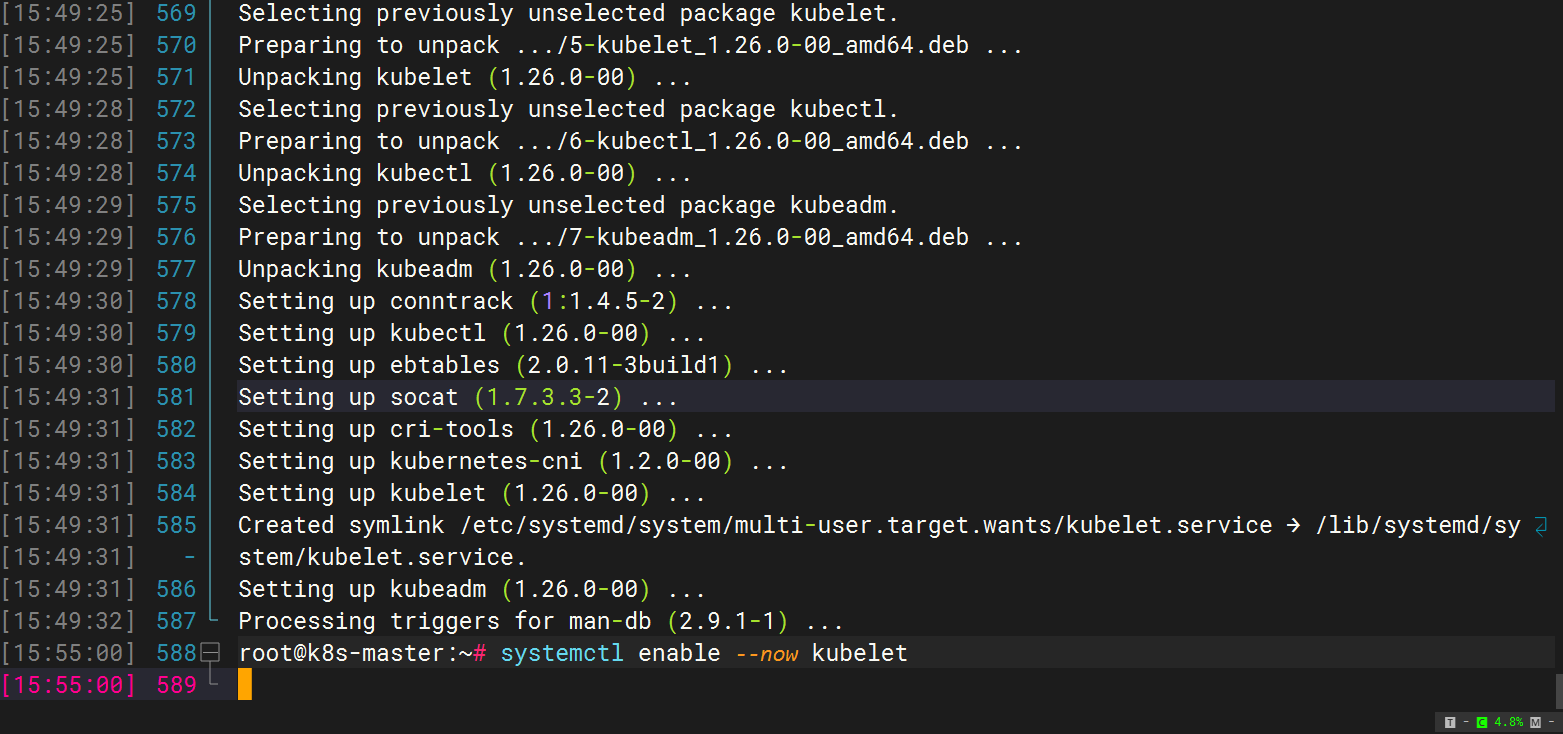
sudo apt-get install -y kubelet=1.25.0-00 kubeadm=1.25.0-00 kubectl=1.25.0-00
systemctl enable --now kubelet
|
| --- |
#### 标记软件包
标记软件包,避免其自动更新。
| $ sudo apt-mark hold kubelet kubeadm kubectl |
| --- |
## 使用kubeadm init初始化集群
```shell
systemctl enable kubelet.service
使用kubeadm config print init-defaults --component-configs KubeletConfiguration
可以打印集群初始化默认的使用的配置:
配置如下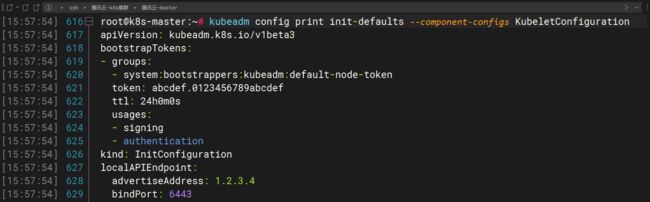
apiVersion: kubeadm.k8s.io/v1beta3
bootstrapTokens:
- groups:
  - system:bootstrappers:kubeadm:default-node-token
  token: abcdef.0123456789abcdef
  ttl: 24h0m0s
  usages:
  - signing
  - authentication
kind: InitConfiguration
localAPIEndpoint:
  advertiseAddress: 1.2.3.4    #需要替换master节点IP
  bindPort: 6443
nodeRegistration:
  criSocket: unix:///var/run/containerd/containerd.sock
  imagePullPolicy: IfNotPresent
  name: node
  taints: null
---
apiServer:
  timeoutForControlPlane: 4m0s
apiVersion: kubeadm.k8s.io/v1beta3
certificatesDir: /etc/kubernetes/pki
clusterName: kubernetes
controllerManager: {}
dns: {}
etcd:
  local:
    dataDir: /var/lib/etcd
imageRepository: registry.k8s.io  #这个源要换成阿里的!registry.aliyuncs.com/google_containers
kind: ClusterConfiguration
kubernetesVersion: 1.26.0
networking:
  dnsDomain: cluster.local
  serviceSubnet: 10.96.0.0/12
scheduler: {}
---
apiVersion: kubelet.config.k8s.io/v1beta1
authentication:
  anonymous:
    enabled: false
  webhook:
    cacheTTL: 0s
    enabled: true
  x509:
    clientCAFile: /etc/kubernetes/pki/ca.crt
authorization:
  mode: Webhook
  webhook:
    cacheAuthorizedTTL: 0s
    cacheUnauthorizedTTL: 0s
cgroupDriver: systemd
clusterDNS:
- 10.96.0.10
clusterDomain: cluster.local
cpuManagerReconcilePeriod: 0s
evictionPressureTransitionPeriod: 0s
fileCheckFrequency: 0s
healthzBindAddress: 127.0.0.1
healthzPort: 10248
httpCheckFrequency: 0s
imageMinimumGCAge: 0s
kind: KubeletConfiguration
logging:
  flushFrequency: 0
  options:
    json:
      infoBufferSize: "0"
  verbosity: 0
memorySwap: {}
nodeStatusReportFrequency: 0s
nodeStatusUpdateFrequency: 0s
resolvConf: /run/systemd/resolve/resolv.conf
rotateCertificates: true
runtimeRequestTimeout: 0s
shutdownGracePeriod: 0s
shutdownGracePeriodCriticalPods: 0s
staticPodPath: /etc/kubernetes/manifests
streamingConnectionIdleTimeout: 0s
syncFrequency: 0s
volumeStatsAggPeriod: 0s
从默认的配置中可以看到,可以使用imageRepository定制在集群初始化时拉取k8s所需镜像的地址。基于默认配置定制出本次使用kubeadm初始化集群所需的配置文件kubeadm.yaml:
写好的配置文件,修改成你的master节点即可
apiVersion: kubeadm.k8s.io/v1beta3
kind: InitConfiguration
localAPIEndpoint:
  advertiseAddress: 192.168.2.5  #master节点IP
  bindPort: 6443
nodeRegistration:
  criSocket: unix:///run/containerd/containerd.sock
  taints:
  - effect: PreferNoSchedule
    key: node-role.kubernetes.io/master
---
apiVersion: kubeadm.k8s.io/v1beta2
kind: ClusterConfiguration
kubernetesVersion: 1.26.0
imageRepository: registry.aliyuncs.com/google_containers #阿里的源
networking:
  podSubnet: 10.244.0.0/16
---
apiVersion: kubelet.config.k8s.io/v1beta1
kind: KubeletConfiguration
cgroupDriver: systemd
failSwapOn: false
---
apiVersion: kubeproxy.config.k8s.io/v1alpha1
kind: KubeProxyConfiguration
mode: ipvs

这里定制了imageRepository为阿里云的registry,避免因gcr被墙,无法直接拉取镜像。criSocket设置了容器运行时为containerd。 同时设置kubelet的cgroupDriver为systemd,设置kube-proxy代理模式为ipvs。
拉取镜像
在开始初始化集群之前可以使用kubeadm config images pull --config kubeadm.yaml预先在各个服务器节点上拉取所k8s需要的容器镜像。
kubeadm config images pull --config kubeadm.yaml  #提前拉取镜像
[config/images] Pulled registry.aliyuncs.com/google_containers/kube-apiserver:v1.26.0
[config/images] Pulled registry.aliyuncs.com/google_containers/kube-controller-manager:v1.26.0
[config/images] Pulled registry.aliyuncs.com/google_containers/kube-scheduler:v1.26.0
[config/images] Pulled registry.aliyuncs.com/google_containers/kube-proxy:v1.26.0
[config/images] Pulled registry.aliyuncs.com/google_containers/pause:3.9
[config/images] Pulled registry.aliyuncs.com/google_containers/etcd:3.5.6-0
[config/images] Pulled registry.aliyuncs.com/google_containers/coredns:v1.9.3

接下来使用kubeadm初始化集群执行下面的命令
kubeadm init --config kubeadm.yaml

W0104 01:55:08.531622   29428 common.go:84] your configuration file uses a deprecated API spec: "kubeadm.k8s.io/v1beta2". Please use 'kubeadm config migrate --old-config old.yaml --new-config new.yaml', which will write the new, similar spec using a newer API version.
[init] Using Kubernetes version: v1.26.0
[preflight] Running pre-flight checks
[preflight] Pulling images required for setting up a Kubernetes cluster
[preflight] This might take a minute or two, depending on the speed of your internet connection
[preflight] You can also perform this action in beforehand using 'kubeadm config images pull'
[certs] Using certificateDir folder "/etc/kubernetes/pki"
[certs] Using existing ca certificate authority
[certs] Using existing apiserver certificate and key on disk
[certs] Using existing apiserver-kubelet-client certificate and key on disk
[certs] Using existing front-proxy-ca certificate authority
[certs] Using existing front-proxy-client certificate and key on disk
[certs] Using existing etcd/ca certificate authority
[certs] Using existing etcd/server certificate and key on disk
[certs] Using existing etcd/peer certificate and key on disk
[certs] Using existing etcd/healthcheck-client certificate and key on disk
[certs] Using existing apiserver-etcd-client certificate and key on disk
[certs] Using the existing "sa" key
[kubeconfig] Using kubeconfig folder "/etc/kubernetes"
[kubeconfig] Using existing kubeconfig file: "/etc/kubernetes/admin.conf"
[kubeconfig] Using existing kubeconfig file: "/etc/kubernetes/kubelet.conf"
[kubeconfig] Using existing kubeconfig file: "/etc/kubernetes/controller-manager.conf"
[kubeconfig] Using existing kubeconfig file: "/etc/kubernetes/scheduler.conf"
[kubelet-start] Writing kubelet environment file with flags to file "/var/lib/kubelet/kubeadm-flags.env"
[kubelet-start] Writing kubelet configuration to file "/var/lib/kubelet/config.yaml"
[kubelet-start] Starting the kubelet
[control-plane] Using manifest folder "/etc/kubernetes/manifests"
[control-plane] Creating static Pod manifest for "kube-apiserver"
[control-plane] Creating static Pod manifest for "kube-controller-manager"
[control-plane] Creating static Pod manifest for "kube-scheduler"
[etcd] Creating static Pod manifest for local etcd in "/etc/kubernetes/manifests"
[wait-control-plane] Waiting for the kubelet to boot up the control plane as static Pods from directory "/etc/kubernetes/manifests". This can take up to 4m0s
[apiclient] All control plane components are healthy after 9.503362 seconds
[upload-config] Storing the configuration used in ConfigMap "kubeadm-config" in the "kube-system" Namespace
[kubelet] Creating a ConfigMap "kubelet-config" in namespace kube-system with the configuration for the kubelets in the cluster
[upload-certs] Skipping phase. Please see --upload-certs
[mark-control-plane] Marking the node node1 as control-plane by adding the labels: [node-role.kubernetes.io/control-plane node.kubernetes.io/exclude-from-external-load-balancers]
[mark-control-plane] Marking the node node1 as control-plane by adding the taints [node-role.kubernetes.io/master:PreferNoSchedule]
[bootstrap-token] Using token: o4pn35.3zjs1udp6uw1eg8w
[bootstrap-token] Configuring bootstrap tokens, cluster-info ConfigMap, RBAC Roles
[bootstrap-token] Configured RBAC rules to allow Node Bootstrap tokens to get nodes
[bootstrap-token] Configured RBAC rules to allow Node Bootstrap tokens to post CSRs in order for nodes to get long term certificate credentials
[bootstrap-token] Configured RBAC rules to allow the csrapprover controller automatically approve CSRs from a Node Bootstrap Token
[bootstrap-token] Configured RBAC rules to allow certificate rotation for all node client certificates in the cluster
[bootstrap-token] Creating the "cluster-info" ConfigMap in the "kube-public" namespace
[kubelet-finalize] Updating "/etc/kubernetes/kubelet.conf" to point to a rotatable kubelet client certificate and key
[addons] Applied essential addon: CoreDNS
[addons] Applied essential addon: kube-proxy

Your Kubernetes control-plane has initialized successfully!

To start using your cluster, you need to run the following as a regular user:

  mkdir -p $HOME/.kube
  sudo cp -i /etc/kubernetes/admin.conf $HOME/.kube/config
  sudo chown $(id -u):$(id -g) $HOME/.kube/config

Alternatively, if you are the root user, you can run:

  export KUBECONFIG=/etc/kubernetes/admin.conf

You should now deploy a pod network to the cluster.
Run "kubectl apply -f [podnetwork].yaml" with one of the options listed at:
  https://kubernetes.io/docs/concepts/cluster-administration/addons/

Then you can join any number of worker nodes by running the following on each as root:
#注意:这段kubeamd join命令的token只有24h,24h就过期,需要执行kubeadm token create --print-join-command 重新生成。
kubeadm join 192.168.2.5:6443 --token shrl66.4tkloy7gnukj03l4 \
    --discovery-token-ca-cert-hash sha256:f82eb61a39fbc0164f0b91e2d2619fc3d8f9b2d1b235ed3a60c4cc4e97b68dc9
上面记录了完成的初始化输出的内容,根据输出的内容基本上可以看出手动初始化安装一个Kubernetes集群所需要的关键步骤。 其中有以下关键内容:
[certs]生成相关的各种证书
[kubeconfig]生成相关的kubeconfig文件
[kubelet-start] 生成kubelet的配置文件"/var/lib/kubelet/config.yaml"
[control-plane]使用/etc/kubernetes/manifests目录中的yaml文件创建apiserver、controller-manager、scheduler的静态pod
[bootstraptoken]生成token记录下来,后边使用kubeadm join往集群中添加节点时会用到
[addons]安装基本插件:CoreDNS, kube-proxy
下面的命令是配置常规用户如何使用kubectl访问集群:
#我们根据输入的提示信息复制粘贴照着做即可
root@master:~# mkdir -p $HOME/.kube										#复制上面提示照着做即可
root@master:~# sudo cp -i /etc/kubernetes/admin.conf $HOME/.kube/config	#复制上面提示照着做即可
root@master:~# sudo chown $(id -u):$(id -g) $HOME/.kube/config			#复制上面提示照着做即可
root@master:~#  export KUBECONFIG=/etc/kubernetes/admin.conf
查看一下集群状态,确认个组件都处于healthy状态
kubectl get cs

Warning: v1 ComponentStatus is deprecated in v1.19+
NAME                 STATUS    MESSAGE                         ERROR
controller-manager   Healthy   ok
scheduler            Healthy   ok
etcd-0               Healthy   {"health":"true","reason":""}
如果出现问题,就执行kubeadm reset命令进行清理,然后执行执行rm -rf $HOME/.kube,再init。(坑后面会补充)
部署Pod Network组件Calico
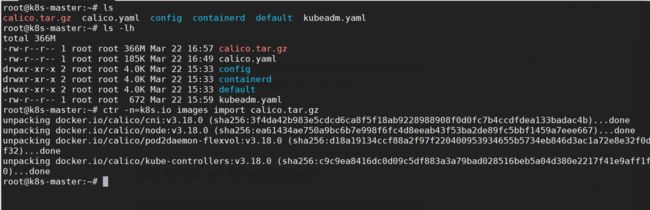
把安装 calico 需要的镜像 calico.tar.gz 传到 xianchaomaster1、xianchaomaster2、 这个包可以从1.24到1.26都可以使用
xianchaomaster3 和 xianchaonode1 节点,手动解压:
链接:https://pan.baidu.com/s/1LnEvpmyqClh_cSdcouWnIQ?pwd=rpzh
提取码:rpzh
--来自百度网盘超级会员V2的分享
[root@xianchaomaster1 ~]# ctr -n=k8s.io images import calico.tar.gz
[root@xianchaomaster2 ~]# ctr -n=k8s.io images import calico.tar.gz
[root@xianchaomaster3 ~]# ctr -n=k8s.io images import calico.tar.gz
[root@xianchaonode1 ~]# ctr -n=k8s.io images import calico.tar.gz

上传 calico.yaml 到 xianchaomaster1 上,使用 yaml 文件安装 calico 网络插件 。
[root@xianchaomaster1 ~]# kubectl apply -f calico.yaml

#calico 的 STATUS 状态是 Ready,说明 k8s 集群正常运行了
测试在 k8s 创建 pod 是否可以正常访问网络
#把 busybox-1-28.tar.gz 上传到 xianchaonode1 节点,手动解压
[root@xianchaonode1 ~]# ctr images import busybox-1-28.tar.gz
[root@xianchaomaster1 ~]# kubectl run busybox --image
docker.io/library/busybox:1.28 --image-pull-policy=IfNotPresent --restart=Never --rm -it
busybox -- sh
/ # ping www.baidu.com
PING www.baidu.com (39.156.66.18): 56 data bytes
64 bytes from 39.156.66.18: seq=0 ttl=127 time=39.3 ms
#通过上面可以看到能访问网络,说明 calico 网络插件已经被正常安装了
ctr 和 crictl 区别
背景:在部署 k8s 的过程中,经常要对镜像进行操作(拉取、删除、查看等)
问题:使用过程中会发现 ctr 和 crictl 有很多相同功能,也有些不同,那区别到底在哪里?
说明:
1.ctr 是 containerd 自带的 CLI 命令行工具,crictl 是 k8s 中 CRI(容器运行时接口)的客户端,
k8s 使用该客户端和 containerd 进行交互;
[root@xianchaonode1 ~]# cat /etc/crictl.yaml
runtime-endpoint: "/run/containerd/containerd.sock"
image-endpoint: ""
timeout: 0
debug: false
pull-image-on-create: false
disable-pull-on-run: false
systemctl restart containerd
2.ctr 和 crictl 命令具体区别如下,也可以--help 查看。crictl 缺少对具体镜像的管理能力,可能是
k8s 层面镜像管理可以由用户自行控制,能配置 pod 里面容器的统一镜像仓库,镜像的管理可以有
habor 等插件进行处理。


docker 跟 containerd 不冲突,安装 docker 是为了能基于 dockerfile 构建
镜像

配置containerd使用crictl
cat > /etc/crictl.yaml <<EOF
runtime-endpoint: unix:///run/containerd/containerd.sock
image-endpoint: unix:///run/containerd/containerd.sock
timeout: 10
debug: false
EOF

systemctl restart containerd
闭坑和遇到的问题
1、在kubeadm init成功之后,如果想kubeadm reset ,
那么需要在执行kubeadm reset之前手动删除 $HOME/.kube。否则会报:

k8s重新初始化集群

1、移除所有工作节点
kubectl delete node izwz9ac58lkokssyf8owagz

2、所有工作节点删除工作目录,并重置kubeadm
rm -rf /etc/kubernetes/*
kubeadm reset

3、Master节点删除工作目录,并重置kubeadm
rm -rf /etc/kubernetes/* \
rm -rf ~/.kube/*  \
rm -rf /var/lib/etcd/*  \
rm -rf /var/lib/cni/  \
rm -fr /etc/cni/net.d

从新初始化
kubeadm init --config kubeadm.yaml
2、kubeadm init 时出现卡在
[wait-control-plane] Waiting for the kubelet to boot up the control plane as static Pods from directory "/etc/kubernetes/manifests". This can take up to 4m0s
[kubelet-check] Initial timeout of 40s passed.


然后通过journalctl -f -u containerd看容器引擎的日志

因为containerd默认从k8s官网拉取镜像,其次默认配置中是pause:3.6版本,而实际我们需要的3.9版本。
failed to pull and unpack image \"k8s.gcr.io/pause:3.6\
所以我们安装完containerd一定修改containerd的配置,改源,改pause版本号。
我的解答思路和尝试过的方法
cni的问题是因为还未安装calico,需要使用kubectl -f
但想解决"node "k8s-master01" not found"问题

我想要达到的结果
解决此问题
报错解决文章
https://blog.csdn.net/Trollz/article/details/127066096?ops_request_misc=%257B%2522request%255Fid%2522%253A%2522167947247216800213029749%2522%252C%2522scm%2522%253A%252220140713.130102334.pc%255Fall.%2522%257D&request_id=167947247216800213029749&biz_id=0&utm_medium=distribute.pc_search_result.none-task-blog-2~all~first_rank_ecpm_v1~pc_rank_34-4-127066096-null-null.142^v76^pc_new_rank,201^v4^add_ask,239^v2^insert_chatgpt&utm_term=Unfortunately%2C%20an%20error%20has%20occurred%3A%20%20%20%20%20%20%20%20%20timed%20out%20waiting%20for%20the%20condition&spm=1018.2226.3001.4187