React教程(四):React组件进阶
传送门:
React教程(一):React基础
React教程(二):React组件基础
React教程(三):React组件通信
一.Children属性
1.children属性是什么?
表示该组件的子节点,只要组件内部有子节点,props中就有该熟悉感。
2.children可以是什么?
- 普通文本
- 普通标签元素
- 函数
- JSX
举个例子:
// 子组件A
const SonA = (props) => {
  return <div>组件A:{props.children}</div>;
};
// 子组件B
const SonB = (props) => {
  return <div>组件B:{props.children}</div>;
};

// 子组件C
const SonC = (props) => {
  return <div>组件C:{props.children}</div>;
};

// 子组件C
const SonD = (props) => {
  console.log("dddd", props.children);
  return <div>组件D:{props.children}</div>;
};
// 根组件
class App extends React.Component {
  state = {
    msg: "11111好耶111",
  };
  renderUI = () => {
    return <span>111</span>;
  };
  render() {
    return (
      <div>
        {/* 普通文本 */}
        <SonA>aaaaa</SonA>
        {/* 标签 */}
        <SonB>
          <span>bbbb</span>
        </SonB>
        {/* jsx元素 */}
        <SonC>{true && <span>ccccc</span>}</SonC>
        {/* 函数 */}
        <SonD>{this.renderUI()}</SonD>
      </div>
    );
  }
}
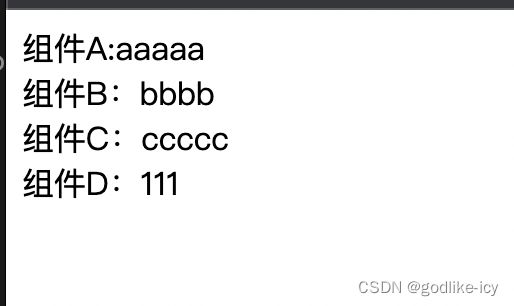
显示结果:

这里要注意的是,如果直接在jsx中使用匿名函数,他将不会解析为jsx元素,会被当成一个函数。
比如下面这种写法:
        <SonD>
          {() => {
            return <span>111</span>;
          }}
        </SonD>
导致的报错如下:
大致就是函数无法作为react组件的子节点

这个时候,我们传递过去的是函数,那么我们需要调用这个函数:
子组件D中需要去调用它,后面加一个括号就行:
// 子组件C
const SonD = (props) => {
  console.log("dddd", props.children);
  return <div>组件D:{props.children()}</div>;
};
我们使用children一般用来做高阶组件,诸如fusion组件库中的navbar就是使用了chidren属性。
二.props校验-场景和使用
(了解就好,有TS基础可以直接跳过)
使用场景:
对于组件来说,props是由外部传入的,我们其实无法保证组件使用者传入了什么格式的数据,如果传入的数据格式不对,就可能导致内部错误。
且组件使用者无法知道报错原因。
举个栗子:
// 随便声明一个函数组件
const ShowPersonList = (props) => {
  const { personList, id, kind } = props;
  return (
    <div>
      {personList.map((item) => {
        return (
          <div>
            {item.name}
            {id}----{kind}
          </div>
        );
      })}
    </div>
  );
};
我们知道personList表示的是一个数组,我们在渲染jsx时使用了数组的方法map。
但是组件的使用者并不知道我们组件内部使用了这个api呀(黑盒)。
所以使用者在使用时如果传入一个非数组例如1
// 根组件
function App() {
  return (
    <div>
      <ShowPersonList personList={1} id={"22"} kind={122} />
    </div>
  );
}
那么就会导致控制台报错

类型错误,personList.map不是一个方法。因为我们传的是数字number,number当然没有map方法。
而使用者就会很蒙蔽,这是哪里的报错,我哪里用了map这种疑问。
当然有的人可能会说啦,啊,我的组件是TS写的,有TS声明,当然,现在开发都是基于TS的,组件可以规定使用者必须传入什么类型的数据甚至什么字段,极大减少了因为传入错误的数据而导致的错误的发生。(还能提示报错原因)

但!!!!
我们假设只使用js的情况下怎么解决这个问题。
面对这样的问题,我们可以使用props校验。
做法就是使用第三方的校验包(当然你也可以自己写,不过现成的不香吗)
实现步骤:
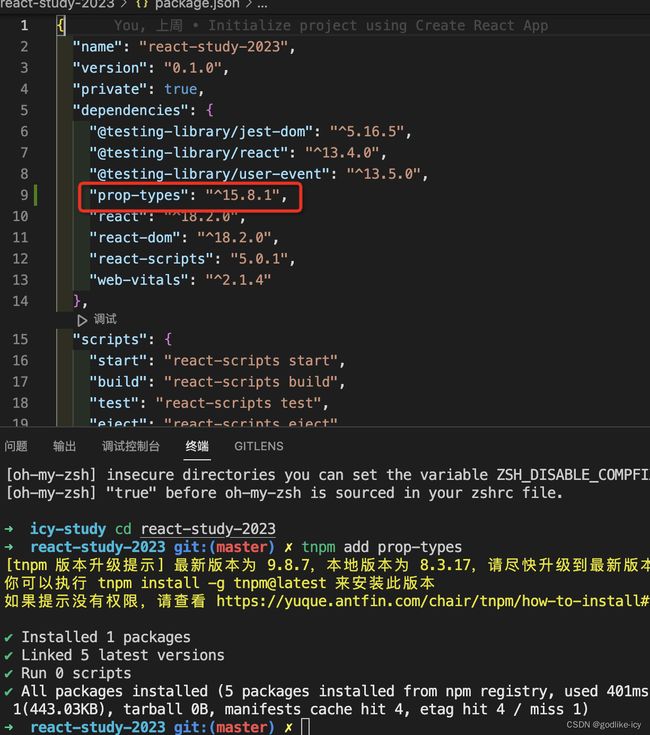
- 安装属性校验包:
npm add prop-types- 导入
prop-types包- 使用
组件名.propTypes={}给组件添加校验规则。
好,我装好了,记得command/ctrl +shift + p 再enter重启下vscode窗口。
代码演示实战:
// 引入prop-types包 里面有各种各样的校验规则
import propTypes from "prop-types";

// 随便声明一个函数组件
const ShowPersonList = (props) => {
  const { personList, id, kind } = props;
  return (
    <div>
      {personList.map((item) => {
        return (
          <div>
            {item.name}
            {id}----{kind}
          </div>
        );
      })}
    </div>
  );
};

// 添加校验规则
ShowPersonList.propTypes = {
  // 定义各种规则
  personList: propTypes.array, // 表示personList是个数组类型
  id: propTypes.number, // 表示id是number类型
  kind: propTypes.string, // 表示kind是个字符类型
};

// 根组件
function App() {
  return (
    <div>
      <ShowPersonList personList={1} id={"22"} kind={122} />
    </div>
  );
}
我们定义了传入是数组,但我们传入number,他会进行一个报错告诉我们哪个位置出错了,为什么导致的出错等。

常见校验规则说明:
四种常见结构
- 常见类型:array、bool、func、number、object、string
- React元素类型:element
- 必填项: isRequired
- 特定结构的对象: shape({})
- 设置默认值
代码说明
// 添加校验规则
ShowPersonList.propTypes = {
  // 定义各种规则
  personList: PropTypes.array, // 表示personList是个数组类型
  id: PropTypes.number.isRequired, // isRequired 表示id必传
  kind: PropTypes.string,
  // 定义特定结构的对象 该对象拥有sort和des两个特定属性
  hobbies: PropTypes.shape({
    sort: PropTypes.string,
    des: PropTypes.string,
  }),
};
如何设置默认值:
1.函数组件
使用defaultProps
// 函数组件
function List(props){
	return <div>{props.name}</div>
}
// 设置默认值
List.defaultProps = {
	name: 'icy'
}
// 使用时不传入name
<List />
2.类组件
方法一:跟函数组件一样使用defaultProps
方法二:使用静态属性声明
class List extends React.component {
	static defaultProps = {
		name:'icy'
	}
	render(){
		return <div>{this.props.name}</div>
	}
}
官方文档:
https://legacy.reactjs.org/docs/typechecking-with-proptypes.html#gatsby-focus-wrapper
随便看看就好,太老了都不更新了。
三. 组件生命周期 (难点掌握)
1.生命周期-概述
组件生命周期是指组件从创建到挂载到页面中运行起来,再到组件不用时卸载的过程,注意:
只有类组件才有生命周期(类组件需要实例化,函数组件不需要实例化)
周期图地址:https://projects.wojtekmaj.pl/react-lifecycle-methods-diagram/
2.生命周期-挂载阶段
执行顺序:
constructor => render => componentDidMount
代码演示:
// 类组件
class App extends React.Component {
  constructor() {
    super();
    console.log("construct执行");
  }
  // 挂载阶段最后会执行该函数
  componentDidMount() {
    console.log("componentDidMount执行");
  }
  render() {
    console.log("render执行");
    return <div>mytest</div>;
  }
}
| 钩子函数 | 触发时机 | 作用 |
|---|---|---|
| construct | 创建组件时最先执行,初始化的时候只执行一次 | 1.初始化state 2.创建Ref 3.使用bind解决this指向问题 |
| render | 每次组件渲染都会触发 | 渲染UI(注意:不能在里面调用setState()) |
| componentDidMount | 组件挂载(完成DOM渲染)后执行,初始化的时候执行一次 | 1.发送网络请求 2.DOM操作 |
3. 生命周期-更新阶段
render => componentDidUpdate
| 钩子函数 | 触发时机 | 作用 |
|---|---|---|
| render | 每次组件渲染都会触发 | 渲染UI(与挂载阶段是用一个render) |
| componentDidUpdate | 组件更新后(DOM渲染完毕) | DOM操作,可以获取到更新后的DOM内容,不要直接调用setState |
代码展示:
// 类组件
class App extends React.Component {
  constructor() {
    super();
    this.state = {
      name: "icy",
      height: 160,
    };
    console.log("construct执行");
  }
  // 挂载阶段最后会执行该函数
  componentDidMount() {
    console.log("componentDidMount执行");
  }
  // 更新阶段会执行该函数
  componentDidUpdate() {
    console.log("componentDidUpdate执行");
  }
  // 帮助icy长高的函数
  helpIcy = () => {
    this.setState({
      ...this.state,
      height: this.state.height + 1,
    });
  };
  render() {
    console.log("render执行");
    return (
      <div>
        {this.state.name}的身高:{this.state.height}
        <button onClick={this.helpIcy}>帮助{this.state.name}长高</button>
      </div>
    );
  }
}
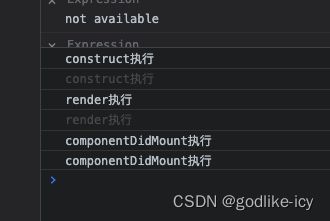
首先我们发现,在没有点击按钮前,comPonentDidUpadate是不会执行的,只会执行挂载阶段的钩子函数,如控制台所示:

当我们点击button后,执行身高+1的操作,则触发组件更新,先执行render,随后执行componentDidUpdate。如下图:

4. 生命周期-卸载阶段
| 钩子函数 | 触发时机 | 作用 |
|---|---|---|
| componentWIllUnmount | 组件卸载(从页面中消失) | 执行清理工作(比如:清理定时器等) |
通过一个状态控制组件是否渲染可以出发组件卸载阶段。
代码示例:
class MyTest extends React.Component {
  componentWillUmount() {
    console.log("componentWillUnmount执行");
  }
  render() {
    return <div>test1111</div>;
  }
}

// 类组件
class App extends React.Component {
  constructor() {
    super();
    this.state = {
      isShow: true,
    };
  }
  changeState = () => {
    this.setState({
      ...this.state,
      isShow: false,
    });
  };
  render() {
    console.log("render执行");
    return (
      <div>
        <button onClick={this.changeState}>销毁该组件</button>
        {this.state.isShow ? <MyTest /> : null}
      </div>
    );
  }
}
按下按钮,子组件被隐藏,触发子组件的componentWillUnmout:
清理定时器在这个阶段执行,如果不清理定时器,则定时器会一直执行,即使你的组件被卸载了。
代码示例:
class MyTest extends React.Component {
  timer = null;

  componentDidMount() {
    this.timer = setInterval(() => console.log("定时器运行"), 1000);
  }
  componentWillUnmount() {
    console.log("componentWillUnmount执行");
    clearInterval(this.timer);
  }
  render() {
    return <div>test1111</div>;
  }
}
注意:
如果数据是组件的状态需要去影响视图,那么定义到state中。
而如果我们需要的数据状态不和视图绑定,则定义成一个普通实例属性就可以,如上面的timer定时器。
原则:state尽量保持精简。


