【JavaWeb】博客系统(前端部分)
目录
登录界面
HTML
CSS
博客列表页
HTML
CSS
博客详情页
HTML
CSS
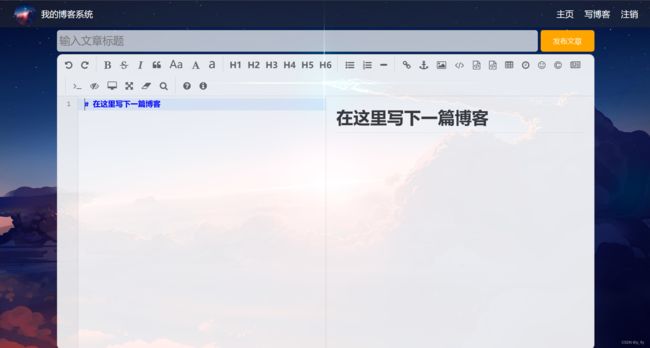
博客编辑页
HTML
CSS
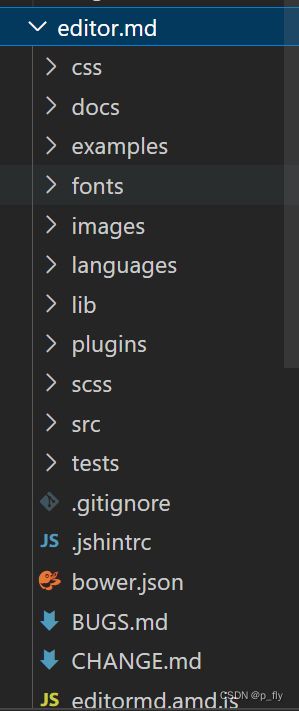
引入editor.md
登录界面
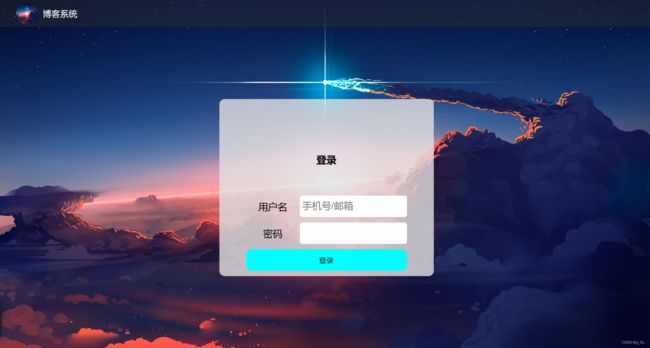
预期效果:
HTML
login.html
登录页面
CSS
整个页面通用的CSS。因为页面有些操作是相同的(比如清楚浏览器的默认样式),有的地方贯穿了整个页面(比如导航栏),对于这些地方写一个通用的CSS可以节省工作量。
common.css
    /* 先去除浏览器的公共样式 设置 border-box 避免元素盒子被内边距和边框撑大 */
* {
    margin: 0;
    padding: 0;
    box-sizing: border-box;
}

html, body {
    /*
    html 是页面最顶层元素 高度100% 是相对父元素的高度 (和父元素一样高)
    对于html标签来说,父元素是浏览器窗口 浏览器窗口多高 html就多高
    body 的父亲是html 设为100% 是 body和html一样高

    如果不设置高度,元素默认高度取决于内部的内容
    */
    height: 100%;
}

body {
    background-image: url(../image/background.png);
    background-repeat: no-repeat;
    background-size: cover;
    background-position: center center;
}

/* 实现导航栏的样式 */
.nav {
    /* 设置宽度和父元素一样高 */
    /* 块级元素默认是width:100% */
    width: 100%;
    /* 设置高度是 50px */
    height: 50px;
    background-color: rgba(50, 50, 50, 0.4);
    color: white;

    /* 导航栏里面的元素都是水平排列,弹性布局设置 */
    display: flex;
    /* 垂直方向子元素居中 */
    align-items: center;
}

.nav img {
    width: 40px;
    height: 40px;
    margin-left: 30px;
    margin-right: 10px;
    /* 圆角 */
    border-radius: 50%;
}

.nav .spacer {
    width: 70%;
}

.nav a {
    color: white;
    /* 去掉下划线 */
    text-decoration: none;
    /* 加上内边距,不要让标签过于紧凑 */
    padding: 0 10px;
}

/* 页面主题样式 */
.container {
    /* 设置主体部分宽度 1000px */
    width: 1000px;
    /* 高度能填充整个页面 */
    height: calc(100% - 50px);
    /* 水平居中 */
    margin: 0 auto;

    /* 为了方便看效果,临时加背景色,后面再去掉 */
    /* background-color: bule; */

    /* 弹性布局 */
    display: flex;
    align-items: center;
    justify-content: space-between;
}

.container-left {
    /* 尺寸写百分数,相对于父元素为基准 */
    height: 100%;
    width: 200px;
}

.container-right {
    height: 100%;
    /* 留出 5px 作为中缝 */
    width: 795px;

    background-color: rgba(225, 225, 225, 0.8);
    border-radius: 10px;

    /* 让这个元素自己带上滚动条 */
    /* 内容没有溢出,没有滚动条;溢出,自动加滚动条 */
    overflow: auto;
}

/* 左侧用户信息 */
.card {
    background-color: 225, 225, 225, 0.8;
    border-radius: 10px;
    /* 设置内边距,让内容和边框之间有点距离 */
    padding: 30px;
}

/* 用户头像 */
.card img {
    width: 140px;
    height: 140px;
    border-radius: 50%;
}

/* 用户名字 */
.card h3 {
    /* 文字水平居中 */
    text-align: center;
    /* 让文字和上下都有内边距 */
    padding: 10px;
}

/* 用户的gitee链接 */
.card a {
    text-align: center;
    display: block;
    color: aquamarine;
    text-decoration: none;
    padding: 10px;
}

.card .counter {
    /* 为了让里面的元素水平排列,使用弹性布局 */
    display: flex;
    justify-content: space-around;
    padding: 5px    ;
}
login.css
/* 登录页面的样式 */
.login-container {
    width: 100%;
    height: calc(100% - 50px);
    display: flex;
    justify-content: center;
    align-items: center;
}

.login-dialog {
    width: 400px;
    height: 330px;
    background-color: rgba(225, 225, 225, 0.8);
    border-radius: 10px;
}

.login-dialog {
    text-align: center;
    padding: 50px 0;
}

.login-dialog h3 {
    text-align: center;
    padding: 50px 0;
}

.login-dialog .row {
    height: 50px;
    display: flex;
    justify-content: center;
    align-items: center;
}

.login-dialog .row span {
    width: 100px;
    font-size: 18px;
}

#username, #password {
    width: 200px;
    height: 40px;
    border-radius: 5px;
    /* 去掉边框 */
    border: none;
    /* 放大字体 */
    font-size: 18px;
    padding-left: 5px;
}

#submit {
    width: 300px;
    height: 40px;
    color: black;
    background-color: aqua;
    border: none;
    border-radius: 10px;
}

#submit:active {
    background-color: #666;
}
效果
博客列表页
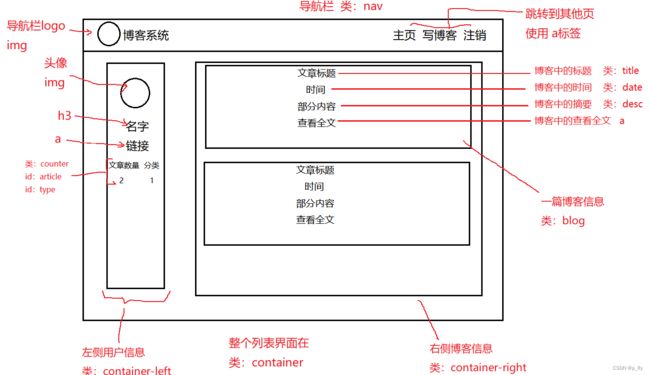
预期效果
HTML
blog_list.html
博客列表页
CSS
blog_list.css
/* 博客列表页的样式 */

/* 设置整个博客的容器元素的样式 */
.blog {
    width: 100%;
    padding: 20px;
}

.blog .title {
    text-align: center;
    font-size: 24px;
    font-weight: 700;
    padding: 10px;
}

.blog .date {
    text-align: center;
    color: aqua;
    padding: 10px;
}

.blog .desc {
    text-indent: 2em;
}

.blog a {
    /* 把a标签转成块级元素 */
    display: block;
    width: 120px;
    height: 40px;
    /* 水平居中 */
    margin-top: 20px;
    margin-left: auto;
    margin-right: auto;
    /* 设置边框 */
    border: 2px solid black;
    /* 让文字水平居中 */
    text-align: center;
    /* 让文字垂直居中 */
    line-height: 40px;
    /* 去掉下划线 */
    text-decoration: none;
    color: black;
    /* 圆角矩阵 */
    border-radius: 10px;
    /* 鼠标悬停的过渡效果 */
    transition: all 0.6s;
}

/* 鼠标到按钮的变化 */
.blog a:hover {
    color: white;
    background: #666;
}
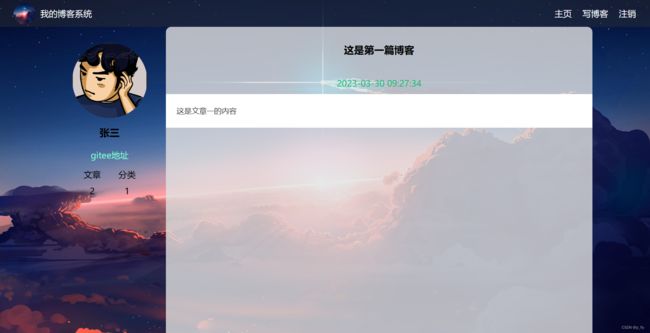
有了后端数据后就可以变成这样的页面。
博客详情页
预期效果
HTML
博客详情页
CSS
/* 博客列表页的样式 */

/* 设置整个博客的容器元素的样式 */
.blog {
    width: 100%;
    padding: 20px;
}

.blog .title {
    text-align: center;
    font-size: 24px;
    font-weight: 700;
    padding: 10px;
}

.blog .date {
    text-align: center;
    color: aqua;
    padding: 10px;
}

.blog .desc {
    text-indent: 2em;
}

.blog a {
    /* 把a标签转成块级元素 */
    display: block;
    width: 120px;
    height: 40px;
    /* 水平居中 */
    margin-top: 20px;
    margin-left: auto;
    margin-right: auto;
    /* 设置边框 */
    border: 2px solid black;
    /* 让文字水平居中 */
    text-align: center;
    /* 让文字垂直居中 */
    line-height: 40px;
    /* 去掉下划线 */
    text-decoration: none;
    color: black;
    /* 圆角矩阵 */
    border-radius: 10px;
    /* 鼠标悬停的过渡效果 */
    transition: all 0.6s;
}

/* 鼠标到按钮的变化 */
.blog a:hover {
    color: white;
    background: #666;
}
效果
博客编辑页
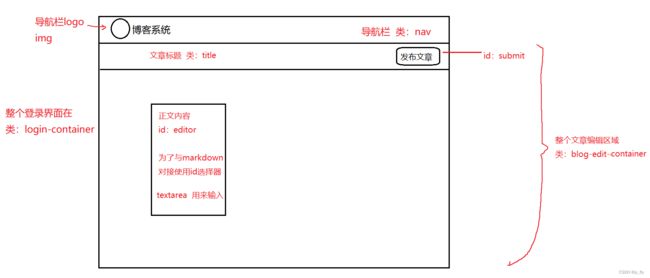
预期效果
HTML
博客详情页
CSS
/* 这个文件用来写博客编辑页的样式 */

.blog-edit-container {
    width: 1000px;
    height: calc(100% - 50px);
    margin: 0 auto;
}

.blog-edit-container .title {
    height: 50px;
    display: flex;
    align-items: center;
    justify-content: space-between;
}

#title {
    height: 40px;
    width: 895px;
    border: none;
    padding-left: 5px;
    font-size: 20px;
    border-radius: 5px;
    /* 去掉轮廓线. 鼠标选中后黑圈 */
    outline: none;
    /* 设置背景半透明 */
    background-color: rgba(255, 255, 255, 0.7);
}

/* 获取到焦点 */
#title:focus {
    background-color: rgb(255, 255, 255);
}

#submit {
    height: 40px;
    width: 100px;
    color: white;
    background-color: orange;
    border-radius: 5px;
    border: none;
}

#submit:active {
    background-color: #666;
}

#editor {
    border-radius: 10px;
    /* background-color: rgba(255, 255, 255, 0.8); */
    opacity: 90%;
}
引入editor.md
这里的markdown文章编辑器使用现成的。
GitHub上一搜就有。
效果
至此,前端页面大功告成了。
后端在下篇博客中。
有什么错误评论区指出。希望可以帮到你。


