【CentOS8.5安装jira9.40和confluence8.0】
这是我安装jira和confluence的安装记录。
##############################################
系统安装、yum源、对时、关闭防火墙,这些就不写了,大家按自己习惯就好。
#cat /etc/redhat-release
CentOS Linux release 8.5.2111
systemctl stop firewalld
# 禁止开机启动防火墙
systemctl disable firewalld
#查看是否关闭防火墙
systemctl status firewalld
关闭selinux
# 编辑文件
vi /etc/selinux/config
# 修改内容
SELINUX=disabled
文件放置到/soft,或者你喜欢的目录,文件我已经放在网盘,或者你自己去下载更新的版本。
atlassian-agent.jar
jdk-8u241-linux-x64.tar.gz
atlassian-confluence-8.0.0-x64.bin
atlassian-jira-software-9.4.0-x64.bin
mysql-8.0.31-1.el8.x86_64.rpm-bundle.tar
mysql-connector-java-8.0.28.jar
confluence-8.0.0不是正式版,是测试版,插件是否支持未知,谨慎起见可以安装7.19.4,步骤完全相同。
下载地址:百度网盘 请输入提取码百度网盘为您提供文件的网络备份、同步和分享服务。空间大、速度快、安全稳固,支持教育网加速,支持手机端。注册使用百度网盘即可享受免费存储空间https://pan.baidu.com/s/1VbIF243i9PO26ODUXgtONA 提取码:3751
##############################################
1.安装jdk
tar -zxvf jdk-8u241-linux-x64.tar.gz -C /usr/local
cd /usr/local/
ln -s jdk1.8.0_241 java
vi /etc/profile
最后增加
export JAVA_HOME=/usr/local/java
export CLASSPATH=$:CLASSPATH:$JAVA_HOME/lib/
export PATH=$PATH:$JAVA_HOME/bin
source /etc/profile
java -version
2.安装Mysql 8
实际上用yum安装更方便,我只是出于习惯,喜欢手动安装。
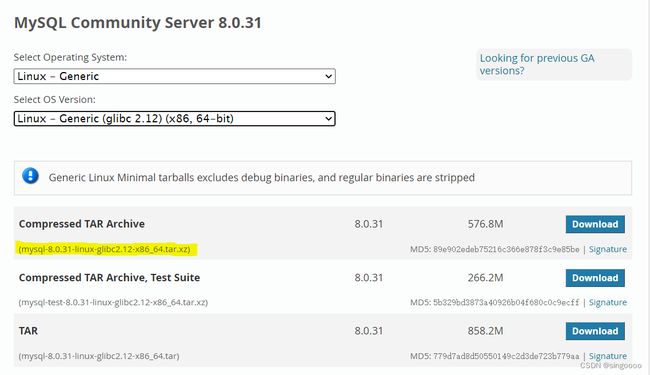
下载mysql
MySQL :: Download MySQL Community Server
创建目录
mkdir -p /usr/local/mysql
解压
xz -d mysql-8.0.31-linux-glibc2.12-x86_64.tar.xz
tar xvf mysql-8.0.31-linux-glibc2.12-x86_64.tar -C /usr/local/
cd /usr/local/
ln -s mysql-8.0.31-linux-glibc2.12-x86_64 mysql
mkdir -p /data/mysql
创建组、用户
groupadd mysql
useradd -g mysql mysql
chown -R mysql.mysql /usr/local/mysql
cp /usr/local/mysql/mysql-8.0.31/support-files/mysql.server /etc/init.d/mysqld
chmod +x /etc/init.d/mysqld
chkconfig --level 2345 mysqld on #设置开启自动启动
mkdir -pv /data/mysql/{data,binlogs,log,run,share}
ln -sv /data/mysql/run /usr/local/mysql/run
chmod go-rwx /data/mysql/
mkdir -p /data/mysql/relay_log/mysql-relay-bin
ln -sv /usr/local/mysql /bin/ /data/mysql/bin
chown -R mysql:mysql /data
echo "export PATH=$PATH:/usr/local/mysql /bin" >> /etc/profile
source /etc/profile
vi /etc/my.cnf
[mysqld]
# 设置3306端口
port=3306
# 设置mysql的安装目录
basedir=/usr/local/mysql/
# 设置mysql数据库的数据的存放目录
datadir=/data/mysql/data
tmpdir=/data/mysql/tmp
# 允许最大连接数
max_connections=1000
# 允许连接失败的次数。这是为了防止有人从该主机试图攻击数据库系统
max_connect_errors=100
# 服务端使用的字符集默认为UTF8
character-set-server=utf8mb4
# 创建新表时将使用的默认存储引擎
default-storage-engine=INNODB
# 默认使用“mysql_native_password”插件认证
#default_authentication_plugin=mysql_native_password
authentication_policy = mysql_native_password
#是否对sql语句大小写敏感,1表示不敏感
lower_case_table_names = 1
#MySQL连接闲置超过一定时间后(单位:秒)将会被强行关闭
#MySQL默认的wait_timeout 值为8个小时, interactive_timeout参数需要同时配置才能生效
interactive_timeout = 1800
wait_timeout = 1800
#Metadata Lock最大时长(秒), 一般用于控制 alter操作的最大时长sine mysql5.6
#执行 DML操作时除了增加innodb事务锁外还增加Metadata Lock,其他alter(DDL)session将阻塞
lock_wait_timeout = 3600
#内部内存临时表的最大值。
#比如大数据量的group by ,order by时可能用到临时表,
#超过了这个值将写入磁盘,系统IO压力增大
tmp_table_size = 64M
max_heap_table_size = 64M
# 是否开启binlog,0-不开启 1-开启
log_bin=1
#binlog全路径,包括名称
log_bin=/data/mysql/data/binlog
#binlog最大文件大小,默认为1G大小
max_binlog_size=2048M
#错误日志路径,如果不设置默认在data目录中
log_error=/data/mysql/log/error.log
#开启慢查询日志,默认为0不启用
slow_query_log=0
#慢查询日志路径,如果不设置默认在data目录中
slow_query_log_file=/data/mysql/log/slow-sql.log
#慢查询阀值,默认10s
long_query_time=1
#慢日志输出方式,默认FILE输出到文件,可以设置为TABLE写入到mysql.slow_log表,也可以设置FILE,TABLE
log_output=FILE
collation-server=utf8mb4_bin
max_allowed_packet=256M
#innodb_log_file_size=2GB
innodb_redo_log_capacity = 2G
transaction-isolation=READ-COMMITTED
log-bin=mysql-bin
#log-slow-queries=slowquery.log
slow_query_log = on
slow-query-log-file = /data/mysql/log/mysql-slow.log
long_query_time = 2
binlog_format=row
log_bin_trust_function_creators = 1
optimizer_switch = derived_merge=off
bind-address = 0.0.0.0
socket=/data/mysql/run/mysql.sock
pid_file=/data/mysql/run/mysql.pid
[mysql]
# 设置mysql客户端默认字符集
default-character-set=utf8mb4
socket = /data/mysql/run/mysql.sock
[client]
# 设置mysql客户端连接服务端时默认使用的端口
port=3306
default-character-set=utf8mb4
socket = /data/mysql/run/mysql.sock
[mysqldump]
socket = /data/mysql/run/mysql.sock
[mysqladmin]
socket = /data/mysql/run/mysql.sock
初始化
/usr/local/mysql/mysql-8.0.31/bin/mysqld --defaults-file=/etc/my.cnf --initialize --user=mysql --basedir=/usr/local/mysql/mysql-8.0.31 --datadir=/data/mysql/data --explicit_defaults_for_timestamp
根据输出,修改/etc/my.cnf,删除data,再重新初始化,直到没有报错为止
cat /data/mysql/log/error.log
可以看到root密码为:root@localhost: of/psr1ukYsv
执行
mysql -V 报错:
mysql: error while loading shared libraries: libtinfo.so.5: cannot open shared object file: No such file or directory
安装ncurses-compat-lib可以解决该问题
yum -y install ncurses-compat-lib
# mysql -V
mysql Ver 8.0.31 for Linux on x86_64 (MySQL Community Server - GPL)
登录mysql
mysql –uroot –p
设置root密码
ALTER USER 'root'@'localhost' IDENTIFIED BY '123456';
FLUSH PRIVILEGES;
mysql创建jira和confluence的库和用户,并赋权
mysql用root创建jira库和用户、赋权
mysql –uroot –p
建库
CREATE DATABASE jira CHARACTER SET utf8mb4 COLLATE utf8mb4_bin;
创建一个不限制ip登录的用户,%代表不限制ip登录
create user 'jira'@'%' identified by 'jira';
mysql8的赋权与5.7不同,用户不能授权的原因是mysql 数据库中user 表中的特定用户(root) 的host 的属性值为localhost.
use mysql;
update user set host='%' where user='root';
grant all privileges on jira.* to jira@'%';
FLUSH PRIVILEGES;
创建confluence库和用户、赋权
建库
CREATE DATABASE confluence CHARACTER SET utf8mb4 COLLATE utf8mb4_bin;
建用户
create user 'confluence'@'%' identified by 'confluence';
赋权
use mysql;
update user set host='%' where user='root';
grant all privileges on confluence.* to confluence @'%';
FLUSH PRIVILEGES;
3.安装jira
root用户登录
建用户
useradd -u 2000 jira
-u只是习惯,不用也无所谓
安装jira
bash atlassian-jira-software-9.4.0-x64.bin
默认安装就可以了
Unpacking JRE ...
Starting Installer ...
You do not have administrator rights to this machine and as such, some installation options will not be available. Are you sure you want to continue?
Yes [y, Enter], No [n]
y
This will install Jira Software 9.4.0 on your computer.
OK [o, Enter], Cancel [c]
o
Click Next to continue, or Cancel to exit Setup.
Choose the appropriate installation or upgrade option.
Please choose one of the following:
Express Install (use default settings) [1], Custom Install (recommended for advanced users) [2, Enter], Upgrade an existing Jira installation [3]
1
Details on where Jira Software will be installed and the settings that will be used.
Installation Directory: /home/jira/atlassian/jira
Home Directory: /home/jira/atlassian/application-data/jira
HTTP Port: 8080
RMI Port: 8005
Install as service: No
Install [i, Enter], Exit [e]
i
……
Would you like Setup to overwrite it?
Yes [y], Yes to All [ya], No [n], No to All [na]
ya
Installation of Jira Software 9.4.0 is complete
Start Jira Software 9.4.0 now?
Yes [y, Enter], No [n]
Y
Installation of Jira Software 9.4.0 is complete
Your installation of Jira Software 9.4.0 is now ready and can be accessed
via your browser.
Jira Software 9.4.0 can be accessed at http://localhost:8080
Finishing installation ...
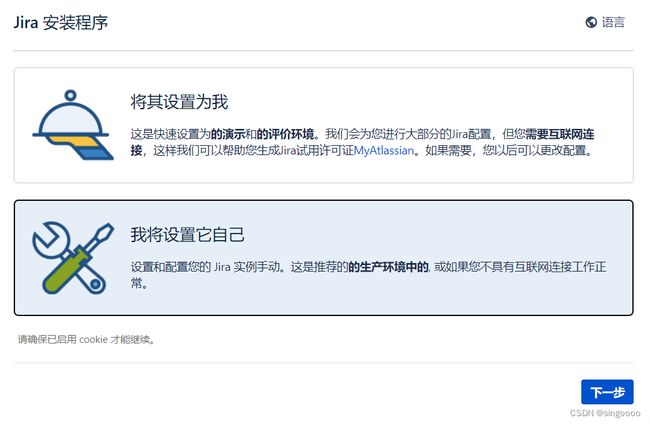
安装完毕进入设置
Netstat –an |grep LISTEN如果发现只有tcp6的监听,没有tcp的
vi /etc/sysctl.conf
增加几条,关闭ipv6
net.ipv6.conf.all.disable_ipv6 = 1
net.ipv6.conf.default.disable_ipv6 = 1
net.ipv6.conf.lo.disable_ipv6 = 1
sysctl -p /etc/sysctl.conf 执行生效
重启jira
cd /home/jira/atlassian/jira/bin
./stop-jira.sh
cp /soft/atlassian-agent.jar /home/jira/
vi setenv.sh
最后增加这一句
export JAVA_OPTS="-javaagent:/home/jira/atlassian-agent.jar ${JAVA_OPTS}"
安装驱动
cp /soft/mysql-connector-java-8.0.28.jar /home/jira/atlassian/jira/atlassian-jira/WEB-INF/lib
启动jira
./start-jira.sh
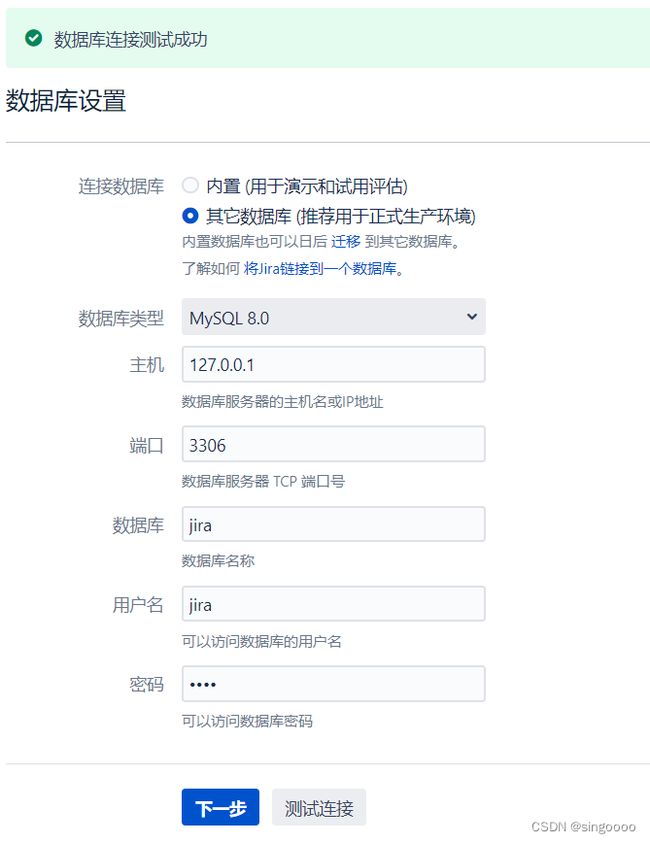
网页访问 ip:8080
因为是导入的数据库,所以没有要求提供注册码,如果是新装jira会出现要求licences key。可以用下面破解插件的办法取得,只要记住Server ID并将XXX换成jira就可以了。
在系统信息中可以查到服务器ID
服务器 ID BZCL-N77S-JIXK-1ZFS
破解
java -jar atlassian-agent.jar -p XXX -m [email protected] -n devops -o https://zhile.io -s BZCL-N77S-JIXK-1ZFS
将XXX换成对应软件的key就可以得到破解码
后面是导入数据,需要注意附件是需要手动导入的,附件目录位置默认可以在:系统--高级--附件中找到,我的系统在:
/home/jira/atlassian/application-data/jira/data/attachments
#######################################################
4.安装confluence
建用户
useradd -u 3000 confluence
$ bash atlassian-confluence-8.0.0-x64.bin
Waring: fontconfig is necessary to run with OpenJDK. Run the installer as root/sudo to install fontconfig.
Installing fontconfig and fonts
CentOS-8 - Base - mirrors.aliyun.com 2.0 MB/s | 4.6 MB 00:02
CentOS-8 - Extras - mirrors.aliyun.com 23 kB/s | 10 kB 00:00
CentOS-8 - AppStream - mirrors.aliyun.com 1.8 MB/s | 8.4 MB 00:04
Error: This command has to be run with superuser privileges (under the root user on most systems).
Error: This command has to be run with superuser privileges (under the root user on most systems).
Error: This command has to be run with superuser privileges (under the root user on most systems).
Regenerating the font cache
Fonts and fontconfig have been installed
Unpacking JRE ...
Starting Installer ...
You do not have administrator rights to this machine and as such, some installation options will not be available. Are you sure you want to continue?
Yes [y, Enter], No [n]
y
This will install Confluence 8.0.0 on your computer.
OK [o, Enter], Cancel [c]
o
Click Next to continue, or Cancel to exit Setup.
Choose the appropriate installation or upgrade option.
Please choose one of the following:
Express Install (uses default settings) [1],
Custom Install (recommended for advanced users) [2, Enter],
Upgrade an existing Confluence installation [3]
1
See where Confluence will be installed and the settings that will be used.
Installation Directory: /home/confluence/atlassian/confluence
Home Directory: /home/confluence/atlassian/application-data/confluence
HTTP Port: 8090
RMI Port: 8000
Install as service: No
Install [i, Enter], Exit [e]
i
Extracting files ...
Please wait a few moments while we configure Confluence.
Installation of Confluence 8.0.0 is complete
Start Confluence now?
Yes [y, Enter], No [n]
y
Please wait a few moments while Confluence starts up.
Launching Confluence ...
Installation of Confluence 8.0.0 is complete
Your installation of Confluence 8.0.0 is now ready and can be accessed via
your browser.
Confluence 8.0.0 can be accessed at http://localhost:8090
Finishing installation ...
安装完毕
cd /home/confluence/atlassian/confluence/bin
./stop-confluence.sh
cp /soft/atlassian-agent.jar /home/confluence
vi setenv.sh
在最后添加
export JAVA_OPTS="-javaagent:/home/confluence/atlassian-agent.jar ${JAVA_OPTS}"
配置连接文件
cp /soft/mysql-connector-java-8.0.28.jar /home/confluence/atlassian/confluence/confluence/WEB-INF/lib/
重启confluence
./start-confluence.sh
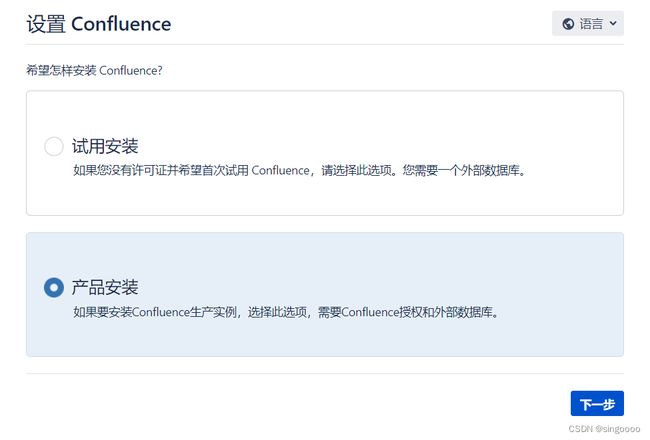
网页访问Ip:8090
破解
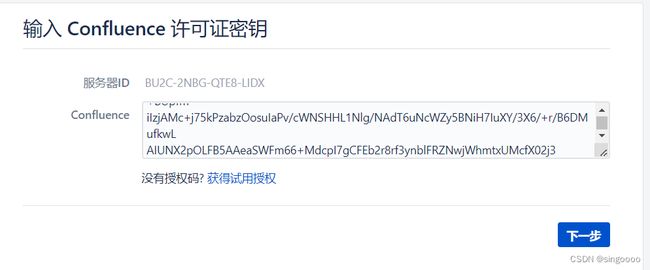
java -jar atlassian-agent.jar -m '[email protected]' -p conf -o 'http://127.0.0.1:8090/' -s 'BU2C-2NBG-QTE8-LIDX'
将取得的密钥贴到页面上。
注:网上推荐的用confluence_keygen.jar破解atlassian-extras-decoder文件的办法不管用,可能只支持到2-3.4.1,现在这个文件版本是atlassian-extras-decoder-v2-3.4.6.jar,破解之后confluence无法启动。
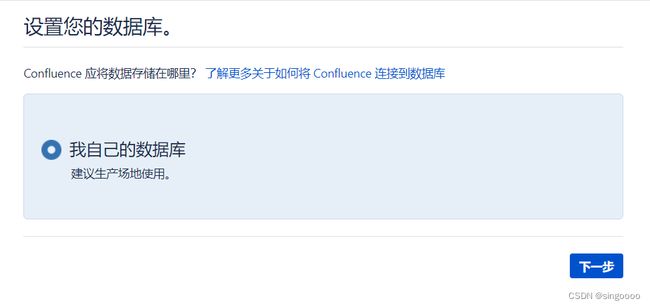
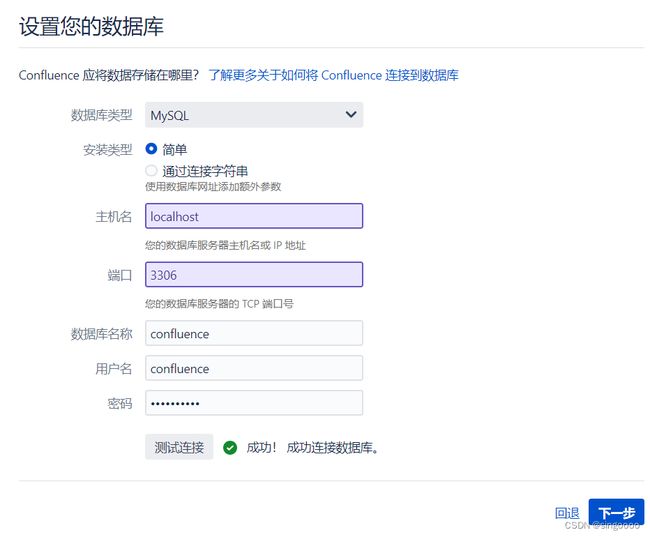
下一步,设置数据库
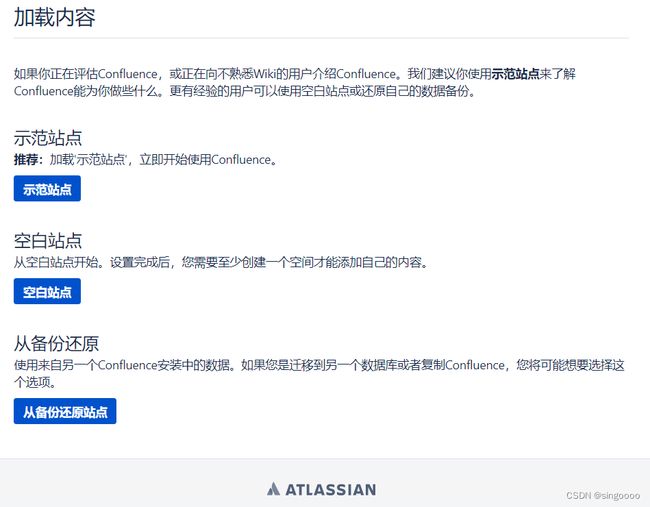
后面就是按部就班的导入数据了
注:管理员经常显示已经自动注销,分别修改conf/ context.xml
分别将
jira改成
confluence改成
重启服务
