Apache网页优化与安全优化
文章目录
- 一、Apache网页优化
-
- 1.Apache网页优化概述
- 2.优化内容
- 3.网页压缩
- 4、配置网页压缩功能
- 5、配置网页压缩
- 6、配置网页缓存功能
- 二、Apache安全优化
-
- 1. 配置Apache隐藏版本信息
- 2.ServerTokens的赋值
- 3.隐藏版本配置
- 4.防盗链
-
- 1.防盗链的作用
- 2.不设置防盗链
- 3.配置防盗链
一、Apache网页优化
1.Apache网页优化概述
在企业中,部署Apache后只能采用默认的配置参数,会引发网站很多的 问题,换言之默认配置是针对以前较低的服务器配置,以前的配置以及不适用现在的互联网时代了。
2.优化内容
- 配置网页压缩功能
- 配置网页缓存
- 工作模式的选择与参数优化
- 配置隐藏版本号
- 配置防盗链
- …
3.网页压缩
3.1 gzip介绍
- 配置Apache的网页压缩功能,是使用gzip压缩算法来对网页内容进行压缩后再传输到客户端浏览器
3.2 作用
- 降低了网络传输的字节数,加快网页加载的速度
- 节省流量,改善用户的浏览体验
- gzip与搜索引擎的抓取工具有着更好的关系
3.3 Apache实现网页压缩的功能模块包括
- mod_gzip模块
- mod deflate模块
Apache 1.x
- 没有内建网页压缩技术,但可使用第三方mod_gzip模块执行压缩
Apache 2.x
- 在开发的时候,内建了mod_deflate这个模块,取代mod_gzip
3.4 mod_gzip模块与mod_deflate模块
- 两者均使用gzip压缩算法,运作原理类似
- mod_deflate压缩速度略快,而mod_gzip的压缩比略高
- mod_gzip对服务器CPU的占用要高一些
- 高流量的服务器,使用mod_deflate可能会比mod_gzip加载速度更快
4、配置网页压缩功能
注:前面就是正常编译安装Apache步骤,但yum多安装zlib-devel(压缩功能);configure配置中多开启一个deflate模块,比之前安装的Apache环境多了个 压缩功能
1.安装Apache
tar zxf apr-1.6.2.tar.gz
tar zxf apr-util-1.6.0.tar.gz
tar jxf httpd-2.4.29.tar.bz2

mv apr-1.6.2 httpd-2.4.29/srclib/apr
mv apr-util-1.6.0 httpd-2.4.29/srclib/apr-util

yum -y install gcc gcc-c++ make pcre-devel expat-devel perl zlib-devel

cd httpd-2.4.29/

./configure --prefix=/usr/local/httpd --enable-so --enable-rewrite --enable-charset-lite --enable-cgi --enable-deflate


make  &&   make install

 cp /usr/local/httpd/bin/apachectl /etc/init.d/httpd
 vim /etc/init.d/httpd
添加:
#chkconfig:35 85 21
#description:Apache HTTP Server

chkconfig --add httpd
chkconfig --list
ln -s /usr/local/httpd/conf/httpd.conf /etc/
ln -s /usr/local/httpd/bin/* /usr/bin/
vi  /etc/httpd.conf
修改:
      ServerName  www.nb.com:80

systemctl stop firewalld
setenforce 0
[root@server1 ~]# vi /etc/httpd.conf

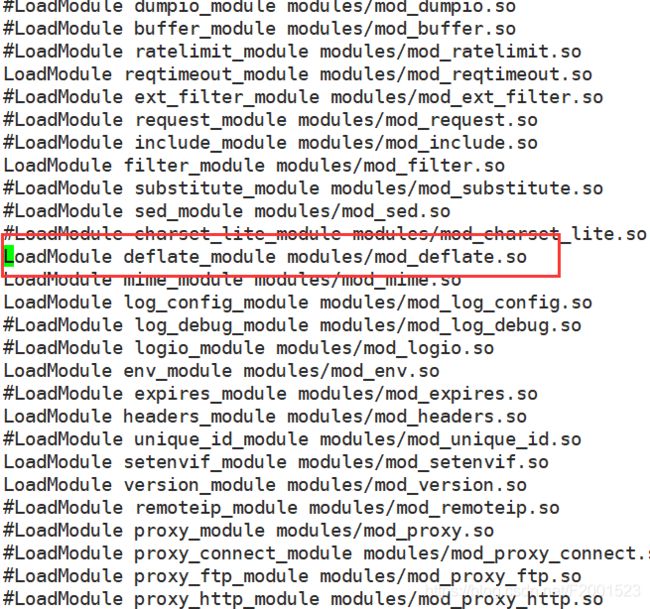
LoadModule deflate_module/mod_deflate.so     #把前面的#删掉,启用mod_deflate模块
[root@server1 ~]# systemctl start httpd
[root@server1 ~]# systemctl status httpd
[root@server1 ~]# netstat -anpt | grep httpd
[root@server1 ~]# apachectl -D DUMP_MODULES | grep deflate
5、配置网页压缩
1.设置压缩内容类型
[root@server1 ~]# vi /etc/httpd.conf
#............#在文件末尾加入以下内容
#AddOutputFilterByType DEFLATE text/html text/plain text/css text/xml text/javascript
#DeflateCompressionLevel 9      #9代表压缩等级一般用6即可
#SetOutputFilter DEFLATE    text/javascript
DeflateCompressionLevel 9
SetOutputFilter DEFLATE
[root@server1 ~]# systemctl start httpd
[root@server1 ~]# httpd -t
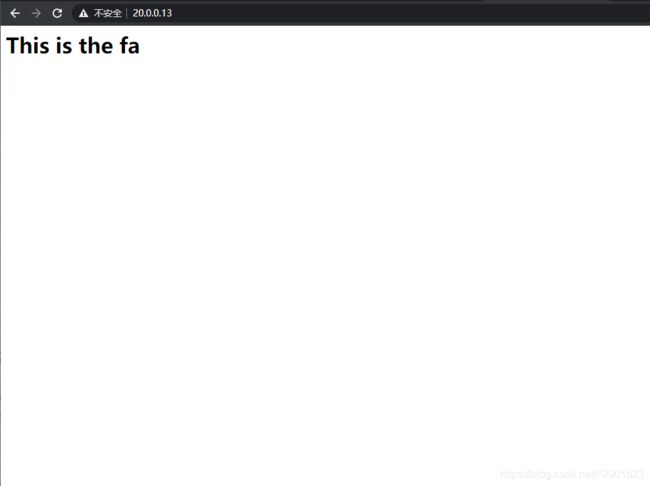
[root@server1 ~]# echo "This is the fa
" > /usr/local/httpd/htdocs/index.html
6、配置网页缓存功能
1.启用网页缓存功能步骤
- 查看是否安装mod_expire模块
- 修改配置文件,启用缓存功能
- 访问测试
解决中文乱码的问题
vi /etc/httpd.conf
添加:
    AddDefaultCharset utf-8
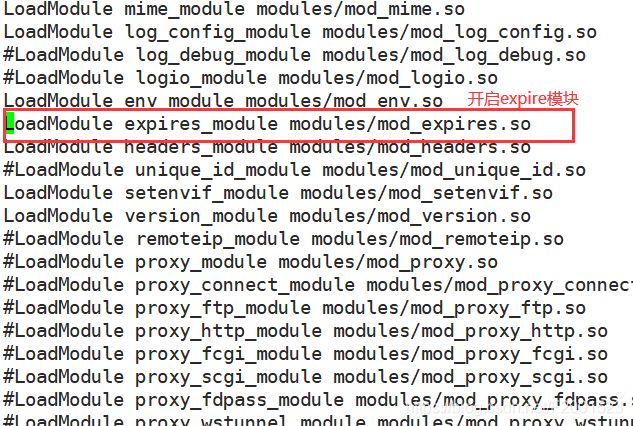
1.开启expire模块
[root@server1 ~]# vi /etc/httpd.conf
去除#号,开启expire模块
LoadModule expires_module modules/mod_expires.so
[root@server1 ~]# systemctl start httpd
[root@server1 ~]# apachectl -D DUMP_MODULES | grep expires
2.设置配置文件
[root@server1 ~]# vi /etc/httpd.conf
[root@server1 ~]# httpd -t
[root@server1 ~]# systemctl stop httpd
[root@server1 ~]# systemctl start httpd

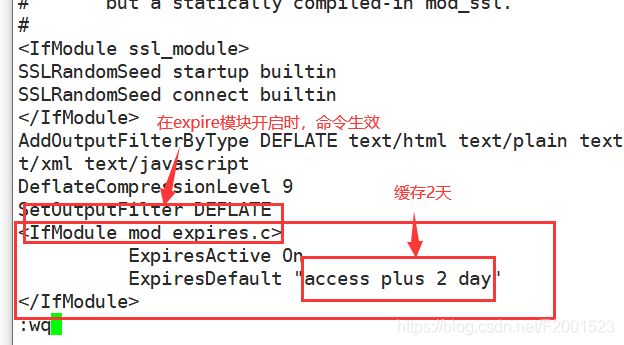
<IfModule mod_expires.c>   当expire模块开启时,命令生效
         ExpiresActive On
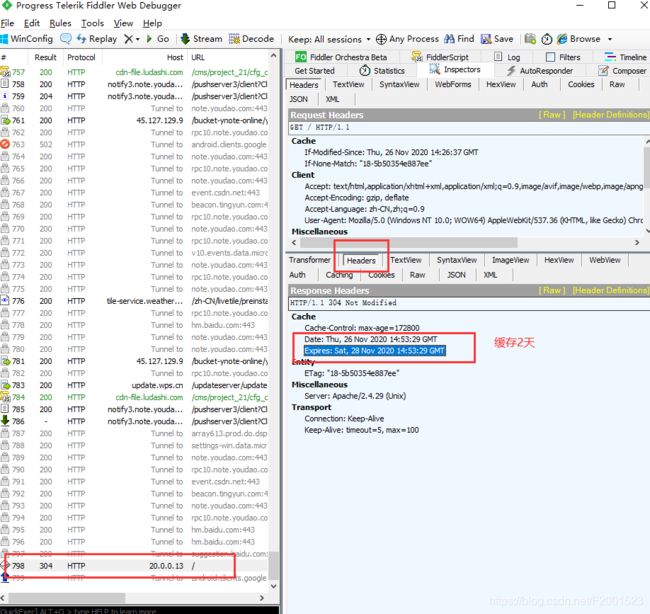
         ExpiresDefault "access plus 3 day"   缓存3天
</IfModule>
二、Apache安全优化
1. 配置Apache隐藏版本信息
- Apache的版本信息,透露了一定的漏洞信息,从而给网站带来安全隐患
- 生产环境中要配置Apache隐藏版本信息
2.ServerTokens的赋值
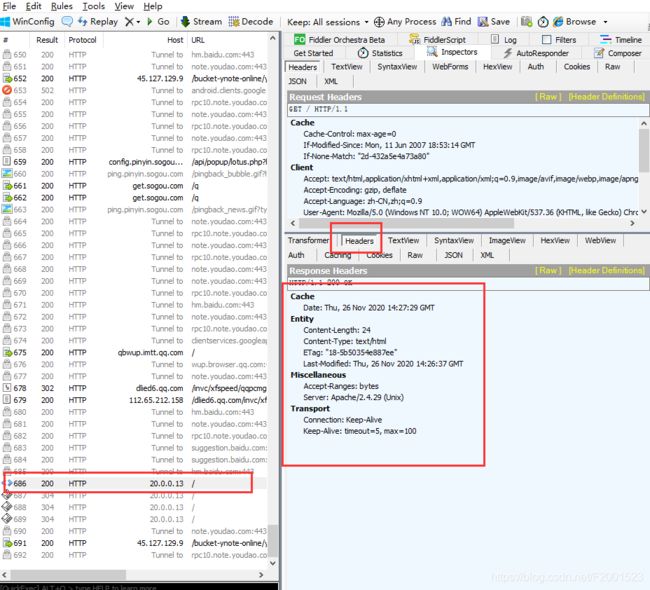
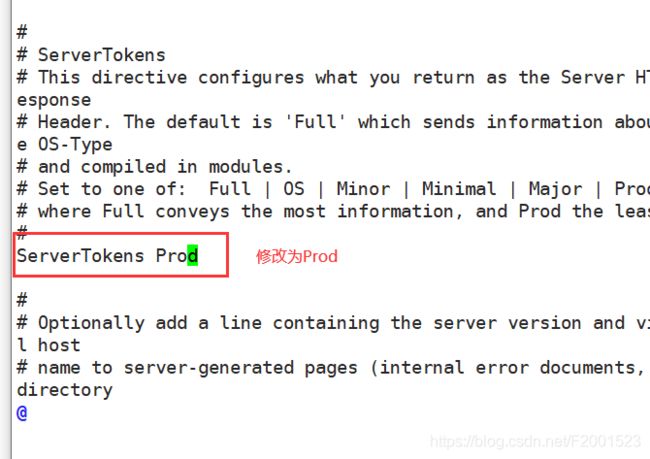
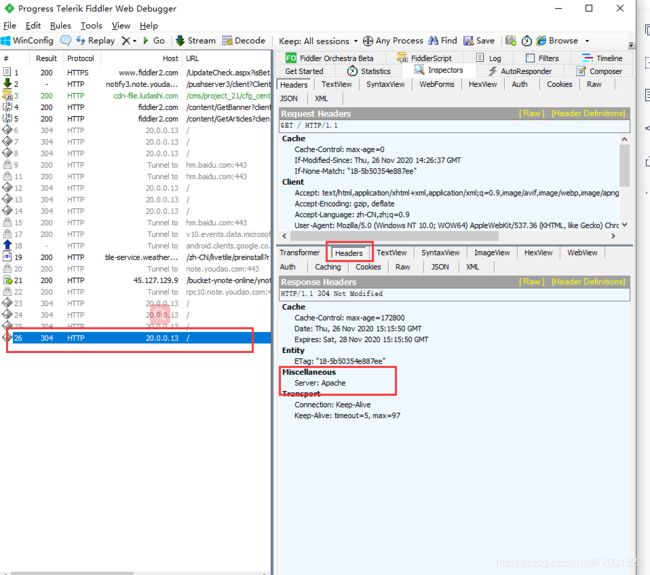
ServerTokens Prod  显示“Server:Apache” 显示版本信息
ServerTokens Major 显示“Server:Apache/2” 版本数
ServerTokens Minor 显示“Server:Apache/2.2” 版本数下发行的版本数
ServerTokens Min   显示“Server:Apache/2.2.17” 完整版本
ServerTokens OS    显示“Server:Apache/2.2.17 (Unix)”平台
ServerTokens Full  显示“Server:Apache/2.2.17 (Unix) PHP/5.3.5”其它平台所有信息(apache嵌存PHP模块)
3.隐藏版本配置
[root@server1 ~]# vi /usr/local/httpd/conf/extra/httpd-default.conf
修改为:
     ServerTokens Prod
  [root@server1 ~]# vi /etc/httpd.conf
  修改:
    Include conf/extra/httpd-default.conf        #取消注释
  [root@server1 ~]# systemctl stop httpd
  [root@server1 ~]# systemctl start httpd
4.防盗链
1.防盗链的作用
- 防盗链是防止别人的网站代码里面盗用我们自己服务器上的图片,文件,视频等相关资源
- 如果别人盗用网站的这些静态资源,明显的是会增大服务器的带宽压力
- 作为网站的维护人员,要杜绝服务器的静态资源被其它网站盗用
2.不设置防盗链
1.删除域名配置
   [root@server1 ~]# cd /usr/local/httpd/htdocs/
      [root@server1 htdocs]# ls
       index.html
      [root@server1 htdocs]# rm -rf index.html
      [root@server1 htdocs]#
2.编辑配置文件
     [root@server1 ~]# vi /etc/httpd.conf
     修改:
       LoadModule rewrite_module modules/mod_rewrite.so   #取消配置
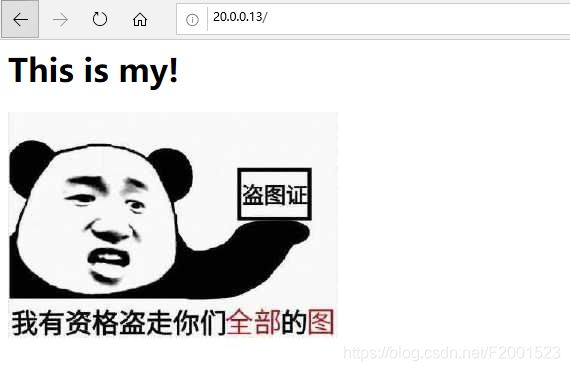
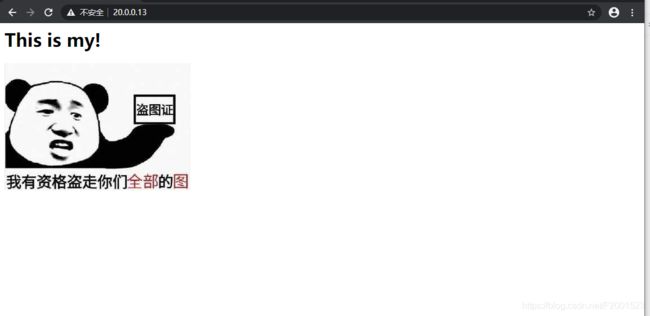
在用本机ip地址访问
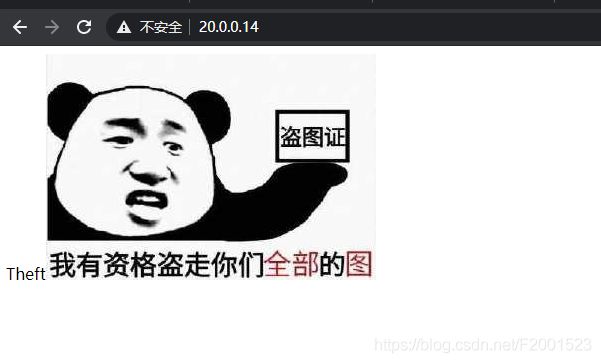
重新开一台机器(20.0.0.14)
1.安装httpd,配置域名
[root@server2 ~]# yum -y install httpd
[root@server2 ~]# vi /var/www/html/index.html
添加:
 <html><body>Theft<img src="http://20.0.0.13/a.jpg"/></body></html>
[root@server2 ~]# systemctl stop firewalld
[root@server2 ~]# setenforce 0
[root@server2 ~]# systemctl start httpd
3.配置防盗链
在主机上
1.编辑配置文件
[root@server1 ~]# vi /etc/httpd.conf
[root@server1 ~]# httpd -t
[root@server1 ~]# systemctl stop httpd
[root@server1 ~]# systemctl start httpd

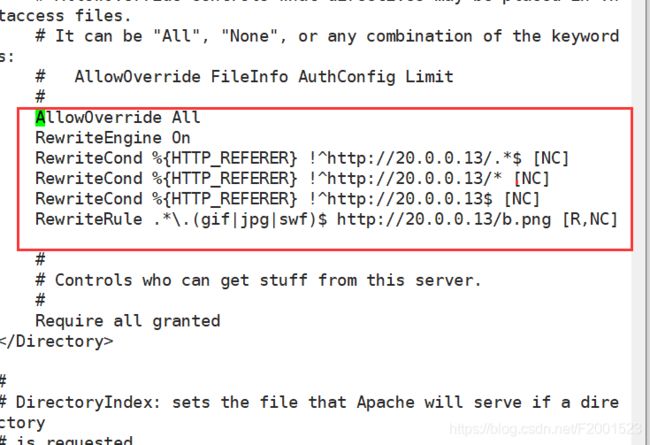
AllowOverride All
    RewriteEngine On
    RewriteCond %{HTTP_REFERER} !^http://20.0.0.13/.*$ [NC]
    RewriteCond %{HTTP_REFERER} !^http://20.0.0.13/* [NC]
    RewriteCond %{HTTP_REFERER} !^http://20.0.0.13$ [NC]
    RewriteRule .*\.(gif|jpg|swf)$ http://20.0.0.13/b.png [R,NC]

