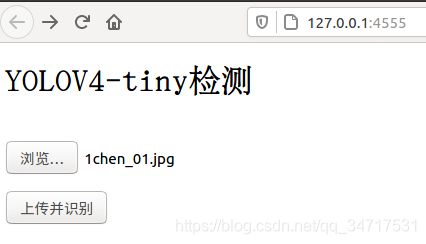
yolov4 yolov4-tiny flask部署web服务
前篇参考:https://blog.csdn.net/qq_34717531/article/details/107818606
# -*- coding: utf-8 -*-
from flask import Flask, request, jsonify
import cv2
import numpy as np
import os
import time
import json

'''
  pathIn:原始图片的路径
  pathOut:结果图片的路径
  label_path:类别标签文件的路径
  config_path:模型配置文件的路径
  weights_path:模型权重文件的路径
  confidence_thre:0-1,置信度(概率/打分)阈值,即保留概率大于这个值的边界框,默认为0.5
  nms_thre:非极大值抑制的阈值,默认为0.3
'''
def yolo_detect(im=None,
                pathIn=None,
                label_path='./cfg/coco.names',
                config_path='./cfg/yolov4-tiny.cfg',
                weights_path='./cfg/yolov4-tiny.weights',
                confidence_thre=0.5,
                nms_thre=0.3):

    #加载类别标签文件
    LABELS = open(label_path).read().strip().split("\n")
    nclass = len(LABELS)

    # 为每个类别的边界框随机匹配相应颜色
    np.random.seed(42)
    COLORS = np.random.randint(0, 255, size=(nclass, 3), dtype='uint8')
    if pathIn == None:
        img = im
    else:
        img = cv2.imread(pathIn)
    # print(pathIn)

    # 载入图片并获取其维度
    filename = pathIn.split('/')[-1]
    name = filename.split('.')[0]
    (H, W) = img.shape[:2]

    # 加载模型配置和权重文件
    net = cv2.dnn.readNetFromDarknet(config_path, weights_path)

    # 获取YOLO输出层的名字
    ln = net.getLayerNames()
    ln = [ln[i[0] - 1] for i in net.getUnconnectedOutLayers()]

    # 将图片构建成一个blob,设置图片尺寸,然后执行一次
    # YOLO前馈网络计算,最终获取边界框和相应概率
    blob = cv2.dnn.blobFromImage(img, 1 / 255.0, (416, 416), swapRB=True, crop=False)
    net.setInput(blob)
    start = time.time()
    layerOutputs = net.forward(ln)
    end = time.time()

    # 初始化边界框,置信度(概率)以及类别
    boxes = []
    confidences = []
    classIDs = []

    # 迭代每个输出层,总共三个
    for output in layerOutputs:

        # 迭代每个检测
    	for detection in output:

                # 提取类别ID和置信度
    		scores = detection[5:]
    		classID = np.argmax(scores)
    		confidence = scores[classID]

                # 只保留置信度大于某值的边界框
    		if confidence > confidence_thre:

    			# 将边界框的坐标还原至与原图片相匹配,记住YOLO返回的是
                        # 边界框的中心坐标以及边界框的宽度和高度
    			box = detection[0:4] * np.array([W, H, W, H])
    			(centerX, centerY, width, height) = box.astype("int")

    			# 计算边界框的左上角位置
    			x = int(centerX - (width / 2))
    			y = int(centerY - (height / 2))

                        # 更新边界框,置信度(概率)以及类别
    			boxes.append([x, y, int(width), int(height)])
    			confidences.append(float(confidence))
    			classIDs.append(classID)

    # 使用非极大值抑制方法抑制弱、重叠边界框
    idxs = cv2.dnn.NMSBoxes(boxes, confidences, confidence_thre, nms_thre)
    lab = []
    loc = []
    data={}
    data["filename"]=filename
    data["counts"]=len(idxs)

    # 确保至少一个边界框
    if len(idxs) > 0:
        # 迭代每个边界框
        for i in idxs.flatten():
            # 提取边界框的坐标
            (x, y) = (boxes[i][0], boxes[i][1])
            (w, h) = (boxes[i][2], boxes[i][3])

            # 绘制边界框以及在左上角添加类别标签和置信度
            color = [int(c) for c in COLORS[classIDs[i]]]
            cv2.rectangle(img, (x, y), (x + w, y + h), color, 2)
            text = '{}: {:.3f}'.format(LABELS[classIDs[i]], confidences[i])
            (text_w, text_h), baseline = cv2.getTextSize(text, cv2.FONT_HERSHEY_SIMPLEX, 0.5, 2)
            cv2.rectangle(img, (x, y-text_h-baseline), (x + text_w, y), color, -1)
            cv2.putText(img, text, (x, y-5), cv2.FONT_HERSHEY_SIMPLEX, 0.5, (0, 0, 0), 2)
            text_inf = text + ' ' + '(' + str(x) + ',' + str(y) + ')' + ' ' + '宽:' + str(w) + '高:' + str(h)
            info = {"label":LABELS[classIDs[i]],"confidences":confidences[i],"x":str(x),"y":str(y),"w":str(w),"h":str(h)}

            data["data"+str(i)]=info
            # print(filename,LABELS[classIDs[i]],confidences[i],str(x),str(y),str(w),str(h))
            loc.append([x, y, w, h])
            lab.append(text_inf)
    res = jsonify(data)
    return lab, img, loc, res

# if __name__ == '__main__':
#     pathIn = './static/images/test1.jpg'
#     im = cv2.imread('./static/images/test2.jpg')
#     lab, img, loc = yolo_detect(pathIn=pathIn)
#     print(lab)


