Spring_纯注解实现AOP技术铺垫 (5)
目录
1、传统方式实现AOP:
2、纯注解的方式实现 AOP铺垫:
2.1 AnnotationConfigApplicationContext
2.2 AnnotationConfigApplicationContext源码解读
2.1.1 AnnotatedBeanDefinitionReader
2.1.2 ClassPathBeanDefinitionScanner:
3. 把启动spring自动扫描的类实例化BeanDefinition
4、核心流程refresh()方法:
4.1 invokeBeanFactoryPostProcessors()
4.1.1 实例化BeanDefinition
4.1.2 注册AOP支持的postProcessor接口
总结:
最近几年,Spring boot 和spring cloud比较火。其实,要提到这2个框架,还是离不开Spring,因为他们还是spring的一种由配置文件逐减演化到纯注解实现的过程。归根结底,还是Spring技术的演化而已。
约定大于配置,这是Spring的基本原则。既然spring boot和spring cloud这么流行,后面我会把这两个框架源码也给分享出来。目前,只是尽量往sping boot上靠。
首先,还是有必要来了解一下基于配置的形式实现AOP注解技术的,我会简单带过。
1、传统方式实现AOP:
上面贴出的代码,就是基于配置的方式实现Spring AOP 的传统方式。
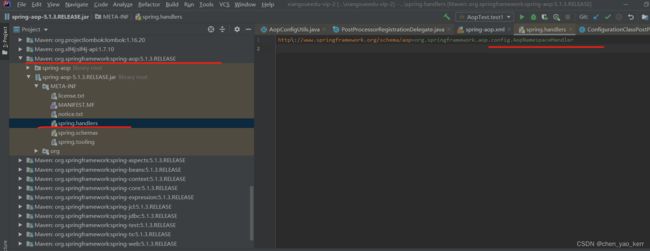
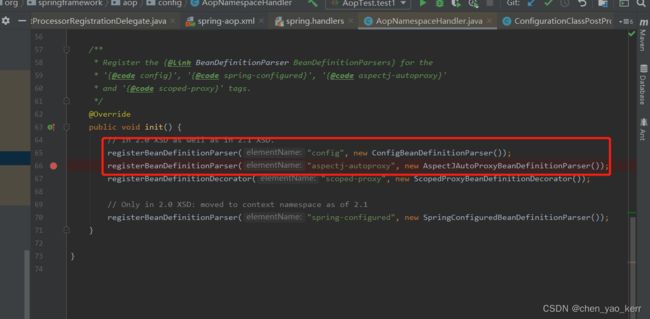
那么,我们如何去定位这2个自定义标签呢?
对于这2个自定义标签,我们之前提到过如何去找,下面看截图,代码自己去跟:
简单概括就是一句话,不同的标签都有不同的解析器。按照实际使用的标签去解析和初始化的。好了,这两种方式我就不扯远了。下面进入今天的主题。
2、纯注解的方式实现 AOP铺垫:
本章节是Spring AOP的开始,在开始AOP之前,我们先介绍AnnotationConfigApplicationContext类,它是spring boot得以实现的核心类。
因此,我们有必要先介绍一下我们先介绍AnnotationConfigApplicationContext类这个类。其实在这个类中,AOP和IOC的步骤,基本和Spring是一样的的,最大的区别就是实例化BeanDefinition的操作。
2.1 AnnotationConfigApplicationContext
它是纯注解方式实现存在的关键,也是spring boot能玩下去的重要一环。下面看一下纯注解实例spring的流程。首先,需要定义一个类,使用注解的方式启动spring的自动扫描过程,它的作用和
扫描类:
package com.xiangxue.jack.bean;

import org.springframework.context.annotation.ComponentScan;
import org.springframework.stereotype.Service;

@Service
@ComponentScan(basePackages = {"com.xiangxue"})
public class ComponentScanBean {

//    @Bean
//    public void xx() {
//        System.out.println("==");
//    }
}
启动AOP的类,和
package com.xiangxue.jack.aop;
import org.springframework.context.annotation.EnableAspectJAutoProxy;
import org.springframework.stereotype.Service;
/*
* @Service会被@ComponentScan扫描到
* */
@Service
/*
* 开启注解AOP
* 替代了:切面、切点等关于AOP实现的技术下一章分析,本章节主要关注的是纯注解的形式实现spring的功能。
2.2 AnnotationConfigApplicationContext源码解读
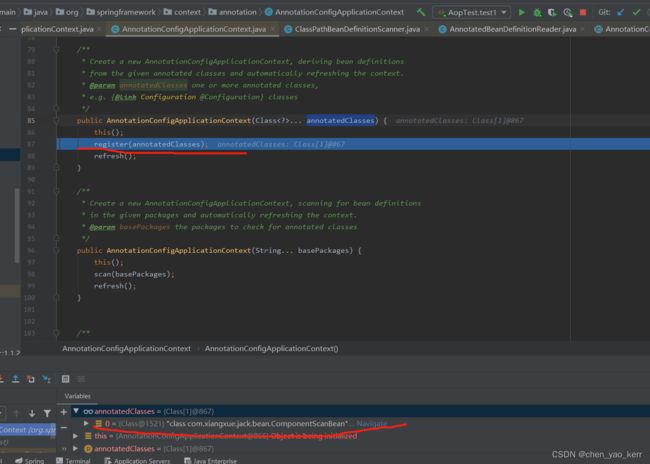
构造方法:
public AnnotationConfigApplicationContext(Class... annotatedClasses) {
		this();
		register(annotatedClasses);
		refresh();
	}
进入this()方法:
	public AnnotationConfigApplicationContext() {
		this.reader = new AnnotatedBeanDefinitionReader(this);
		this.scanner = new ClassPathBeanDefinitionScanner(this);
	}
看他的构造方法,我们知道它实例化了2个类。看名字大概就能猜测出来,一个是负责注解形式beanDefinition解析的,一个是负责BeanDefinition扫描的。
2.1.1 AnnotatedBeanDefinitionReader
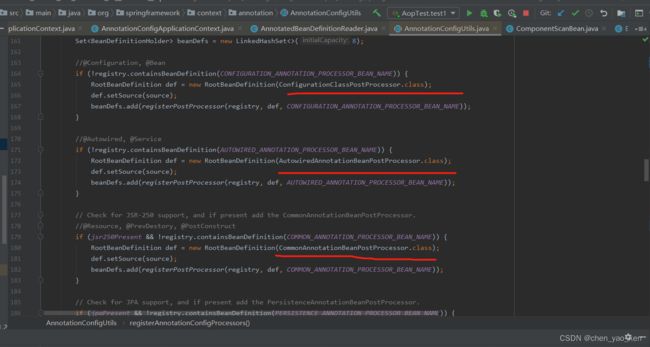
注入ConfigurationClassPostProcessor、AutowiredAnnotationBeanPostProcessor、CommonAnnotationBeanPostProcessor等Postprocessor接口,就是提前把他们生成BeanDefinition进行注册.
a. ConfigurationClassPostProcessor继承了BeanDefinitionRegistryPostProcessor,因为在invoke的时候会优先实例化,非常重要,后面会重点分析这个接口。
b. AutowiredAnnotationBeanPostProcessor、CommonAnnotationBeanPostProcessor之前说过,就是支持spring的注解功能。
看一下它的注册post processor过程:
2.1.2 ClassPathBeanDefinitionScanner:
初始化的时候会设置注解过滤器,就是扫描的时候根据什么注解进行扫描的。
默认是this.includeFilters.add(new AnnotationTypeFilter(Component.class));这个类非常重要,后面会重点分析。
3. 把启动spring自动扫描的类实例化BeanDefinition
4、核心流程refresh()方法:
我们之前分析过,通过自定义标签或者是默认标签,我们解析beanDefinition的入口方法是obtainFreshBeanFactory()。但是,使用纯注解的形式,则不再使用这个方法进行初始化BeanDefinition操作了。
我们之前分析过这个方法invokeBeanFactoryPostProcessors(beanFactory),它是在手动强制实例化BeanDefinition的时候作为甜点进行分析的。而今天,,它将作为分析方法进行分析。
4.1 invokeBeanFactoryPostProcessors()
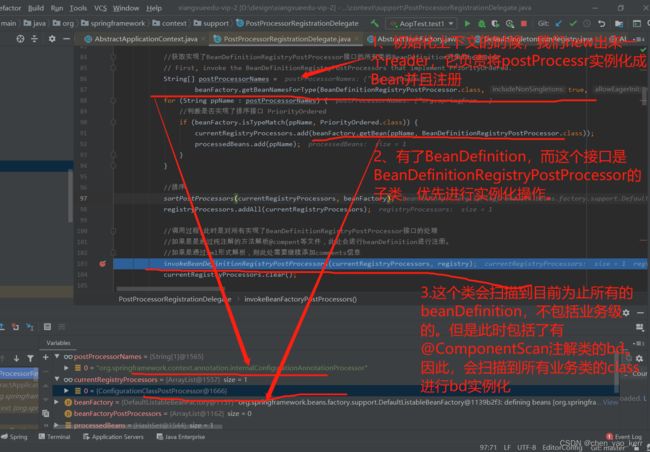
进入这个这个方法,首先获取到所有的BeanDefinition。其实,这个时候很少,就是之前注入的几个post processor和启动扫描类的 ComponentScanBean。
4.1.1 实例化BeanDefinition
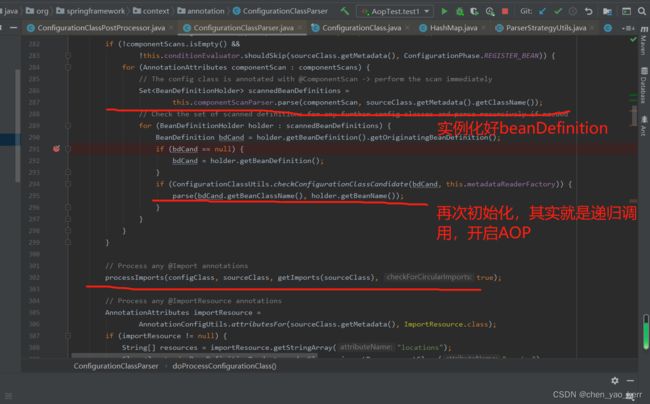
下面就是扫描所有的class,然后封装BeanDefinition了,老样子,没什么新意:
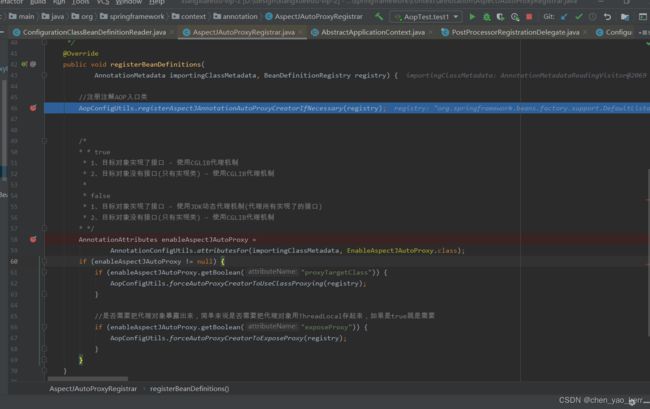
其实,再次调用parse方法,就是为了搜集@Import等标签的,这些是为了AOP做准备的。
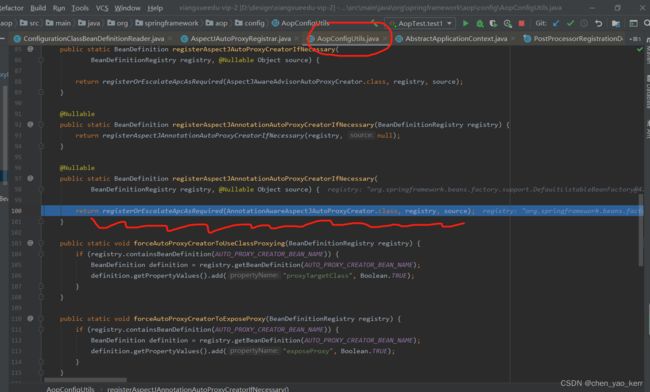
4.1.2 注册AOP支持的postProcessor接口
返回主方法:
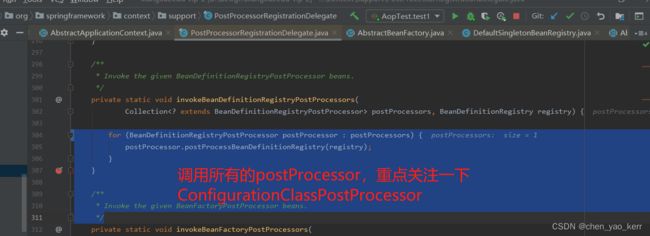
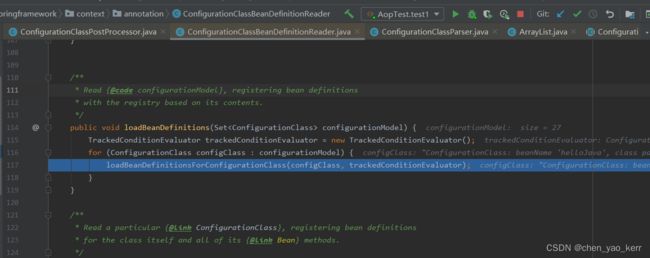
到目前为止,我们已经实例化全部的BeanDefinition了。
总结:
1、首先找到post processor接口和启动spring ioc自动扫描的类,提前进行实例化
2、根据启动spring ioc自动扫描的类,也就是带有@ComponentScan(basePackages = {""}的类,扫描到所有的BeanDefinition并进行注册。
3、实例化完以后,我们会启动对AOP注解的搜集与注册BeanDefinition。具体操作就是
a. 根据@EnableAspectJAutoProxy(proxyTargetClass = false,exposeProxy = true)找到接口
@EnableAspectJAutoProxy(proxyTargetClass = false,exposeProxy = true)
public class EnableAspectJAutoProxyBean {

}
b. 搜集这个接口的@Import注解信息并实话BeanDefinition。也就是把AspectJAutoProxyRegistrar实例化BeanDefinition。
 */
@Target(ElementType.TYPE)
@Retention(RetentionPolicy.RUNTIME)
@Documented
@Import(AspectJAutoProxyRegistrar.class)
public @interface EnableAspectJAutoProxy {
3. 最后遍历所有的实例化好的BeanDefinition,找到需要从AspectJAutoProxyRegistrar加载的beanDefinition, 也就是找到了EnableAspectJAutoProxyBean这个类。具体是首先注入支持AOP的接口AnnotationAwareAspectJAutoProxyCreator。 然后是搜集注解上方的信息,为AOP做准备。
