yolov7模型部署——代码实现(python版和c#版)
忙了两个星期,终于把c#版onnx调用整合到项目中,并和UI功能结合起来了~~~也终于腾出时间来总结一下,都快忘记踩过什么坑了T_T。
一,python版
python版比较容易,毕竟有官方的detect.py指导,据说之前官方放了个使用onnx推理的ipynb文件,但很快就删了~~~参考这篇博客。通过模型结构图查看模型输入要求尺寸为[1 3 640 640]。

onnx调用的基本思想步骤就是:
- 根据EP建立session:
providers = ['CUDAExecutionProvider', 'CPUExecutionProvider'] if cuda else ['CPUExecutionProvider'] session = ort.InferenceSession(w, providers=providers) - 调用session.run:
outputs = session.run(outname, inp)[0] - 解析并可视化结果
具体实现步骤为:
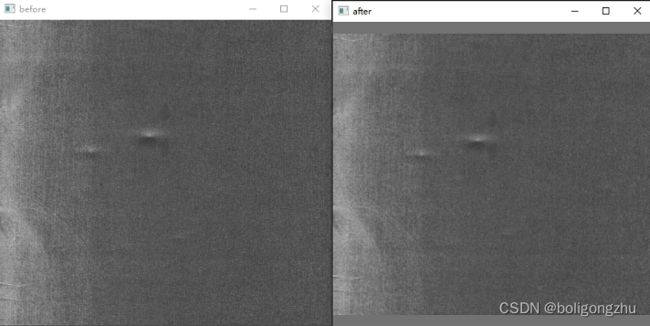
- Resize原始图片,处理成onnx模型需要的大小,这个过程是通过letterbox()函数实现的。公主的模型输入尺寸为[640, 640]。根据官方提供的思想resize的时候需要保持原始图片的长宽比。因此需要首先计算与所需尺寸相差的最小ratio(即根据原始长度长,宽较长一边计算出的ratio),将图片resize之后,剩下的空隙用灰色来填充。公主输入图片原始尺寸为[512, 555, 3],转换之后为[640, 640, 3],如下图所示:
- 将图像转为RGB格式,并增加一维以符合输入尺寸,通过以下命令实现
image = image.transpose((2, 0, 1))
image = np.expand_dims(image, 0)
- 调用onnx模型
- 可视化输出结果,输出是个二维n*7数组,n代表检测结果数,每一条结果的7个值分别代表:[batch_id, bbox左上角横坐标,bbox左上角纵坐标,bbox右下角横坐标,bbox右下角纵坐标,classIndex,置信度]。这里可视化bbox时注意,得出的bbox坐标为resize之后的图像中坐标,需要根据resize时用到的ratio和padding数来还原出原始坐标,才可以在原始图像中显示出来。
python代码:
import cv2
import time
import requests
import random
import numpy as np
import onnxruntime as ort
import onnx
import torch

# import torchvision
# from PIL import Image
# from pathlib import Path
# from collections import OrderedDict, namedtuple

cuda = torch.cuda.is_available()
w = "bestE2E.onnx"  # 模型名称

# 判断模型是否有效,这步可以省略
onnx_model = onnx.load(w)
try:
    onnx.checker.check_model(onnx_model)
except Exception:
    print("incorrect model")
    exit()
else:
    print("correct model")

# 创建session
providers = ['CUDAExecutionProvider', 'CPUExecutionProvider'] if cuda else ['CPUExecutionProvider']
session = ort.InferenceSession(w, providers=providers)


# Resize原始图像,预处理
def letterbox(im, new_shape=(640, 640), color=(114, 114, 114), auto=True, scaleup=True, stride=32):
    # Resize and pad image while meeting stride-multiple constraints
    shape = im.shape[:2]  # current shape [height, width]
    if isinstance(new_shape, int):
        new_shape = (new_shape, new_shape)

    # Scale ratio (new / old)
    r = min(new_shape[0] / shape[0], new_shape[1] / shape[1])
    if not scaleup:  # only scale down, do not scale up (for better val mAP)
        r = min(r, 1.0)

    # Compute padding
    new_unpad = int(round(shape[1] * r)), int(round(shape[0] * r))
    dw, dh = new_shape[1] - new_unpad[0], new_shape[0] - new_unpad[1]  # wh padding

    if auto:  # minimum rectangle
        dw, dh = np.mod(dw, stride), np.mod(dh, stride)  # wh padding

    dw /= 2  # divide padding into 2 sides
    dh /= 2
    print(shape[::-1])
    if shape[::-1] != new_unpad:  # resize
        im = cv2.resize(im, new_unpad, interpolation=cv2.INTER_LINEAR)
    top, bottom = int(round(dh - 0.1)), int(round(dh + 0.1))
    left, right = int(round(dw - 0.1)), int(round(dw + 0.1))
    im = cv2.copyMakeBorder(im, top, bottom, left, right, cv2.BORDER_CONSTANT, value=color)  # add border
    return im, r, (dw, dh)


# 类别名称,根据需要自己修改
names = ['bubbles']
colors = {name: [random.randint(0, 255) for _ in range(3)] for i, name in enumerate(names)}


# 读入待检测图像
img_path = r"D:/YOLOV7/img/test.bmp"
img = cv2.imread(img_path)

# BGR to RGB,并增加一维
image = img.copy()
image, ratio, dwdh = letterbox(image, auto=False)
image = image.transpose((2, 0, 1))
image = np.expand_dims(image, 0)
image = np.ascontiguousarray(image)

# 归一化
im = image.astype(np.float32)
im /= 255

outname = [i.name for i in session.get_outputs()]
inname = [i.name for i in session.get_inputs()]

# 调用模型得出结果,并记录时间
inp = {inname[0]: im}
t1 = time.time()
outputs = session.run(outname, inp)[0]
print('inference time :%.4f' % (time.time() - t1))

ori_images = [img.copy()]

# 可视化结果
for i, (batch_id, x0, y0, x1, y1, cls_id, score) in enumerate(outputs):
    image = ori_images[int(batch_id)]
    box = np.array([x0, y0, x1, y1])
    box -= np.array(dwdh * 2)
    box /= ratio
    box = box.round().astype(np.int32).tolist()
    cls_id = int(cls_id)
    score = round(float(score), 3)
    name = names[cls_id]
    color = colors[name]
    name += ' ' + str(score)
    cv2.rectangle(image, box[:2], box[2:], color, 2)
    cv2.putText(image, name, (box[0], box[1] - 2), cv2.FONT_HERSHEY_SIMPLEX, 0.75, [225, 255, 255], thickness=2)

cv2.imshow('dddd', ori_images[0])
cv2.waitKey(0)
cv2.destroyAllWindows()
结果显示:

二,C# 版
公主做的demo界面如下:

步骤与python版一模一样,公主一句一句翻译过来的。中间遇到过很多坑,但事情太多忘记一条一条记录了,有问题随时欢迎评论区讨论,完整代码如下:
private void btn_analyze_Click(object sender, EventArgs e){

            // 原始图像切割为3份,分成1024*1024
            Mat img_img = this.img_mat;
            Mat[] subImg = new Mat[3];
            int w = Width / 3;

            subImg[0] = img_img[0, 1024, startX, startX + w];
            subImg[1] = img_img[0, 1024, startX + w, startX + w * 2];
            subImg[2] = img_img[0, 1024, startX + w * 2, startX + rect.Width - edge * 2];

            // pictureBox对象“们”存为数组
            PictureBox[] picbox = new PictureBox[3] { this.pictureBox2, this.pictureBox3, this.pictureBox4 };
            for(int i = 0; i < 3; i++)
            {
                int top = 0, left = 0;
                double ratio = 0.0;
                // after resize and padding
                Mat img_copy = new Mat();
                subImg[i].CopyTo(img_copy);

                // letterbox实现Resize图像
                Mat imageRgb = letterbox(img_copy, imgSize, out top, out left, out ratio);

                // 将Mat格式图像转化为onnx模型需要的tensor张量
                Bitmap imageBmp = BitmapConverter.ToBitmap(imageRgb);
                Tensor input = FastToOnnxTensor(imageBmp);
                var inputs = new List
                {
                    NamedOnnxValue.CreateFromTensor("images", input)
                };

                // 调用onnx模型,保存结果
                IDisposableReadOnlyCollection results = session.Run(inputs);

                // 图像后处理,并可视化
                var resultsArray = results.ToArray()[0];
                Tensor tensors = resultsArray.AsTensor();
                var array = tensors.ToArray();

                Mat newMat = new Mat();
                Cv2.CvtColor(subImg[i], newMat, ColorConversionCodes.GRAY2RGB);

                if (array.Length > 0)
                {
                    for (int j = 0; j < tensors.Dimensions[0]; j++)
                    {
                        int startIndex = j * tensors.Dimensions[1];
                        Scalar color = new Scalar(127, 255, 0);  // 灰度颜色
                        int lefttop_x = (int)((array[startIndex + 1] - left) / ratio);
                        int lefttop_y = (int)((array[startIndex + 2] - top) / ratio);
                        int rightbottom_x = (int)((array[startIndex + 3] - left) / ratio);
                        int rightbottom_y = (int)((array[startIndex + 4] - top) / ratio);
                        Cv2.Rectangle(newMat, new OpenCvSharp.Point(lefttop_x, lefttop_y),
                                        new OpenCvSharp.Point(rightbottom_x, rightbottom_y),
                                        color, 2);
                        Cv2.PutText(newMat, LabelMap.Labels[(int)array[startIndex + 5]],
                                    new OpenCvSharp.Point(lefttop_x, lefttop_y - 5),
                                    HersheyFonts.HersheySimplex, 0.75, color, 2);
                    }
                }
                picbox[i].Image = BitmapConverter.ToBitmap(newMat);
            }
}


// Load表格时创建session
private void OnnxDemo_Load(object sender, EventArgs e){
            options = SessionOptions.MakeSessionOptionWithCudaProvider(0);

            session = new InferenceSession(path, options);
}


// letterbox预处理图像
private Mat letterbox(Mat subImg, int newSize, out int top, out int left, out double ratio)
        {
            int width = subImg.Cols;
            int height = subImg.Rows;

            ratio = Math.Min(((double)newSize / (double)width), ((double)newSize / (double)height));
            int[] new_unpad = { (int)(Math.Round(height * ratio)), (int)(Math.Round(width * ratio)) };
            int[] dwh = { (newSize - new_unpad[0]) / 2, (newSize - new_unpad[1]) / 2 };

            if (dwh != new_unpad)
            {
                Cv2.Resize(subImg, subImg, new OpenCvSharp.Size(new_unpad[1], new_unpad[0]));
            }

            top = (int)(Math.Round(dwh[0] - 0.1));
            int bottom = newSize - top - new_unpad[0];
            left = (int)(Math.Round(dwh[1] - 0.1));
            int right = newSize - left - new_unpad[1];

            Cv2.CopyMakeBorder(subImg, subImg, top, bottom, left, right, BorderTypes.Constant, Scalar.Gray);

            Cv2.CvtColor(subImg, subImg, ColorConversionCodes.GRAY2RGB);  //Gray to RGB

            return subImg;
}


// Bitmap格式转化为Tensor张量
public Tensor FastToOnnxTensor(Bitmap source)
        {
            var floatArray = new float[source.Width * source.Height * 3];

            var bitmap_data = source.LockBits(new Rectangle(0, 0, source.Width, source.Height), ImageLockMode.ReadOnly, System.Drawing.Imaging.PixelFormat.Format24bppRgb);
            var bitmap_bytes = new byte[Math.Abs(bitmap_data.Stride) * source.Height];

            Marshal.Copy(bitmap_data.Scan0, bitmap_bytes, 0, bitmap_bytes.Length);

            int total_pixels_count = source.Width * source.Height;


            Parallel.For(0, total_pixels_count, (p_idx, state) =>
            {

                var g_idx = p_idx + total_pixels_count;
                var b_idx = p_idx + total_pixels_count * 2;

                floatArray[p_idx] = bitmap_bytes[p_idx * 3] / 255f;//R
                floatArray[g_idx] = bitmap_bytes[p_idx * 3 + 1] / 255f;//G
                floatArray[b_idx] = bitmap_bytes[p_idx * 3 + 2] / 255f;//B

            });

            source.UnlockBits(bitmap_data);

            return new DenseTensor(new Memory(floatArray), new int[] { 1, 3, source.Height, source.Width });
        }
静态变量:
// 静态变量,用来保存类别名称

using System;
using System.Collections.Generic;
using System.Linq;
using System.Text;
using System.Threading.Tasks;

namespace OnnxDemo
{
    public static class LabelMap
    {
        static LabelMap()
        {
            Labels = new string[]
            {
                "bubble"
            };
        }
        public static string[] Labels { set; get; }
    }
}
运行结果:

Nice~Nice~Nice~~~公主对结果还是灰常满意哒!!!