高级服务框架(黑马)
![]()
一、修改order-service服务
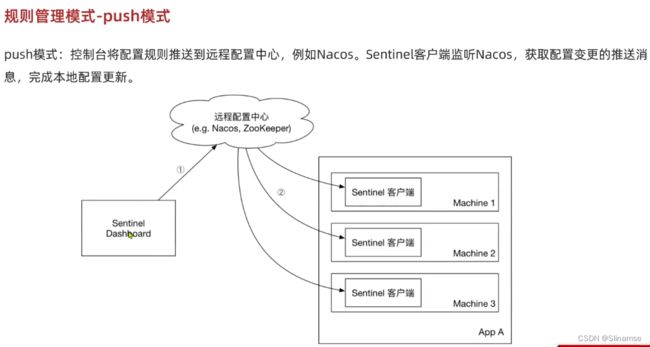
修改OrderService,让其监听Nacos中的sentinel规则配置。
具体步骤如下:
1.引入依赖
在order-service中引入sentinel监听nacos的依赖:
    com.alibaba.csp
    sentinel-datasource-nacos
2.配置nacos地址
在order-service中的application.yml文件配置nacos地址及监听的配置信息:
spring:
  cloud:
    sentinel:
      datasource:
        flow:
          nacos:
            server-addr: localhost:8848 # nacos地址
            dataId: orderservice-flow-rules
            groupId: SENTINEL_GROUP
            rule-type: flow # 还可以是:degrade、authority、param-flow
二、修改sentinel-dashboard源码
SentinelDashboard默认不支持nacos的持久化,需要修改源码。
1. 解压
解压课前资料中的sentinel源码包:
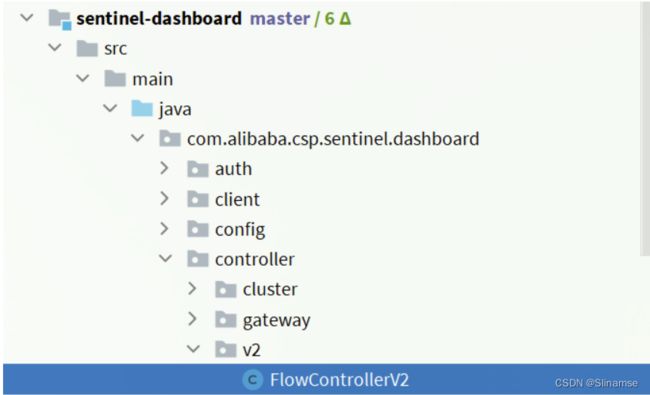
然后并用IDEA打开这个项目,结构如下:
2. 修改nacos依赖
在sentinel-dashboard源码的pom文件中,nacos的依赖默认的scope是test,只能在测试时使用,这里要去除:
将sentinel-datasource-nacos依赖的scope去掉:
    com.alibaba.csp
    sentinel-datasource-nacos
3. 添加nacos支持
在sentinel-dashboard的test包下,已经编写了对nacos的支持,我们需要将其拷贝到main下。
4. 修改nacos地址
然后,还需要修改测试代码中的NacosConfig类:
![]()
修改其中的nacos地址,让其读取application.properties中的配置:
在sentinel-dashboard的application.properties中添加nacos地址配置:
nacos.addr=localhost:88485. 配置nacos数据源
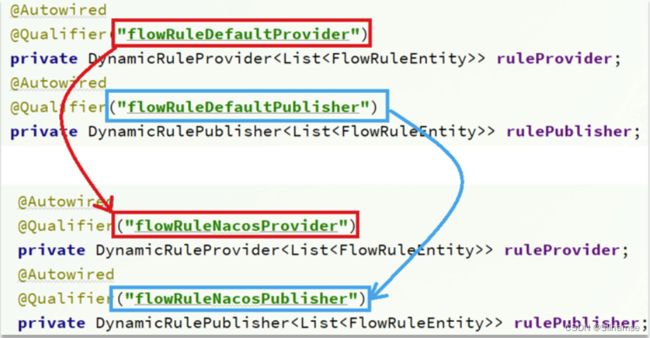
另外,还需要修改com.alibaba.csp.sentinel.dashboard.controller.v2包下的FlowControllerV2类:
6. 修改前端页面
接下来,还要修改前端页面,添加一个支持nacos的菜单。
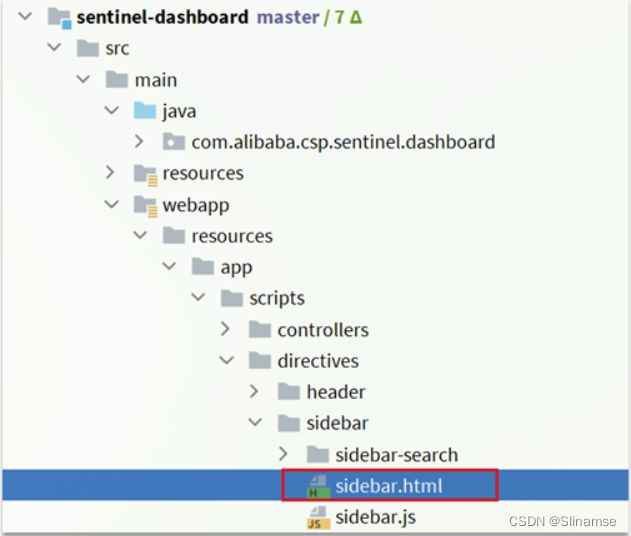
修改src/main/webapp/resources/app/scripts/directives/sidebar/目录下的sidebar.html文件:
将其中的这部分注释打开:
修改其中的文本:
7. 重新编译、打包项目
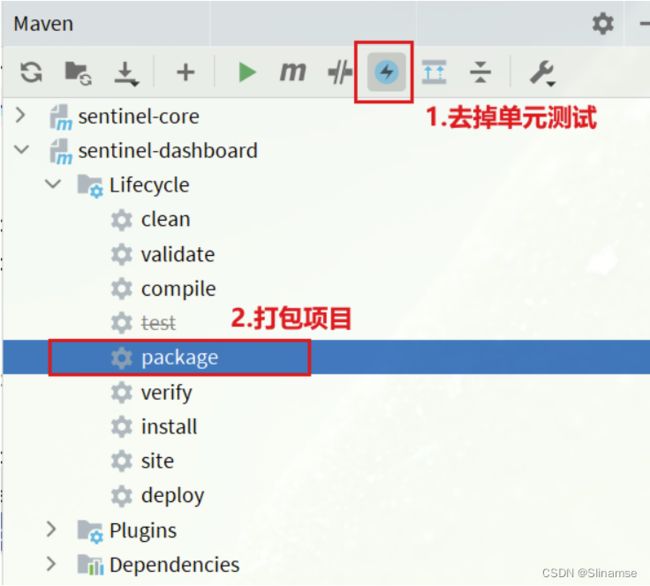
运行IDEA中的maven插件,编译和打包修改好的Sentinel-Dashboard:
8.启动
启动方式跟官方一样:
java -jar sentinel-dashboard.jar如果要修改nacos地址,需要添加参数:
java -jar -Dnacos.addr=localhost:8848 sentinel-dashboard.jarseata的部署和集成
一、部署Seata的tc-server
1.下载
首先我们要下载seata-server包,地址在http://seata.io/zh-cn/blog/download.html
当然,课前资料也准备好了:
2.解压
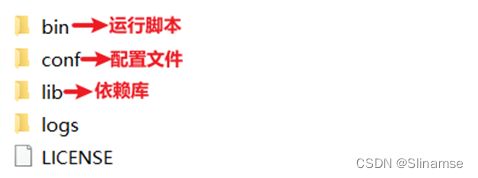
在非中文目录解压缩这个zip包,其目录结构如下:
3.修改配置
修改conf目录下的registry.conf文件:
内容如下:
registry {
  # tc服务的注册中心类,这里选择nacos,也可以是eureka、zookeeper等
  type = "nacos"

  nacos {
    # seata tc 服务注册到 nacos的服务名称,可以自定义
    application = "seata-tc-server"
    serverAddr = "127.0.0.1:8848"
    group = "DEFAULT_GROUP"
    namespace = ""
    cluster = "SH"
    username = "nacos"
    password = "nacos"
  }
}

config {
  # 读取tc服务端的配置文件的方式,这里是从nacos配置中心读取,这样如果tc是集群,可以共享配置
  type = "nacos"
  # 配置nacos地址等信息
  nacos {
    serverAddr = "127.0.0.1:8848"
    namespace = ""
    group = "SEATA_GROUP"
    username = "nacos"
    password = "nacos"
    dataId = "seataServer.properties"
  }
}
4.在nacos添加配置
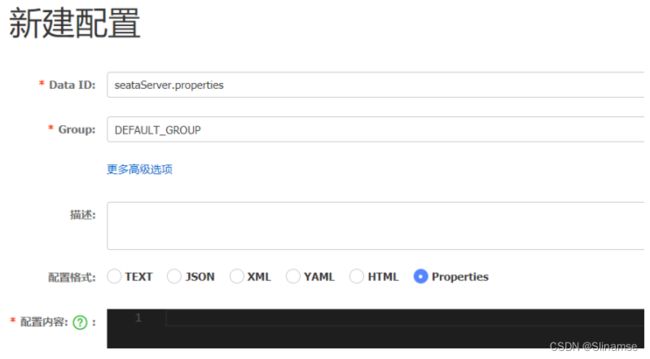
特别注意,为了让tc服务的集群可以共享配置,我们选择了nacos作为统一配置中心。因此服务端配置文件seataServer.properties文件需要在nacos中配好。
格式如下:
配置内容如下:
# 数据存储方式,db代表数据库
store.mode=db
store.db.datasource=druid
store.db.dbType=mysql
store.db.driverClassName=com.mysql.jdbc.Driver
store.db.url=jdbc:mysql://127.0.0.1:3306/seata?useUnicode=true&rewriteBatchedStatements=true
store.db.user=root
store.db.password=123
store.db.minConn=5
store.db.maxConn=30
store.db.globalTable=global_table
store.db.branchTable=branch_table
store.db.queryLimit=100
store.db.lockTable=lock_table
store.db.maxWait=5000
# 事务、日志等配置
server.recovery.committingRetryPeriod=1000
server.recovery.asynCommittingRetryPeriod=1000
server.recovery.rollbackingRetryPeriod=1000
server.recovery.timeoutRetryPeriod=1000
server.maxCommitRetryTimeout=-1
server.maxRollbackRetryTimeout=-1
server.rollbackRetryTimeoutUnlockEnable=false
server.undo.logSaveDays=7
server.undo.logDeletePeriod=86400000

# 客户端与服务端传输方式
transport.serialization=seata
transport.compressor=none
# 关闭metrics功能,提高性能
metrics.enabled=false
metrics.registryType=compact
metrics.exporterList=prometheus
metrics.exporterPrometheusPort=9898
其中的数据库地址、用户名、密码都需要修改成你自己的数据库信息。
5.创建数据库表
特别注意:tc服务在管理分布式事务时,需要记录事务相关数据到数据库中,你需要提前创建好这些表。
新建一个名为seata的数据库,运行课前资料提供的sql文件:
![]()
这些表主要记录全局事务、分支事务、全局锁信息:
SET NAMES utf8mb4;
SET FOREIGN_KEY_CHECKS = 0;

-- ----------------------------
-- 分支事务表
-- ----------------------------
DROP TABLE IF EXISTS `branch_table`;
CREATE TABLE `branch_table`  (
  `branch_id` bigint(20) NOT NULL,
  `xid` varchar(128) CHARACTER SET utf8 COLLATE utf8_general_ci NOT NULL,
  `transaction_id` bigint(20) NULL DEFAULT NULL,
  `resource_group_id` varchar(32) CHARACTER SET utf8 COLLATE utf8_general_ci NULL DEFAULT NULL,
  `resource_id` varchar(256) CHARACTER SET utf8 COLLATE utf8_general_ci NULL DEFAULT NULL,
  `branch_type` varchar(8) CHARACTER SET utf8 COLLATE utf8_general_ci NULL DEFAULT NULL,
  `status` tinyint(4) NULL DEFAULT NULL,
  `client_id` varchar(64) CHARACTER SET utf8 COLLATE utf8_general_ci NULL DEFAULT NULL,
  `application_data` varchar(2000) CHARACTER SET utf8 COLLATE utf8_general_ci NULL DEFAULT NULL,
  `gmt_create` datetime(6) NULL DEFAULT NULL,
  `gmt_modified` datetime(6) NULL DEFAULT NULL,
  PRIMARY KEY (`branch_id`) USING BTREE,
  INDEX `idx_xid`(`xid`) USING BTREE
) ENGINE = InnoDB CHARACTER SET = utf8 COLLATE = utf8_general_ci ROW_FORMAT = Compact;

-- ----------------------------
-- 全局事务表
-- ----------------------------
DROP TABLE IF EXISTS `global_table`;
CREATE TABLE `global_table`  (
  `xid` varchar(128) CHARACTER SET utf8 COLLATE utf8_general_ci NOT NULL,
  `transaction_id` bigint(20) NULL DEFAULT NULL,
  `status` tinyint(4) NOT NULL,
  `application_id` varchar(32) CHARACTER SET utf8 COLLATE utf8_general_ci NULL DEFAULT NULL,
  `transaction_service_group` varchar(32) CHARACTER SET utf8 COLLATE utf8_general_ci NULL DEFAULT NULL,
  `transaction_name` varchar(128) CHARACTER SET utf8 COLLATE utf8_general_ci NULL DEFAULT NULL,
  `timeout` int(11) NULL DEFAULT NULL,
  `begin_time` bigint(20) NULL DEFAULT NULL,
  `application_data` varchar(2000) CHARACTER SET utf8 COLLATE utf8_general_ci NULL DEFAULT NULL,
  `gmt_create` datetime NULL DEFAULT NULL,
  `gmt_modified` datetime NULL DEFAULT NULL,
  PRIMARY KEY (`xid`) USING BTREE,
  INDEX `idx_gmt_modified_status`(`gmt_modified`, `status`) USING BTREE,
  INDEX `idx_transaction_id`(`transaction_id`) USING BTREE
) ENGINE = InnoDB CHARACTER SET = utf8 COLLATE = utf8_general_ci ROW_FORMAT = Compact;

SET FOREIGN_KEY_CHECKS = 1;
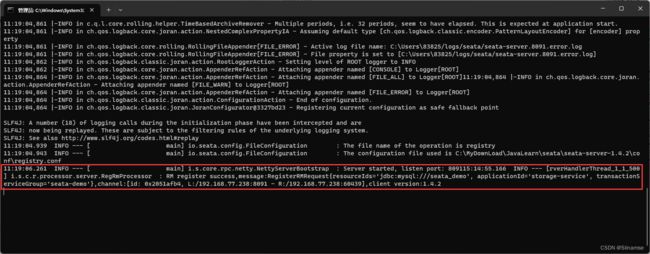
6.启动TC服务
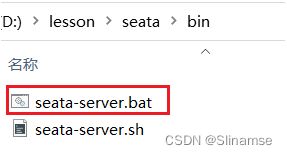
进入bin目录,运行其中的seata-server.bat即可:
启动成功后,seata-server应该已经注册到nacos注册中心了。
打开浏览器,访问nacos地址:http://localhost:8848,然后进入服务列表页面,可以看到seata-tc-server的信息:
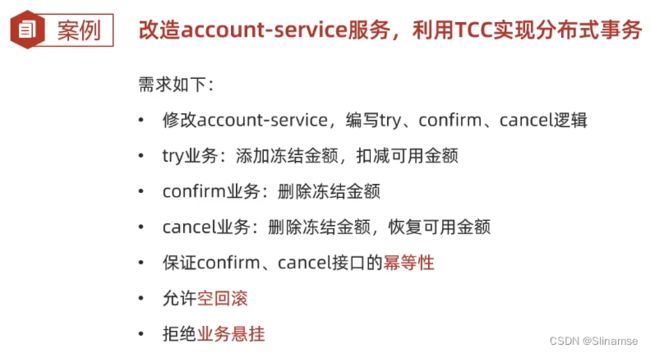
@Service
public class AccountTCCServiceImpl implements AccountTCCService {

    @Autowired
    private AccountMapper accountMapper;

    @Autowired
    private AccountFreezeMapper freezeMapper;

    @Override
    @Transactional
    public void prepare(String userId, int money) {
        //0.获取事务id
        String xid = RootContext.getXID();
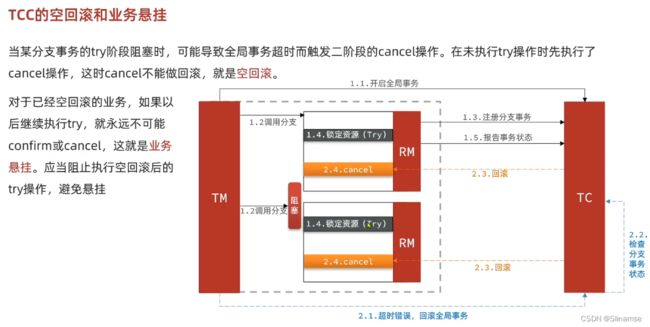
        //事务悬挂,判断freeze中是否有冻结记录,如果有一定是CANCEL执行过,要拒绝业务
        AccountFreeze oldFreeze = freezeMapper.selectById(xid);
        if(oldFreeze != null){
            //CANCEL执行过,拒绝业务
            return;
        }
        //1.扣减可用余额
        accountMapper.deduct(userId,money);
        //2.记录冻结金额,事务状态
        AccountFreeze freeze = new AccountFreeze();
        freeze.setUserId(userId);
        freeze.setFreezeMoney(money);
        freeze.setState(AccountFreeze.State.TRY);
        freeze.setXid(xid);
        freezeMapper.insert(freeze);
    }

    @Override
    public boolean confirm(BusinessActionContext context) {
        //1.获取事务id
        String xid = context.getXid();
        //2.根据id删除冻结记录
        int count = freezeMapper.deleteById(xid);
        return count == 1;
    }

    @Override
    public boolean cancel(BusinessActionContext context) {
        //0.查询冻结记录
        String xid = context.getXid();
        String userId = (String) context.getActionContext("userId");
        Integer money = (Integer) context.getActionContext("money");
        AccountFreeze freeze = freezeMapper.selectById(xid);
        //1.空回滚的判断,判断freeze是否为null,为null证明try没执行,需要空回滚
        if(freeze == null){
            //证明try没执行,需要空回滚
            freeze.setXid(xid);
            freeze.setUserId(userId);
            freeze.setFreezeMoney(money);
            freeze.setState(AccountFreeze.State.CANCEL);
            freezeMapper.insert(freeze);
            return true;
        }
        //2.幂等判断
        if(freeze.getState() == AccountFreeze.State.CANCEL){
            //已经处理过一次CANCEL了,无需重复处理
            return true;
        }
        //1.恢复可用余额
        accountMapper.refund(freeze.getUserId(), freeze.getFreezeMoney());
        //2.将冻结金额清零,状态改为CANCEL
        freeze.setState(AccountFreeze.State.CANCEL);
        freeze.setFreezeMoney(0);
        int count = freezeMapper.updateById(freeze);
        return count == 1;
    }
}
TC服务的高可用和异地容灾
1.模拟异地容灾的TC集群
计划启动两台seata的tc服务节点:
| 节点名称 | ip地址 | 端口号 | 集群名称 |
|---|---|---|---|
| seata | 127.0.0.1 | 8091 | SH |
| seata2 | 127.0.0.1 | 8092 | HZ |
之前我们已经启动了一台seata服务,端口是8091,集群名为SH。
现在,将seata目录复制一份,起名为seata2
修改seata2/conf/registry.conf内容如下:
registry {
  # tc服务的注册中心类,这里选择nacos,也可以是eureka、zookeeper等
  type = "nacos"

  nacos {
    # seata tc 服务注册到 nacos的服务名称,可以自定义
    application = "seata-tc-server"
    serverAddr = "127.0.0.1:8848"
    group = "DEFAULT_GROUP"
    namespace = ""
    cluster = "HZ"
    username = "nacos"
    password = "nacos"
  }
}

config {
  # 读取tc服务端的配置文件的方式,这里是从nacos配置中心读取,这样如果tc是集群,可以共享配置
  type = "nacos"
  # 配置nacos地址等信息
  nacos {
    serverAddr = "127.0.0.1:8848"
    namespace = ""
    group = "SEATA_GROUP"
    username = "nacos"
    password = "nacos"
    dataId = "seataServer.properties"
  }
}
进入seata2/bin目录,然后运行命令:
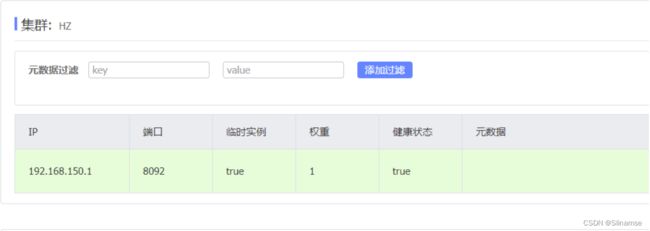
seata-server.bat -p 8092打开nacos控制台,查看服务列表:
点进详情查看:
将事务组映射配置到nacos
接下来,我们需要将tx-service-group与cluster的映射关系都配置到nacos配置中心。
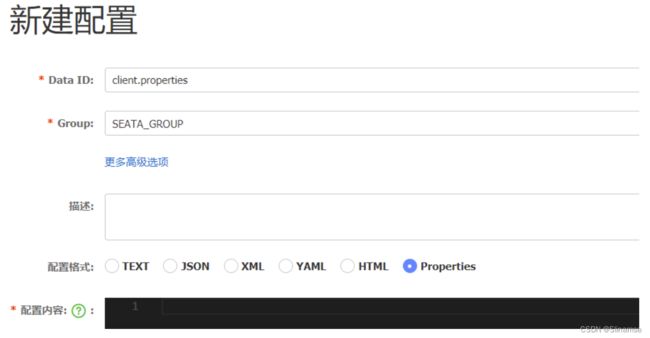
新建一个配置:
配置的内容如下:
# 事务组映射关系
service.vgroupMapping.seata-demo=SH

service.enableDegrade=false
service.disableGlobalTransaction=false
# 与TC服务的通信配置
transport.type=TCP
transport.server=NIO
transport.heartbeat=true
transport.enableClientBatchSendRequest=false
transport.threadFactory.bossThreadPrefix=NettyBoss
transport.threadFactory.workerThreadPrefix=NettyServerNIOWorker
transport.threadFactory.serverExecutorThreadPrefix=NettyServerBizHandler
transport.threadFactory.shareBossWorker=false
transport.threadFactory.clientSelectorThreadPrefix=NettyClientSelector
transport.threadFactory.clientSelectorThreadSize=1
transport.threadFactory.clientWorkerThreadPrefix=NettyClientWorkerThread
transport.threadFactory.bossThreadSize=1
transport.threadFactory.workerThreadSize=default
transport.shutdown.wait=3
# RM配置
client.rm.asyncCommitBufferLimit=10000
client.rm.lock.retryInterval=10
client.rm.lock.retryTimes=30
client.rm.lock.retryPolicyBranchRollbackOnConflict=true
client.rm.reportRetryCount=5
client.rm.tableMetaCheckEnable=false
client.rm.tableMetaCheckerInterval=60000
client.rm.sqlParserType=druid
client.rm.reportSuccessEnable=false
client.rm.sagaBranchRegisterEnable=false
# TM配置
client.tm.commitRetryCount=5
client.tm.rollbackRetryCount=5
client.tm.defaultGlobalTransactionTimeout=60000
client.tm.degradeCheck=false
client.tm.degradeCheckAllowTimes=10
client.tm.degradeCheckPeriod=2000

# undo日志配置
client.undo.dataValidation=true
client.undo.logSerialization=jackson
client.undo.onlyCareUpdateColumns=true
client.undo.logTable=undo_log
client.undo.compress.enable=true
client.undo.compress.type=zip
client.undo.compress.threshold=64k
client.log.exceptionRate=100
微服务读取nacos配置
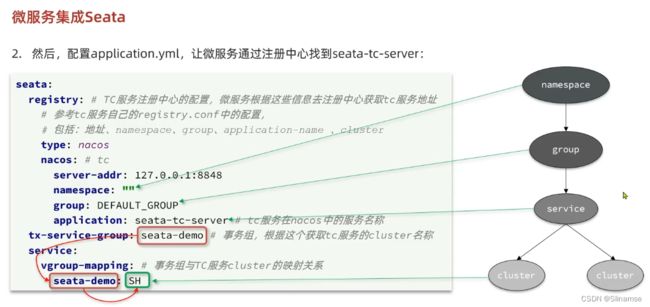
接下来,需要修改每一个微服务的application.yml文件,让微服务读取nacos中的client.properties文件:
seata:
  config:
    type: nacos
    nacos:
      server-addr: 127.0.0.1:8848
      username: nacos
      password: nacos
      group: SEATA_GROUP
      data-id: client.properties
重启微服务,现在微服务到底是连接tc的SH集群,还是tc的HZ集群,都统一由nacos的client.properties来决定了。
共包含三个节点,一个主节点,两个从节点。
这里我们会在同一台虚拟机中开启3个redis实例,模拟主从集群,信息如下:
| IP | PORT | 角色 |
|---|---|---|
| 192.168.150.101 | 7001 | master |
| 192.168.150.101 | 7002 | slave |
| 192.168.150.101 | 7003 | slave |
准备实例和配置
要在同一台虚拟机开启3个实例,必须准备三份不同的配置文件和目录,配置文件所在目录也就是工作目录。
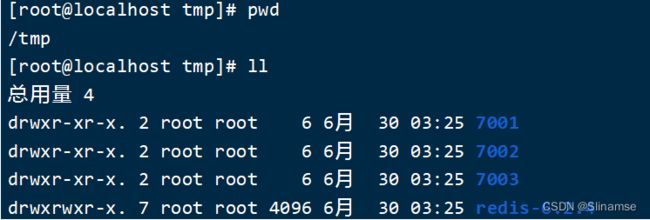
1)创建目录
我们创建三个文件夹,名字分别叫7001、7002、7003:
# 进入/tmp目录
cd /tmp
# 创建目录
mkdir 7001 7002 7003
如图:
2)恢复原始配置
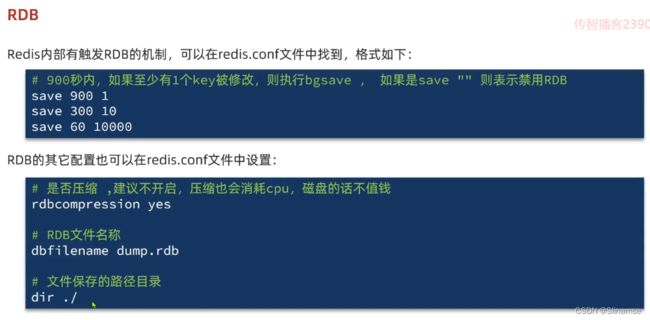
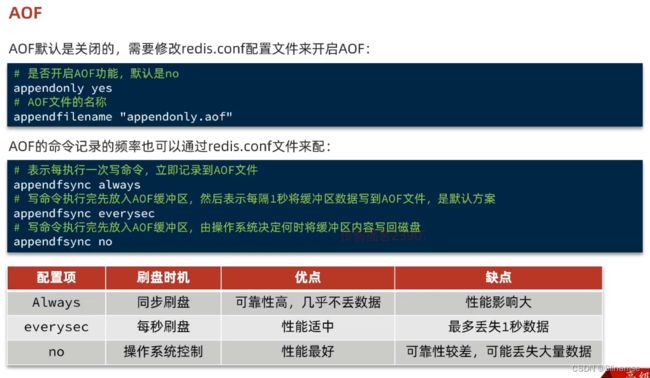
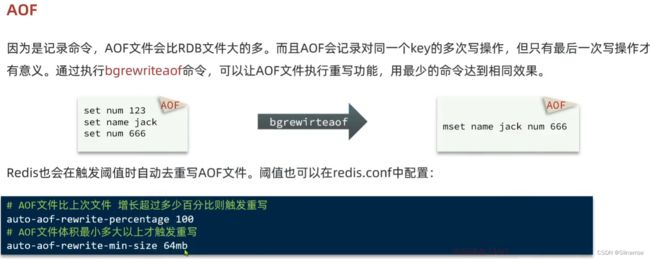
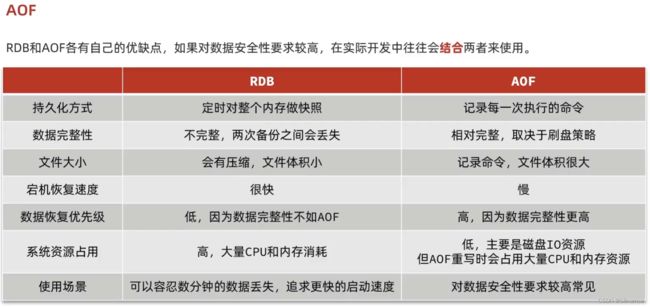
修改redis-6.2.4/redis.conf文件,将其中的持久化模式改为默认的RDB模式,AOF保持关闭状态。
# 开启RDB
# save ""
save 3600 1
save 300 100
save 60 10000

# 关闭AOF
appendonly no
3)拷贝配置文件到每个实例目录
然后将redis-6.2.4/redis.conf文件拷贝到三个目录中(在/tmp目录执行下列命令):
# 方式一:逐个拷贝
cp redis-6.2.4/redis.conf 7001
cp redis-6.2.4/redis.conf 7002
cp redis-6.2.4/redis.conf 7003
# 方式二:管道组合命令,一键拷贝
echo 7001 7002 7003 | xargs -t -n 1 cp redis-6.2.4/redis.conf
4)修改每个实例的端口、工作目录
修改每个文件夹内的配置文件,将端口分别修改为7001、7002、7003,将rdb文件保存位置都修改为自己所在目录(在/tmp目录执行下列命令):
sed -i -e 's/6379/7001/g' -e 's/dir .\//dir \/tmp\/7001\//g' 7001/redis.conf
sed -i -e 's/6379/7002/g' -e 's/dir .\//dir \/tmp\/7002\//g' 7002/redis.conf
sed -i -e 's/6379/7003/g' -e 's/dir .\//dir \/tmp\/7003\//g' 7003/redis.conf
5)修改每个实例的声明IP
虚拟机本身有多个IP,为了避免将来混乱,我们需要在redis.conf文件中指定每一个实例的绑定ip信息,格式如下:
# redis实例的声明 IP
replica-announce-ip 192.168.150.101
每个目录都要改,我们一键完成修改(在/tmp目录执行下列命令):
# 逐一执行
sed -i '1a replica-announce-ip 192.168.150.101' 7001/redis.conf
sed -i '1a replica-announce-ip 192.168.150.101' 7002/redis.conf
sed -i '1a replica-announce-ip 192.168.150.101' 7003/redis.conf

# 或者一键修改
printf '%s\n' 7001 7002 7003 | xargs -I{} -t sed -i '1a replica-announce-ip 192.168.150.101' {}/redis.conf
启动
为了方便查看日志,我们打开3个ssh窗口,分别启动3个redis实例,启动命令:
# 第1个
redis-server 7001/redis.conf
# 第2个
redis-server 7002/redis.conf
# 第3个
redis-server 7003/redis.conf
启动后:
如果要一键停止,可以运行下面命令:
printf '%s\n' 7001 7002 7003 | xargs -I{} -t redis-cli -p {} shutdown开启主从关系
现在三个实例还没有任何关系,要配置主从可以使用replicaof 或者slaveof(5.0以前)命令。
有临时和永久两种模式:
-
修改配置文件(永久生效)
-
在redis.conf中添加一行配置:
slaveof
-
-
使用redis-cli客户端连接到redis服务,执行slaveof命令(重启后失效):
slaveof 注意:在5.0以后新增命令replicaof,与salveof效果一致。
这里我们为了演示方便,使用方式二。
通过redis-cli命令连接7002,执行下面命令:
# 连接 7002
redis-cli -p 7002
# 执行slaveof
slaveof 192.168.150.101 7001
通过redis-cli命令连接7003,执行下面命令:
# 连接 7003
redis-cli -p 7003
# 执行slaveof
slaveof 192.168.150.101 7001
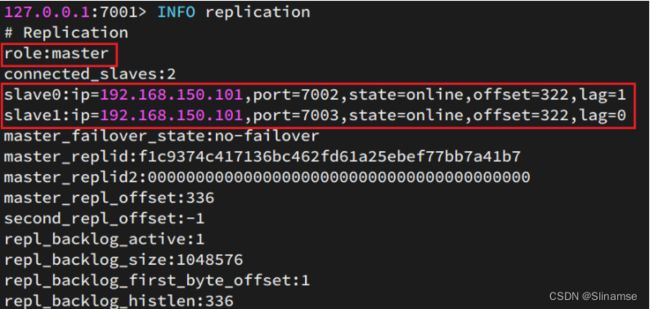
结果:
测试
执行下列操作以测试:
-
利用redis-cli连接7001,执行
set num 123 -
利用redis-cli连接7002,执行
get num,再执行set num 666 -
利用redis-cli连接7003,执行
get num,再执行set num 888
可以发现,只有在7001这个master节点上可以执行写操作,7002和7003这两个slave节点只能执行读操作。
