vue-quill-editor富文本编辑框使用
vue富文本中实现上传图片及修改图片大小等功能。
1,配置使用
配置使用网上很多,记录下自己的使用过程
第一步:components/Editor文件夹下创建QuillEditor.vue文件
第二步:代码中加入QuillEditor的引入
import quillEditor from "@/components/Editor/QuillEditor";
export default {
    name: "Biz_ztxx_text_manager",
    components: { quillEditor },
...... 
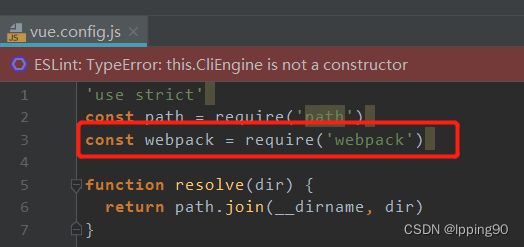
第三步:vue.config.js中加入webpack
在文件顶部加入:
const webpack = require('webpack')在文件底部加入:
config.plugin('provide').use(webpack.ProvidePlugin, [{
      // 'window.Quill': 'quill'
      'window.Quill': 'quill'
    }])

第四步:代码中引用
第五步:命令行中执行安装
npm install vue-quill-editor
npm install quill-image-resize-module --save
npm install quill-image-drop-module --save
npm install quill-image-extend-module --save
若安装失败,执行npm install 或者npm install --registry=https://registry.npmmirror.com
大部分情况都能成功。之后执行启动即可,可以在富文本中进行上传图片及修改图片大小等功能。
2,富文本框无法调整默认高度
参考:vue 的Quill Editor如何设置默认高度?_quill-editor 高度_Rocket MAN的博客-CSDN博客
添加此样式
3,设置富文本框只读
vue-quill-editor设置readonly等不起作用
使用此命令设置只读,其他的设置disabled等的均不好使
let that = this
this.$nextTick(()=>{
        that.$refs.quillEditor.Quill.enable(false);
})
4,出现报错等,参考Vue Element UI 之富文本插件实现图片调整大小(quill-image-resize-module)、图片粘贴(quill-image-drop-module) - 灰信网(软件开发博客聚合)
5,设置复制黏贴自动上传
参考:Vue Element UI 之富文本插件实现图片调整大小(quill-image-resize-module)、图片粘贴(quill-image-drop-module) - 灰信网(软件开发博客聚合)
进行部分调整
QuillEditor.vue中添加监听
@paste.native="handlePaste($event)"安装及引入jquery
npm install jquery --save

import $ from 'jquery';
增加handlePaste方法
handlePaste(evt) {
      let that = this
      if (evt.clipboardData &&
        evt.clipboardData.files &&
        evt.clipboardData.files.length) {
        evt.preventDefault();
        [].forEach.call(evt.clipboardData.files, (file) => {
          if (!file.type.match(/^image\/(gif|jpe?g|a?png|bmp)/i)) {
            return;
          }
          const formData = new FormData();
          formData.append("file", file);//后台上传接口的参数名
          // 实现上传
          $.ajax({
            type: "post",
            url: process.env.VUE_APP_BASE_API +'/common/imortImg', // 上传的图片服务器地址
            data: formData,
            headers:{'Authorization': "Bearer " + getToken()},//必须
            dataType: "json",
            processData: false,
            contentType: false,//设置文件上传的type值,必须
            success: (response) => {
              if (response.code == 200) {
                //当编辑器中没有输入文本时,这里获取到的 range 为 null
                debugger
                var range = that.$refs.myQuillEditor.quill.selection.savedRange;
                //图片插入在富文本中的位置
                var index = 0;
                if (range == null) {
                  index = 0;
                } else {
                  index = range.index;
                }
                //将图片链接插入到当前的富文本当中
                that.$refs.myQuillEditor.quill.insertEmbed(index, "image", response.data.imgUrl);
                // 调整光标到最后
                that.$refs.myQuillEditor.quillsetSelection(index + 1); //光标后移一位
              }
            },
            error: function () {
              this.$message.error('上传失败!')
            },
          });
        });
      }
    },