Xxl-job分布式调度中心,以及如何嵌入至自己的Spring-boot项目
一、运行与测试Xxl-job分布式调度中心
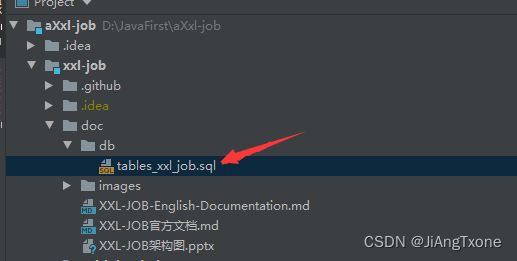
1.在xxl-job的doc目录中找到db/tables_xxl_job.sql
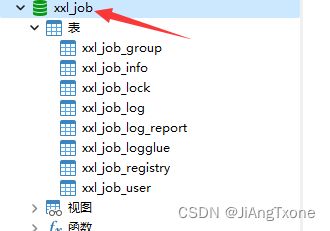
将其中的脚本在SQL中运行即可,即可创建xxl_job数据库
2.更改xxl-job-admin 中的配置文件(application.properties)
主要是端口、数据库的配置信息
①端口:我设置的是8080端口。(打开分布式调度中心页面所需的端口)
### web
server.port=8080
server.servlet.context-path=/xxl-job-admin
②数据库配置信息
分别设置数据库的连接地址、用户名以及密码
### xxl-job, datasource
spring.datasource.url=jdbc:mysql://114.213.242.67/xxl_job?useUnicode=true&characterEncoding=UTF-8&autoReconnect=true&serverTimezone=Asia/Shanghai
spring.datasource.username=root
spring.datasource.password=root
spring.datasource.driver-class-name=com.mysql.cj.jdbc.Driver
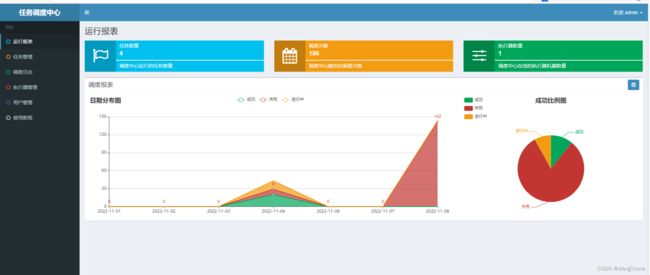
③即可登录
初始用户名为admin,登录密码为123456。
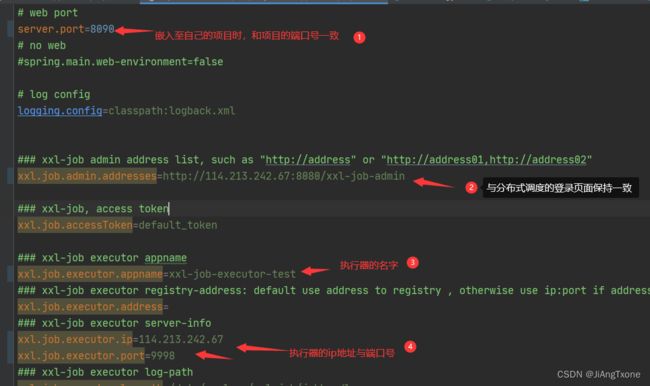
3、更改xxl-job-executor-sample-springboot 中的配置文件(application.properties)
主要是更改如下的地方。
# web port
server.port=8090
### xxl-job admin address list, such as "http://address" or "http://address01,http://address02"
xxl.job.admin.addresses=http://114.213.242.67:8080/xxl-job-admin
### xxl-job executor appname
xxl.job.executor.appname=xxl-job-executor-test
### xxl-job executor registry-address: default use address to registry , otherwise use ip:port if address is null
xxl.job.executor.address=
### xxl-job executor server-info
xxl.job.executor.ip=114.213.242.67
xxl.job.executor.port=9998
4.测试
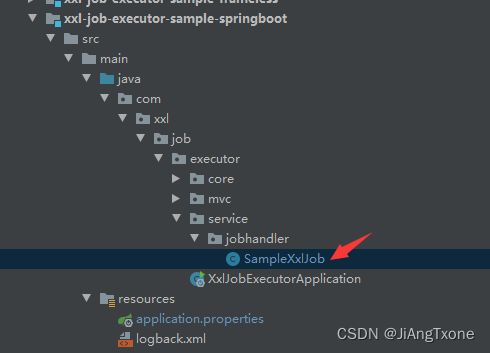
①在xxl-job-executor-sample-springboot执行器中的SampleXxlJob类中编写一个执行器代码进行测试
@XxlJob("FeJobHandler")
public void FeJobHandler() throws Exception {
    XxlJobHelper.log("XXL-JOB, Hello World.");

    System.out.println("hello");
    // default success
}
②在分布式调度中运行
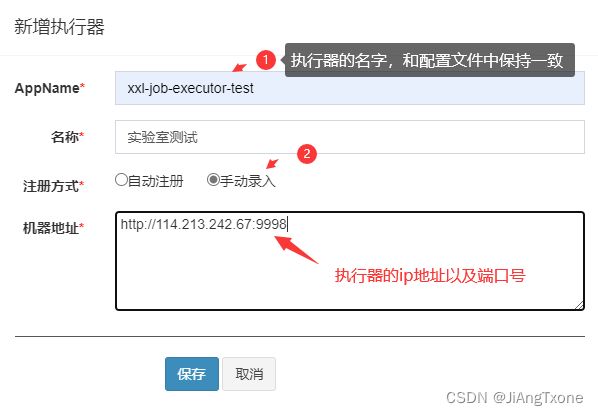
2.1在分布式网页中的执行器管理中,新增一个执行器
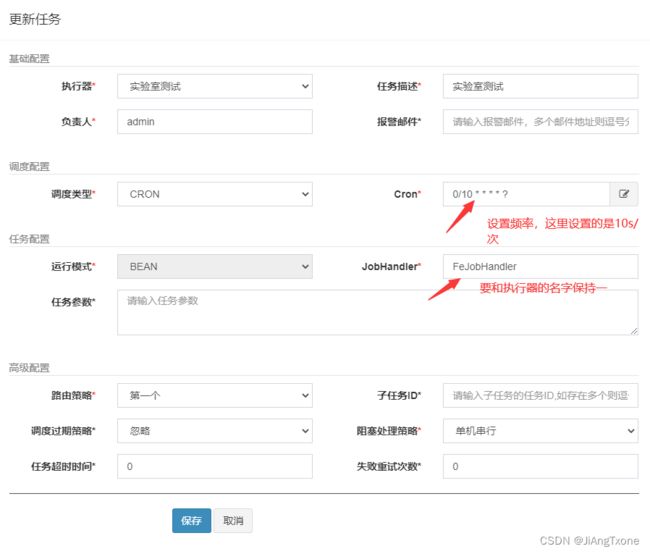
2.2 在分布式网页中的任务管理中,新增一个任务
2.3启动任务管理器即可。在任务调度日志中查看(需要在Xxl-Job中启动执行器的Application,不然会报连接问题)
二、嵌入至自己的项目(Spring-Boot)中
①在项目中,将xxl-job-executor-sample-springboot中的3个文件和一个依赖复制到自己的项目
依赖:我这里的版本是2.3.1(嵌入至项目中,记得刷新maven依赖)
    com.xuxueli
    xxl-job-core
    2.3.1
②将如上3个文件导入值自己的项目中
ps:注意因为项目中有多个配置
测试时加上:spring.profiles.active=dev
application-dev.properties文件即时Xxl-Job中的配置文件,其中的端口号要和自己项目的端口号保持一致
# web port
server.port=8090
③以上即完成嵌入至自己的项目中啦
