import cv2
import numpy as np
def Process(img):
gaussian = cv2.GaussianBlur(img,(3,3),0,0,cv2.BORDER_DEFAULT)
median = cv2.medianBlur(gaussian,5)
sobel = cv2.Sobel(median,cv2.CV_8U,1,0,ksize=3)
ret,binary = cv2.threshold(sobel,175,255,cv2.THRESH_BINARY)
element1 = cv2.getStructuringElement(cv2.MORPH_RECT,(9,1))
element2 = cv2.getStructuringElement(cv2.MORPH_RECT,(9,7))
dilation = cv2.dilate(binary,element2,iterations=1)
erosion = cv2.erode(dilation,element1,iterations=1)
dilation2 = cv2.dilate(erosion,element2,iterations=3)
cv2.imwrite("binary.png",binary)
cv2.imwrite("dilation.png",dilation)
cv2.imwrite("erosion.png",erosion)
cv2.imwrite("dilation2.png",dilation2)
return dilation2
def GetRegion(img):
regions = []
_,contours,hierarchy = cv2.findContours(img, cv2.RETR_TREE, cv2.CHAIN_APPROX_SIMPLE)
for contour in contours:
area = cv2.contourArea(contour)
if (area < 2000):
continue
epslion = 1e-3 * cv2.arcLength(contour,True)
approx = cv2.approxPolyDP(contour,epslion,True)
rect = cv2.minAreaRect(contour)
box = cv2.boxPoints(rect)
box = np.int0(box)
height = abs(box[0][1] - box[2][1])
weight = abs(box[0][0] - box[2][0])
radio = float(weight) / float(height)
if (radio > 2 and radio <5.5):
regions.append(box)
return regions
def detect(img):
gray = cv2.cvtColor(img,cv2.COLOR_BGR2GRAY)
prc = Process(gray)
regions = GetRegion(prc)
print('[INFO]:Detct %d license plates' % len(regions))
for box in regions:
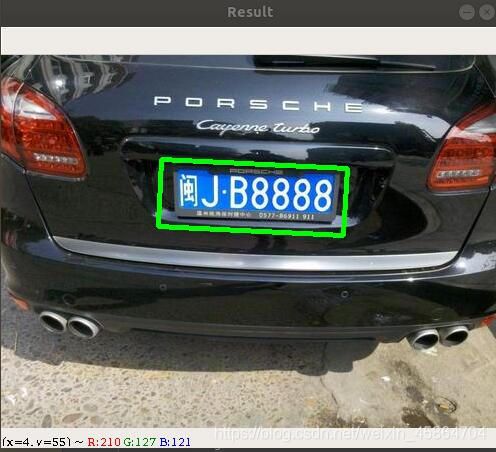
cv2.drawContours(img,[box],0,(0,255,0),3)
cv2.imshow('Result', img)
cv2.imwrite('result.jpg', img)
cv2.waitKey(0)
x, y, w, h = cv2.boundingRect(box)
rect = (x, y, w, h)
mask = np.zeros(img.shape[:2], np.uint8)
bgdModel = np.zeros((1, 65), np.float64)
fgdModel = np.zeros((1, 65), np.float64)
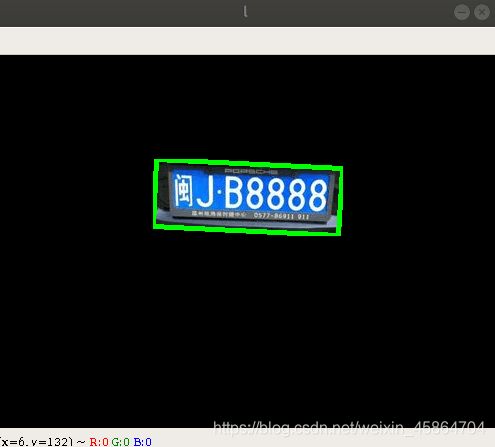
cv2.grabCut(img, mask, rect, bgdModel, fgdModel, 5, cv2.GC_INIT_WITH_RECT)
mask2 = np.where((mask == 2) | (mask == 0), 0, 1).astype('uint8')
img = img * mask2[:, :, np.newaxis]
cv2.imshow('l', img)
cv2.imwrite('l.jpg', img)
cv2.waitKey(0)
if __name__=='__main__':
img = cv2.imread('/home/xiaoshiguang/PycharmProjects/untitled/venv/1/1.jpg')
detect(img)