Ubuntu 20.04 LTS下安装python科学计算包
学习目标:
在Ubuntu 20.04 LTS下安装 python科学计算包:numpy、scipy、matplotlib、scikit-learn。
学习内容:
搭建 python 开发环境
安装pip,然后通过pip安装python科学计算包
- 安装pip
sudo apt-get install python3-pip
- 安装scipy
sudo pip install scipy
- 安装matplotlib
sudo pip install matplotlib
- 安装scikit-learn
sudo pip install -U scikit-learn
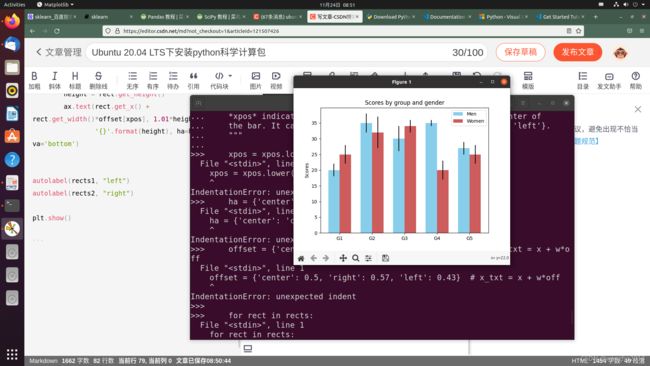
- 测试安装效果
import numpy as np
import matplotlib.pyplot as plt

men_means, men_std = (20, 35, 30, 35, 27), (2, 3, 4, 1, 2)
women_means, women_std = (25, 32, 34, 20, 25), (3, 5, 2, 3, 3)

ind = np.arange(len(men_means))  # the x locations for the groups
width = 0.35  # the width of the bars

fig, ax = plt.subplots()
rects1 = ax.bar(ind - width/2, men_means, width, yerr=men_std,
                color='SkyBlue', label='Men')
rects2 = ax.bar(ind + width/2, women_means, width, yerr=women_std,
                color='IndianRed', label='Women')

# Add some text for labels, title and custom x-axis tick labels, etc.
ax.set_ylabel('Scores')
ax.set_title('Scores by group and gender')
ax.set_xticks(ind)
ax.set_xticklabels(('G1', 'G2', 'G3', 'G4', 'G5'))
ax.legend()


def autolabel(rects, xpos='center'):
    """
    Attach a text label above each bar in *rects*, displaying its height.

    *xpos* indicates which side to place the text w.r.t. the center of
    the bar. It can be one of the following {'center', 'right', 'left'}.
    """

    xpos = xpos.lower()  # normalize the case of the parameter
    ha = {'center': 'center', 'right': 'left', 'left': 'right'}
    offset = {'center': 0.5, 'right': 0.57, 'left': 0.43}  # x_txt = x + w*off

    for rect in rects:
        height = rect.get_height()
        ax.text(rect.get_x() + rect.get_width()*offset[xpos], 1.01*height,
                '{}'.format(height), ha=ha[xpos], va='bottom')


autolabel(rects1, "left")
autolabel(rects2, "right")

plt.show()

参考:
[1]ubuntu18下在线安装matplotlib并测试使用
[2] Getting Started with Python in VS Code
[3]