Top 10 steps to optimize data access in SQL Server: Part V (Optimize database files and apply partitioning)
Introduction
Sorry for being so late in writing the last part of the article. I have a full-time job to earn my living, and for the last couple of months, I had been extremely busy with some of my client projects (Sounds like an excuse?).
Any way, better late than never. It's good to be back again!
Background
So, where were we?
We were actually executing a step-by-step optimization process in an SQL Server database, and so far, we've done quite a lot of things. Take a look at the following articles to get to know the steps that we've carried out so far.
- Top 10 steps to optimize data access in SQL Server: Part I (Use indexing)
- Top 10 steps to optimize data access in SQL Server: Part II (Re-factor TSQLs and apply best practices)
- Top 10 steps to optimize data access in SQL Server: Part III (Apply advanced indexing and de-normalization)
- Top 10 steps to optimize data access in SQL Server: Part IV (Diagnose database performance problems)
This is the last part in this series of articles, and here we are going to discuss some more topics to optimize database performance. Please note that the topics we are going to cover in this article are topics where mainly DBAs have expertise on. As a developer, I personally believe, we should at least have some working knowledge on this area so that when we have no DBA around, we can at least try to do everything that a developer can do to optimize database performance.
So, here we go.
Step 9: Organize file groups and files in the database
When a SQL Server database is created, the database server internally creates a number of files in the file system. Every database related object that gets created later in the database is actually stored inside these files.
A SQL Server database has the following three kinds of files:
- .mdf file: This is the primary data file. There can be only one primary data file for each database. All system objects reside in the primary data file, and if a secondary data file is not created, all user objects (user created database objects) also take their place in the primary data file.
- .ndf file: These are the secondary data files, which are optional. These files also contain user created objects.
- .ldf file: These are the Transaction log files. These files could be one or many in number. They contain Transaction logs.
When a SQL Server database is created, by default, the primary data file and the transaction log file are created. You can, of course, modify the default properties of these two files.
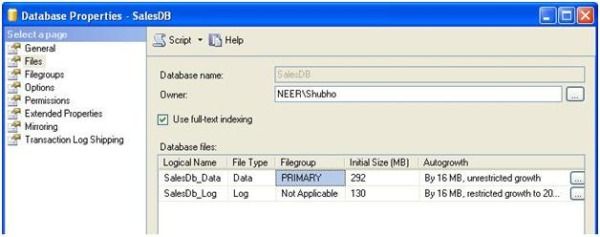
File group
Database files are logically grouped for better performance and improved administration on large databases. When a new SQL Server database is created, the primary file group is created and the primary data file is included in the primary file group. Also, the primary group is marked as the default group. As a result, every newly created user object is automatically placed inside the primary file group (more specifically, inside the files in the primary file group).
If you want your user objects (Tables/Views/Stored Procedures/Functions, and others) to be created in a secondary data file, then:
- Create a new file group and mark that file group as Default.
- Create a new data file (.ndf file) and set the file group of this data file to the new file group that you just created.
After doing this, all subsequent objects you create in the database are going to be created inside the file(s) in the secondary file group.
Please note that, Transaction log files are not included in any file group.
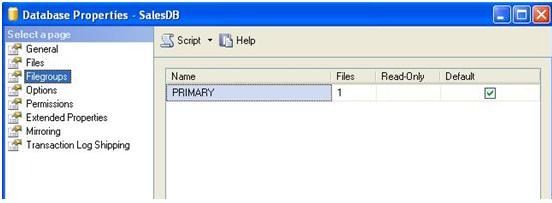
File/ File group organization best practices
When you have a small or moderate sized database, then the default file/ file group organization that gets created while creating the database may be enough for you. But, when your database has a tendency to grow larger (say, over 1000 MB) in size, you can (and should) do a little tweaking in the file/file group organizations in the database to enhance database performance. Here are some of the best practices you can follow:
- The primary file group must be totally separate, and should be left to have only system objects, and no user defined object should be created on the primary file group. Also, the primary file group should not be set as the default file group. Separating the system objects from other user objects will increase performance and enhance the ability to access tables in cases of serious data failures.
- If there are N physical disk drives available in the system, then try to create N files per file group and put each one in a separate disk. This will allow distributing disk I/O load over multiple disks, and will increase performance.
- For frequently accessed tables containing indexes, put the tables and the indexes in separate file groups. This would enable reading the index and table data faster.
- For frequently accessed table containing
TextorImagecolumns, create a separate file group and put the text, next, and image columns in that file group on different physical disks, and put the tables in a different file group. This would enable faster data retrieval from the table with queries that don't contain text or image columns. - Put the transaction log file on a different physical disk that is not used by the data files. The logging operation (Transaction log writing operation) is more write-intensive, and hence it is important to have the log on the disk that has good I/O performance.
- Consider assigning "Read only" tables into a file group that is marked as "Read only". This would enable faster data retrieval from these read only tables. Similarly, assign "Write only" tables in a different file group to allow for faster updates.
- Do not let SQL Server fire the "Auto grow" feature too often because it is a costly operation. Set an "Auto grow" increment value so that the database size is increased less frequently (say, once per week). Similarly, do not use the "Auto shrink" feature for the same reason. Disable it, and either shrink the database size manually, or use a scheduled operation that runs in a timed interval (say, once a month).
Step 10: Apply partitioning in big fat tables
What is table partitioning?
Table partitioning means nothing but splitting a large table into multiple smaller tables so that queries have to scan less amount of data while retrieving. That is "Divide and Conquer".
When you have a large (in fact, very large, possibly having millions of rows) table in your database and when you see that querying on this table is executing slowly, you should consider portioning the table (of course, after making sure that all other optimization steps are done) to improve performance.
The two following options are available to partition a table:
Horizontal partitioning
Suppose we have a table containing 10 million rows. For easy understandability, let's assume that the table has an auto-increment primary key field (say, ID). We can divide the table's data into 10 separate portioning tables where each partition will contain 1 million rows and the partition will be based upon the value of the ID field. That is, the first partition will contain those rows which have a primary key value in the range 1-1000000, and the second partition will contain those rows which have a primary key value in the range 1000001-2000000, and so on.
As you can see, we are partitioning the table by grouping the rows based upon a criteria (ID range), which seems like we have a stack of books in a box from where we are horizontally splitting the stack by taking a group of books from the top and putting it in smaller boxes. Hence this is called horizontal partitioning.
Vertical partitioning
Suppose we have a table with many columns and also millions of rows. Some of the columns in the table are very frequently accessed in some queries, and most of the columns in the table are less frequently accessed in some other queries.
As the table size is huge (in terms of number of columns and rows), any data retrieval query from the table performs slowly. So, this table could be portioned based on the frequency of access of the columns. That is, we can split the table into two or more tables (partitions) where each table would contain a few columns from the original tables. In our case, a partition of this table should contain the columns that are frequently accessed by queries, and another partition of this table should contain the columns that are less frequently accessed by other queries. Splitting the columns vertically and putting them in different thinner partitions is called vertical partitioning.
Another good way for applying vertical partitioning could be to partition the indexed columns and non-indexed columns into separate tables. Also, vertical partitioning could be done by splitting LOB or VARCHARMAX columns into separate tables.
Like horizontal partitioning, vertical partitioning also allows to improve query performance (because queries now have to scan less data pages internally, as the other column values from the rows have been moved to another table), but this type of partitioning is to be done carefully, because if there is any query that involves columns from both partitions, then the query processing engine would require joining two partitions of the tables to retrieve data, which in turn would degrade performance.
In this article, we would focus on horizontal partitioning only.
Partitioning best practices
- Consider partitioning big fat tables into different file groups where each file inside the file group is spread into separate physical disks (so that the table spans across different files in different physical disks). This would enable the database engine to read/write data operations faster.
- For history data, consider partitioning based on "Age". For example, suppose a table has order data. To partition this table, use the Order date column to split the table so that a partition is created to contain each year's sales data.
How to partition?
Suppose, we have an Order table in our database that contains Order data for 4 years (1999, 2000, 2001, and 2002) and this table contains millions of rows. We would like to apply partitioning on this table. To do that, the following tasks are to be performed:
- Add user defined file groups to the database
Use the following SQL command to create a file group:
ALTER DATABASE OrderDB ADD FILEGROUP [1999]


ALTER DATABASE OrderDB ADD FILE (NAME = N'1999', FILENAME

= N'C:\OrderDB\1999.ndf', SIZE = 5MB, MAXSIZE = 100MB, FILEGROWTH = 5MB) TO

FILEGROUP [1999]
Here, we are adding a file group '1999' and adding a secondary data file 'C:\OrderDB\1999.ndf' to this file group. We did this because we would like to put our table partitions into separate files in separate file groups.
Using the SQL command above, create three other file groups '2000', '2001', and '2002'. As you can perhaps imagine already, each of these file groups would store a year's Order data inside their corresponding data files.
- Create a partition function
A partition function is an object that defines the boundary points for partitioning data. The following command creates a partition function:
CREATE PARTITION FUNCTION FNOrderDateRange (DateTime) AS

RANGE LEFT FOR VALUES ('19991231', '20001231', '20011231')
The above partition function specifies that the Order date column has a value between:
DateTime <= 1999/12/31 would fall into 1<sup>st</sup> partition.

DateTime > 1999/12/31 and <= 2000/12/31 would fall info 2<sup>nd</sup> partition.

DateTime > 2000/12/31 and <= 2001/12/31 would fall info 3rd partition.

DateTime > 2001/12/31 would fall info 4th partition.
RANGE LEFT is used to specify that the boundary value should fall into the left partition. For example, here the boundary value 1999/12/31 is falling into the first partition (with all other dates less than this value), and the next value is falling into the next partition. If we specify RANGE RIGHT, then the boundary value would fall into the right partition. So, in this example, the boundary value 2000/12/31 would fall into the second partition, and any date less than this value would fall into the first partition.
- Create a partition schema
The partition scheme maps the partitions of a partitioned table/index to the file groups that will be used to store the partitions.
The following command creates a partition schema:
CREATE PARTITION SCHEME OrderDatePScheme AS PARTITION FNOrderDateRange

TO ([1999], [2000], [2001], [2002])
Here, we are specifying that:
The 1<sup>st</sup> partition should go into the ‘1999' file group

The 2<sup>nd </sup>partition should go into the ‘2000' file group

The 3<sup>rd</sup> partition should go into the ‘2001' file group

The 4<sup>th</sup> partition should go into the ‘2002' file group
- Apply partitioning on the table
At this point, we have defined the necessary partitioning criteria. So all we need to do now is to partition the table.
In order to do this, follow these steps:
Drop the existing clustered index from the table that is most likely created due to the primary key creation on the table. The clustered index can be dropped by using the DROP INDEX statement. Assuming that PK_Orders is the primary key of the table, use the following command to drop the Primary Key, which will eventually drop the clustered index from the table:
ALTER TABLE Orders DROP CONSTRAINT

PK_Orders
Recreate the clustered index on the partition scheme. The index can be created on a partitioned scheme as follows:
CREATE UNIQUE CLUSTERED INDEX PK_Orders ON Orders(OrderDate) ON

OrderDatePScheme (OrderDate)
Assuming that the OrderDate column values are unique in the table, the table will be partitioned based on the partition scheme specified (OrderDatePScheme), which internally uses the partition function to partition the table into 4 smaller parts in 4 different file groups.
There are quite a few very well-written articles on the web on Table partitioning. I can mention a few here:
- Partitioned Tables and Indexes in SQL Server 2005 (A very detailed explanation on partitioning).
- SQL Server 2005 Database Table Partitioning Tutorial - How to Horizontal Partition a Database Table (A very simple and easily understandable tutorial on partitioning).
Step 11 (The bonus step): Better-manage DBMS objects, Use TSQL templates
We all know that in order to better manage DBMS objects (Stored Procedures, Views, Triggers, Functions, etc.), it's important to follow a consistent structure while creating these. But, for many reasons (time constraints mainly), most of the time, we fail to maintain a consistent structure while developing these DBMS objects. So when code is debugged later for any performance related issue or a reported bug, it becomes a nightmare for any person to understand the code and find the possible causes.
To help you in this regard, I have developed some TSQL templates that you can use to develop DBMS objects using a consistent structure, within a short amount of time.
I've also imagined that there will be a person reviewing DBMS objects and routines created by the team. The review process helps in identifying issues that generally are missed by developers (say, best practices) due to work pressure or other issues, and the templates have a "REVIEW" section where the reviewer can put review information along with comments.
I've attached some sample templates of various DBMS objects in SQL Server. These are:
- Template_StoredProcedure.txt: Template for developing Stored Procedures
- Template_View.txt: Template for developing Views
- Template_Trigger.txt: Template for developing Triggers
- Template_ScalarFunction.txt: Template for developing Scalar functions
- Template_TableValuedFunction.txt: Template for developing Table valued functions
How to create templates
At first, you need to create templates in your SQL Server Management Studio. To do this, you need to download the attached templates and follow the steps given below. I've used Template_StoredProcedure.txt for creating the Stored Procedure template. You can follow the same procedure to create the other templates.
- Open SQL Server Management Studio and go to View->Template Explorer.
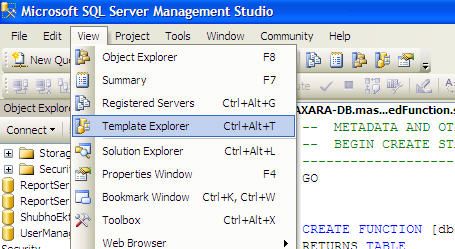
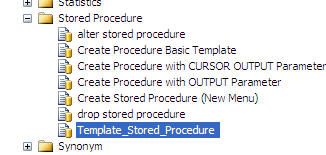
- Go to Template Explorer, "Stored Procedure" node, and expand it:
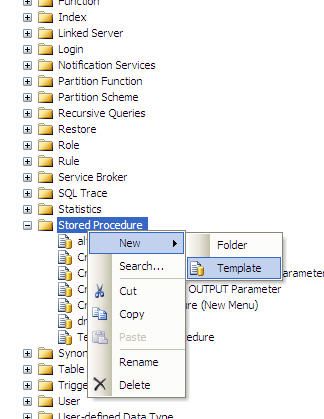
- Rename the newly created blank template as follows:
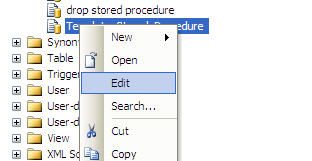
- Right click on the newly created template and open it in Edit mode, as follows:
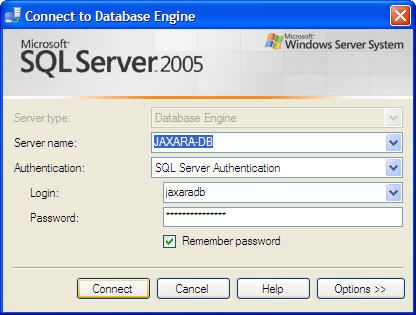
- SQL Server Management Studio will ask for credentials. Provide valid credentials, and press "Connect" to access the database instance and to edit the template.
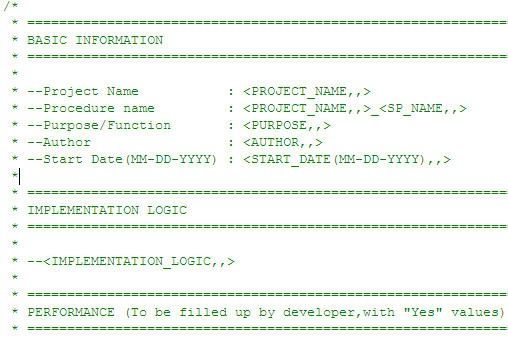
- Open the attached Template_StoredProcedure.txt in an editor, copy all the contents, and paste onto the template that is being edited in Management Studio:
- Save the template by pressing the Save button in Management Studio:

How to use the templates
Well, after creating all the templates in SQL Server Management Studio, it's time to use them. I am showing how to use the Stored Procedure template here, but the procedure is the same for all the other templates
- In Template Explorer, double click on the newly created Stored Procedure template:
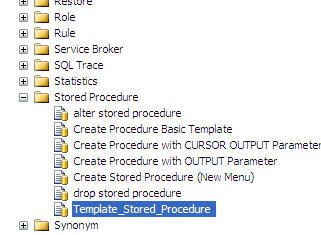
- SQL Server Management Studio will ask for valid credentials to use the template. Provide valid credentials and press "Connect".

- After connecting successfully, the template will be opened in the editor for filling up the variables with appropriate values:

- Specify the values for the template by clicking the following icon. Alternatively, you can press Ctrl+Shift+M to do the same.

- Specify the parameter values and press "OK".
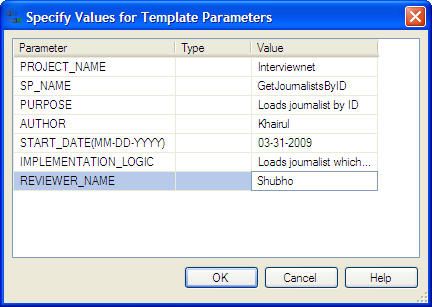
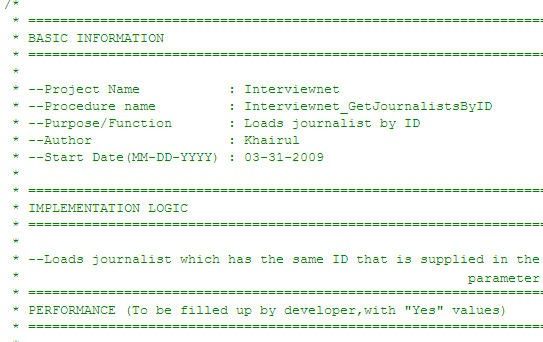
- The template will be filled up with the provided values.
- Select the target database where you would like to execute the Stored Procedure creation script, and press the Execute icon:
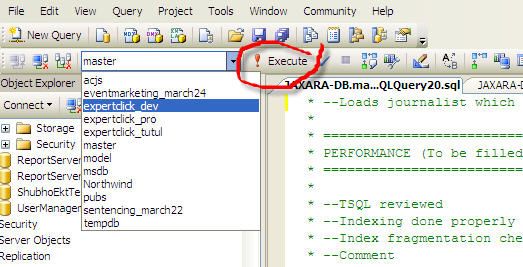
- If everything is OK, the Stored procedure should be created successfully.
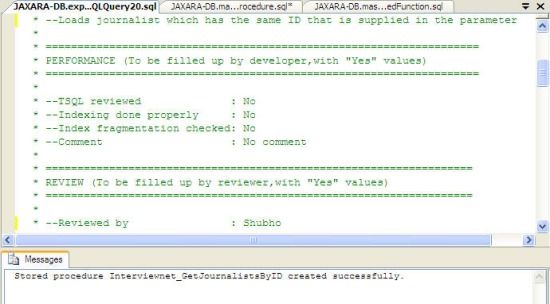
You can follow the above steps to create other DBMS objects (Functions, Views, Triggers, etc.).
I can promise that you can now create DBMS objects using templates in an easier manner, within a quick amount of time.
Summary
Optimization is a mindset rather than an automatic occurrence. In order to optimize your database performance, first, you have to believe that optimization is possible. Then you need to give your best effort and apply knowledge and best practices to optimize. The most important part is, you have to try to prevent any possible performance issues that may take place later by applying your knowledge before or along with your development activity, rather than trying to recover after the problem occurs. One little extra hour spent during development time to ensure good practices may save you hundreds of long hours in the long run!
"Work smarter, not harder" :)
License
This article, along with any associated source code and files, is licensed under The Code Project Open License (CPOL)