Ambari 编译
Ambari 编译
- 编译 Ambari
-
- 下载安装包
- Maven
-
- 配置文件
- 配置环境变量
- 下载 Ambari
-
- HDP
- 配置文件
- 编译
-
- 秘密武器
- 实时编译 Ambari
-
- ambari-admin 编译
-
- 下载包
- 修改 .bowerrc 配置
- 修改 gulpfile.js 文件
- 建立软链接
- ambari-web 编译
-
- 创建软链接
- 实时监控编译

编译 Ambari
下载安装包
软件安装 :
sudo yum install -y wget git psutils python-devel rpm-build java-1.8.0-openjdk-devel
搭建 http 服务
sudo yum install -y httpd

sudo systemctl enable httpd

sudo systemctl start httpd

- hadoop-3.1.1.tar.gz
- hbase-2.0.2.tar.gz
- grafana-6.7.4.linux-amd64.tar.gz
- apache-phoenix-5.0.0-HBase-2.0-bin.tar.gz
放到 http 服务的 /var/www/html/compile-ambari目录
sudo mkdir compile-ambari

下载安装包
sudo wget https://repo.huaweicloud.com/apache/hadoop/common/hadoop-3.1.1/hadoop-3.1.1.tar.gz
sudo wget https://repo.huaweicloud.com/apache/hbase/2.0.2/hbase-2.0.2-bin.tar.gz
sudo wget https://dl.grafana.com/oss/release/grafana-6.7.4.linux-amd64.tar.gz
sudo wget https://repo.huaweicloud.com/apache/phoenix/apache-phoenix-5.0.0-HBase-2.0/bin/apache-phoenix-5.0.0-HBase-2.0-bin.tar.gz

Maven
下载 Maven3.6.3
wget https://archive.apache.org/dist/maven/maven-3/3.6.3/binaries/apache-maven-3.6.3-bin.tar.gz

解压 Maven
tar -zxvf apache-maven-3.6.3-bin.tar.gz

配置文件
vim settings.xml

<settings xmlns="http://maven.apache.org/SETTINGS/1.0.0"
          xmlns:xsi="http://www.w3.org/2001/XMLSchema-instance"
          xsi:schemaLocation="http://maven.apache.org/SETTINGS/1.0.0 http://maven.apache.org/xsd/settings-1.0.0.xsd">

  <localRepository>/opt/module/maven-3.6.3/apache-maven-3.6.3/repositorylocalRepository>


  <mirrors>

    <mirror>
      <id>aliyunmavenid>
      <mirrorOf>centralmirrorOf>
      <name>阿里云公共仓库name>
      <url>https://maven.aliyun.com/repository/publicurl>
    mirror>

    <mirror>
      <id>mirrorid>
      <mirrorOf>central,jcenter,!rdc-releases,!rdc-snapshotsmirrorOf>
      <name>mirrorname>
      <url>https://maven.aliyun.com/nexus/content/groups/publicurl>
    mirror>


    <mirror>
      <id>huaweicloudid>
      <mirrorOf>centralmirrorOf>
      <url>https://repo.huaweicloud.com/repository/maven/url>
    mirror>


    <mirror>
      <id>repo1id>
      <mirrorOf>centralmirrorOf>
      <name>Human Readable Name for this Mirror.name>
      <url>https://repo1.maven.org/maven2/url>
    mirror>


    <mirror>
      <id>repo2id>
      <mirrorOf>centralmirrorOf>
      <name>Human Readable Name for this Mirror.name>
      <url>https://repo2.maven.org/maven2/url>
    mirror>
  mirrors>

  <profiles>

    <profile>
        <id>jdk-1.8id>
        <activation>
          <activeByDefault>trueactiveByDefault>
          <jdk>1.8jdk>
        activation>

        <properties>
          <maven.compiler.source>1.8maven.compiler.source>
          <maven.compiler.target>1.8maven.compiler.target>
          <maven.compiler.compilerVersion>1.8maven.compiler.compilerVersion>
        properties>
    profile>
  profiles>

<settings>
由于编译相关 jar 包较难下载,所以提供仅用于 ambari 编译的 maven repository,将该 repository 替换放在 repository目录即可
ambari repository :
链接:https://pan.baidu.com/s/1zeK_nsi-E9Gcsnk4eH5PFA?pwd=g9nq
提取码:g9nq
tar -zxvf maven-repository.tar.gz -C /opt/module/maven-3.6.3/apache-maven-3.6.3

mv maven-repository repository
配置环境变量
vim /etc/porfile.d/my_env.sh
#MAVEN_HOME
export MAVEN_HOME=/opt/module/maven-3.6.3/apache-maven-3.6.3
export PATH=$PATH:$MAVEN_HOME/bin
source /etc/profile

下载 Ambari
下载:
wget https://mirrors.tuna.tsinghua.edu.cn/apache/ambari/ambari-2.7.6/apache-ambari-2.7.6-src.tar.gz
解压 :
tar zxvf apache-ambari-2.7.6-src.tar.gz

HDP
添加 HDP3.1 配置文件 , 把 .txt 去掉在解压
HDP.zip.txt
把内容复制到 ambari-server\src\main\resources\stacks\HDP下

配置文件
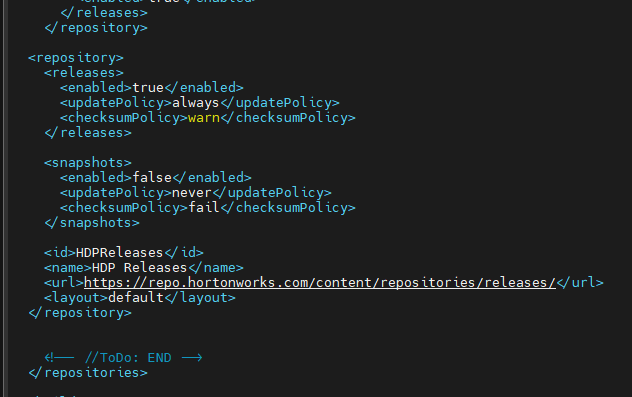
修改主目录下的 pom 文件,新增 hdp 仓库:

  <repository>
    <releases>
      <enabled>trueenabled>
      <updatePolicy>alwaysupdatePolicy>
      <checksumPolicy>warnchecksumPolicy>
    releases>

    <snapshots>
      <enabled>falseenabled>
      <updatePolicy>neverupdatePolicy>
      <checksumPolicy>failchecksumPolicy>
    snapshots>

    <id>HDPReleasesid>
    <name>HDP Releasesname>
    <url>https://repo.hortonworks.com/content/repositories/releases/url>
    <layout>defaultlayout>
  repository>
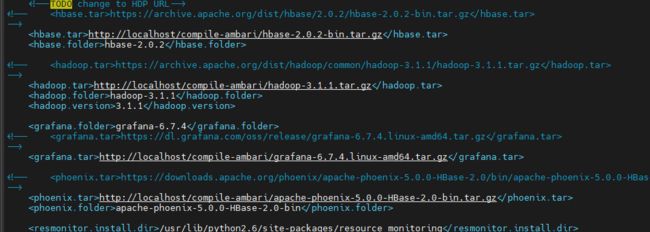
修改 ambari-metrics/pom.xml,将 hbase、hadoop、grafana 的下载地址替换为本地地址:

  <hbase.tar>http://localhost/compile-ambari/hbase-2.0.2-bin.tar.gz</hbase.tar>
  <hadoop.tar>http://localhost/compile-ambari/hadoop-3.1.1.tar.gz</hadoop.tar>
  <grafana.tar>http://localhost/compile-ambari/grafana-6.7.4.linux-amd64.tar.gz</grafana.tar>
  <phoenix.tar>http://localhost/compile-ambari/apache-phoenix-5.0.0-HBase-2.0-bin.tar.gz</phoenix.tar>
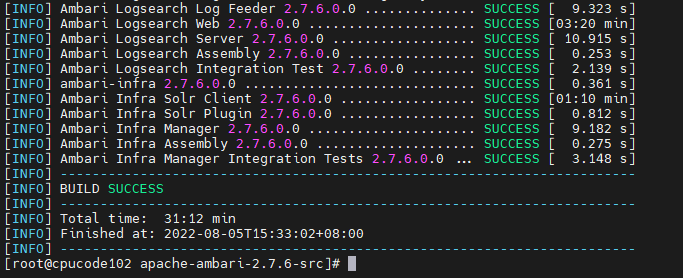
编译
在 /opt/module/ambari-src/apache-ambari-2.7.6-src下编译
mvn -B clean install package rpm:rpm -DnewVersion=2.7.6.0.0 -DskipTests -Drat.skip -Dpython.ver="python >= 2.7" -Preplaceurl

秘密武器
这里一直有问题 , 要使用秘密武器就可以了,我用的 clash , 大家百度使用
把 .sh 去掉使用 , 运行程序
clash.sh

把文件放在 /root/.config/clash
把 .txt 去掉使用
Country.mmdb.txt

局部秘密武器 :
export proxy="http://127.0.0.1:7890"
export http_proxy=$proxy
export https_proxy=$proxy
export ftp_proxy=$proxy
export no_proxy="localhost, 127.0.0.1, ::1"
成功 :
安装 postgresql-server
yum install postgresql-server

rpm -ivh ambari-server-2.7.6.0-0.x86_64.rpm

实时编译 Ambari
总体思路:
- 对 ambari-admin , ambari-web 模块单独编译(因为二次开发主要是针对这两个模块)
- 利用 brunch watch 功能,对文件夹源码进行实时监控编译,提高开发效率
ambari-admin 编译
下载包
全局安装 gulp、bower
npm install -g gulp

npm install -g bower
![]()
安装bower的依赖包
bower install
安装 gulp-webserver
npm install gulp-webserver --save-dev

npm install gulp-load-plugins

npm install gulp-clean
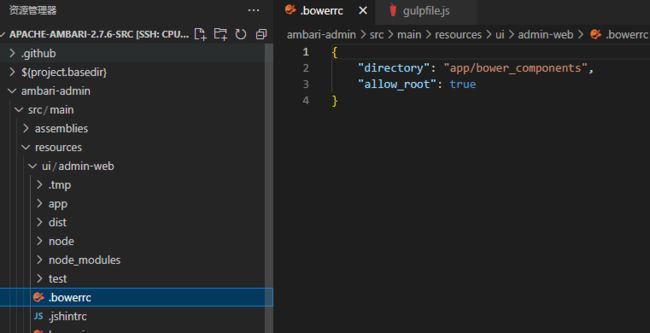
修改 .bowerrc 配置
修改 /opt/module/ambari-src/apache-ambari-2.7.6-src/ambari-admin/src/main/resources/ui/admin-we/.bowerrc
# 说明:添加一行"allow_root": true 允许以root用户执行bower命令。也可以在执行命令的时候通过参数设定 如:bower install –allow-root
{
  "directory": "app/bower_components",
  "allow_root": true
}
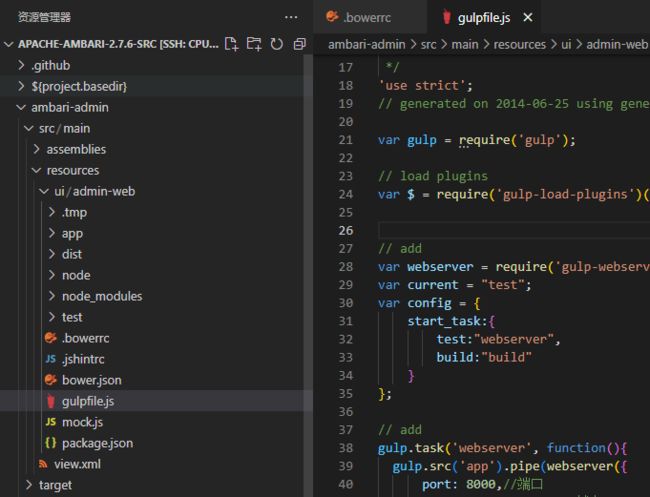
修改 gulpfile.js 文件
// add
var webserver = require('gulp-webserver');
var current = "test";
var config = {
  start_task:{
    test:"webserver",
    build:"build"
  }
};

// add
gulp.task('webserver', function(){
  gulp.src('app').pipe(webserver({
    port: 18080,//端口
    host: 'cpucode102',//域名
    livereload: true,//实时刷新代码。不用f5刷新
    directoryListing: true,
    //fallback:'index.html',
    open:true
  }))
});

//add
gulp.task('xml',function(){
  return gulp.src('app/view.xml')
    .pipe(gulp.dest('dist'))
});

//edit
gulp.task('build', ['html', 'views', 'images', 'fonts', 'extras', 'xml']);

//edit
gulp.task('default', ['clean'], function () {
  gulp.start(config.start_task[current]);
});
建立软链接
切换到 ambari-server对应 admin 页面的目录下
cd /var/lib/ambari-server/resources/views/work
备份 ADMIN_VIEW{2.7.6.0}
mv ADMIN_VIEW\{2.7.6.0\} ADMIN_VIEW\{2.7.6.0\}.bak

建立软链接
ln -s /opt/module/ambari-src/apache-ambari-2.7.6-src/ambari-admin/src/main/resources/ui/admin-web/dist ADMIN_VIEW\{2.7.6.0\}

复制文件
cp ADMIN_VIEW\{2.7.6.0\}.bak/view.xml ADMIN_VIEW\{2.7.6.0\}/

cp ADMIN_VIEW\{2.7.6.0\}.bak/view.xml /opt/module/ambari-src/apache-ambari-2.7.6-src/ambari-admin/src/main/resources/ui/admin-web/app/

gulp
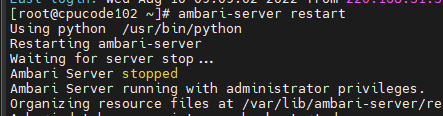
重启服务
ambari-server restart
界面访问: http://ip:port(默认8080) 查看效果

ambari-web 编译
创建软链接
cd /usr/lib/ambari-server

# 备份web
mv web web.bak

# 创建软链接
ln -s /opt/module/ambari-src/apache-ambari-2.7.6-src/ambari-web/public web

实时监控编译
监控编译
# 编译
brunch build

# 或 实时监控编译
brunch watch

重启 ambari-server
ambari-server restart
界面访问: http://ip:port(默认8080) 查看效果
