安装pytest
pip install pytest
编写测试环境相关代码
在tests文件夹下, 创建一个名为conftest.py的文件
文如其名, conf-test, 测试的配置
所有的配置重点在于这个装饰器: @pytest.fixture(scope="session")
fixure有道的翻译为固定装置, 其实它就是每次测试的固定装置, 而且这也能理解为什么它会有scope(范围)这个参数
scope代表这个固定装置安装的范围或位置, 它有四个值:
"function" (default):作用于每个测试方法,每个 test 都运行一次
"class":作用于整个类,每个 class 的所有 test 只运行一次
"module":作用于整个模块,每个 module 的所有 test 只运行一次
"session:作用于整个 session(慎用),每个 session 只运行一次
"params":(list 类型)提供参数数据,供调用标记方法的函数使用
"autouse":是否自动运行,默认为 False 不运行,设置为 True 自动运行
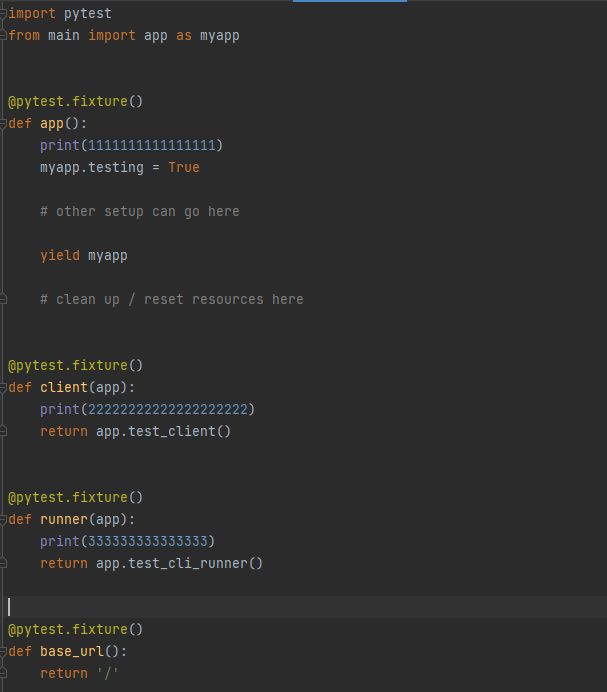
import pytest
from main import app as myapp


@pytest.fixture()
def app():
    print(1111111111111111)
    myapp.testing = True

    # other setup can go here

    yield myapp

    # clean up / reset resources here


@pytest.fixture()
def client(app):
    print(22222222222222222222)
    return app.test_client()


@pytest.fixture()
def runner(app):
    print(333333333333333)
    return app.test_cli_runner()
编写测试用例
我们需要在tests文件夹下, 创建以test_开头的文件, 例如: test_api
①测试文件以 test_xx.py 命名需要以 test_开头(或_test 结尾)
②测试类以 Test开头,并且不能带有 init 方法
③测试函数或方法以 test 开头总体上分为三个阶段:
pytest会按照字符顺序执行测试用例
测试用例可以笼统归纳为两种: http请求和非http请求
Pytest 最常用的断言一般有以下五种:
assert xx:判断 xx 为真assert not xx:判断 xx 不为真assert a in b:判断 b 包含 a assert a == b:判断 a 等于 b assert a !=b:判断 a 不等于 b
import json


def test_logout(client):
    print(44444444444444)
    rv = client.get('/logout')

    assert rv.status_code == 200
    assert rv.json['code'] == 0

class TestAccess:
    def test_login_empty_username(self, client):
        headers = {
            'Content-Type': 'application/json'
        }

        data = {
            'password': 'test@123'
        }
        res = client.post('/login', headers=headers, data=json.dumps(data))
        assert res.status_code == 200, '网络状态码异常'
        assert res.json['code'] == -1, '业务状态码异常'

    def test_login_success(self, client):
        headers = {
            'Content-Type': 'application/json'
        }

        data = {
            'username': 'test',
            'password': 'test@123'
        }
        res = client.post('/login', headers=headers, data=json.dumps(data))
        assert res.status_code == 200, '网络状态码异常'
        assert res.json['code'] == 0, '业务状态码异常'
测试用例执行
单个文件执行
pytest 文件名 例: pytest ./test_access.py
多个文件执行
如果只输入 pytest,则会默认执行当前文件夹下所有以 test_开头(或_test 结尾)的文件。
pytest执行顺序
conftest中的app -> client -> 测试用例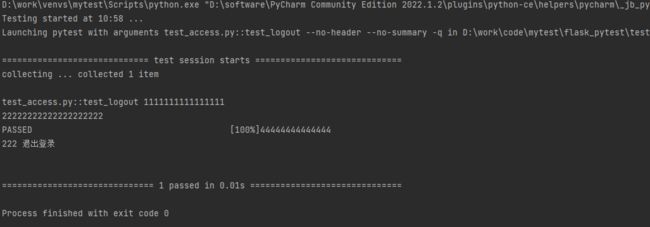
初体验
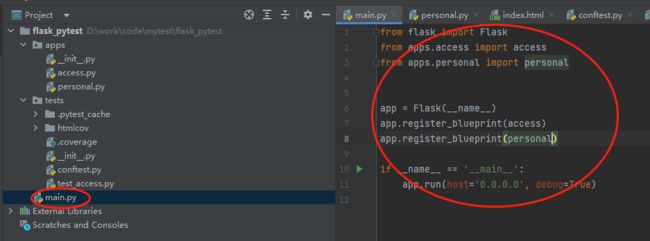
项目目录结构
main.py
from flask import Flask, request

app = Flask(__name__)


@app.route('/login', methods=['POST'])
def login():
    body = request.json
    username = body.get('username')
    password = body.get('password')

    if not (username and password):
        return {'code': -1, 'msg': '用户名或密码为空'}

    print(1111, username, password)
    return {'code': 0, 'msg': '成功'}


@app.route('/logout', methods=['get'])
def logout():
    print(222, '退出登录')
    return {'code': 0, 'msg': '成功'}


if __name__ == '__main__':
    app.run(host='0.0.0.0', debug=True)
conftest.py
import pytest
from main import app as myapp


@pytest.fixture()
def app():
    print(1111111111111111)
    myapp.testing = True

    # other setup can go here

    yield myapp

    # clean up / reset resources here


@pytest.fixture()
def client(app):
    print(22222222222222222222)
    return app.test_client()


@pytest.fixture()
def runner(app):
    print(333333333333333)
    return app.test_cli_runner()
test_access.py
import json


def test_logout(client):
    print(44444444444444)
    rv = client.get('/logout')

    assert rv.status_code == 200
    assert rv.json['code'] == 0

class Test_access:
    def test_login_empty_username(self, client):
        headers = {
            'Content-Type': 'application/json'
        }

        data = {
            'password': 'test@123'
        }
        res = client.post('/login', headers=headers, data=json.dumps(data))
        assert res.status_code == 200, '网络状态码异常'
        assert res.json['code'] == -1, '业务状态码异常'

    def test_login_success(self, client):
        headers = {
            'Content-Type': 'application/json'
        }

        data = {
            'username': 'test',
            'password': 'test@123'
        }
        res = client.post('/login', headers=headers, data=json.dumps(data))
        assert res.status_code == 200, '网络状态码异常'
        assert res.json['code'] == 0, '业务状态码异常'
【注意】在tests文件夹下需要有__init__.py文件,否在只用命令行执行pytest xxx相关命令的时候会提示"ModuleNotFoundError: No module named 'main'"找不到main模块。
参考文档: https://mp.weixin.qq.com/s?__biz=MzI3NDc4NTQ0Nw==&mid=2247526985&idx=1&sn=468201c0c30591a5ee28cf3676e1963a&chksm=eb0c9f81dc7b169753904d29b821b18ed595f210cfeeebea3692fff6d3359892b390467304cc&scene=27
测试覆盖率
安装pytest-cov
pip install pytest-cov
查看覆盖率命令
pytest --cov
查看覆盖率html报告
pytest --cov --cov-report=html
指定被测试代码
pytest --cov=apps
apps是项目模块名称
也可以指定具体的py模块名称
pytest --cov=apps.access
apps.access是指apps模块中的access.py文件
调整下上边的项目结构
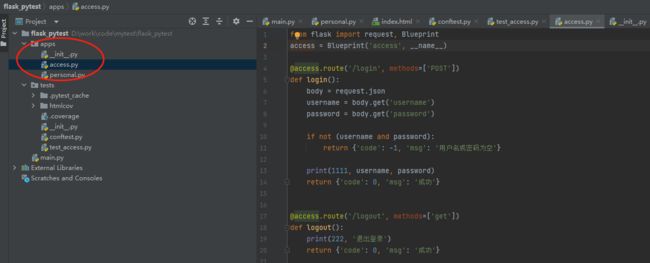
将上边项目按找应用分文件夹重构,将之前main.py中的登录与登出相关的代码移动到apps/access.py中,并新加personal.py文件,写了个更改用户名的接口,测试用例内容没有变化
验证
执行pytest --cov
可以看到access.py中的覆盖率是100%,personal.py中的覆盖率是44%(总共9个有5个未被执行)。很奇怪,为什么测试用例没有变化,但是personal.py中会有被覆盖的情况???(下面会揭晓答案)
执行pytest --cov --cov-report=html
结果里没有任何信息,但是会当前目录生成一个htmlcov文件夹。打开htmlcov/index.html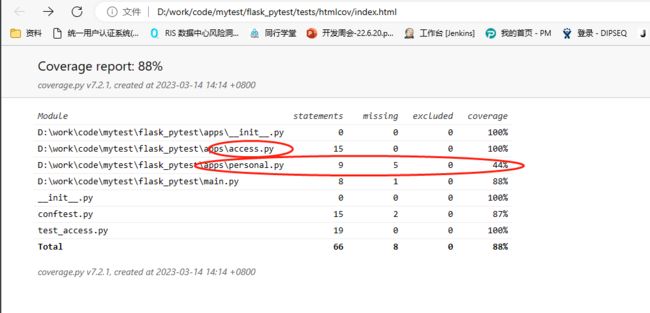
可以看到这里的内容与上边执行pytest --cov的结果一模一样,但是,点击xx\apps\personal.py, 看到如下结果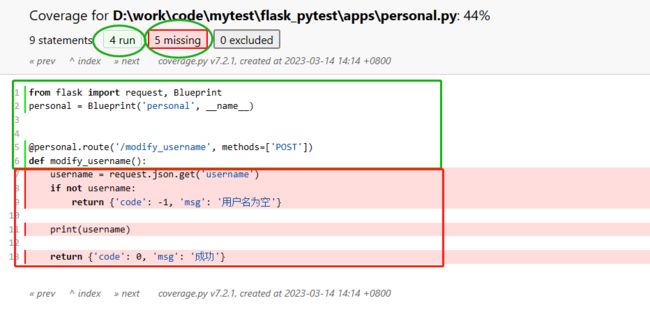
看到了没,对于这个文件,总共有9行代码,有4行被执行了,5行没有被执行。(为什么4行被执行了,5行没被执行就不用解释了吧)
所以会有报告中44%的覆盖率了。这也就明白了,cov的覆盖率是怎么计算的。
cov的覆盖率是根据代码行数计算的,有多少行被执行了, 多少行未被执行
测试报告生成 allure
安装allure
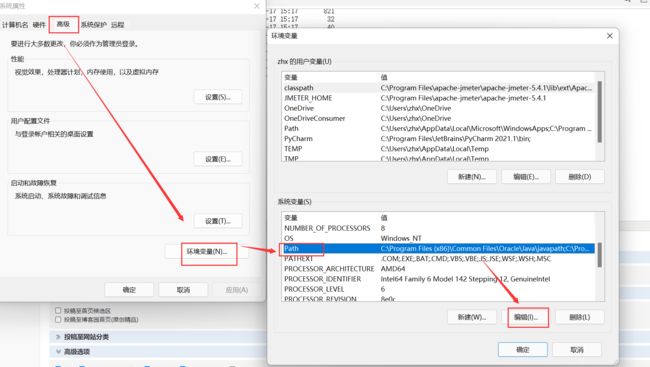
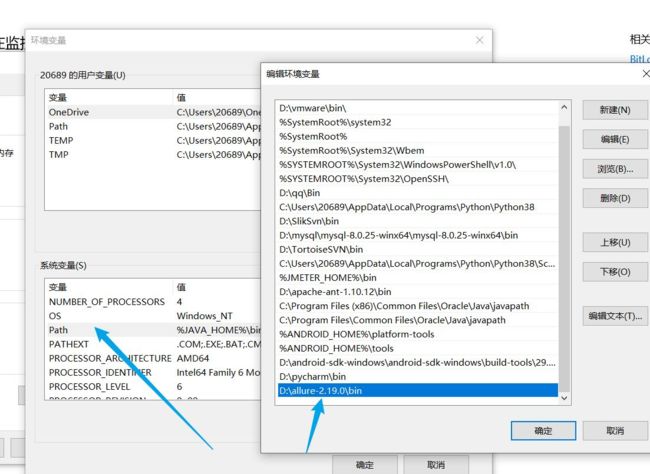
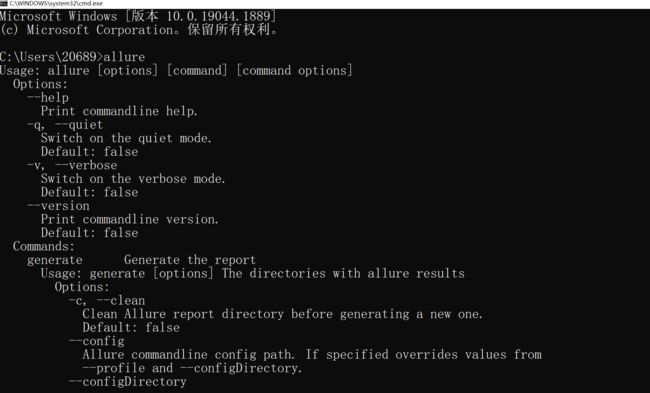
Allure运行需要Java环境,Java安装并配置环境变量后,在命令窗口执行以下命令,更多信息可查阅官方文档
1.下载地址https://repo.maven.apache.org/maven2/io/qameta/allure/allure-commandline/
下载版本-推荐下载最新的版本 windows下载zip的安装包,下载完之后直接解压
安装allure-pytest插件
pip install allure-pytest
生成allure报告
pytest [测试文件] -s -q --alluredir=./result #--alluredir指定测试报告路径
查看报告
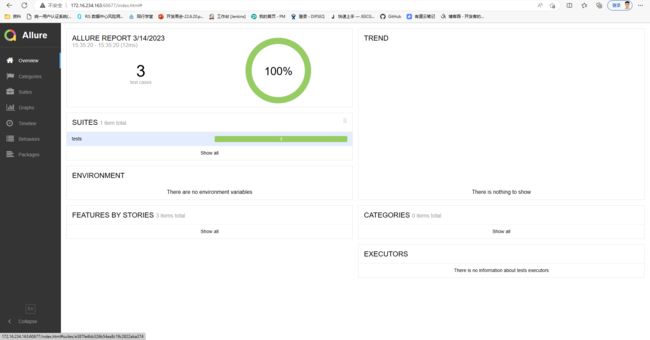
方式一:直接打开默认浏览器展示报告allure serve ./result
方式二:从结果生成报告
- 生成报告
allure generate ./result/ -o ./report/ --clean (覆盖路径加–clean) - 打开报告
allure open -h 127.0.0.1 -p 8883 ./report/
参考文档:https://blog.csdn.net/u010698107/article/details/111416173
使用装饰器
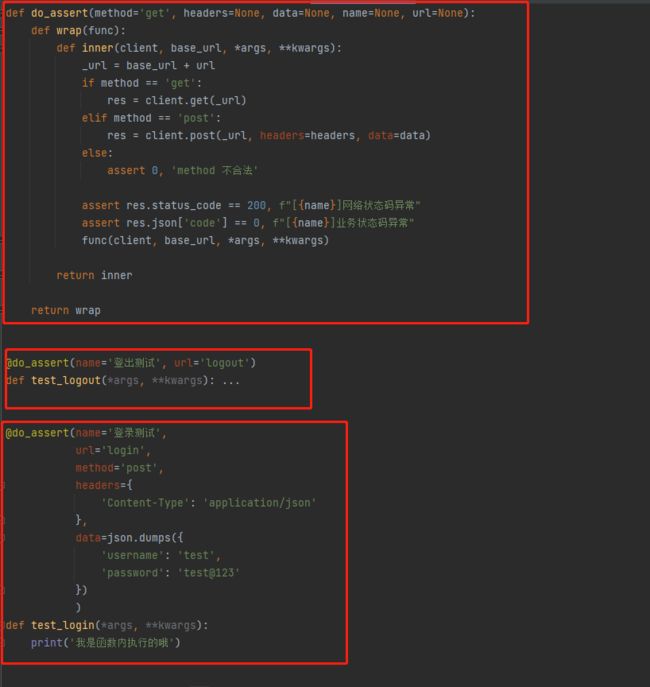
因为我们在测试的时候每次都会需要请求网络,检查网络状态码和业务状态码,所以我们把这部分功能提取到装饰器中。
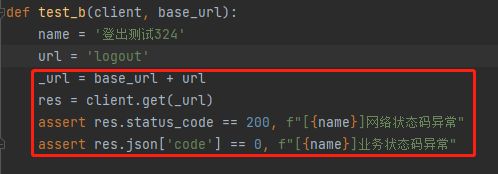
未使用装饰器代码
def test_b(client, base_url):
    name = '登出测试324'
    url = 'logout'
    _url = base_url + url
    res = client.get(_url)
    assert res.status_code == 200, f"[{name}]网络状态码异常"
assert res.json['code'] == 0, f"[{name}]业务状态码异常"使用装饰器提取公共部分
import json


def do_assert(method='get', headers=None, data=None, name=None, url=None):
    def wrap(func):
        def inner(client, base_url, *args, **kwargs):
            _url = base_url + url
            if method == 'get':
                res = client.get(_url)
            elif method == 'post':
                res = client.post(_url, headers=headers, data=data)
            else:
                assert 0, 'method 不合法'

            assert res.status_code == 200, f"[{name}]网络状态码异常"
            assert res.json['code'] == 0, f"[{name}]业务状态码异常"
            func(client, base_url, *args, **kwargs)

        return inner

    return wrap


@do_assert(name='登出测试', url='logout')
def test_logout(*args, **kwargs): ...


@do_assert(name='登录测试',
           url='login',
           method='post',
           headers={
               'Content-Type': 'application/json'
           },
           data=json.dumps({
               'username': 'test',
               'password': 'test@123'
           })
           )
def test_login(*args, **kwargs):
    print('我是函数内执行的哦')
与上边未使用装饰器的代码功能等价,如果有其他的操作,比如要查询数据库之类的,可以在函数内实现,在使用的之后装饰器会执行函数中的内容。
参数化用例,比上边装饰器更高级好用
@pytest.mark.parametrize(argnames, argvalues)
argnames:参数化变量名,可以是string(逗号分割) 、list 和 tuple类型
-
@pytest.mark.parametrize("a, b", [(1,2),(3,4)])
-
@pytest.mark.parametrize(["a","b"], [(1,2),(3, 4)])
-
@pytest.mark.parametrize(("a", "b"), [(1,2),(3,4)])
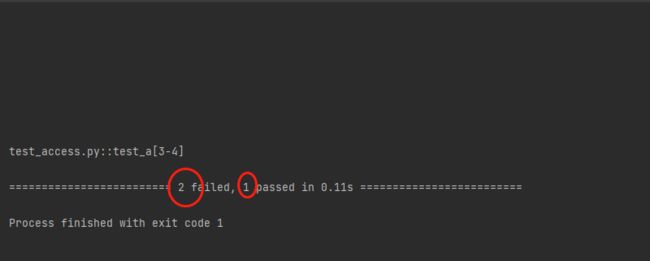
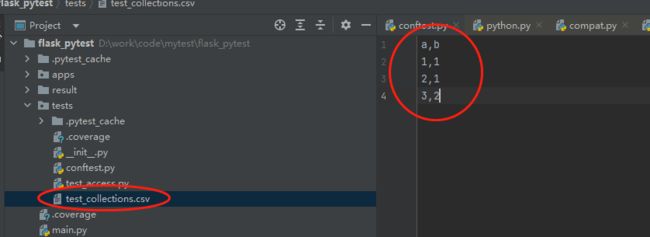
@pytest.mark.parametrize('a,b', pd.read_csv('test_collections.csv').values)
def test_a(a, b):
    print(111111111, a, b)
assert a == b参数来源可以通过文件,变量各种形式。参见文档https://blog.51cto.com/u_15441270/4719922
好用

