QT学习笔记6
一.QLable控件使用:


创建控件:
方式一:代码
文本:
QLabel *label=new QLabel(this);
//建立标签
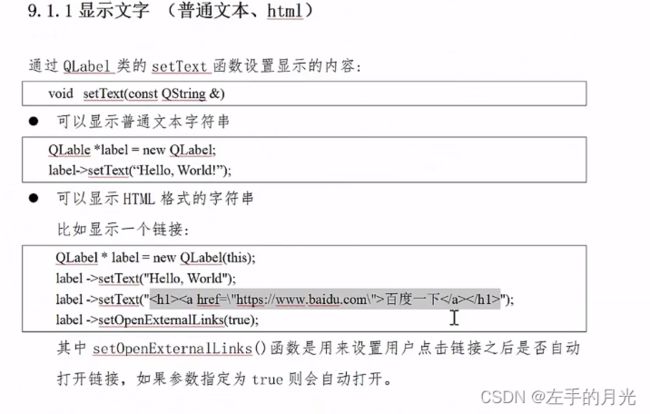
label->setText("这是代码创建标签");超链接:
label->setText("百度
");
//百度网址,一级标签和超链接标签
label->setOpenExternalLinks(true);
//点击自动打开
显示图片:
QPixmap pixmap;
    //创立图片类
    pixmap.load(":/image/u=4100216834,2628143061&fm=253&fmt=auto&app=138&f=JPEG.webp");
    //图片控件加载图片
    ui->labe_image->setPixmap(pixmap);
显示动图:
 //创建动画类
    QMovie *move=new QMovie(":/image/71f657c7c43242a684f22c3ea6b858c8.gif");
    //将动画显示在主页面
    ui->labelgif->setMovie(move);
    move->start();
    connect(ui->pushButton,&QPushButton::clicked,this,[=](){
        move->stop();
    });


    connect(ui->pushButton_2,&QPushButton::clicked,this,[=](){
        move->start();
    });
方式二:ui
拖拽方式

二.QLineEdit控件使用
单行文本编辑框
创建QLineEdit:
方法一:
QLineEdit *edit=new QLineEdit(this);方法二:
拖拽
![]()

    QLineEdit *edit=new QLineEdit(this);
    //输入文字
    edit->setText("代码创建");
    //获取ui创建的文字
    QString str=ui->lineEdit->text();
    qDebug()<
ui->lineEdit->setEchoMode(QLineEdit::Password);
//设置为密码模式
ui->lineEdit->setTextMargins(10,0,0,0);三.自定义控件
建立一个页面:

创建好页面以后,利用ui设置一个界面
在主界面的ui中建立一个widget,右击提升为,输入刚刚建立的页面名字即可;
 connect(ui->spinBox,SIGNAL(valueChanged(int)),
            ui->horizontalSlider,SLOT(setValue(int)));
connect(ui->horizontalSlider,SIGNAL(valueChanged(int)),
            ui->spinBox,SLOT(setValue(int)));
两个信号绑定,实现类似进度条功能,在新建的页面中写
form.cpp
#include "form.h"
#include "ui_form.h"

Form::Form(QWidget *parent) :
    QWidget(parent),
    ui(new Ui::Form)
{
    ui->setupUi(this);
    connect(ui->spinBox,SIGNAL(valueChanged(int)),
            ui->horizontalSlider,SLOT(setValue(int)));
    connect(ui->horizontalSlider,SIGNAL(valueChanged(int)),
            ui->spinBox,SLOT(setValue(int)));
}

Form::~Form()
{
    delete ui;
}

void Form::setnumber(){
    ui->horizontalSlider->setValue(50);

}
在次页面建立槽函数
widget.c
#include "widget.h"
#include "ui_widget.h"
#include "QLineEdit"
#include
Widget::Widget(QWidget *parent)
    : QWidget(parent)
    , ui(new Ui::Widget)
{
    ui->setupUi(this);

    QLineEdit *edit=new QLineEdit(this);
    //输入文字
    edit->setText("代码创建");
    //获取ui创建的文字
    QString str=ui->lineEdit->text();
    qDebug()<lineEdit->setEchoMode(QLineEdit::Password);
    //设置为密码模式
    ui->lineEdit->setTextMargins(10,0,0,0);

    //点击会变为50
    connect(ui->pushButton,&QPushButton::clicked,ui->widget,&Form::setnumber);
}

Widget::~Widget()
{
    delete ui;
}
四.栈容器
页面切换(主页面不换)
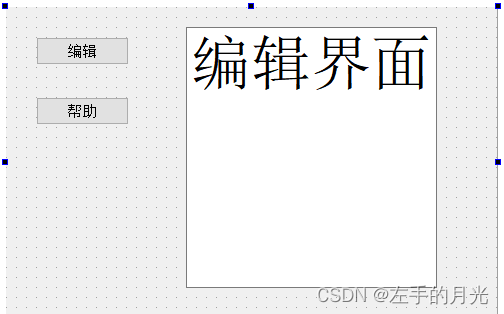
先建立以下界面,建立一个栈容器;
![]()


可以插入页;

创建两个页面,充当栈容器的两个页面;
创建好两个页面
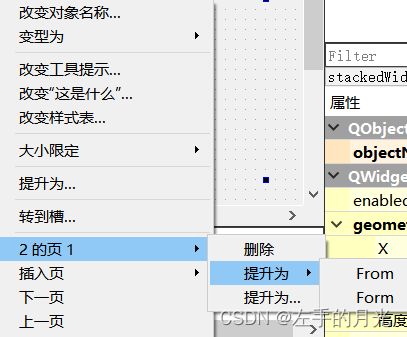
将这两个在栈容器中分别提升为
     connect(ui->pushButton,&QPushButton::clicked,this,[=](){
        ui->stackedWidget->setCurrentIndex(0);
    });

    connect(ui->pushButton_2,&QPushButton::clicked,this,[=](){
        ui->stackedWidget->setCurrentIndex(1);
    });
连接信号与槽,点击按钮更换页面;