Ubuntu18.04安装配置FRR
FRR
文章描述了如何在Ubuntu18.04的环境下安装配置frr
0. 更新安装源
vi /etc/apt/sources.list
更改文件内容
deb http://mirrors.aliyun.com/ubuntu/ bionic main restricted universe multiverse
deb-src http://mirrors.aliyun.com/ubuntu/ bionic main restricted universe multiverse

deb http://mirrors.aliyun.com/ubuntu/ bionic-security main restricted universe multiverse
deb-src http://mirrors.aliyun.com/ubuntu/ bionic-security main restricted universe multiverse

deb http://mirrors.aliyun.com/ubuntu/ bionic-updates main restricted universe multiverse
deb-src http://mirrors.aliyun.com/ubuntu/ bionic-updates main restricted universe multiverse

deb http://mirrors.aliyun.com/ubuntu/ bionic-proposed main restricted universe multiverse
deb-src http://mirrors.aliyun.com/ubuntu/ bionic-proposed main restricted universe multiverse

deb http://mirrors.aliyun.com/ubuntu/ bionic-backports main restricted universe multiverse
deb-src http://mirrors.aliyun.com/ubuntu/ bionic-backports main restricted universe multiverse
加载更新源
sudo apt-get update
sudo apt-get upgrade
1. 安装依赖
首先先更新一下源
apt update
之后下载其余的依赖安装包
apt-get install git autoconf automake libtool make libreadline-dev texinfo pkg-config libpam0g-dev libjson-c-dev bison flex libc-ares-dev python3-dev python3-sphinx install-info build-essential libsnmp-dev perl libcap-dev libelf-dev libunwind-dev
2. 编译libyang
apt install cmake libpcre2-dev -y
git clone https://github.com/CESNET/libyang.git
cd libyang
git checkout v2.0.0
mkdir build; cd build
cmake -D CMAKE_INSTALL_PREFIX:PATH=/usr -D CMAKE_BUILD_TYPE:String="Release" ..
make
sudo make install
3. 安装 Protobuf, ZeroMQ
apt-get install protobuf-c-compiler libprotobuf-c-dev
apt-get install libzmq5 libzmq3-dev -y
4. 添加 FRR 用户和组
groupadd -r -g 92 frr
groupadd -r -g 85 frrvty
adduser --system --ingroup frr --home /var/run/frr/ --gecos "FRR suite" --shell /sbin/nologin frr
usermod -a -G frrvty frr
5. 编译安装FRR
git clone https://github.com/frrouting/frr.git frr
cd frr
./bootstrap.sh
./configure \
     --prefix=/usr \
     --includedir=\${prefix}/include \
     --bindir=\${prefix}/bin \
     --sbindir=\${prefix}/lib/frr \
     --libdir=\${prefix}/lib/frr \
     --libexecdir=\${prefix}/lib/frr \
     --localstatedir=/var/run/frr \
     --sysconfdir=/etc/frr \
     --with-moduledir=\${prefix}/lib/frr/modules \
     --enable-user=frr \
     --enable-group=frr \
     --enable-vty-group=frrvty \
make
sudo make install
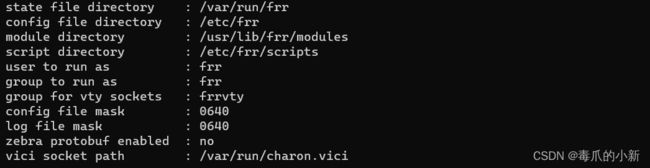
配置如下
6. 安装FRR配置文件
install -m 775 -o frr -g frr -d /var/log/frr
install -m 775 -o frr -g frrvty -d /etc/frr
install -m 640 -o frr -g frrvty tools/etc/frr/vtysh.conf /etc/frr/vtysh.conf
install -m 640 -o frr -g frr tools/etc/frr/frr.conf /etc/frr/frr.conf
install -m 640 -o frr -g frr tools/etc/frr/daemons.conf /etc/frr/daemons
install -m 640 -o frr -g frr tools/etc/frr/daemons /etc/frr/daemons
7. 调整系统
vi /etc/sysctl.conf 添加如下配置
net.ipv4.ip_forward=1
net.ipv6.conf.all.forwarding=1
sysctl -p刷新
8. 添加MPLS内核模块
首先在宿主机上加载必要的linux内核MPLS模块,直接分别在宿主机上运行如下命令
modprobe mpls_router
modprobe mpls_gso
modprobe mpls_iptunnel
查看模块是否加载成功
lsmod | grep mpls

将这3个内核模块添加到容器的配置文件中,确保容器也能加载这些模块
sudo vi /etc/modules
添加如下内容
mpls_router
mpls_gso
mpls_iptunnel
加载内核模块
modprobe mpls-router mpls-iptunnel
vi /etc/sysctl.conf启用 MPLS 转发,【如果没有那么多网卡,请注释】
net.mpls.conf.eth0.input=1
net.mpls.conf.eth1.input=1
net.mpls.conf.eth2.input=1
net.mpls.platform_labels=100000
sysctl -p刷新
9. 安装服务
install -m 644 tools/frr.service /etc/systemd/system/frr.service
# 设置开机自启
systemctl enable frr
10. 启用守护进程
开启你需要的服务,设置为yes,且修改MAX_FDS=1024
vim /etc/frr/daemons

11. 启用frr
# 启用
systemctl start frr
# 重启
systemctl restart frr
启动后可以使用netstat -nlpt看下端口是否正常。
默认守护程序的路径是/etc/frr/xxx.conf
12. 测试frr
如果输入如下代码,可以进入编辑模式,则frr安装完毕
vtysh