springboot自动配置原理及手写starter
本文是向大家介绍springboot的精髓部分-自动装配,掌握自动装配能让你更深的去理解boot框架,学会启动器(starter)的开发,能让你的开发更加便捷、得心应手、效率加倍。
1.自动配置原理
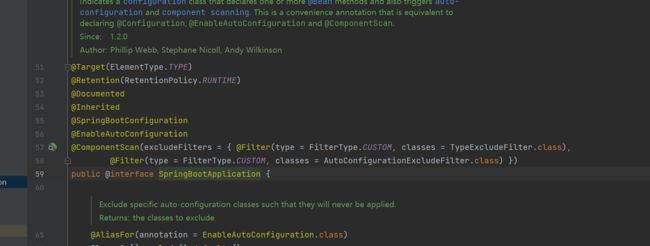
在springboot的启动类上我们可以看到有 @SpringBootApplication注解
点击去看我们发现
这是一个组合注解
@SpringBootApplication中有3个主要注解
1.@SpringBootConfiguration
2.@ComponentScan
3.@EnableAutoConfiguration
我们依次讲解:
首先讲解一下
@SpringBootConfiguration
这个注解 这个其实和 @Configuration 的注解一样用于定义bean的,springboot的启动类其实也就是作为spring的一个bean注入到spring容器中
@ComponentScan
是spring中的注解 主要就是定义扫描的路径从中找出标识了需要装配的类自动装配到spring的bean容器中
接下里就是 @EnableAutoConfiguration
这个注解 这个是开启自动装配的核心注解,他的作用就是获取配置类 扫描并注入IOC容器中进行管理,他也是组合注解 我们点进去看又能看到
@AutoConfigurationPackage 和 @Import 这2个注解
@AutoConfigurationPackage
添加该注解的类所在的package 作为 自动配置 package 进行管理,个人的理解吧 我觉得这个注解的含义就是扫描 springboot 所在包 将其配置类交给IOC管理
@Import({AutoConfigurationImportSelector.class})
这个导入AutoConfigurationImportSelector.class这个类,将其注入spring容器 而这个导入的类的作用可以帮助将所有符合条件的@Configuration配置交给spring的IOC容器进行注入
进入 AutoConfigurationImportSelector 类里面有 selectImports 方法,该方法中调用了 getAutoConfigurationEntry 进入这个方法
该方法中调用了 getCandidateConfigurations 这个将获取 META-INF/spring.factories 中配置文件中的需要自动装配的类名,配置文件如下图
这些类基本都是被@Configuration注解的
简而言之,就是Spring Boot在启动的时候就是从类路径下的META-INF/spring.factories中获取需要自动装配的类 (一些配置组件),找到这些类(XXXAutoConfiguration),通过SpringFactoriesLoader机制创建对应的bean,注入到容器中,完成了自动注入spring容器,本来需要在spring的xml配置文件中去配置bean的操作就免去了 ,也就是springboot完成了自动装配
2.手写starter
知道了上面的配置原理我们可以仿照上面自己写一个starter
写一个jedis的starter
我们创建一个工程 my_starter
pom中引入依赖
        org.springframework.boot
        spring-boot-starter


        org.springframework.boot
        spring-boot-starter-test
        test


        redis.clients
        jedis
        3.3.0


        org.springframework.boot
        spring-boot-configuration-processor
        true


        org.projectlombok
        lombok
        true
resources/META-INF 下面新建一个 spring.factories
spring.factories 配置写上
org.springframework.boot.autoconfigure.EnableAutoConfiguration=com.chris.autoconfiguration.jedis.JedisAutoConfiguration
写上我们的配置类
package com.chris.autoconfiguration.jedis;

import lombok.Data;
import org.springframework.boot.context.properties.ConfigurationProperties;

@ConfigurationProperties(prefix = "jedis.config")
@Data
public class JedisProperties {
    private String host = "127.0.0.1";
    private int  port = 6379;
    private String password;
    private int maxTotal = 8;
    private int maxIdle = 8;
    private int minIdle = 0;
    private int timeout = 1000;
}
写一个我们的功能类
package com.chris.autoconfiguration.jedis;

import redis.clients.jedis.Jedis;
import redis.clients.jedis.JedisPool;

import java.util.Objects;
import java.util.function.Consumer;


public class JedisCore {

    private JedisPool jedisPool;

    public JedisCore(JedisPool jedisPool) {
        this.jedisPool = jedisPool;
    }

    public void executeJedis(Consumer consumer){
        if (Objects.isNull(jedisPool)) {
            throw new RuntimeException("jedisPool为空");
        }
        try (Jedis jedis = jedisPool.getResource()) {
            consumer.accept(jedis);
        }catch (Exception e) {
            throw new RuntimeException("jedis错误");
        }
    }
}
将功能类自动装配进ioc
package com.chris.autoconfiguration.jedis;

import org.springframework.beans.factory.annotation.Autowired;
import org.springframework.boot.autoconfigure.condition.ConditionalOnMissingBean;
import org.springframework.boot.autoconfigure.condition.ConditionalOnProperty;
import org.springframework.boot.context.properties.EnableConfigurationProperties;
import org.springframework.context.annotation.Bean;
import org.springframework.context.annotation.Configuration;
import redis.clients.jedis.JedisPool;
import redis.clients.jedis.JedisPoolConfig;

@Configuration
@EnableConfigurationProperties(JedisProperties.class)
@ConditionalOnProperty(prefix = "jedis", name = "enable", havingValue = "true") // 取jedis.enable的配置和 havingValue 后的值对比 相同的话则生效启用
public class JedisAutoConfiguration {

    @Autowired
    private JedisProperties properties;

    @Bean
    @ConditionalOnMissingBean(JedisPool.class)
    public JedisPool jedisPool() {
        JedisPoolConfig config = new JedisPoolConfig();
        config.setMinIdle(properties.getMinIdle());
        config.setMaxIdle(properties.getMaxIdle());
        config.setMaxTotal(properties.getMaxTotal());
        JedisPool pool = new JedisPool(config,
                properties.getHost(),
                properties.getPort(),
                properties.getTimeout(),
                properties.getPassword());
        return pool;
    }


    @Bean
    @ConditionalOnMissingBean(JedisCore.class)
    public JedisCore jedisCore(JedisPool jedisPool) {
        JedisCore jedisCore = new JedisCore(jedisPool);
        return jedisCore;
    }


}
ok 以上我们就写完了一个jedis的starter
3.使用自定义的starter
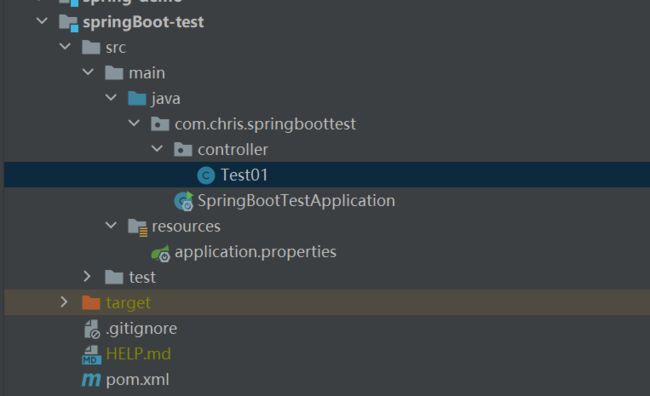
新建一个springboot工程
pom中引入 我们自己的starter
    com.chris
    jedis-spring-boot-starter
    0.0.1-SNAPSHOT
配置文件如下:
4.运行测试
浏览器访问 http://localhost:1234/test/jedis
然后在redis工具中访问redis
可以看到 结果success
代码地址 ClearlovX/my_starter


