Pytorch中的仿射变换(F.affine_grid)
目录
1、平移操作实现
2、缩放操作
3、旋转操作
4、转置操作
在pytorch框架中, F.affine_grid 与 F.grid_sample(torch.nn.functional as F)联合使用来对图像进行变形。
F.affine_grid 根据形变参数产生sampling grid,F.grid_sample根据sampling grid对图像进行变形。
需要注意,pytorch中的F.grid_sample是反向采样,这就导致了形变参数与直觉是相反的(后面有实验验证)(例如放射矩阵中的缩放因子是0.5,会使目标图像扩大两倍;平移为正会使目标图像往左上角移动)
【反向采样】:定义的sampling grid尺寸即输出图像的尺寸,而sampling grid其中每一个位置内的数值x,y,例如sampling_grid[i,j]=[x,y], 则表示输出图像在(i,j)点的像素值应该在原图(x,y)处取值,若x,y都恰好为整数且在原图范围内,则直接取原图在x,y点的像素值;若x,y不是都为整数但都在原图范围内,则需要用插值算法计算该点的像素值;超出图像范围的则为0。
torch.nn.functional.affine_grid(theta,size):
给定一组仿射矩阵(theta),生成一个2d的流场.通常与 grid_sample() 结合使用,用于空间变换网络.
参数:
- theta(Tensor 类型):输入的一组仿射矩阵(N*2*3)
- size(torch.Size 类型):要输出的图像的size,(N*C*H*W),比如:torch.Size((32,3,24,24))
- 其中 N 是指 batch_size
回忆一下仿射变换,需要一个3*3的矩阵。而affine grid需要的theta是N*2*3的,其中的这个2*3就是仿射矩阵的前两行(因为第三行是涉及到透视变换的,和仿射变换无关,pytorch维护者就不管最后一行)。
再回忆一下,前两行都是控制什么的:
- 前两列涉及到旋转和缩放
- 最后一列涉及到平移
- 这6个自由度,就组成了平面2d图像的仿射变换需要的变换矩阵。而affine grid,就是通过用户设置仿射变换的参数(theta),并且指定仿射变换之后得到的图像的size,得到了一个grid。这个grid输入到grid sample中,就完成了仿射变换。grid用来指定,新图像的每个位置,需要去源图像的哪个位置采样。
———————————————————————————————————————————
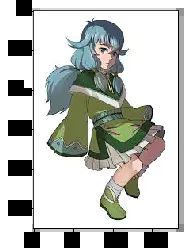
假设我们有这么一张图片:
利用python进行显示:
from torchvision import transforms
from PIL import Image
import matplotlib.pyplot as plt

img_path = "图片文件路径"
img_torch = transforms.ToTensor()(Image.open(img_path))

plt.imshow(img_torch.numpy().transpose(1, 2, 0))
plt.show()
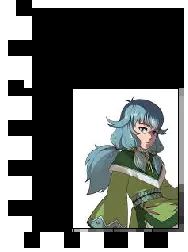
1、平移操作实现
-
利用普通方式
例如我们需要向右平移50px,向下平移100px。
import numpy as np
import torch

theta = np.array([
    [1,0,50],
    [0,1,100]
])
# 变换1:可以实现缩放/旋转,这里为 [[1,0],[0,1]] 保存图片不变
t1 = theta[:,[0,1]]
# 变换2:可以实现平移
t2 = theta[:,[2]]

_, h, w = img_torch.size()
new_img_torch = torch.zeros_like(img_torch, dtype=torch.float)
for x in range(w):
    for y in range(h):
        pos = np.array([[x], [y]])
        npos = t1@pos+t2
        nx, ny = npos[0][0], npos[1][0]
if 0<=nx-
利用pytorch 方式
向右移动0.2,向下移动0.4:
from torch.nn import functional as F

theta = torch.tensor([
    [1,0,-0.2],
    [0,1,-0.4]
], dtype=torch.float)
grid = F.affine_grid(theta.unsqueeze(0), img_torch.unsqueeze(0).size())
output = F.grid_sample(img_torch.unsqueeze(0), grid)
new_img_torch = output[0]
plt.imshow(new_img_torch.numpy().transpose(1,2,0))
plt.show()
总结:
- 要使用 pytorch 的平移操作,只需要两步:
- 创建 grid:
grid = torch.nn.functional.affine_grid(theta, size),其实我们可以通过调节size设置所得到的图像的大小(相当于resize); - grid_sample 进行重采样:
outputs = torch.nn.functional.grid_sample(inputs, grid, mode='bilinear')
- 创建 grid:
- theta 的第三列为平移比例,向右为负,向下为负;
我们通过设置 size 可以将图像resize:
from torch.nn import functional as F

theta = torch.tensor([
    [1,0,-0.2],
    [0,1,-0.4]
], dtype=torch.float)
# 修改size
N, C, W, H = img_torch.unsqueeze(0).size()
size = torch.Size((N, C, W//2, H//3))
grid = F.affine_grid(theta.unsqueeze(0), size)
output = F.grid_sample(img_torch.unsqueeze(0), grid)
new_img_torch = output[0]
plt.imshow(new_img_torch.numpy().transpose(1,2,0))
plt.show()
2、缩放操作
-
利用普通方式
放大1倍:
import numpy as np
import torch

theta = np.array([
    [2,0,0],
    [0,2,0]
])
t1 = theta[:,[0,1]]
t2 = theta[:,[2]]

_, h, w = img_torch.size()
new_img_torch = torch.zeros_like(img_torch, dtype=torch.float)
for x in range(w):
    for y in range(h):
        pos = np.array([[x], [y]])
        npos = t1@pos+t2
        nx, ny = npos[0][0], npos[1][0]
        if 0<=nx
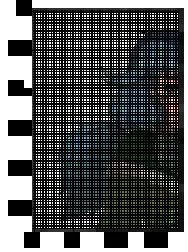
由于没有使用插值算法,所以中间有很多部分是黑色的。
-
利用pytorch 方式
from torch.nn import functional as F

theta = torch.tensor([
    [0.5, 0  , 0],
    [0  , 0.5, 0]
], dtype=torch.float)
grid = F.affine_grid(theta.unsqueeze(0), img_torch.unsqueeze(0).size())
output = F.grid_sample(img_torch.unsqueeze(0), grid)
new_img_torch = output[0]
plt.imshow(new_img_torch.numpy().transpose(1,2,0))
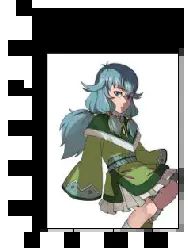
plt.show()结论:可以看到,affine_grid 的放大操作是以图片中心为原点的。
3、旋转操作
-
利用普通操作
将图片旋转30度:
import numpy as np
import torch
import math

angle = 30*math.pi/180
theta = np.array([
    [math.cos(angle),math.sin(-angle),0],
    [math.sin(angle),math.cos(angle) ,0]
])
t1 = theta[:,[0,1]]
t2 = theta[:,[2]]

_, h, w = img_torch.size()
new_img_torch = torch.zeros_like(img_torch, dtype=torch.float)
for x in range(w):
    for y in range(h):
        pos = np.array([[x], [y]])
        npos = t1@pos+t2
        nx, ny = int(npos[0][0]), int(npos[1][0])
if 0<=nx-
利用pytorch 方式
from torch.nn import functional as F
import math

angle = -30*math.pi/180
theta = torch.tensor([
    [math.cos(angle),math.sin(-angle),0],
    [math.sin(angle),math.cos(angle) ,0]
], dtype=torch.float)
grid = F.affine_grid(theta.unsqueeze(0), img_torch.unsqueeze(0).size())
output = F.grid_sample(img_torch.unsqueeze(0), grid)
new_img_torch = output[0]
plt.imshow(new_img_torch.numpy().transpose(1,2,0))
plt.show()
pytorch 以图片中心为原点进行旋转,并且在旋转过程中会发生图片缩放,如果选择角度变为 90°,图片为:
4、转置操作
-
利用普通操作
import numpy as np
import torch

theta = np.array([
    [0,1,0],
    [1,0,0]
])
t1 = theta[:,[0,1]]
t2 = theta[:,[2]]

_, h, w = img_torch.size()
new_img_torch = torch.zeros_like(img_torch, dtype=torch.float)
for x in range(w):
    for y in range(h):
        pos = np.array([[x], [y]])
        npos = t1@pos+t2
        nx, ny = npos[0][0], npos[1][0]
if 0<=nx-
利用pytorch 方式
我们可以通过size大小,保存图片不被压缩:
from torch.nn import functional as F

theta = torch.tensor([
    [0, 1, 0],
    [1, 0, 0]
], dtype=torch.float)
N, C, H, W = img_torch.unsqueeze(0).size()
grid = F.affine_grid(theta.unsqueeze(0), torch.Size((N, C, W, H)))
output = F.grid_sample(img_torch.unsqueeze(0), grid)
new_img_torch = output[0]
plt.imshow(new_img_torch.numpy().transpose(1,2,0))
plt.show()
