MOSS User Profile(五):操作用户配置文件属性
MOSS User Profile(五):操作用户配置文件属性
前面介绍过,用户配置文件包含了很多默认的属性字段可以设置,但是也支持用户自定义属性进行添加。这个操作有两种方法,一种是通过创建的共享服务管理网站中的操作,另一种是通过MOSS提供的对象模型来进行创建。
首先介绍第一种,通过共享服务管理网站来维护用户配置文件的属性。
①打开共享服务管理网站,找到“用户配置文件和属性”,点击进入。
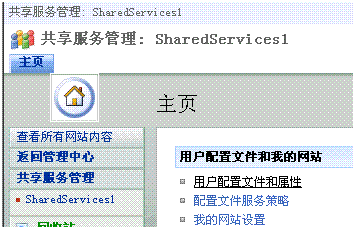
②进入后页面的上半部分是关于用户配置文件的维护,下半部分既是我们要找的“用户配置文件属性”维护的位置。

③可以看到,提供了添加和查看两个操作。如果需要删除属性则需要进入到“查看配置文件属性”中,找到相应的属性,在下拉菜单中选择删除即可。但是,这里有一点需要注意,不是所有默认的配置文件属性都可以删除,只有一部分默认属性是可以删除的。


④如果需要添加配置文件的属性,那么就点击“添加配置文件属性”,进入后即可看到添加自定义配置文件属性的页面。
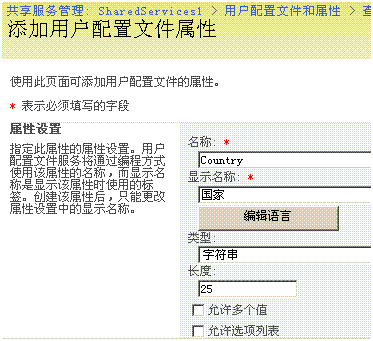
这里有个比较有意思的东西,在显示名称的位置,有个“编辑语言”的按钮。点击打开,可以看到如下的窗口。
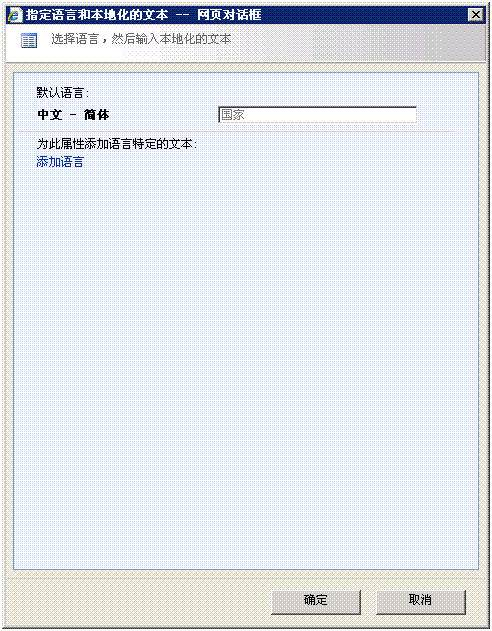
点击“添加语言”链接,可以看到让大家选择语言,然后输入对应语言的内容。这里我并没有进行多语言的测试,不过猜想大概是在各个不同语言浏览的时候显示不同的语言内容。

⑤添加后在查看属性页面的自定义属性部分就可以看到刚刚添加的“国家”了。

下面介绍第二种方法,同样声明,代码中对象模型的使用方法是从参考资料的书中学习到的。
这里需要添加两个组件的引用。
Microsoft.Office.Server.dll
Microsoft.SharePoint.dll
| using System; using System.Collections.Generic; using System.Text; using Microsoft.SharePoint; using System.Web; using Microsoft.Office.Server; using Microsoft.Office.Server.Administration; using Microsoft.Office.Server.UserProfiles;
namespace ConsoleApplication4 { class Program { static void Main(string[] args) { try { using (SPSite site = new SPSite("http://mossweb:1111/sites/Publish")) { ServerContext context = ServerContext.GetContext(site); UserProfileManager profileManager = new UserProfileManager(context); PropertyCollection pc = profileManager.Properties; Property p = pc.Create(false); // 名称 p.Name = "SkillLevel"; // 显示名称 p.DisplayName = "技能级别"; // 类型 p.Type = "String"; // 长度 p.Length = 50; // 策略设置 p.PrivacyPolicy = PrivacyPolicy.OptIn; // 默认隐私设置 p.DefaultPrivacy = Privacy.Organization; pc.Add(p); Console.WriteLine("Success!"); } } catch (Exception ex) { Console.WriteLine(ex.Message); } Console.ReadLine(); } } } |
上面的例子仅仅对一个简单值类型的属性字段创建。还有一种是多值类型或者下拉列表选择的字段,这类字段,其实创建起来也是不难的。仅需要在创建字段属性的时候声明它是一个多值的用户配置文件属性字段,然后给它赋值即可。
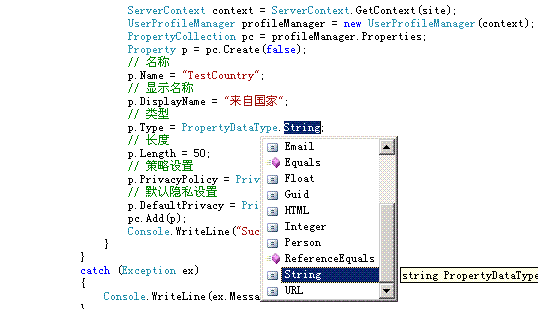
类型可以用PropertyDataType.String的常量来设置,这样不会像字符串设置起来那样会出错。
设置它的IsMultivalued属性,声明这是一个多值字段。
p.IsMultivalued = true;
设置属性是否可编辑。
p.IsUserEditable = true;
然后设置输入框的行为和可选值。
p.ChoiceType = ChoiceTypes.Open;
string[] choices = new string[] { "中国", "美国", "加拿大", "新加坡" };
foreach (string choice in choices)
{
p.ChoiceList.Add(choice);
}
ChoiceTypes.Closed和ChoiceTypes.Open时具有不同行为的输入框。

一个带有验证按钮,一个不带。点击带加号的按钮就会弹出选择对话框,感觉很好。
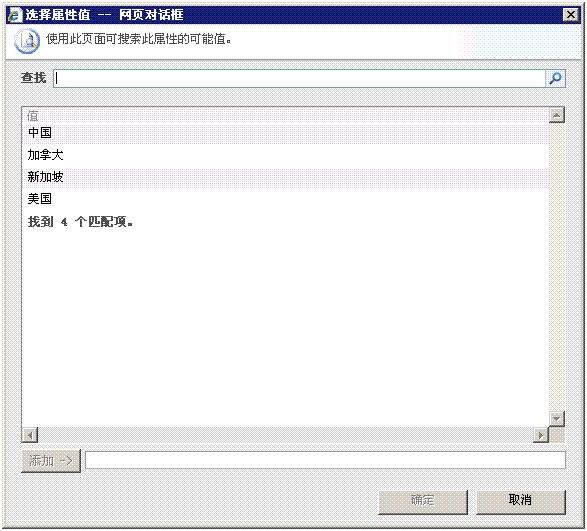
可以用Ctrl或者Shift键来选择多个值进行添加。
多值字段的分隔符也可以通过两个方式来修改:页面、代码。
页面上,只需要在“查看配置文件属性”中找到相应的多值属性字段,在下拉菜单中选择编辑即可。然后会在页面上找到选择分隔符的位置,设置后点击确定即可。

而在代码中会更简单一些,只需设置字段属性对象的Separator属性即可。它的值是MultiValueSeparator枚举类型的可选值。包括,逗号、行、分号和未知四种。
p.Separator = MultiValueSeparator.Comma;
| using System; using System.Collections.Generic; using System.Text; using Microsoft.SharePoint; using System.Web; using Microsoft.Office.Server; using Microsoft.Office.Server.Administration; using Microsoft.Office.Server.UserProfiles;
namespace ConsoleApplication4 { class Program { static void Main(string[] args) { try { using (SPSite site = new SPSite("http://mossweb:1111/sites/Publish")) { ServerContext context = ServerContext.GetContext(site); UserProfileManager profileManager = new UserProfileManager(context); PropertyCollection pc = profileManager.Properties; Property p = pc.Create(false); // 名称 p.Name = "TestCountry1"; // 显示名称 p.DisplayName = "来自国家"; // 类型 p.Type = PropertyDataType.String; // 长度 p.Length = 50; // 策略设置 p.PrivacyPolicy = PrivacyPolicy.OptIn; // 默认隐私设置 p.DefaultPrivacy = Privacy.Organization; // 多值字段 p.IsMultivalued = true; // 是否可编辑 p.IsUserEditable = true; p.ChoiceType = ChoiceTypes.Closed; string[] choices = new string[] { "中国", "美国", "加拿大", "新加坡" }; foreach (string choice in choices) { p.ChoiceList.Add(choice); } p.Separator = MultiValueSeparator.Comma; pc.Add(p); Console.WriteLine("Success!"); } } catch (Exception ex) { Console.WriteLine(ex.Message); } Console.ReadLine(); } } } |
参考资料:Sams Microsoft SharePoint 2007 Development Unleashed