Linux -- 进阶 Web服务器 搭建基于 HTTPS 协议的静态网站 (实验实操)
现在我们想架设一个 互联网网站的话,我们就得想法认证自己是官方的,得产生一个证书
这个证书呢,我们使用的是 X.509 格式的证书
该证书 包含三个文件 : key , csr , crt 。
先介绍下 :
PKI(Public Key Infrastructure)公钥基础设施是提供公钥加密和数字签名服务的系统或平台,目的是为了管理密钥和证书。一个机构通过采用PKI 框架管理密钥和证书可以建立一个安全的网络环境
PKI 主要包括四个部分:X.509 格式的证书(X.509 V3)和证书废止列表CRL(X.509 V2);CA 操作协议;CA管理协议;CA政策制定
X.509通用的证书格式包含三个文件:key,csr,crt。
===>>>
key是私钥文件
csr是证书签名请求文件,用于提交给证书颁发机构(CA)对证书签名
crt是由证书颁发机构(CA)签名后的证书,或者是开发者自签名的证书,包含证书持有人的信息,持有人的公钥,以及签署者的签名等信息
使用 Apache + mod_ssl 组件的加密认证网站 :
概念 :
因为 Apache ( httpd ) 是没有任何安全性的限制的 ,所以需要安装一个 mod_ssl 组件。
mod_ssl 组件 : 是 Apache 的一个模块,以 openssl ( 就相当于 ssh) 的工具箱为基础
专门为 Apache 提供密码保护的一种组件模块儿~~!!
预备工作 :
安装 Apache ( httpd )
===>>>
[root@server ~]# dnf install httpd -y 安装 mod_ssl 组件 :
===>>>
[root@server ~]# dnf install mod_ssl -y
配置文件 :
主配置文件 : /etc/httpd/conf.d/ssl.conf
证书文件目录 : /etc/pki/tls/certs/xxxx.crt ( 以 .crt 结尾的都是 证书文件 )
私钥文件 : /etc/pki/tls/private/xxxx.key ( 以 .key )
进入主配置文件看看 :
[root@server ~]# vim /etc/httpd/conf.d/ssl.conf===>>>
5  Listen 443 https     #   监听端口号 ( 443 )

18 SSLPassPhraseDialog exec:/usr/libexec/httpd-ssl-pass-dialog   # 存储证书的密码信息

23 SSLSessionCache      shmcb:/run/httpd/sslcache(512000)    #  ssl 的缓存 及 存储位置

24 SSLSessionCacheTimeout  300    #  缓存的超时时长

40     #  重要**    定义虚拟主机的信息,配置

48 ErrorLog logs/ssl_error_log    #   错误日志

49 TransferLog logs/ssl_access_log    #  传输日志

50 LogLevel warn             #  日志等级

54 SSLEngine on              #  SSL 引擎是否开启  ( on 开启 )

66 SSLHonorCipherOrder on      # 协商算法 ( 是否开启 )

85 SSLCertificateFile /etc/pki/tls/certs/localhost.crt   #  证书存储路径 ( 建议主机名 来表示,你主机名是啥,localhost 就是啥 )

93 SSLCertificateKeyFile /etc/pki/tls/private/localhost.key   # 私钥文件路径

202   #  虚拟主机结束定义
* 第一列数字为 行号
* 从 第 40 行 开始 到 202 行 结束 都是 虚拟主机 的相关配置
切换到 证书文件目录 看看 :
[root@server ~]# cd /etc/pki/tls/certs
[root@server certs]# ls
ca-bundle.crt  ca-bundle.trust.crt
就可以看到 以 .crt 结尾的文件 ( 即是 数字证书 )
实验 :
* 搭建 HTTP + SSL 的加密认证Web 服务器
* 准备工作 ( 就和 预备工作 一样 )
# 关闭 Selinux 及 防火墙
[root@server ~]# setenforce 0
[root@server ~]# systemctl stop firewalld
# 安装 :
[root@server ~]# dnf install httpd -y

[root@server ~]# dnf install mod_ssl -y
# 新建网页存储目录, 并使用 xftp 上传网页文件
[root@server ~]# mkdir -p /www/andy XFTP 上传文件
* 在 /etc /pki /tls /private 目录下生成私钥文件
# 私钥文件必须建立在指定目录下 ( 前面介绍 主文件配置里 就有 )
===>>>
[root@server ~]# cd /etc/pki/tls/private/就在这个目录下建立 私钥文件
# 还得介绍一个新命令 >>>>> openssl
# 建立私钥文件过程
===>>>>
[root@server private]# openssl genrsa -aes128 2048 > andy.key # 建一个私钥文件,名为 andy.key
Enter PEM pass phrase:                   # 键入了 123456  ( 是不显示的,意思是对私钥还要再加密一下 )
Verifying - Enter PEM pass phrase:       # 再次输入密码
[root@server private]# ls                # 显示下有没有文件,显示出了
andy.key
我们就是通过 opensll 命令 ( 是一个加密组件的命令 ) , genrsa 是建立私钥文件的,
-aes128 2048 ( 设置 密钥位数 )
> andy.key 把信息写到 andy.key 文件中 ( andy.key 就是 私钥文件名称 )
* 在 /etc/pki//tls/certs 目录下 新建证书
实操 :
[root@server ~]# cd /etc/pki/tls/certs  # 在该目录下 新建证书

[root@server certs]# openssl req -utf8 -new -key /etc/pki/tls/private/andy.key -x509 -days 365 -out andy.crt
Enter pass phrase for /etc/pki/tls/private/andy.key:     #  输入私钥加密密码 ( 前面的 123456)
You are about to be asked to enter information that will be incorporated
into your certificate request.
What you are about to enter is what is called a Distinguished Name or a DN.
There are quite a few fields but you can leave some blank
For some fields there will be a default value,
If you enter '.', the field will be left blank.
-----
Country Name (2 letter code) [XX]:86
State or Province Name (full name) []:shanxi
Locality Name (eg, city) [Default City]:xi'an
Organization Name (eg, company) [Default Company Ltd]:openlab
Organizational Unit Name (eg, section) []:RHCE
Common Name (eg, your name or your server's hostname) []:localhost
Email Address []:[email protected]
===>>>
# 我们要建立自己的证书 ( 在上示目录下 是已经有两个 证书文件的 ) 我们要建立自己的证书
而且自己建立的证书 还要 匹配前面的私钥 ~!!
# 还是使用的 openssl 命令, req 是专门用来建立 证书的, 证书的字符编码 : utf8
-new 表示 新建, -key 代表加密, 紧接着的路径 是 证书的私钥路径 ,
-x509 是证书的制作协议, -days 是 证书的有效期 365 天,
- out 代表把证书 输到 什么地方去 ( 可以是相对路径我们用的就是相对路径,也可以绝对
路径)
当这一串命令执行完成后, 会让你输入 私钥的密码 ( 就是 你当时设置的密码 - 123456 )
执行完成后 就到了输入证书的相关信息 :
第一行 : 国家名称 ( 是以 编码输入的,我们国家是 86 )
第二行 : 省名称
第三行 : 城市名称
第四行 : 公司名称
第五行 : 公司部门
第六行 : 当前主机名 (你有主机名就写主机名,没有主机名那就写通用主机名 - localhost )
第七行 :邮箱地址
我们浏览下 看下目录里面 有没有 我们刚才建的 证书文件
===>>>
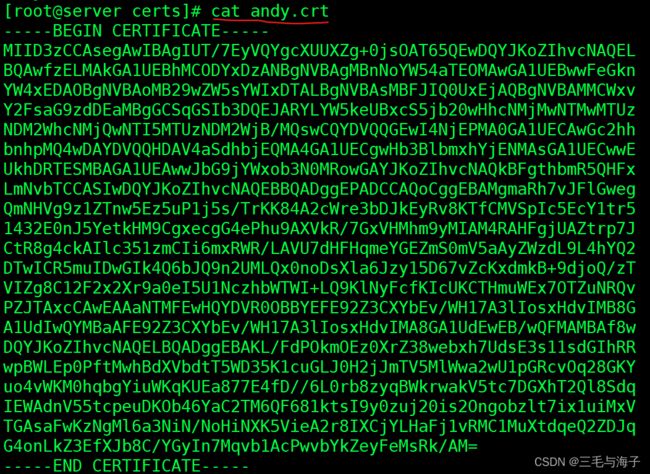
我们大致浏览下 andy.crt 文件的内容
===>>>
* 主配置文件的编辑,输入新的配置信息
打开主配置文件
===>>>
[root@server certs]# vim /etc/httpd/conf.d/ssl.conf进入配置文件,调至最后,添加内容 :
我们直接就在 主配置文件,定位最后一行,添加上示标记内容。
对上式添加内容做以说明
===>>>
204         # 访问的IP地址 及 端口号
205         SSLEngine on                     # 开启 ssl 引擎
206         SSLCertificateFile /etc/pki/tls/certs/andy.crt       #  证书路径
207         SSLCertificateKeyFile  /etc/pki/tls/private/andy.key    # 私钥路径
208         ServerName      192.168.153.130    # 主机名
209         DocumentRoot    /www/andy          # 网页启动目录
210
211
212                 # 网站目录的权限
213         AllowOverride   none
214         Require all granted
215
上示内容,添加完成后,重启 Apache ( 重启 Httpd )
===>>>
[root@server ~]# systemctl restart httpd重启之后,会让你输入 私钥加密密码( 之前设置的私钥加密密码 )
输入完 密钥之后即可 验证
验证实验 :
在网站上验证 :
点击 高级 ( 在 地址栏输入 https:// IP 地址 )
即 验证成功 ~!!!!


