qtcanpool 知 04:主题之争
文章目录
- 前言
- 争鸣
-
- 原生
- 图标
- 调色
- 绘画
- 样式表
- 重绘
-
- 官方介绍
-
- 开发样式感知(Style-Aware)的自定义控件
- 创建一个自定义的样式
- 使用一个自定义的样式
- 小结
- 官方示例
-
- 类定义
- 方法介绍
- 小结
- 运用
- 后语
前言
作者在设定这个主题(标题)之后,就有点后悔了,因为作者也没有很丰富的主题经验之谈,唯恐介绍的流于表面,让读者读后收获甚微……
既然没有经验,那就现学现卖吧,多少之前还是有一些些使用经历的,不能做到高质量,至少可以做到归纳总结吧……
何谓主题?此主题非中心思想的意思,在Windows操作系统,“主题”一词特指Windows的视觉外观,别称有“皮肤、壁纸、样式”等。一个界面软件的主题,主要包括:窗口的外观、字体、颜色、图标等等。
那么Qt开发的界面软件,有哪些手段可以用来设置主题呢?这些不同的手段又有哪些利弊呢?这就是本章要讲的:主题之争。
争鸣
为什么我们要改变主题呢,原生的为什么满足不了我们?一个字:丑……
如何解决丑的问题,人类是怎么做的呢?穿衣搭配、健身塑型、梳妆化妆、照片PS、整容……
从人类美化自己的过程,粗略的得出美化界面的手段如下:
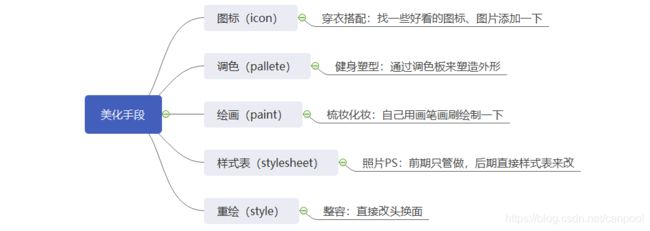
下面作者就通过一个简单的例子,来详细讲解这几种手段是如何美化界面的。
原生
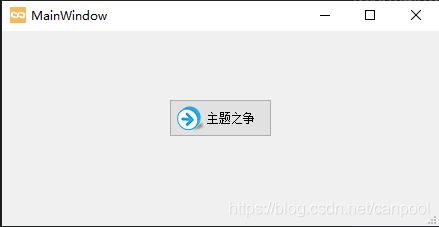
功能描述:实现一个窗口类,其包含一个QToolButton,显示文本为“主题之争”。
由于功能简单,这里作者就采用Designer来设计:
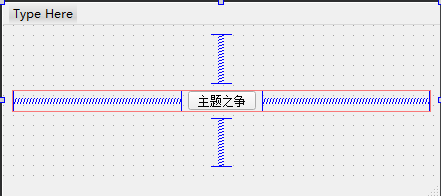
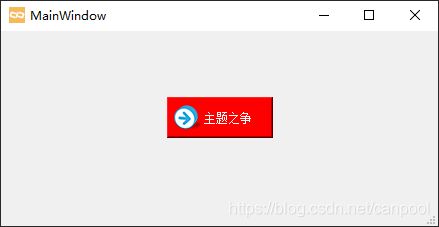
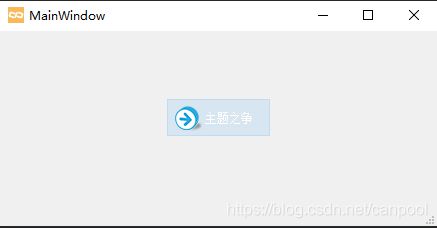
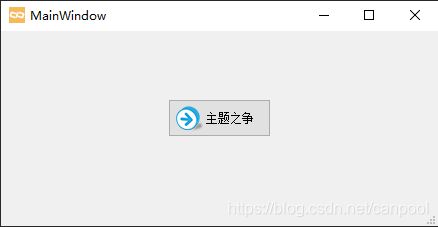
效果如下:
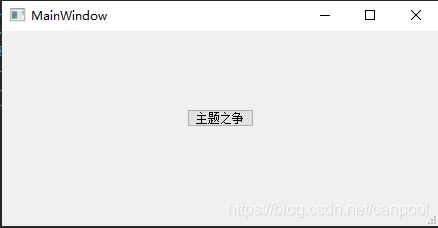
备注:关于Designer和手写代码的区别,可以查看“设计器pk手码”章节。
这么一看,颜值确实有点普通,下面开始上美化手段。
图标
功能描述:给QToolButton添加按钮图标,给MainWindow换Logo。
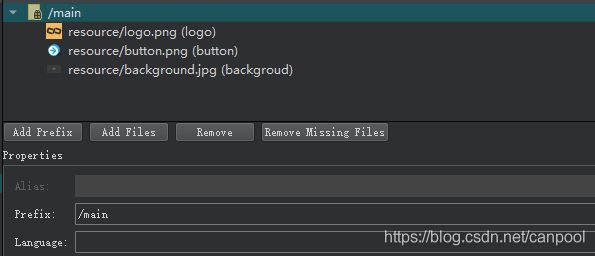
新建资源文件resource.qrc,添加两个图标如下:
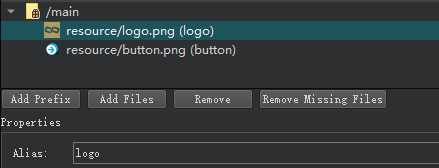
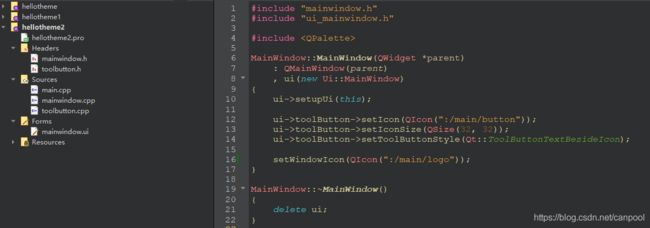
修改mainwindow.cpp如下:
MainWindow::MainWindow(QWidget *parent)
    : QMainWindow(parent)
    , ui(new Ui::MainWindow)
{
    ui->setupUi(this);

    ui->toolButton->setIcon(QIcon(":/main/button"));
    ui->toolButton->setIconSize(QSize(32, 32));
    ui->toolButton->setToolButtonStyle(Qt::ToolButtonTextBesideIcon);

    setWindowIcon(QIcon(":/main/logo"));
}
- 看:logo图标的路径明明是
/main/resource/logo.png,为什么代码里面写:/main/logo就可以了。
破:资源编辑界面最下面有Alias,即别名,这里采用别名,可以屏蔽路径的差异,随着图标越来越多,可能需要分目录存放,当你改变图标路径时,只要保证Prefix和Alias不变,就不需要改代码了。
添加图标,立马效果不一样了。最简单的美化就是加图标,图标的表意也可以更好的表达控件的功能。
图标只是点缀,控件本身的背景和文字颜色还是有点单调,如何调色呢?这就要说起QPalette了。
调色
-
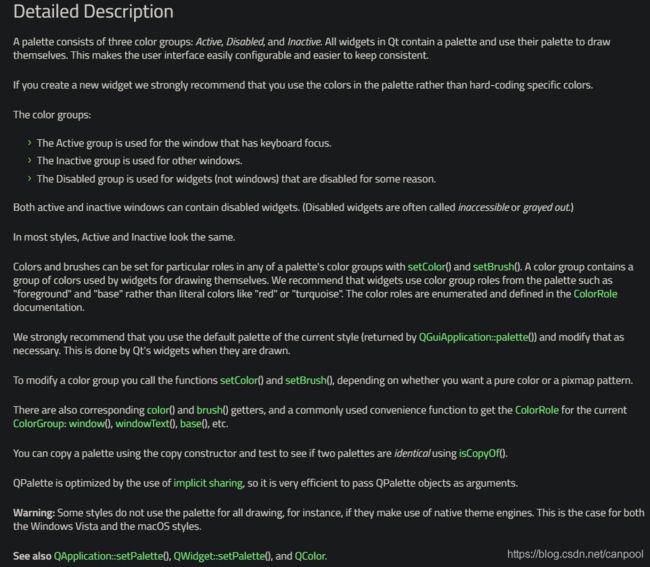
Qt中的所有widget都包含一个调色板,并使用其调色板进行绘制。这使用户界面易于配置并且更易于保持一致。
-
如果创建新的widget,我们强烈建议您使用调色板中的颜色,而不是对特定颜色进行硬编码。
-
强烈建议您使用当前样式的默认调色板(由QGuiApplication :: palette()返回),并根据需要进行修改。这是由Qt的widget在绘制时完成的。
-
要修改颜色组,请调用函数setColor()和setBrush(),具体取决于您要纯色还是像素图图案。
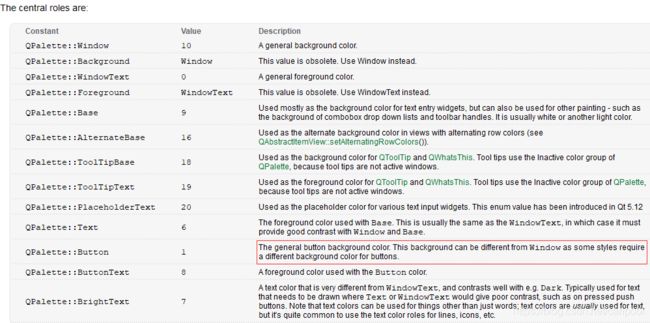
ColorRole(颜色角色)示意图如下:

下面采用QPalette对主窗口和按钮进行配色。
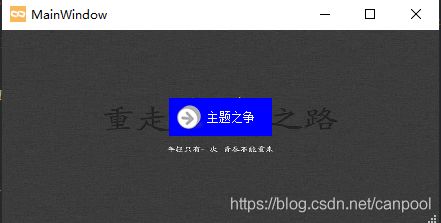
功能描述:主窗口设置背景图片,按钮设置红底白字。
MainWindow::MainWindow(QWidget *parent)
    : QMainWindow(parent)
    , ui(new Ui::MainWindow)
{
    ui->setupUi(this);

    ui->toolButton->setIcon(QIcon(":/main/button"));
    ui->toolButton->setIconSize(QSize(32, 32));
    ui->toolButton->setToolButtonStyle(Qt::ToolButtonTextBesideIcon);

    QPalette palette = ui->toolButton->palette();
    palette.setColor(QPalette::Button, Qt::red);
    palette.setColor(QPalette::ButtonText, Qt::white);
    ui->toolButton->setPalette(palette);

    setWindowIcon(QIcon(":/main/logo"));

    palette = this->palette();
    palette.setBrush(QPalette::Window, QBrush(QPixmap(":/main/backgroud").scaled(this->width(), this->height())));
    this->setPalette(palette);
}
- 看:为什么按钮背景色不是红色,而主窗口背景被改为图片了?
破:点击QWidget::setPalette()看看官方如何介绍的:

背景色被用来填充控件的背景,请看QWidget::autoFillBackground:
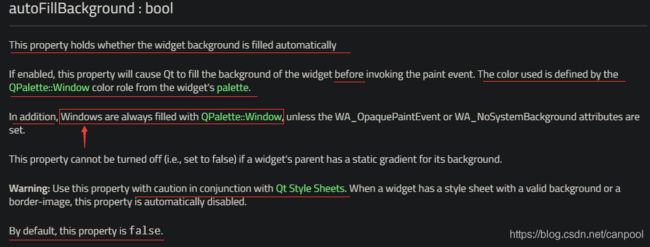
1)这个属性用来控制背景是否自动填充,默认是false
2)对于Windows如果未设置后面两个属性,将永远填充。
思考:莫非QMainWindow是Window,按钮不是Window?
调试:查看二者的windowFlags(),如下所示,看来按钮确实不是Window。

使能按钮的自动填充背景色属性,增加如下代码:
ui->toolButton->setAutoFillBackground(true);
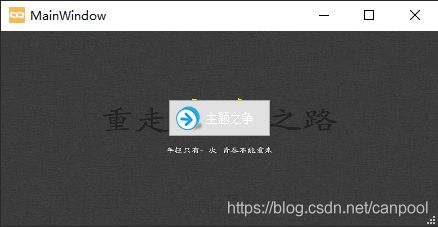
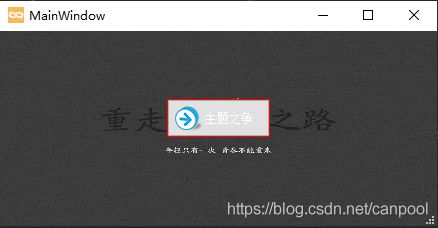
- 看:按钮的背景为什么只有四周是红色,好像上面被什么遮挡了?
破:具体原因作者也不是很明朗,在看到QPushButton的时候,QPushButton的isFlat()属性会影响其border的raise,于是寻找QToolButton有没有类似的属性,发现autoRaise属性如下:
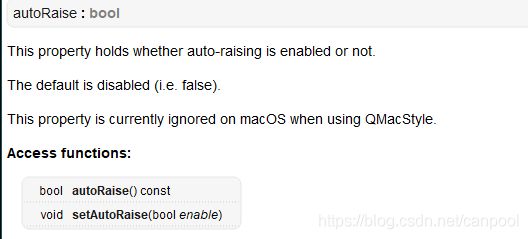
使能这个属性,增加代码ui->toolButton->setAutoRaise(true);,测试效果如下:
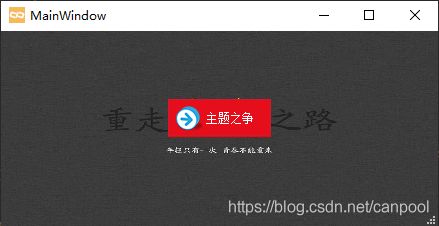
从效果来看,基本是满足了要求,作者暂未发现别的解决方案……
小结:
- 上面例子中使用的是QWidget::setPalette()设置widget的配色,实际上可以先通过QApplication::setPalette设置全局的配色,然后再局部调整widget的配色。
- 非Window的控件,设置背景色时,需要显示使能属性autoFillBackgroud。
- 按钮在设置背景色时,需要额外配置一些属性。
思考一下:调色板明明由三个颜色组组成,刚刚的例子似乎没感受到。
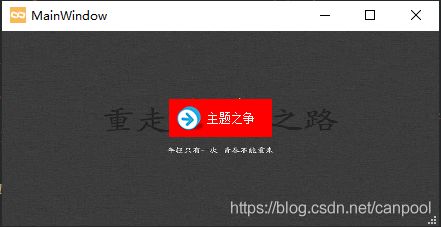
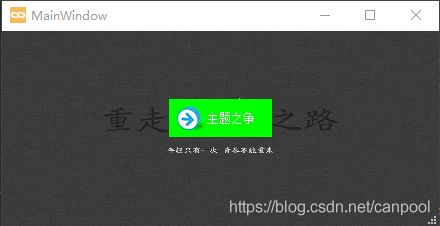
这是因为刚刚调用的palette接口,将三个颜色组设置成一样了,现在改造一下button的背景色为:活动时红色,不活动时绿色,禁能时蓝色,修改代码如下:
MainWindow::MainWindow(QWidget *parent)
    : QMainWindow(parent)
    , ui(new Ui::MainWindow)
{
    ui->setupUi(this);

    ui->toolButton->setIcon(QIcon(":/main/button"));
    ui->toolButton->setIconSize(QSize(32, 32));
    ui->toolButton->setToolButtonStyle(Qt::ToolButtonTextBesideIcon);
    ui->toolButton->setAutoFillBackground(true);
    ui->toolButton->setAutoRaise(true);

    QPalette palette = ui->toolButton->palette();
    palette.setColor(QPalette::Active, QPalette::Button, Qt::red);
    palette.setColor(QPalette::Inactive, QPalette::Button, Qt::green);
    palette.setColor(QPalette::Disabled, QPalette::Button, Qt::blue);
    palette.setColor(QPalette::ButtonText, Qt::white);
    ui->toolButton->setPalette(palette);

    setWindowIcon(QIcon(":/main/logo"));

    palette = this->palette();
    palette.setBrush(QPalette::Window, QBrush(QPixmap(":/main/backgroud").scaled(this->width(), this->height())));
    this->setPalette(palette);
}
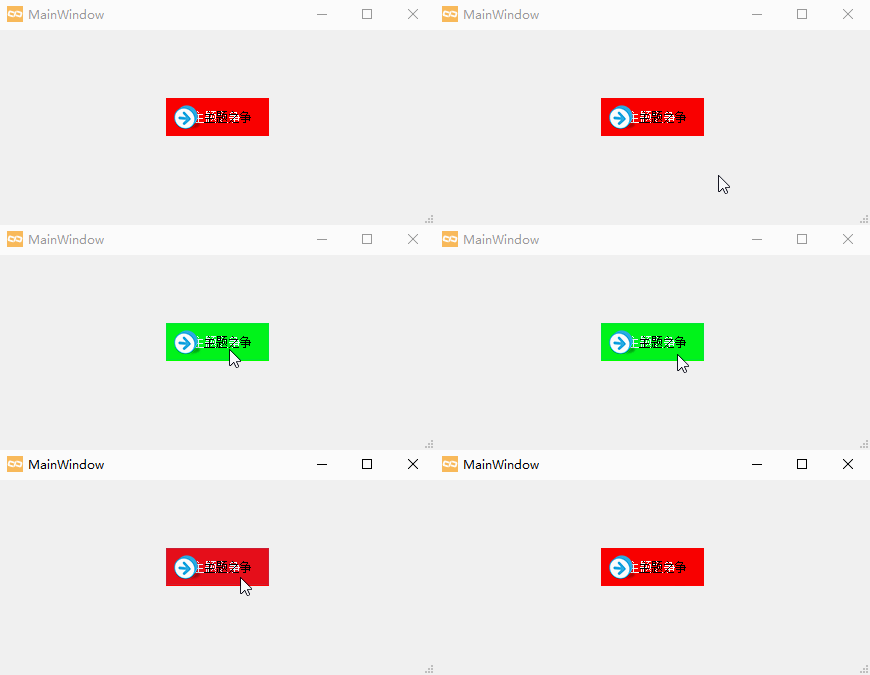
1)活动时效果如下:
2)单击其他界面或任务栏,非活动时效果如下:
3)禁能按钮,增加代码ui->toolButton->setDisabled(true);,效果如下:
QPalette调色板只有三种颜色组,那么像按钮这种控件会有很多状态,比如鼠标悬浮、鼠标离开、鼠标单击等,这些状态的颜色怎么控制呢?
不知道读者有没有注意到,在查阅autoFillBackground属性的时候,有这么一句话,如下:

在调用paint event之前进行填充,这么看来“绘画”放在“配色”之后也算是冥冥之中了。
鼠标的各种操作都是一个个事件,在不同的事件响应时,可以去绘画按钮的样式。下一节让我们走进paint世界吧……
绘画
Qt 根据不同的系统平台为我们提供了基础的控件,这些控件尽量表现得像各平台的原生控件一样,原生的出于历史等诸多原因,一般做出来的界面都比较传统或普通,如果用户不满意这些原生控件,就必须自己完成控件的绘制。
但是,像那种directUI的自绘方式(style)难度又比较大,太过于底层了。那么,怎样才能让用户既方便又能绘制出自己想要的控件样式呢?
任何平台都提供了图形绘制系统,Qt自然也封装了自己的一套绘制方法,其2D绘图引擎中的QPainter就是神笔马良的神笔。
QPainter提供了高度优化的功能,可以完成大多数图形GUI程序所需的功能。它可以绘制从简单的线条到复杂的形状(如派和弦)的所有内容。它还可以绘制对齐的文本和像素图。通常,它绘制“自然”坐标系,但也可以进行视图和世界变换。 QPainter可以对继承QPaintDevice类的任何对象进行操作。
当paintdevice是widget时,QPainter只能在paintEvent()函数内部或paintEvent()调用的函数中使用。这就意味着,当我们要在widget上绘制自己样式的时候,我们只需要在其paintEvent()中操作即可,其它的就交给Qt引擎吧。
功能描述:在“图标”一节工程基础上,新建一个继承QToolButton的类ToolButton,并在ui中将原来的QToolButton提升为ToolButton。
#ifndef TOOLBUTTON_H
#define TOOLBUTTON_H
#include toolbutton.cpp
#include "toolbutton.h"

ToolButton::ToolButton(QWidget *parent)
    : QToolButton(parent)
{

}
效果如下:
新增需求:设置ToolButton为白字,正常状态红底,鼠标悬浮时绿底,鼠标单击时蓝底。
修改代码如下:
- toolbutton.h
#ifndef TOOLBUTTON_H
#define TOOLBUTTON_H
#include - toolbutton.cpp
#include "toolbutton.h"
#include 效果如下:
额~,文字已经花了,还要看破吗?要吧,总结一下也是好的。
看破
- 看:enterEvent()和leaveEvent()中为什么不需要调用update()?
破:这个问题没找到答案……QToolButton的这两个事件处理中,当使能autoRaise属性时,会自动执行update(),可是ToolButton是继承自QToolButton,并没有显式调用QToolButton的事件方法,到底是怎么做到的呢?[TODO]
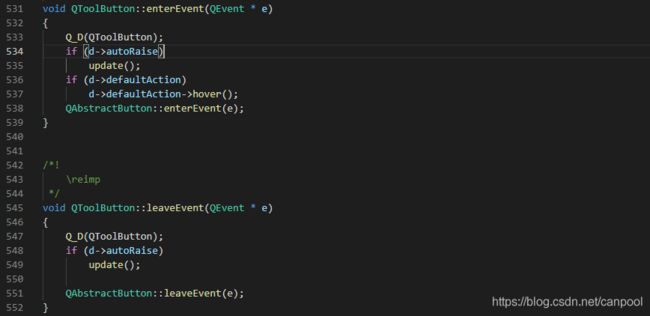
- 看:这里也需要使能autoRaise属性?
破:是的,这里和QPalette那里一样的,autoRaise作者没找到最合适的解释,参考QWidget的raise()方法,可能是自动提升到最顶层吧,不然好似有什么遮住一样。

- 看:text原本就有,paint中又draw一次,而且位置没有排除图标等大小,导致两次文本错位了。
破:是的,但是如果不绘制文本,该怎么改变文本颜色呢?QToolButton属于复合控件,这种简单的paint似乎做不到,一般这种方式的自绘都是在干净的QWidget上进行。作者试图通过下面的方式实现文本上色,结果什么效果都没有,QStyleOptionToolButton中也没有color成员,作者也无能无力了……
    QStylePainter p(this);
    QStyleOptionToolButton opt;
    initStyleOption(&opt);
    p.setPen(m_textColor);
    p.drawComplexControl(QStyle::CC_ToolButton, opt);
总结:在paintEvent只实现了背景色的绘制,前景色暂时未实现,后续在讲到style方式的时候,希望可以有解决方案,哎,还是进行下一节“stylesheet”吧……
后补:
修正单击按钮释放后悬浮的状态,修改mouseReleaseEvent如下:
void ToolButton::mouseReleaseEvent(QMouseEvent *event)
{
    if (event->button() == Qt::LeftButton) {
        if (this->rect().contains(event->pos())) {
            m_windowColor = Qt::green;
        } else {
            m_windowColor = Qt::red;
        }
        update();
    }
}
方案一)“重绘”一节中可以绘制文本颜色,结合这里的绘制背景,修改paintEvent如下:
void ToolButton::paintEvent(QPaintEvent *event)
{
    Q_UNUSED(event);
    QPainter painter(this);

    painter.save();
    painter.setPen(QPen(Qt::NoBrush, 1));
    painter.setRenderHint(QPainter::Antialiasing, true);
    painter.setBrush(m_windowColor);
    painter.drawRect(rect());
    painter.restore();

    painter.save();
    QStyleOptionToolButton opt;
    initStyleOption(&opt);
    opt.palette.setColor(QPalette::Button, m_windowColor);
    opt.palette.setColor(QPalette::ButtonText, m_textColor);
    style()->drawComplexControl(QStyle::CC_ToolButton, &opt, &painter, this);
    painter.restore();
}
效果如下:
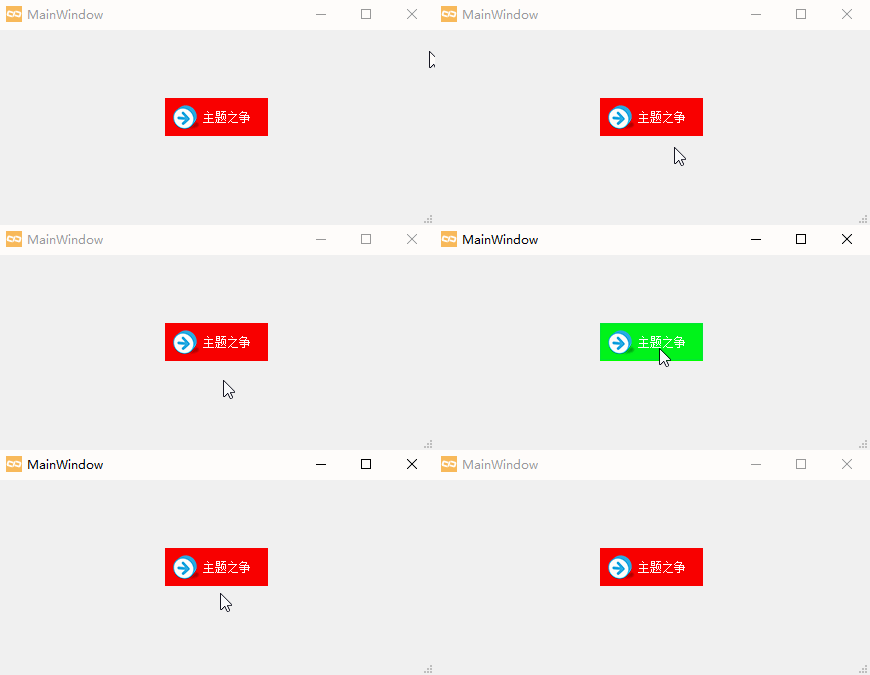
方案二)“重绘”一节中通过官方示例,感悟到用brush填充,修改paintEvent如下:
void ToolButton::paintEvent(QPaintEvent *event)
{
    QStylePainter p(this);
    p.fillRect(this->rect(), QBrush(m_windowColor));
    QStyleOptionToolButton opt;
    initStyleOption(&opt);
    opt.palette.setColor(QPalette::Button, m_windowColor);
    opt.palette.setColor(QPalette::ButtonText, m_textColor);
    p.drawComplexControl(QStyle::CC_ToolButton, opt);
}
样式表
先来看看官方Qt Style Sheets是如何介绍样式表的:
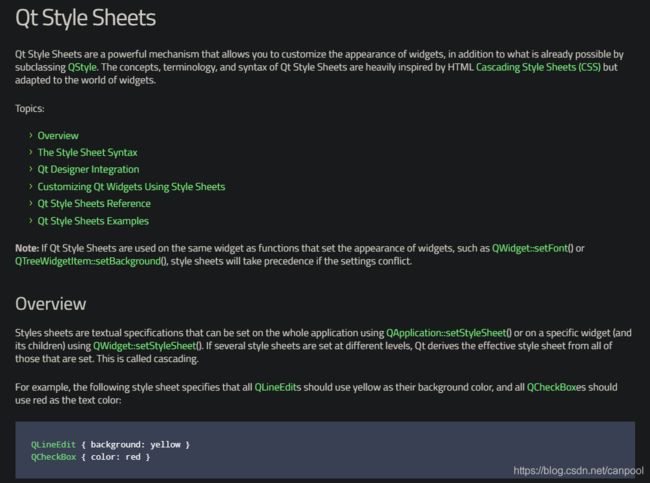
- Qt样式表是一种强大的机制,除了可以通过子类化QStyle来实现之外,还可以自定义widgets的外观。 Qt样式表的概念,术语和语法在很大程度上受HTML级联样式表(CSS)的启发,但适用于widgets的世界。
- 注意:如果将Qt样式表与设置widgets外观的函数(例如QWidget::setFont()或QTreeWidgetItem::setBackground())用于同一widgtes,则在设置冲突时样式表将优先。
- 样式表是文本规范,可以使用QApplication::setStyleSheet()在整个应用程序上设置,也可以使用QWidget::setStyleSheet()在特定的widget(及其子控件)上设置。 如果在不同级别上设置了多个样式表,则Qt将从所有已设置的样式表中得出有效样式表。 这称为级联。
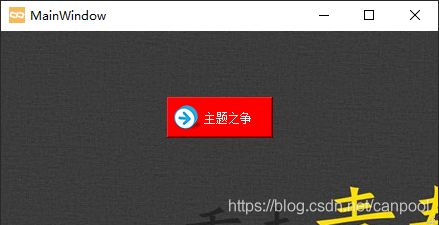
功能描述:在“图标”一节工程基础上,使用QApplication::setStyleSheet()的方式来设置整个应用程序的界面样式,主窗口设置背景图片;按钮白字,正常状态红底,鼠标悬浮时绿底,鼠标单击时蓝底。
- 新建样式文件 test.css,内容如下:
MainWindow {
    background-images: url(:/main/backgroud);
}

QToolButton {
    color: white;
    background: red;
}

QToolButton:hover {
    background: green;
}

QToolButton:pressed {
    background: blue;
}
#include "mainwindow.h"
#include Could not create pixmap from :\main\background
Could not create pixmap from :\main\background
这是没有找到图片路径,那换成绝对路径试试呢,作者也是第一次在css文件中加载图片:
MainWindow {
/*    background-image: url(:/main/background);*/
    background-image: url(D:\projects\qt\demos\hellotheme4\resource\background.jpg);
}
程序输出窗口继续报:
Could not parse application stylesheet
可能是路径分隔符是windows风格的原因,将’\‘改为’/'试试:
MainWindow {
/*    background-image: url(:/main/background);*/
/*    background-image: url(D:\projects\qt\demos\hellotheme4\resource\background.jpg);*/
    background-image: url(D:/projects/qt/demos/hellotheme4/resource/background.jpg);
}
- 看:为什么使用
url(:/main/backgroud)无法识别?
破:这个作者也很奇怪,网上搜索很久也没找到办法。没关系,自己试吧。作者初步怀疑是设置了Alias的原因,于是测试如下:
1)改为url(:/main/resource/background.jpg),依然找不到。
2)重新添加background.jpg到索引为images下,并且不设置Alias,即:
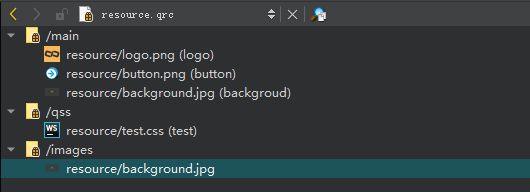
修改为url(:/images/resource/backgroud.jpg,再次测试,可以了:
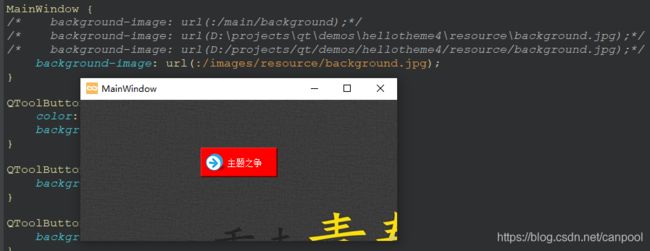
初步结论:css文件中引用资源中的图片,该图片在资源文件中不能设置别名。 - 看:背景图片没有完全填充到窗口中。
破:图片的大小大于窗口的大小,导致不能完全填充。作者查看了 background-image 没有找到拉伸的设置,不过 border-image 可以有拉伸效果,修改为border-image: url(:/images/resource/backgroud.jpg),效果如下:

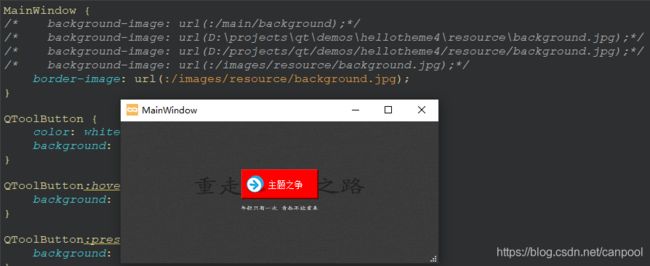
初步结论:backgroud-image需要图片和窗口一样大才可以填充满,border-image可以完成拉伸填满,就是这个名字容易让人误解……
经过上面的测试,现将test.css和resource.qrc修正如下:
- test.css
MainWindow {
    border-image: url(:/images/resource/background.jpg);
}

QToolButton {
    color: white;
    background: red;
}

QToolButton:hover {
    background: green;
}

QToolButton:pressed {
    background: blue;
}
- resource.qrc
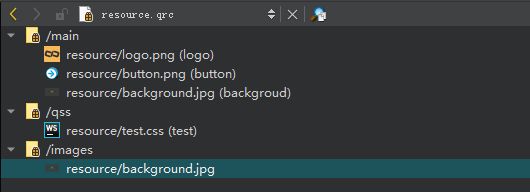
效果如下:
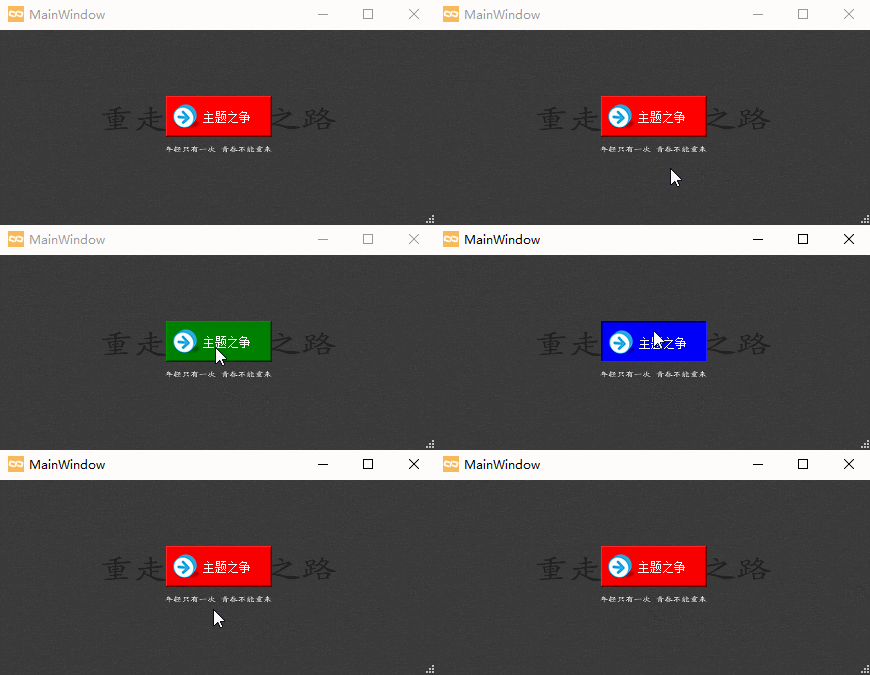
小知识:这里鼠标点击按钮释放后,鼠标还是悬浮在按钮之上的,此时按钮应该响应的是悬浮状态,即绿底而不是红底。在“绘画”一节上,单鼠标点击按钮释放后,按钮是红底而不是绿底,这是有问题的,尽管很无关紧要……
看破
- 看:为什么新建的文件后缀是css,难道是因为受了css的启发,就得叫css?
破:Qt里面的一般后缀会叫qss,但由于编辑器对qss支持并不友好,所以叫css一些编辑器解析会更友好一些,其实并不用关心后缀是啥,只要其内容符合css/qss语法即可。 - 看:看不懂css/qss语法,也不会用怎么办?
破:这个,作者也是半吊子,东抄一抄,西凑一凑,不过刚刚看到官方介绍中有几个主题可供参考,作者也是第一次具体的看了下这些主题,简直就是qss的教程啊,学会了,你就不用再四处去找主题了……
1)The Style Sheet Syntax:语法介绍。包括:规则(Rules),选择器类型(Selector Type),子控件(Sub-Controls),伪状态(Pseudo-States),冲突解决方案(Conflict Resolution),继承、命名空间等的语法规则。
2)Qt Style Sheets Reference:各控件怎样使用样式,样式表支持的所有属性和属性类型,子控件,伪状态,以及如何使用图标等。
3)Qt Style Sheets Examples:多种例子。
总结,哎,别总结了,赶紧去看官方教程吧……
重绘
这种如同再造的方式,作者也是一点也不了解,但是QtitanRibbon就是用这种方式做的,所以重绘的强大,是不言而喻的,同时难度也是不言而喻的,作者打算着重介绍这一节,也为后面qmazy(作者打算重新设计的一款“迷惑人”的界面框架)做铺垫……
style的方式,其实网上教程也不多,学的人也比较少,可能是望难却步吧。资料少,就去官网找,如果官网没有,那么,你就可以不用学了,可能这个要被抛弃。不过,也有可能是你找不到……
官方介绍
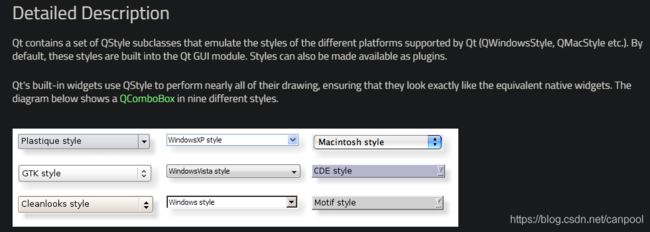
- Qt包含一组QStyle子类,这些子类可模拟Qt支持的不同平台的样式(QWindowsStyle,QMacStyle等)。 默认情况下,这些样式内置在Qt GUI模块中。 样式也可以作为插件使用。
- Qt的内置widgets使用QStyle来执行几乎所有图形绘制,从而确保它们看起来完全等同于等效的本机widgets(平台本地化,即平台原生控件)。
开发样式感知(Style-Aware)的自定义控件
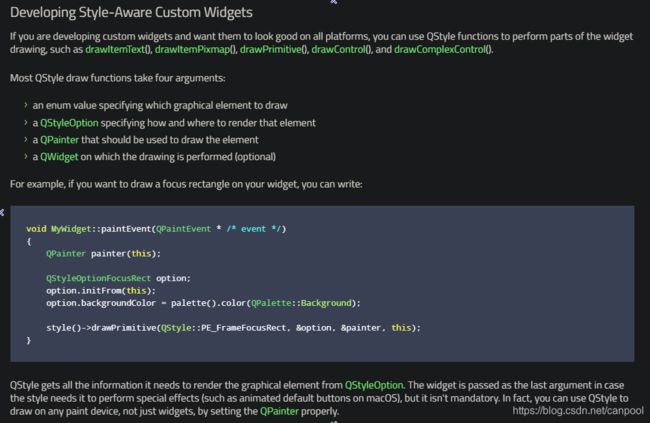
- 如果您正在开发自定义的widgets,并希望它们在所有平台上都看起来不错,则可以使用QStyle函数执行widget绘制的各个部分,例如drawItemText(),drawItemPixmap(),drawPrimitive(),drawControl()和drawComplexControl()。 大多数QStyle绘制函数采用四个参数。
- QStyle从QStyleOption获取呈现图形元素所需的所有信息。 如果样式需要其执行特殊效果(例如macOS上的动画默认按钮),则将其作为最后一个参数传递,但这不是强制性的。 实际上,通过正确设置QPainter,您可以使用QStyle在任何绘画设备上绘画,而不仅仅是widgets。
大意:如果你想开发自定义的widgets,你可以在 paintEvent() 中调用 QStyle 的几个 draw 函数,元素的信息可以从 QStyleOption 中获取……
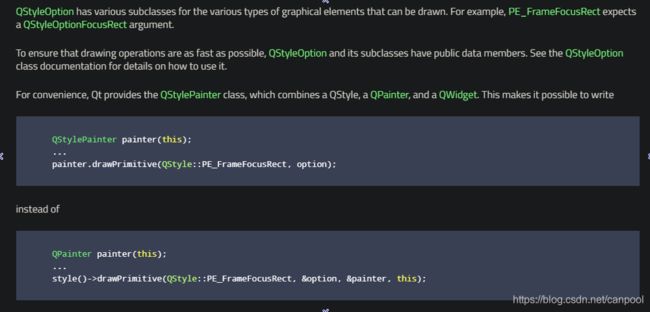
- QStyleOption具有各种子类,可用于绘制各种类型的图形元素。 例如,PE_FrameFocusRect需要一个QStyleOptionFocusRect参数。
- 为了确保绘图操作尽可能快,QStyleOption及其子类具有公共数据成员。
- 为了方便起见,Qt提供了QStylePainter类,该类结合了QStyle,QPainter和QWidget。 这样就可以写成图示的样子。
QStylePointer,这,“绘画”一节最后绘制按钮时,也不能画文字颜色呀!!(耿耿于怀)
既然官方说可以,那就是可以的,刚刚上面说:QStyleOption及其子类具有公共数据成员,下面看下QStyleOptionToolButton的继承关系:
![]()
QStyleOption中有成员palette,原来是这样,不是通过设置QStylePointer,而是设置option的palette。查看源码,drawControl在绘制CE_ToolButtonLabel时,使用的也是pallete来drawItemText的,如下:
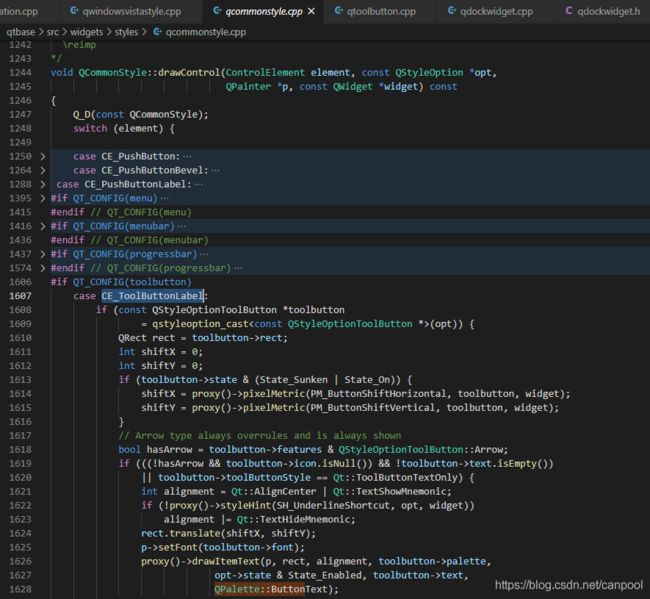
将“绘画”一节的paintEvent()处理改为如下内容:
void ToolButton::paintEvent(QPaintEvent *event)
{
    QStylePainter p(this);
    QStyleOptionToolButton opt;
    initStyleOption(&opt);
    opt.palette.setColor(QPalette::Button, m_windowColor);
    opt.palette.setColor(QPalette::ButtonText, m_textColor);
    p.drawComplexControl(QStyle::CC_ToolButton, opt);
}
找了很久,没找到如何绘制背景色,不过,也算是可以绘制文本颜色了。[TODO]
创建一个自定义的样式
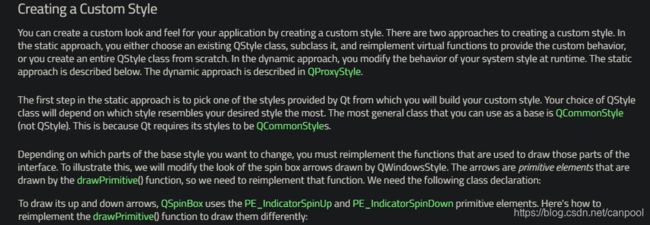
- 您可以通过创建自定义样式来为您的应用程序创建自定义样式。有两种创建自定义样式的方法。在静态方法中,您可以选择现有的QStyle类,对其进行子类化,然后重新实现虚拟函数以提供自定义行为,或者从头开始创建整个QStyle类。在动态方法中,您可以在运行时修改系统样式的行为。静态方法如下所述。动态方法在QProxyStyle中进行了描述(即obj.setStyle(…))。
- 静态方法的第一步是选择Qt提供的一种样式,您将从这些样式中构建自定义样式。您选择的QStyle类将取决于哪种样式最符合您的期望样式。可以用作基础的最通用的类是QCommonStyle(不是QStyle)。这是因为Qt要求其样式为QCommonStyles。
- 根据要更改基本样式的哪些部分,必须重新实现用于绘制界面的那些部分的功能。为了说明这一点,我们将修改由QWindowsStyle绘制的SpinBox箭头的外观。箭头是由drawPrimitive()函数绘制的原始元素,因此我们需要重新实现该函数。我们需要以下类声明:
// QProxyStyle inherits QCommonStyle
class CustomStyle : public QProxyStyle
{
    Q_OBJECT

public:
    CustomStyle();
    ~CustomStyle() {}

    void drawPrimitive(PrimitiveElement element, const QStyleOption *option,
                       QPainter *painter, const QWidget *widget) const override;
};
- 要绘制其向上和向下箭头,QSpinBox使用PE_IndicatorSpinUp和PE_IndicatorSpinDown基本元素。 下面是重新实现drawPrimitive()函数以不同方式绘制它们的方法:
void CustomStyle::drawPrimitive(PrimitiveElement element, const QStyleOption *option,
                                QPainter *painter, const QWidget *widget) const
{
    if (element == PE_IndicatorSpinUp || element == PE_IndicatorSpinDown) {
        QPolygon points(3);
        int x = option->rect.x();
        int y = option->rect.y();
        int w = option->rect.width() / 2;
        int h = option->rect.height() / 2;
        x += (option->rect.width() - w) / 2;
        y += (option->rect.height() - h) / 2;

        if (element == PE_IndicatorSpinUp) {
            points[0] = QPoint(x, y + h);
            points[1] = QPoint(x + w, y + h);
            points[2] = QPoint(x + w / 2, y);
        } else { // PE_SpinBoxDown
            points[0] = QPoint(x, y);
            points[1] = QPoint(x + w, y);
            points[2] = QPoint(x + w / 2, y + h);
        }

        if (option->state & State_Enabled) {
            painter->setPen(option->palette.mid().color());
            painter->setBrush(option->palette.buttonText());
        } else {
            painter->setPen(option->palette.buttonText().color());
            painter->setBrush(option->palette.mid());
        }
        painter->drawPolygon(points);
    } else {
    	QProxyStyle::drawPrimitive(element, option, painter, widget);
    }
}
注意:除了将其传递给QWindowStyle::drawPrimitive()函数外,我们不使用widget参数。 如前所述,有关要绘制的内容以及应如何绘制的信息是由QStyleOption对象指定的,因此无需询问widget。
如果需要使用widget参数来获取其他信息,请在使用前注意确保它不为0,并且类型正确。 例如:
    const QSpinBox *spinBox = qobject_cast<const QSpinBox *>(widget);
    if (spinBox) {
    ...
    }
备注:在实现自定义样式时,不能仅仅因为枚举值被称为PE_IndicatorSpinUp或PE_IndicatorSpinDown而假定该widget是QSpinBox。
“Styles”示例的文档更详细地介绍了此主题。
警告:自定义QStyle子类当前不支持Qt样式表。官方计划在将来的Qt版本中解决此问题。
使用一个自定义的样式

在Qt应用程序中有几种使用自定义样式的方法。最简单的方法是在创建QApplication对象之前将自定义样式传递给QApplication::setStyle()静态函数:
#include 其实可以随时调用QApplication::setStyle(),但是通过在构造函数之前调用它,可以确保遵守使用-style命令行选项设置的用户首选项。
效果如下:左侧使用默认样式,右侧使用自定义的样式
![]()
好像看不出来有啥很大区别,重新设定spinBox大小为300x100,效果如下:

默认样式的箭头应该是固定大小,自定义样式的箭头是根据rect计算大小。
插件化
您可能希望使您的自定义样式可用于其他应用程序,而这些样式可能不是您自己的,因此无法重新编译。 Qt插件系统使创建样式作为插件成为可能。 Qt本身会在运行时将作为插件创建的样式作为共享对象加载。 请参阅Qt插件文档,以获取有关如何创建样式插件的更多信息。
编译您的插件并将其放入Qt的plugins/styles目录。 现在,我们有了Qt可以自动加载的可插入样式。 要将新样式用于现有应用程序,只需使用以下参数启动应用程序:
./myapplication -style custom
该应用程序将使用您实现的自定义样式的外观。
小结
通过对QStyle的简单介绍,我们大概可以有一些初步的总结,如下:
- 可以在paintEvent()中调用QStyle的几个draw函数来定制/开发自己的样式。
- 可以继承Qt內建的已有样式类(Qt要求其样式为QCommonStyles)创建自己的样式类,然后重载相关的draw函数重绘自己关心的部分。(自定义的暂不支持样式表)
尽管目前对各个draw函数还不是特别清楚,但套路至少感觉还是不难理解……
官方示例
Styles Example,效果如下:
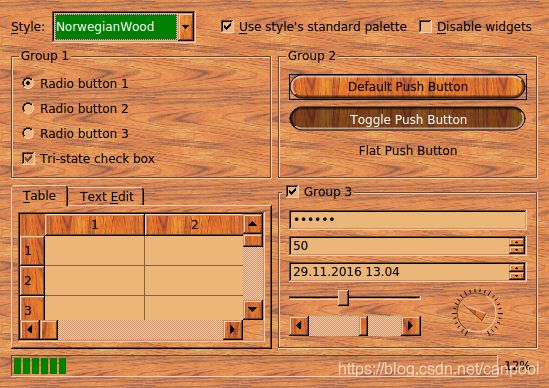
Qt中的样式是QStyle的子类或其子类之一。样式代表widgets执行绘图。Qt提供了一系列预定义的样式,这些样式既可以内置在Qt Widgets模块中,也可以在插件中找到。通常通过子类化QProxyStyle并重新实现一些虚函数来定制样式。虽然QProxyStyle提供了一种透明的方式来自定义特定样式或相应平台的默认样式,但Qt还提供了QCommonStyle作为完整自定义样式实现的便捷基础。
官方示例中已经介绍的很清楚,这里就不再赘述了,读者可以自行去好好研究一下,作者还是心心念“绘画”一节的按钮为什么不能绘制背景……
从上图可以看出,这个示例里面的按钮等背景明明就被改变了,为什么作者的不行呢?作者发现例子在讲到绘制QPushButton的几种状态的时候,定义了brush,并且将brush填充到rect中,难道需要单独通过painter进行brush填充??
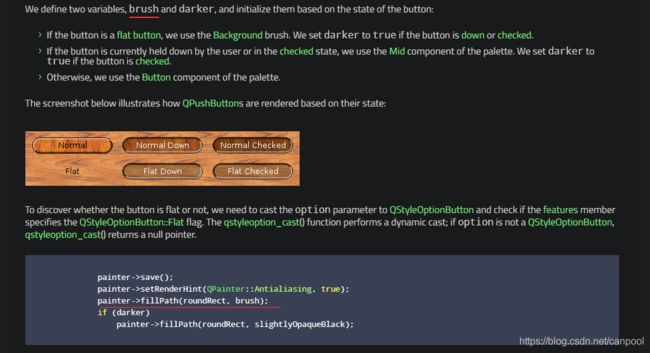
赶紧试试,将“绘画”一节的paintEvent()处理改为如下内容:
void ToolButton::paintEvent(QPaintEvent *event)
{
    QStylePainter p(this);
    p.fillRect(this->rect(), QBrush(m_windowColor)); // perfect
    QStyleOptionToolButton opt;
    initStyleOption(&opt);
    opt.palette.setColor(QPalette::Button, m_windowColor); // Looks good, but it's useless
    opt.palette.setColor(QPalette::ButtonText, m_textColor);
    p.drawComplexControl(QStyle::CC_ToolButton, opt);
}
看破
- 看:为什么fillRect可以?
破:实际上p.fillRect就直接进行填充了,跟后面p.drawComplexControl没有关系。 - 看:那drawComplexControl为什么不可以?
破:RTFSC – Read The Fucking Source Code,那就看看代码吧:
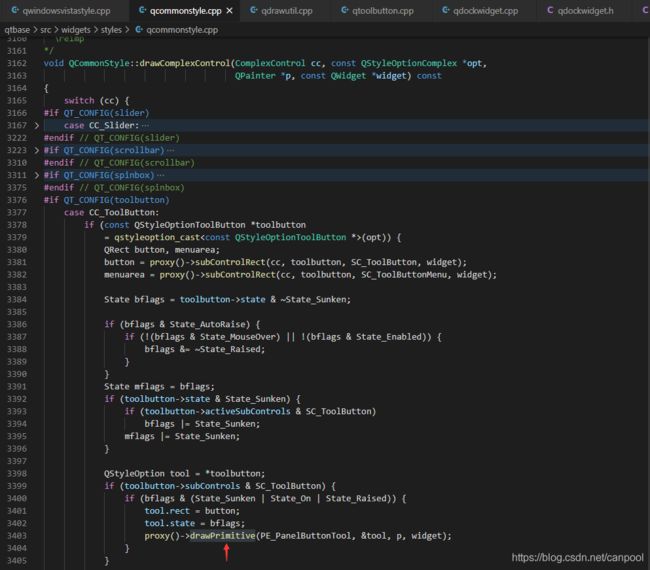
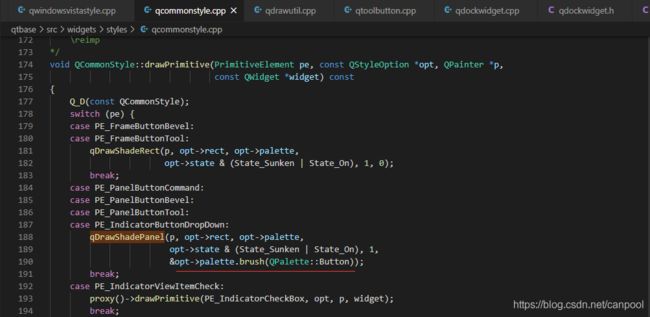
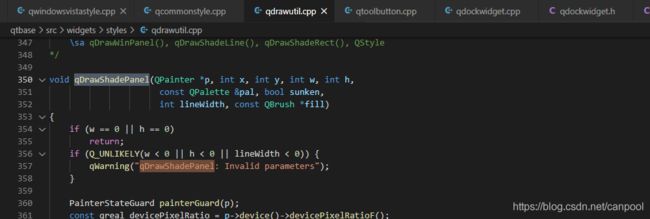

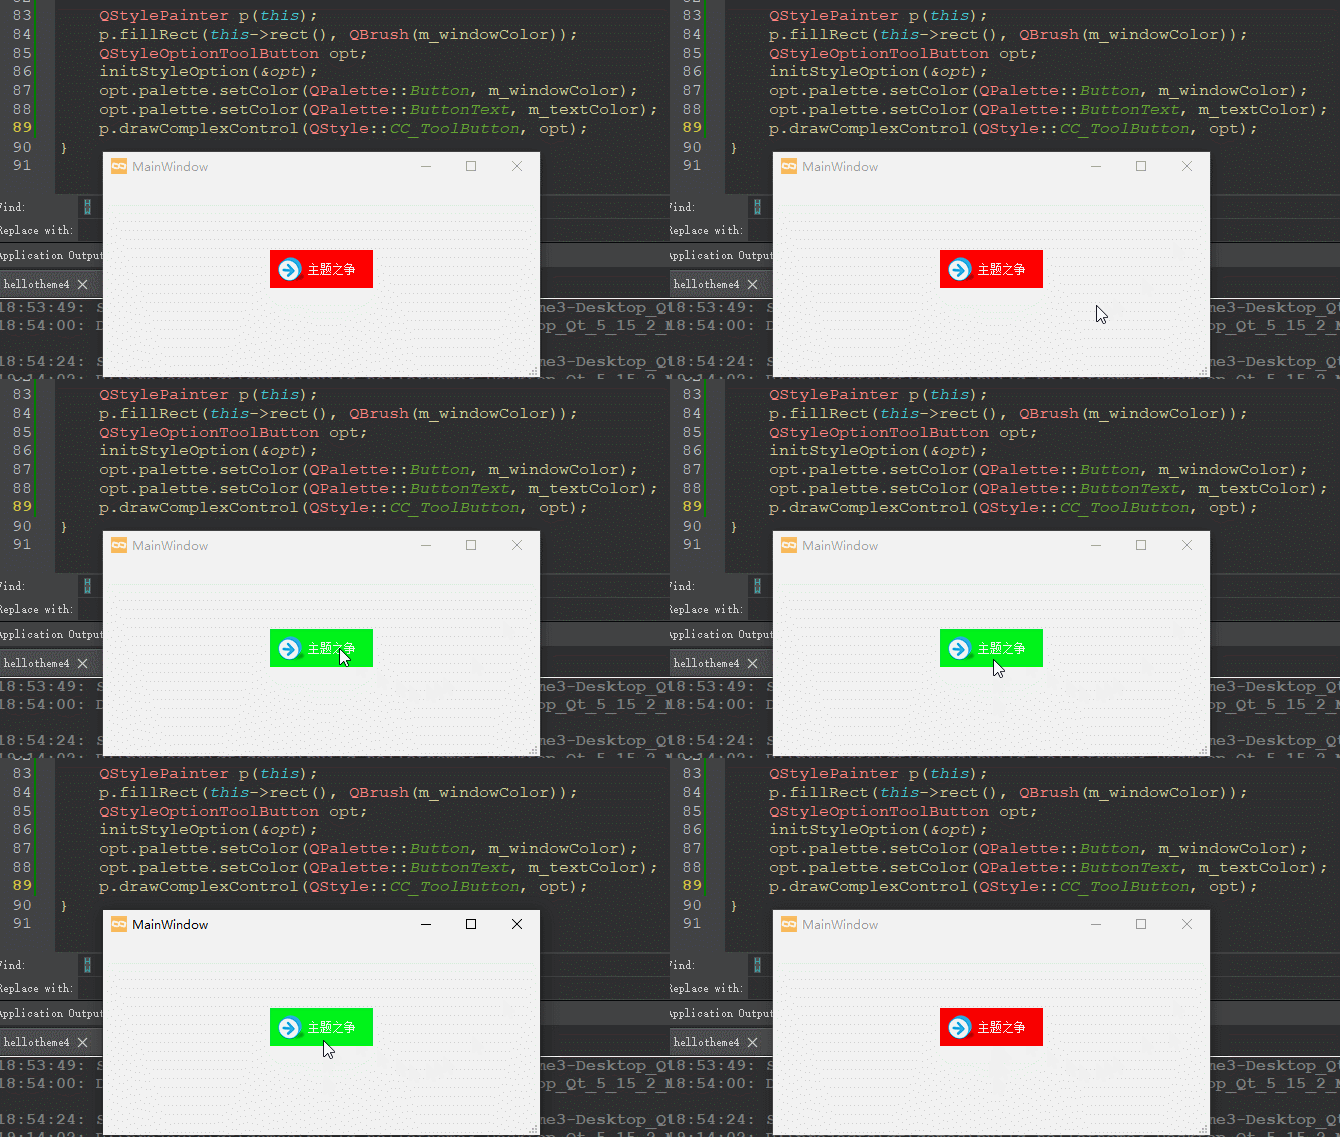
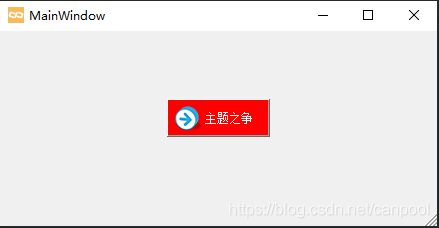
这里看出来palette用的是QPalette::button的brush,实际上这个作者也试了,甚至Window、Base、Shadow都试了,都不管用。作者甚至一度怀疑drawPrimitive没有执行到,所以还单独执行了drawPrimitive,依然不管用。那么,有可能使用的样式就根本不是QCommonStyle,阅读官方示例后,找到了一个解决方案:
1)指定一个內建样式QApplication::setStyle(QStyleFactory::create("Windows"));
2)button禁能autoRaise,使能Qt::WA_Hover属性setAttribute(Qt::WA_Hover, true);
3)paintEvent中不需要设置QPalette::button的brush,设置color就可以。
效果如下:
既然解决了“按钮"之塞,让我们继续了解了解官方示例吧,嘿嘿……
类定义
自定义的样式类NorwegianWoodStyle派生自QProxyStyle,它的主要功能是用木质纹理来填充大多数widget及圆形按钮和组合框。
为了实现样式,使用了QPainter提供的一些高级功能,例如抗锯齿(获得更平滑的按钮边缘),alpha混合(使按钮显得凸起或凹陷)和绘画路径(填充按钮并绘制轮廓),还使用了QBrush和QPallete的许多功能。
NorwegianWoodStyle类的定义如下:
class NorwegianWoodStyle : public QProxyStyle
{
    Q_OBJECT

public:
    NorwegianWoodStyle();

    QPalette standardPalette() const override;

    void polish(QWidget *widget) override;
    void unpolish(QWidget *widget) override;
    int pixelMetric(PixelMetric metric, const QStyleOption *option,
                    const QWidget *widget) const override;
    int styleHint(StyleHint hint, const QStyleOption *option,
                  const QWidget *widget, QStyleHintReturn *returnData) const override;
    void drawPrimitive(PrimitiveElement element, const QStyleOption *option,
                       QPainter *painter, const QWidget *widget) const override;
    void drawControl(ControlElement control, const QStyleOption *option,
                     QPainter *painter, const QWidget *widget) const override;

private:
    static void setTexture(QPalette &palette, QPalette::ColorRole role,
                           const QImage &image);
    static QPainterPath roundRectPath(const QRect &rect);
    mutable QPalette m_standardPalette;
};
所有公共函数都在QStyle(QProxyStyle的祖父类)中声明,此处进行重载以覆盖Windows外观……
方法介绍
1 QPalette standardPalette() const
返回style的标准调色板。
注意:在支持系统颜色的系统上,不使用样式的标准调色板。 特别是Windows Vista和Mac样式不使用标准调色板,而是使用本机主题引擎。 对于这些样式,不应使用QApplication::setPalette()设置调色板。
1)QStyle类中的实现如下:
QPalette QStyle::standardPalette() const
{
    QColor background = QColor(0xd4, 0xd0, 0xc8); // win 2000 grey

    QColor light(background.lighter());
    QColor dark(background.darker());
    QColor mid(Qt::gray);
    QPalette palette(Qt::black, background, light, dark, mid, Qt::black, Qt::white);
    palette.setBrush(QPalette::Disabled, QPalette::WindowText, dark);
    palette.setBrush(QPalette::Disabled, QPalette::Text, dark);
    palette.setBrush(QPalette::Disabled, QPalette::ButtonText, dark);
    palette.setBrush(QPalette::Disabled, QPalette::Base, background);
    return palette;
}
其中,palette的初始化原型(构造函数)如下:
QPalette(const QBrush &windowText, const QBrush &button, const QBrush &light, const QBrush &dark, const QBrush &mid, const QBrush &text, const QBrush &bright_text, const QBrush &base, const QBrush &window)
这就是标准的调色板,如果你觉得这个不好看,现在就可以进行美化它,方法有二:
- 在paintEvent中修改QStyleOption的palette,调用style的draw方法绘制。
- 自定义样式,然后重载standardPalette方法,设置自己的palette。
2 void polish(QWidget *widget)
QStyle::polish()初始化给定widget的外观。
在完全创建完所有widge之后的某个时间点,但在第一次显示之前,每个widget都会调用此函数。
注意:默认实现不执行任何操作。 此函数中的合理操作可能是为该窗口小部件调用QWidget::setBackgroundMode()函数。 请勿使用该功能来设置几何形状。 重新实现此功能提供了一个后门,通过该后门可以更改widget的外观,但是使用Qt的样式引擎,几乎不需要实现此功能。而是 重新实现drawItemPixmap(),drawItemText(),drawPrimitive()等来代替。
QWidget :: inherits()函数可以提供足够的信息以允许特定于类的自定义。 但是,由于新的QStyle子类可以在所有当前和将来的widget中合理使用,因此建议限制使用硬编码的自定义项。
3 void unpolish(QWidget *widget)
QStyle::unpolish() 取消初始化给定widget的外观。
该函数与polish()对应。 每当样式发生动态更改时,每个polish的widget都会调用该方法。 前一种样式必须先取消其设置,然后新样式才能再次对其进行润饰。
注意:只有在widget被销毁时才会调用unpolish()。 在某些情况下,这可能会引起问题,例如,如果您从UI中删除了一个widget,对其进行了缓存,然后在样式更改后重新插入它; Qt的某些类会缓存其widgets。
4 int pixelMetric(PixelMetric metric, const QStyleOption *option, const QWidget *widget) const
pixelMetric()返回给定像素metric的值。
指定的选项和widget可用于计算metric。 通常,不使用widget参数。 可以使用qstyleoption_cast()函数将选项强制转换为适当的类型。 注意:即使对于可以使用该选项的PixelMetrics,该选项也可能为零。 请参阅下表以了解适当的选项强制转换:
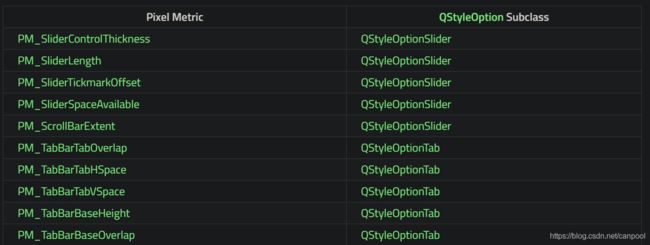
有些像素metric是从widget中调用的,而某些像素metric仅是由样式内部调用的。 如果metric不是由窗口widget调用的,则样式作者可以自行决定使用该metric。 对于某些样式,这可能不合适。
5 int styleHint(StyleHint hint, const QStyleOption *option, const QWidget *widget, QStyleHintReturn *returnData) const
styleHint() 返回一个整数,该整数表示由提供的样式选项描述的给定widget的指定样式提示。
当查询widget需要比styleHint()返回的整数更详细的数据时,将使用returnData。 有关详细信息,请参见QStyleHintReturn类描述。
6 void drawPrimitive(PrimitiveElement element, const QStyleOption *option, QPainter *painter, const QWidget *widget) const
drawPrimitive() 使用option指定的样式选项,使用提供的painter绘制给定的基本元素。
widget参数是可选的,并且可以包含可帮助绘制基本元素的widget。
7 void drawControl(ControlElement control, const QStyleOption *option, QPainter *painter, const QWidget *widget) const
QStyle::drawControl() 使用提供的painter绘制给定元素,其中painter由option指定。
widget参数是可选的,可以用作绘制控件的辅助工具。 option参数是指向QStyleOption对象的指针,该对象可以使用qstyleoption_cast()函数强制转换为正确的子类。
小结
这里作者只是简单介绍了几个方法,详细还请读者阅读官方示例。其实QStyle的这几个draw方法,作者也搞不太清楚,为什么官方要划分为drawItemText,drawItemPixmap,drawPrimitive,drawControl,drawComplexControl,作者大致认为是基础接口和组合接口的关系。搞不清也没关系,后三组接口的第一个参数都是元素类型,使用时查看官方手册,官方指定是绘什么元素的就绘什么就可以了。
由于作者的例子中使用了QToolButton,这个按钮属于复合型按钮,算是控件里面比较复杂的了,除非你很迫切要改变它,不然不建议你去重绘它。这里作者就不进行style重绘了,因为作者还没有什么思路……苦笑……等以后研究QtitanRibbon清楚了,再单独开主题介绍吧……
运用
上面介绍了五种美化手段:
图标(icon),调色(palette),绘画(paint),样式表(stylesheet),重绘(style)。
图标的手段基本可以忽略;调色也只能满足部分需求,不过可以用于辅助其它几种手段,作为调色板/颜料集;剩下的,除了样式表,其它的都是采用硬编码的方式,实际使用中肯定不妥。怎么才能像有的软件那样,有个换肤按钮可以进行主题切换呢?下面作者就试着讲一讲怎么运用这些美化手段……(量力而行)
主题运用,作者简单归纳出了下面三种方式:

接下来,逐个看下每种方式是什么意思。
- setter/getter 接口
即提供一组颜色的setter和getter接口,用户只需要调用相应的颜色接口便可以完成配色。
1)优点:使用简单,用户不需要关心接口的实现细节。
2)缺点:接口具有“传染”性,什么意思呢?比如模块A提供了setter接口,当模块B集成模块A时,模块B需要提供同样的setter接口,用户才可以通过模块B来设置A;当模块C又集成模块B时,模块C依然需要提供同样的setter接口……接口会越来越泛滥,关系如下图所示:
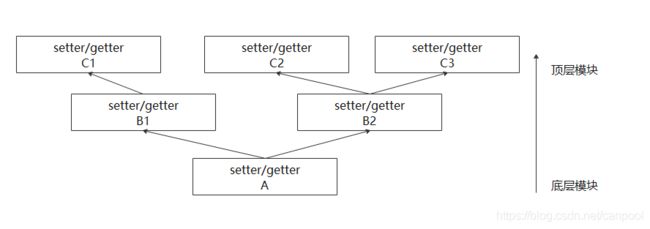
如果模块不提供颜色的setter/getter接口,那么怎么设置/获取颜色呢?可以通过颜色池获取,需要什么颜色从颜色池中找,即所有颜色统一配置在文件中,然后统一解析存储起来……
- 颜色/图片配置文件
根据不同的主题提供不同的颜色/图片配置文件,配置文件风格统一,比如xml,ini等文件,只需要解析这个配置文件,将颜色/图片统一存放,各模块都从这一个地方获取自己期望的颜色/图片……
1)优点:不需要为每个模块提供setter/getter接口,只需要提供统一getter接口供每个模块使用。
2)缺点:高耦合,每个模块的配色都要强依赖这个颜色池模块,模块移植性差,如下图所示:

那么有没有什么配置文件,每个模块不用管自己的配色,由某个模块统一进行配色,实现模块和配色解耦呢?答案是:样式表……
- css/qss文件
用户的模块只管功能逻辑,配色后期统一由qss完成。
1)优点:分工明确,美化由qss统一完成,如下图所示:

2)缺点:qss目前还不能作用于所有控件,比如:qstyle重绘的控件。
怎么解决qss不支持的场景呢?可以结合颜色/图片配置文件,对于不支持的场景用配色/图片配置文件中的配置,其它的由qss控制……
后语
终于算是介绍完了,作者已经尽力了,再回顾一下,美化手段有五种:图标(icon)、调色(palette)、绘画(paint)、样式表(stylesheet)、重绘(style)。
这五种手段可以混合使用,样式表优先,配色可以借助调色板中的不同组和颜色角色来管理,如果需要定制控件,可以使用绘画(包括:pointer->draw、style->draw),重绘最不推荐,尽管其可以改头换面……
qtcanpool中使用了四种:图标(icon)、调色(palette)、绘画(paint)、样式表(stylesheet)。
其中:
- qcanpool:使用了绘画和样式表,采用setter/getter接口
- qlite:使用了样式表,采用css/qss文件
- fancydemo:采用了颜色/图片配置文件
- qtcreator相关:使用了调色板和绘画,采用颜色/图片配置文件
更多功能读者可以自行解锁,如有关心的问题,欢迎评论交流!!
