redhat7多种服务配置(Telnet/VNC/FTP/HTTP/Samba)
老师布置的作业,然后就是配置成功了,像重新配置一遍,也对此总结一下.
链接是参考,可以不用看,直接从我写的主体部分开始,要输入的命令我都有标注,没标注的都是说明,不用从链接里面开始哈!!!!
假设我们一直把yum配置好了,那接下来就一起操作吧.(需要连接网络)
转载请注明出处,尊重作者劳动成果
前言:
目前几个基础的问题。
事先声明,fengxizeyou是我的普通用户名称。看到这个是要对应自己的用户名,就没必要也照着敲了哈。
问题1:普通用户执行权限不够
解决:
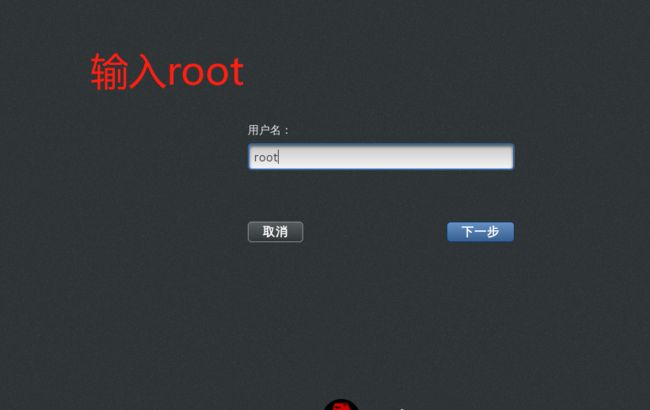
1.重新登录的时候选择root用户登录
2.使用命令切换用户为root用户(同样密码不会回显,需要自己确定)
[fengxizeyou@localhost 桌面]$ su root
密码:
[root@localhost 桌面]#
3.使用sudo命令让普通用户执行一些或者全部的 root 命令(这里是我想安装gcc,然后显示我没权限,后面就用sudo命令,虽然也可以执行,但是需要输入密码,感觉有点麻烦)
[fengxizeyou@localhost 桌面]$ yum install gcc
已加载插件:fastestmirror, product-id, search-disabled-repos, subscription-manager
您需要 root 权限执行此命令。
[fengxizeyou@localhost 桌面]$ sudo yum install gcc

We trust you have received the usual lecture from the local System
Administrator. It usually boils down to these three things:

    #1) Respect the privacy of others.
    #2) Think before you type.
    #3) With great power comes great responsibility.

[sudo] password for fengxizeyou:
已加载插件:fastestmirror, product-id, search-disabled-repos, subscription-manager
This system is not registered to Red Hat Subscription Management. You can use subscription-manager to register.
Loading mirror speeds from cached hostfile
epel/x86_64/metalink                                     | 3.9 kB     00:00
 * epel: ftp.riken.jp
base                                                     | 3.6 kB     00:00
epel                                                     | 4.7 kB     00:00
extras                                                   | 2.9 kB     00:00
mysql-connectors-community                               | 2.6 kB     00:00
mysql-tools-community                                    | 2.6 kB     00:00
mysql80-community                                        | 2.6 kB     00:00
updates                                                  | 2.9 kB     00:00
(1/2): epel/x86_64/updateinfo                              | 1.0 MB   00:03
(2/2): epel/x86_64/primary_db                              | 7.0 MB   01:44
软件包 gcc-4.8.5-44.el7.x86_64 已安装并且是最新版本
无须任何处理
[fengxizeyou@localhost 桌面]$
问题2:yum install 安装出现No more mirrors to try.
解决:换yum,可以参考之前写的。redhat7.2换yum_封奚泽优的博客-CSDN博客![]() https://blog.csdn.net/weixin_64066303/article/details/130436386?spm=1001.2014.3001.5501
https://blog.csdn.net/weixin_64066303/article/details/130436386?spm=1001.2014.3001.5501
问题3:vncviewer连接出现Oh no! Something has gone wrong.
未解决,这个有些人电脑可以但是有些人不行,用centos的可以(已经有同学尝试过),我感觉是连接上了,不是端口的问题,是虚拟机的问题。
问题4:vncviewer连接报错
这个可能是文件编辑的过程中发生错误,vncserver@:3.service和/usr/bin/vncserver,或者就是你窗口开错了,甚至没有开启,又或者没有备份什么的。
问题4:Samba连接报错
解决:可能是没有创建用户,或者从快速访问输入ip地址。
问题5:重启samba服务报错Failed to restart smb.service :Unit sam.service failed to load:
NO such file or directory.
解决:用yum安装三个文件的时候字母打错,可以重新输入安装的指令,yum install -y ....(就是Samba的第一步)
问题6:windows配置了telnet客户端,但是命令行窗口输入telnet命令还是报错‘telnet'不是内部或外部命令,也不是可运行的程序。
解决:参考这个链接,配置环境变量。可能是更新配置的时候发生的故障之类的。已经装了telnet客户端还是无法使用的解决方法-百度经验已经装了telnet客户端还是无法使用的解决方法,前几天小编就遇到了这个情况,明明已经启动了telet客户端,但是却用不了,黑窗口一直显示telet不是内部或外部命令!https://jingyan.baidu.com/article/6525d4b163b667ac7d2e94a8.html
问题7:连接超时,或者用yum安装的时候安装时间太久导致安装未成功。
原因:附近网络状态不好,可以换一个地点再次尝试。
输入命令的时候要细心,如果命令报错,可能是之前的步骤发生的错误,可以重新在确认一遍。
目录
Telnet
VNC(Virtual Network Computing)
FTP(File Transfer Protocol)
HTTP(HyperText Transfer Protocol)
Samba(Server Messages Block)
总结:
Telnet
参考链接https://blog.csdn.net/ccboy2009/article/details/105743595![]() https://blog.csdn.net/ccboy2009/article/details/105743595
https://blog.csdn.net/ccboy2009/article/details/105743595
usage: see firewall-cmd man page firewall-cmd: error: unrecognized arguments: -add-port=8088/tcp_北极眺望南极的博客-CSDN博客![]() https://blog.csdn.net/liyanhui1001/article/details/106589682
https://blog.csdn.net/liyanhui1001/article/details/106589682
Linux学习之七-配置Telnet连接Linux服务器 - SSgeek - 博客园 (cnblogs.com)![]() https://www.cnblogs.com/ssgeek/p/9220411.html#:~:text=%E6%89%93%E5%BC%80Window,%E5%8A%9F%E5%90%8E%E8%BF%9B%E5%85%A5%E7%BB%88%E7%AB%AF%E7%95%8C%E9%9D%A2
https://www.cnblogs.com/ssgeek/p/9220411.html#:~:text=%E6%89%93%E5%BC%80Window,%E5%8A%9F%E5%90%8E%E8%BF%9B%E5%85%A5%E7%BB%88%E7%AB%AF%E7%95%8C%E9%9D%A2
1.安装telnet-server和xinetd(-y是yes的意思,就是不用安装的时候弹出让我们确定的东西)(安装成功会显示完毕!)
[root@localhost ~]# yum install telnet-server -y
[root@localhost ~]# yum install xinetd -y2.设置开机自启(回车之后没有输出就是命令没有报错)
[root@localhost ~]# systemctl enable xinetd.service
[root@localhost ~]# systemctl enable telnet.socket3.启动(没有报错就是命令正确)
[root@localhost ~]# systemctl start telnet.socket
[root@localhost ~]# systemctl start xinetd
4.连接
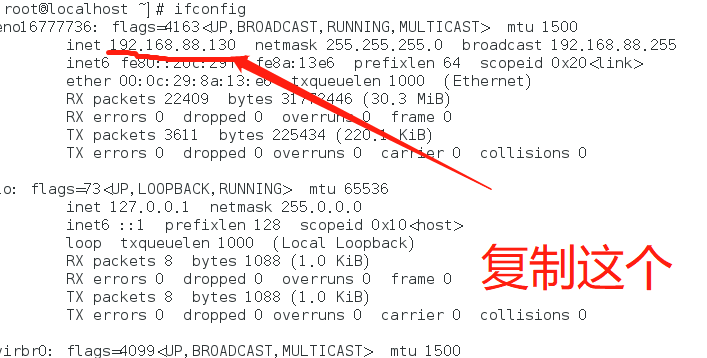
查看ip地址,在redhat系统下面是用ifconfig,在Windows系统下面是用ipconfig查看.在redhat里面ctrl+c是强制中断程序的执行,所以如果要复制的话可以右键选择复制.
在我win11系统下连接产生这个错误,这个说明防火墙是打开的,为了安全考虑,需要吧23号端口打开就行,不需要关闭整个防火墙了.(又好像说启动了telnet-server服务23号端口就会开启)
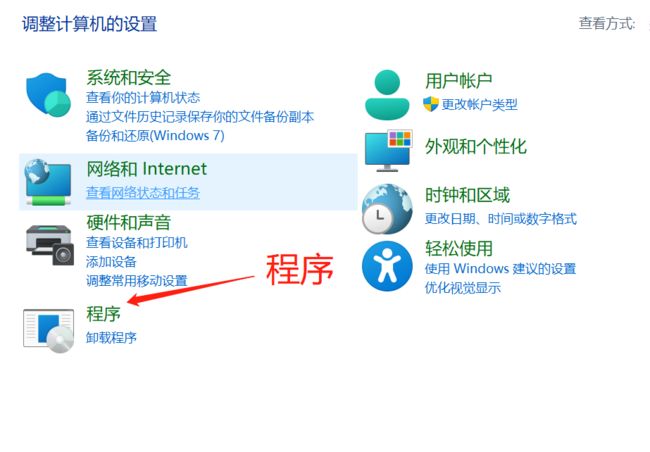
win11开始telnet服务如下:
需要重启电脑
C:\Users\25496>telnet 192.168.88.130
正在连接192.168.88.130...无法打开到主机的连接。 在端口 23: 连接失败
查看防火墙状态
[root@localhost ~]# firewall-cmd --state
running
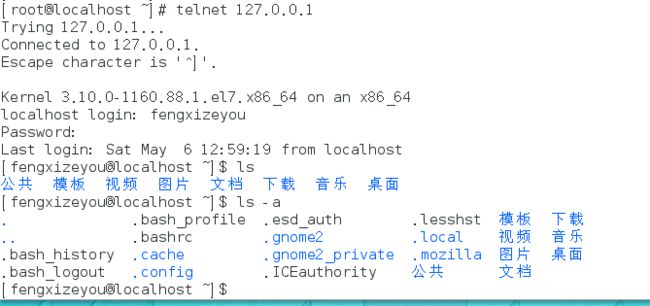
换一个思路吧,在redhat上面安装telnet客户端,如果是直接输入telnet的话退出要用quit,这个算是连接进去了吧.登录名不要用root用户哈,我用root登录,密码是正确的,但是显示密码错误,但是用普通用户登录就可以.
(localhost login,password是对后面的说明,不是指指令,如果yum install -y telnet之后执行telnet 127.0.0.1还是不行,可以再次执行yum install -y telnet这条语句)
localhost login:就是平时进入redhat的用户名
Password:就是平时登录时候的密码,输入的时候不会回显,自己知道就行,最后回车。
[root@localhost ~]# telnet
bash: telnet: 未找到命令...

[root@localhost ~]# yum install -y telnet

[root@localhost ~]# telnet 127.0.0.1
Trying 127.0.0.1...
Connected to 127.0.0.1.
Escape character is '^]'.

Kernel 3.10.0-1160.88.1.el7.x86_64 on an x86_64
localhost login: fengxizeyou
Password:
Last login: Sat May  6 21:28:54 from localhost
[fengxizeyou@localhost ~]$
远程登录root用户报错
[root@localhost ~]# telnet 127.0.0.1
Trying 127.0.0.1...
Connected to 127.0.0.1.
Escape character is '^]'.

Kernel 3.10.0-1160.88.1.el7.x86_64 on an x86_64
localhost login: root
Password:
Login incorrect
用ip地址也没有问题.
[root@localhost ~]# telnet 192.168.88.130
Trying 192.168.88.130...
Connected to 192.168.88.130.
Escape character is '^]'.

Kernel 3.10.0-1160.88.1.el7.x86_64 on an x86_64
localhost login: fengxizeyou
Password:
Last login: Sat May  6 21:30:11 from localhost
[fengxizeyou@localhost ~]$ ls -a
.              .bash_profile  .esd_auth        .lesshst  模板  下载
..             .bashrc        .gnome2          .local    视频  音乐
.bash_history  .cache         .gnome2_private  .mozilla  图片  桌面
.bash_logout   .config        .ICEauthority    公共      文档
[fengxizeyou@localhost ~]$
也就是说自己和自己连接没有发生问题.
查看23号端口,他是打开的,但是用win11还是连接不上.
[root@localhost ~]# netstat -tnl|grep 23
tcp6       0      0 :::23                   :::*                    LISTEN
暂时这样吧。
不知道什么原因,他又可以了(win11),可以关闭防火墙,或者给防火墙添加telnet服务试一下。
Kernel 3.10.0-1160.88.1.el7.x86_64 on an x86_64
localhost login: fengxizeyou
Password:
Last login: Sat May 6 21:33:23 from ::ffff:192.168.88.130
[fengxizeyou@localhost ~]$ ls
鍏叡 妯℃澘 瑙嗛 鍥剧墖 鏂囨。 涓嬭浇 闊充箰 妗岄潰
[fengxizeyou@localhost ~]$乱码是因为:
1.添加telnet服务(防火墙如果没有开启,你就不能在给人家开启服务了)--add-service写成-add-service会报错,也不能分开写
[root@localhost ~]# firewall-cmd --permanent --zone=public --add-service=telnet
success
[root@localhost ~]# firewall-cmd --permanent --zone=public --add-service=telnet
FirewallD is not running
2.关闭防火墙服务
[root@localhost ~]# systemctl stop firewalld
[root@localhost ~]# systemctl disable firewalld
VNC(Virtual Network Computing)
安装教程 - VNC安装 - 听雨危楼 - 博客园 (cnblogs.com)![]() https://www.cnblogs.com/Neeo/articles/13886524.html#:~:text=for%20windows%201%20%E4%B8%8B%E8%BD%BD%EF%BC%9A%20%E9%93%BE%E6%8E%A5%EF%BC%9A%20https%3A%2F%2Fpan.baidu.com%2Fs%2F1phgU95Kfo4W1VboNIB6Mqg%20%E6%8F%90%E5%8F%96%E7%A0%81%EF%BC%9A%20htq9,Viewer%EF%BC%8C%E6%89%BE%E4%B8%8D%E5%88%B0%E5%B0%B1%E6%90%9C%E7%B4%A2%EF%BC%9A%204%20%E8%BF%9E%E6%8E%A5VNC%20Server%E7%AB%AF%EF%BC%8C%E6%AD%A4%E6%97%B6%E4%BD%A0%E5%BA%94%E8%AF%A5%E5%BE%97%E5%88%B0%E4%B8%80%E4%B8%AAserver%E7%AB%AF%E7%BB%99%E4%BD%A0%E7%9A%84IP%EF%BC%8C%E4%BD%A0%E8%BE%93%E5%85%A5IP%E5%90%8E%E7%82%B9%E5%87%BBConnect%EF%BC%9A%20%E6%AD%A4%E6%97%B6%E6%9C%89%E4%B8%A4%E7%A7%8D%E6%83%85%E5%86%B5%EF%BC%8C%E7%AC%AC%E4%B8%80%E7%A7%8D%E5%B0%B1%E6%98%AF%E8%BF%9E%E6%8E%A5server%E7%AB%AF%E9%9C%80%E8%A6%81%E5%AF%86%E7%A0%81%EF%BC%8C%E4%BD%A0%E8%BF%9E%E6%8E%A5%E6%97%B6%E4%BC%9A%E9%81%87%E5%88%B0%E5%A6%82%E4%B8%8B%E6%8F%90%E7%A4%BA%EF%BC%8C%E6%97%A0%E6%B3%95%E8%AF%86%E5%88%ABvnc%E6%9C%8D%E5%8A%A1%E5%99%A8%EF%BC%9A%20%E4%BD%A0%E8%BE%93%E5%85%A5server%E7%AB%AF%E7%9A%84%E5%AF%86%E7%A0%81%E5%8D%B3%E5%8F%AF%E8%BF%9E%E6%8E%A5%E3%80%82%20%E5%8F%A6%E4%B8%80%E7%A7%8D%E6%83%85%E5%86%B5%E5%B0%B1%E6%98%AFserver%E7%AB%AF%E4%B8%8D%E9%9C%80%E8%A6%81%E5%AF%86%E7%A0%81%EF%BC%8C%E4%B9%9F%E5%B0%B1%E6%98%AF%E8%BF%9E%E6%8E%A5%E4%B8%8D%E6%98%AF%E5%8A%A0%E5%AF%86%E8%BF%9E%E6%8E%A5%EF%BC%8C%E4%BD%A0%E8%BF%9E%E6%8E%A5%E6%97%B6%E9%81%87%E5%88%B0%E8%BF%99%E6%A0%B7%E7%9A%84%E6%8F%90%E7%A4%BA%EF%BC%9A%20%E4%BD%A0%E7%82%B9%E5%87%BBContinue%E5%8D%B3%E5%8F%AF%E8%BF%9E%E6%8E%A5%E6%88%90%E5%8A%9F%E3%80%82
https://www.cnblogs.com/Neeo/articles/13886524.html#:~:text=for%20windows%201%20%E4%B8%8B%E8%BD%BD%EF%BC%9A%20%E9%93%BE%E6%8E%A5%EF%BC%9A%20https%3A%2F%2Fpan.baidu.com%2Fs%2F1phgU95Kfo4W1VboNIB6Mqg%20%E6%8F%90%E5%8F%96%E7%A0%81%EF%BC%9A%20htq9,Viewer%EF%BC%8C%E6%89%BE%E4%B8%8D%E5%88%B0%E5%B0%B1%E6%90%9C%E7%B4%A2%EF%BC%9A%204%20%E8%BF%9E%E6%8E%A5VNC%20Server%E7%AB%AF%EF%BC%8C%E6%AD%A4%E6%97%B6%E4%BD%A0%E5%BA%94%E8%AF%A5%E5%BE%97%E5%88%B0%E4%B8%80%E4%B8%AAserver%E7%AB%AF%E7%BB%99%E4%BD%A0%E7%9A%84IP%EF%BC%8C%E4%BD%A0%E8%BE%93%E5%85%A5IP%E5%90%8E%E7%82%B9%E5%87%BBConnect%EF%BC%9A%20%E6%AD%A4%E6%97%B6%E6%9C%89%E4%B8%A4%E7%A7%8D%E6%83%85%E5%86%B5%EF%BC%8C%E7%AC%AC%E4%B8%80%E7%A7%8D%E5%B0%B1%E6%98%AF%E8%BF%9E%E6%8E%A5server%E7%AB%AF%E9%9C%80%E8%A6%81%E5%AF%86%E7%A0%81%EF%BC%8C%E4%BD%A0%E8%BF%9E%E6%8E%A5%E6%97%B6%E4%BC%9A%E9%81%87%E5%88%B0%E5%A6%82%E4%B8%8B%E6%8F%90%E7%A4%BA%EF%BC%8C%E6%97%A0%E6%B3%95%E8%AF%86%E5%88%ABvnc%E6%9C%8D%E5%8A%A1%E5%99%A8%EF%BC%9A%20%E4%BD%A0%E8%BE%93%E5%85%A5server%E7%AB%AF%E7%9A%84%E5%AF%86%E7%A0%81%E5%8D%B3%E5%8F%AF%E8%BF%9E%E6%8E%A5%E3%80%82%20%E5%8F%A6%E4%B8%80%E7%A7%8D%E6%83%85%E5%86%B5%E5%B0%B1%E6%98%AFserver%E7%AB%AF%E4%B8%8D%E9%9C%80%E8%A6%81%E5%AF%86%E7%A0%81%EF%BC%8C%E4%B9%9F%E5%B0%B1%E6%98%AF%E8%BF%9E%E6%8E%A5%E4%B8%8D%E6%98%AF%E5%8A%A0%E5%AF%86%E8%BF%9E%E6%8E%A5%EF%BC%8C%E4%BD%A0%E8%BF%9E%E6%8E%A5%E6%97%B6%E9%81%87%E5%88%B0%E8%BF%99%E6%A0%B7%E7%9A%84%E6%8F%90%E7%A4%BA%EF%BC%9A%20%E4%BD%A0%E7%82%B9%E5%87%BBContinue%E5%8D%B3%E5%8F%AF%E8%BF%9E%E6%8E%A5%E6%88%90%E5%8A%9F%E3%80%82
1.安装VNCserver
[root@localhost ~]# yum -y install tigervnc-server2.创建一个新的VNC配置文件作为备份。
[root@localhost ~]# cd /lib/systemd/system
[root@localhost system]# cp [email protected] vncserver@:3.service
3.使用编辑器(vi,vim,gedit)修改vncserver@:3.service,我怕修改错误就没修改了。(可不修改)
[root@localhost system]# vi vncserver@:3.service
4.修改的话就更新一下
[root@localhost system]# systemctl daemon-reload5.设置用户vnc的密码(两次密码输入要一致,同样输入的时候不会回显)
[root@localhost system]# vncpasswd
Password:
Verify:
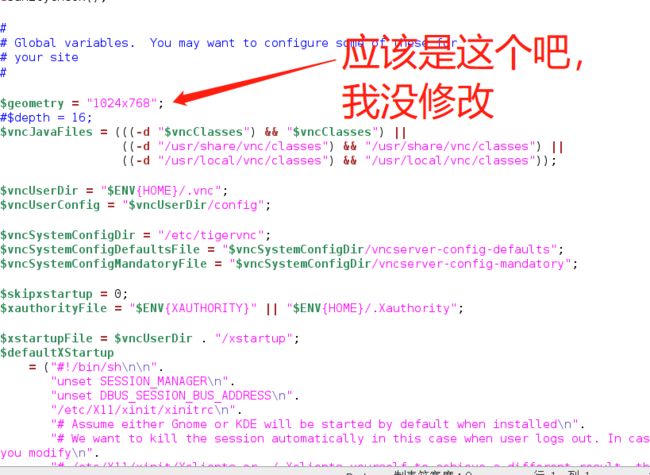
[root@localhost system]# 6.修改默认分辨率(可不修改)
[root@localhost system]# gedit /usr/bin/vncserver
7.开放防火墙的vnc服务(命令正确会显示success,这里firewall-cmd是一个整体,--add-service是一个整体)
[root@localhost system]# firewall-cmd --permanent --add-service=vnc-server
success
[root@localhost system]# firewall-cmd --reload
success
8.使用3号窗口启动vnc服务,之前修改的也是3号窗口(:3前面有空格哈)
[root@localhost system]# vncserver :3

New 'localhost.localdomain:3 (root)' desktop is localhost.localdomain:3

Creating default startup script /root/.vnc/xstartup
Creating default config /root/.vnc/config
Starting applications specified in /root/.vnc/xstartup
Log file is /root/.vnc/localhost.localdomain:3.log9.连接(最开始是用手机连接,但是一直连接不上,不管是连接同一个WiFi还是手机开热点,所以我用在win11下下载vncviewer试一下)很容易就连接成功了,可能需要注册
因为我是登录vncviewer的账号的,所以的手机电脑是同步的,但是还是登录不了。
FTP(File Transfer Protocol)
在Redhat5中开通Root远程登录详解(Telnet) - 爱码网 (likecs.com)![]() https://www.likecs.com/show-307562273.html
https://www.likecs.com/show-307562273.html
1.安装
[root@localhost system]# yum install vsftpd -y2.修改防火墙规则(永久添加tcp21端口,添加ftp服务,启动方法)
[root@localhost ~]# firewall-cmd --zone=public --add-port=21/tcp --permanent
success
[root@localhost ~]# firewall-cmd --permanent --zone=public --add-service=ftp
success
[root@localhost ~]# firewall-cmd --reload
success
[root@localhost ~]#
3.启动方法
[root@localhost ~]# systemctl start vsftpd.service4.win11 ftp客户端(ftp退出也是quit,ftp后面接你redhat的ip地址,同样用root会有问题,那应该是默认允许普通的telnet登陆,默认是不允许root用户登录)
密码同样不会回显,最后显示230 Login successful说明连接上了。
C:\Users\25496>ftp 192.168.88.130
连接到 192.168.88.130。
220 (vsFTPd 3.0.2)
200 Always in UTF8 mode.
用户(192.168.88.130:(none)): fengxizeyou
331 Please specify the password.
密码:
230 Login successful.
ftp>
C:\Users\25496>ftp 192.168.88.130
连接到 192.168.88.130。
220 (vsFTPd 3.0.2)
200 Always in UTF8 mode.
用户(192.168.88.130:(none)): root
530 Permission denied.
登录失败。
ftp>HTTP(HyperText Transfer Protocol)
爱心代码李峋同款爱心 python html_pycharm爱心代码-CSDN博客![]() https://blog.csdn.net/CL_Young/article/details/127808312?ops_request_misc=%257B%2522request%255Fid%2522%253A%2522168338430116800188524024%2522%252C%2522scm%2522%253A%252220140713.130102334..%2522%257D&request_id=168338430116800188524024&biz_id=0&utm_medium=distribute.pc_search_result.none-task-blog-2~all~top_positive~default-2-127808312-null-null.142%5Ev86%5Einsert_down38v5,239%5Ev2%5Einsert_chatgpt&utm_term=%E7%88%B1%E5%BF%83%E4%BB%A3%E7%A0%81%E5%A4%A7%E5%85%A8html&spm=1018.2226.3001.4187
https://blog.csdn.net/CL_Young/article/details/127808312?ops_request_misc=%257B%2522request%255Fid%2522%253A%2522168338430116800188524024%2522%252C%2522scm%2522%253A%252220140713.130102334..%2522%257D&request_id=168338430116800188524024&biz_id=0&utm_medium=distribute.pc_search_result.none-task-blog-2~all~top_positive~default-2-127808312-null-null.142%5Ev86%5Einsert_down38v5,239%5Ev2%5Einsert_chatgpt&utm_term=%E7%88%B1%E5%BF%83%E4%BB%A3%E7%A0%81%E5%A4%A7%E5%85%A8html&spm=1018.2226.3001.4187
http启动(重启)报错:Job for httpd.service failed because the control process exited with error code._开启服务并设置开机自启报错job_王大雏的博客-CSDN博客![]() https://blog.csdn.net/qq_47855463/article/details/118565799
https://blog.csdn.net/qq_47855463/article/details/118565799
解决问题 “You don't have permission to access /index.html on this server.” - 那夜我还很年幼~ - 博客园 (cnblogs.com)![]() https://www.cnblogs.com/longhs/p/3558201.html
https://www.cnblogs.com/longhs/p/3558201.html
1.安装
[root@localhost ~]# yum install httpd -y
2.开放防火墙
[root@localhost ~]# firewall-cmd --permanent --add-service=http
success
[root@localhost ~]# firewall-cmd --reload
success
[root@localhost ~]#
3.修改配置文件(我是用默认的路径)(可不修改)
[root@localhost html]# gedit /etc/httpd/conf/httpd.conf4.启动
root@localhost ~]# systemctl start httpd5.准备一个html的文件,把文件命名为index.html,保存到/var/www/html下。
我是先在win11里面,然后复制粘贴到虚拟机里面。(文件从主机中拖拽/复制粘贴不到虚拟机里面可以切换到root用户下试一下)
root@localhost 桌面]# mv index.html /var/www/html/
[root@localhost 桌面]# ls /var/www/html/
index.html
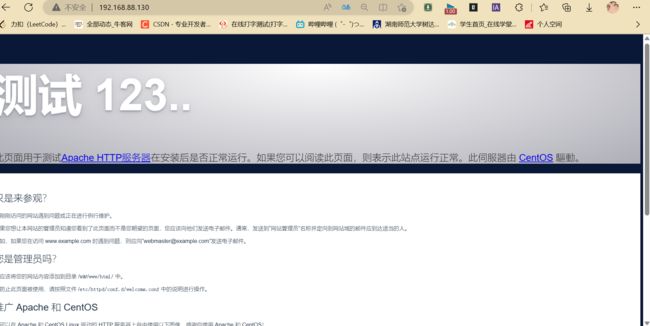
6.用ip地址访问网址(此时访问的应该是默认的网页,上面显示的说明程序没用问题,可能是程序的路径有问题)也可能是index.html文件里面没有内容
查看状态(是打开的)
[root@localhost ~]# pstree|grep httpd
        |-httpd---10*[httpd]
显示这个说明httpd没有启动
SElinux值设置为0,就出现这个了(这个不需要尝试,尝试就回不去了)
[root@localhost html]# setenforce 0没搞好,反而结果服务都开启不了了。-_-,只能重新看看了。
我知道了,我知道。终于,我把在安装服务前对虚拟机拍了快照,然后退回去了,发生上面的那些问题是因为对文件权限不够,可以通过修改文件的权限,让其他用户可以通过浏览器输入ip地址访问,我还一直以为值路径的问题。(一直卡在出现禁止的页面,然后我刚开始以为是修改selinux工作模式的原因,就一直在调setenforce 0/1,通过查看getenforce是否修改,还以为是要重启的原因,就重启了几次,还通过vi /etc/sysconfig/selinux把里边的一行改为SELINUX=disabled,重启,直接自闭了,直接编写一个前端的页面应该就不会有这个问题吧(还是为了装逼,哦不,学习新知识,一切都是为了学习新知识。)
个人认为就是对于文件的执行权限不够导致的,如果错误,希望有人能够指正,这个index.html我是从win11拷贝到redhat中,但是不知道为什么导致对文件的执行权限不够,第一次拷贝没用发生这种情况。
[root@localhost ~]# cd /var/www/html
root@localhost html]# chmod 755 index.html说明:这里昨天第一次弄的时候误会老师了,老师的网课视频上面多了一张rhel6.5的安装课件,里面就是有httpd服务的启动方法以及查看状态,然后我查看状态发现没用打开,就知道没用开启,然后用service httpd start开始报错了,这个是版本问题,要用老师在rhel7提供的systemctl start httpd就可以成功启动,当时没有理解指令的含义,只知道httpd是没有开启的。这个也给我涨了记性。
通过ip给别人访问可能是需要在同一个局域网下面,主机可以访问虚拟机的,要给所有人访问好像是需要买一个服务器。
Samba(Server Messages Block)
Redhat_rhel8.0_SAMBA服务搭建步骤_red hat 安装samba.client_" 晴天 "的博客-CSDN博客![]() https://blog.csdn.net/qq_50380655/article/details/112257962
https://blog.csdn.net/qq_50380655/article/details/112257962
1.安装
[root@localhost html]# yum install -y samba samba-common samba-client
2.创建Samba用户(这个是按照老师课件上面来的,上面显示失败了,但是也没有关系,后面会重新创建,不用管,这步我感觉应该是可有可无的)
[root@localhost html]# smbpasswd -a feng
New SMB password:
Retype new SMB password:
Failed to add entry for user feng.
[root@localhost html]#
3.把SeLinux的Samba服务端口打开
[root@localhost ~]# setsebool -P samba_export_all_rw on
4.配置防火墙,是smb服务流量可以通过防火墙
[root@localhost ~]# firewall-cmd --permanent --add-service=samba
success
[root@localhost ~]# firewall-cmd --reload
success
[root@localhost ~]#
5.重启samba服务(启动,重启)
root@localhost ~]# systemctl start smb.service
[root@localhost ~]# systemctl restart smb.service
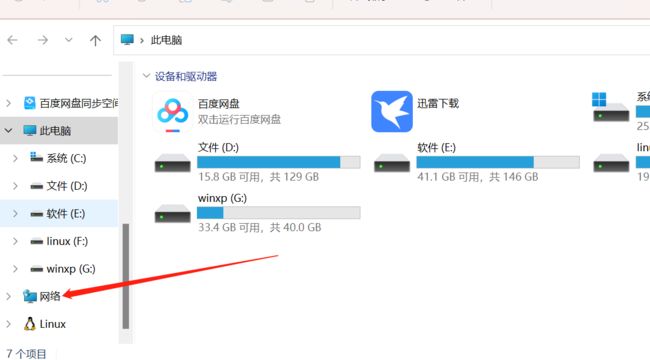
6.连接
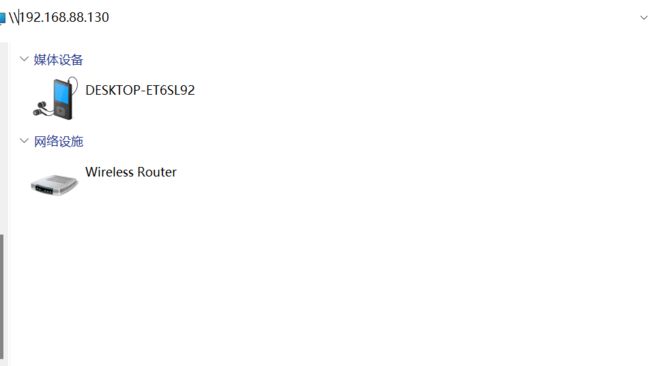
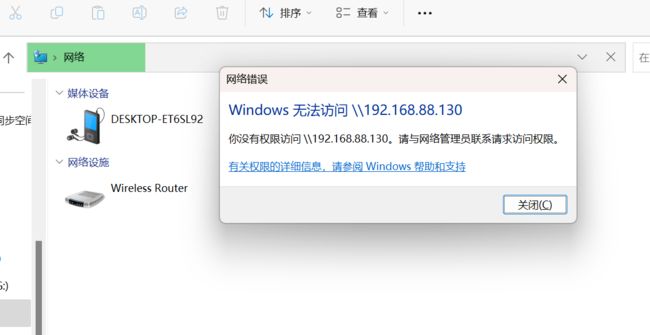
这个就是配置还没调好,这次是没用权限,但是之前弄的是可以连接,但是连接不上,这里要调一下。
7.创建共享资源目录,并给予权限(/sambadir/feng是自己创建的)
[root@localhost ~]# mkdir -p /sambadir/feng
[root@localhost ~]# chmod 777 /sambadir/feng/
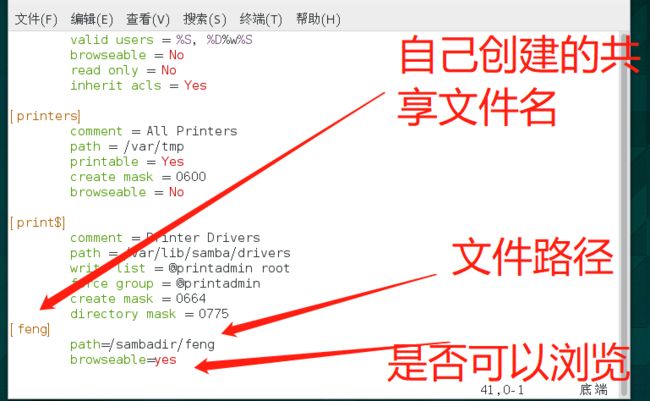
8.编辑配置文件
[root@localhost ~]# vim /etc/samba/smb.conf这个老师课件上面也有,我这也只修改了这这个地方。
9.测试smb.conf文件语法是否错误
[root@localhost ~]# testparm
Load smb config files from /etc/samba/smb.conf
Loaded services file OK.
Server role: ROLE_STANDALONE

Press enter to see a dump of your service definitions

# Global parameters
[global]
	printcap name = cups
	security = USER
	workgroup = SAMBA
	idmap config * : backend = tdb
	cups options = raw


[homes]
	browseable = No
	comment = Home Directories
	inherit acls = Yes
	read only = No
	valid users = %S %D%w%S


[printers]
	browseable = No
	comment = All Printers
	create mask = 0600
	path = /var/tmp
	printable = Yes


[print$]
	comment = Printer Drivers
	create mask = 0664
	directory mask = 0775
	force group = @printadmin
	path = /var/lib/samba/drivers
	write list = @printadmin root


[feng]
	path = /sambadir/feng
[root@localhost ~]#
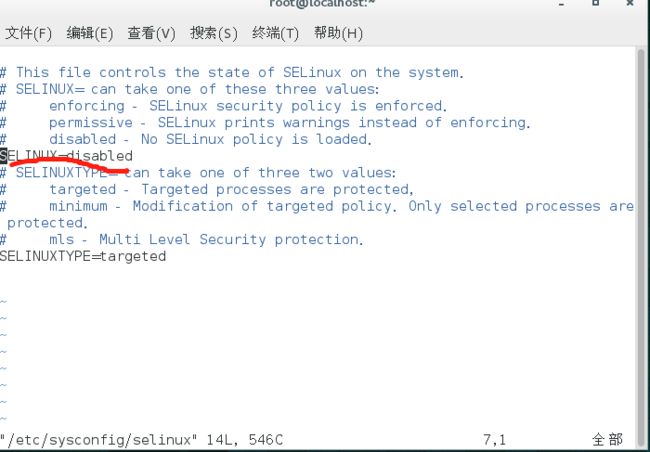
10.关闭SELINUX属于内核的安全服务会阻止外部访问(SELINUX=disabled)需要重启一下电脑
[root@localhost ~]# vim /etc/sysconfig/selinux
11.关闭防火墙(我不想关闭防火墙的,但是这个是照着打的,先把作业上交了再研究吧,关闭服务,关闭开机启动)
[root@localhost ~]# systemctl stop firewalld
[root@localhost ~]# systemctl disable firewalld
12. 重启samba服务
[root@localhost ~]# systemctl restart smb.service
13.创建系统用户、以及提升为samba用户(feng是自己的用户名)
[root@localhost ~]# useradd feng
[root@localhost ~]# pdbedit -a -u feng
然后自己设置密码。
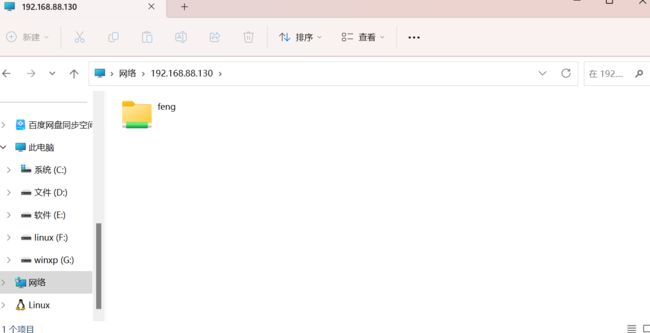
再次重复6.连接(连接成功了)
开启防火墙看一下能不能访问。(前面关闭了开启启动,这里可以打开)
[root@localhost ~]# firewall-cmd --state
not running
[root@localhost ~]# systemctl start firewalld.service
[root@localhost ~]# firewall-cmd --state
running
[root@localhost ~]# systemctl enable firewalld.service
[root@localhost ~]#
还是可以的。
到就到此为止了
总结:
确实还是有很多地方不懂的地方,如果有错误的地方,希望大家能够指正。
最后制作不易,还是希望大家能够点赞/收藏支持一下。
希望未来会越来越好。

