spring cloud搭建(feign)
天行健,君子以自强不息;地势坤,君子以厚德载物。
每个人都有惰性,但不断学习是好好生活的根本,共勉!
文章均为学习整理笔记,分享记录为主,如有错误请指正,共同学习进步。
spring cloud搭建(Feign)
- 一、Feign简介
- 二、开发环境:
- 三、Feign的应用
-
- 1. 配置service1
-
- 1.1 crud接口
- 1.2 crud接口实现类
- 1.3 请求控制
- 1.4 postman调用测试
- 2. 配置service2
-
- 2.1 feign依赖
- 2.2 接口创建
- 2.3 请求控制类
- 2.4 开启feign
- 2.5 postman调用
- 3. 拓展(feign传递对象参数的解决)
spring cloud 相关组件搭建(建议顺序):
- eureka(注册中心服务)spring cloud搭建(eureka)
- P-C service(服务提供者和服务调用者)spring cloud搭建(P-C service)
- feign(接口调用)本篇
- hystrix(熔断器)spring cloud搭建(hystrix)
- zuul(网关服务)spring cloud搭建(zuul)
注:本篇基于前两篇编写
一、Feign简介
- feign是一个轻量级RESTful的http服务客户端
- feign是通过Java接口注解的方式调用请求,广泛应用在spring cloud中。
使用方法:
在调用者的服务中创建一个接口,并在接口上添加注解,即可调用其他服务中的接口。
二、开发环境:
JDK版本:1.8
maven版本:3.9.0
开发工具:IDEA社区版ideaIC-2018.3
项目框架:spring boot 版本为 2.7.3 springboot搭建传送门spring cloud 版本为2021.0.5
以下均基于eureka和自己服务创建后的操作
具体请参考本文目录下的spring cloud搭建顺序的前两篇
三、Feign的应用
两个自己的服务,分别为service1和service2
将service1作为服务的被调用者(具体接口所在的服务)
将service2作为服务的调用者(feign的使用者,会去调用service1中的接口)
1. 配置service1
主要是接口的编写,这里只是测试feign功能的实现就没有用到数据库和具体代码,只写了CRUD的简单接口,返回都是字符串。
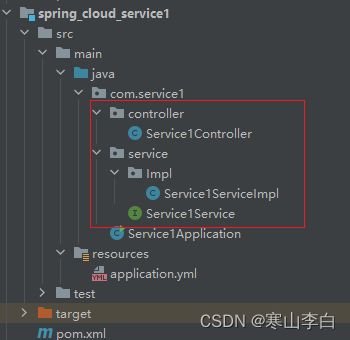
包结构如下,比之前新增了红框中的内容

1.1 crud接口
Service1Service.java
package com.service1.service;

/**
 * @ClassDescription: crud接口
 * @Author:李白
 * @Date:2023/5/31 17:04
 */
public interface Service1Service {
    String addInfo();
    String removeInfo();
    String changeInfo();
    String searchInfo();
}
1.2 crud接口实现类
Service1ServiceImpl.java
添加@Service注解
package com.service1.service.Impl;

import com.service1.service.Service1Service;
import org.springframework.stereotype.Service;

/**
 * @ClassDescription: crud接口实现类
 * @Author:李白
 * @Date:2023/5/31 17:05
 */
@Service
public class Service1ServiceImpl implements Service1Service {
    @Override
    public String addInfo() {
        return "add info success";
    }

    @Override
    public String removeInfo() {
        return "remove info success";
    }

    @Override
    public String changeInfo() {
        return "change info success";
    }

    @Override
    public String searchInfo() {
        return "search info success";
    }
}
1.3 请求控制
Service1Controller.java
package com.service1.controller;

import com.service1.service.Impl.Service1ServiceImpl;
import org.springframework.beans.factory.annotation.Autowired;
import org.springframework.web.bind.annotation.*;

/**
 * @ClassDescription: crud请求控制类
 * @Author:李白
 * @Date:2023/5/31 17:07
 */
@RestController
@RequestMapping("/crud")
public class Service1Controller {

    @Autowired
    Service1ServiceImpl service1ServiceImpl;

    @PostMapping
    public String addInfo(){
        return service1ServiceImpl.addInfo();
    }

    @DeleteMapping
    public String remove(){
        return service1ServiceImpl.removeInfo();
    }

    @PutMapping
    public String change(){
        return service1ServiceImpl.changeInfo();
    }

    @GetMapping
    public String search(){
        return service1ServiceImpl.searchInfo();
    }

}
1.4 postman调用测试
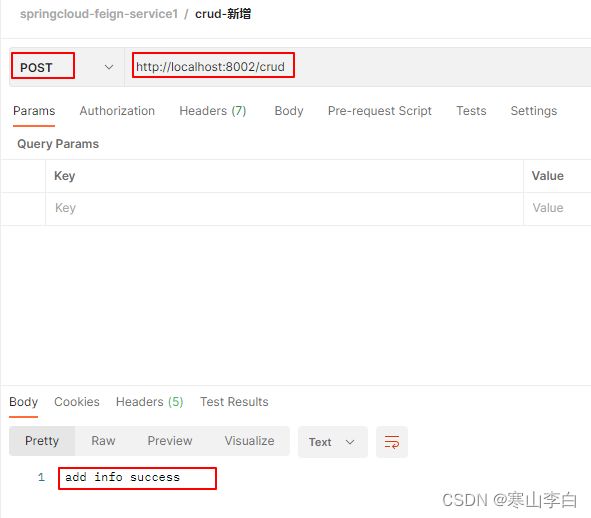
启动service1,使用postman访问接口
(请求注解这里用到了RESTful API ,增POST删DELETE改UPDATE查GET)
http://localhost:8002/crud
如下图(使用不同的请求方式可以获取对应的结果)

这里测试了service1的接口没问题,能正常访问。
2. 配置service2
这里就是服务接口的调用者了,在service2中去调用service1中的接口
需要在service2的pom中配置feign所需的依赖
然后创建接口和请求控制类
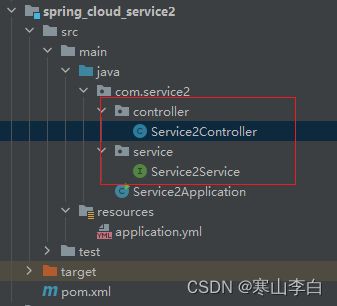
包结构如下,多了一个接口和一个请求控制类

具体操作如下
2.1 feign依赖
在service2的pom中添加feign的依赖
        <dependency>
            <groupId>org.springframework.cloud</groupId>
            <artifactId>spring-cloud-starter-openfeign</artifactId>
        </dependency>
2.2 接口创建
Service2Service.java
package com.service2.service;

import org.springframework.cloud.openfeign.FeignClient;
import org.springframework.web.bind.annotation.DeleteMapping;
import org.springframework.web.bind.annotation.GetMapping;
import org.springframework.web.bind.annotation.PostMapping;
import org.springframework.web.bind.annotation.PutMapping;


/**
 * @ClassDescription: 使用feign的接口 调用service1服务的接口
 * Feign的使用,在接口上加上@FeignClient注解,
 * 参数value为被调用接口所在的服务的实例名,这里即service1的配置文件中spring.application.name的值,
 * path的值为被调用接口的路由前缀,即接口类上的路由
 * 每个接口方法上的注解对应被调用接口的请求控制对用的注解
 * @Author:李白
 * @Date:2023/5/31 18:33
 */
@FeignClient(value = "Service1-app", path = "/crud")
public interface Service2Service {
    @PostMapping
    String addInfo();
    @DeleteMapping
    String removeInfo();
    @PutMapping
    String changeInfo();
    @GetMapping
    String searchInfo();
}
注:在接口上添加@FeignClient注解来使用这个组件进行接口调用
value的值为被调用服务的实例名,也就是它配置文件中的spring.application.name参数的值
path的值为被调用接口请求控制类上的路由前缀,这里指的就是crud
这里说的crud就是service1中的Service1Controller类上@RequestMapping括号里的值
2.3 请求控制类
Service2Controller.java
package com.service2.controller;

import com.service2.service.Service2Service;
import org.springframework.beans.factory.annotation.Autowired;
import org.springframework.web.bind.annotation.*;

/**
 * @ClassDescription: 请求控制类(service2)
 * @Author:李白
 * @Date:2023/5/31 18:42
 */
@RestController
@RequestMapping("/caller")
public class Service2Controller {

    @Autowired
    Service2Service service2Service;

    @PostMapping
    public String addInfo(){
        return service2Service.addInfo();
    }

    @DeleteMapping
    public String remove(){
        return service2Service.removeInfo();
    }

    @PutMapping
    public String change(){
        return service2Service.changeInfo();
    }

    @GetMapping
    public String search(){
        return service2Service.searchInfo();
    }

}
2.4 开启feign
在service2的启动类上加@EnableFeignClients注解开启feign
启动类Service2Application.java
package com.service2;

import org.springframework.boot.SpringApplication;
import org.springframework.boot.autoconfigure.SpringBootApplication;
import org.springframework.cloud.netflix.eureka.EnableEurekaClient;
import org.springframework.cloud.openfeign.EnableFeignClients;

/**
 * @ClassDescription: 服务2启动项
 * 注解@EnableFeignClients开启feign功能,也可以添加参数,basePackages的值可指定使用该功能的接口所在包,
 * 会对指定的包进行扫描包中带有feign注解的接口
 * @Author:李白
 * @Date:2023/5/31 14:51
 */
@EnableEurekaClient
@SpringBootApplication
//@EnableFeignClients(basePackages = "com.service2.service")
@EnableFeignClients
public class Service2Application {
    public static void main(String[] args) {
        SpringApplication.run(Service2Application.class, args);
    }
}
2.5 postman调用
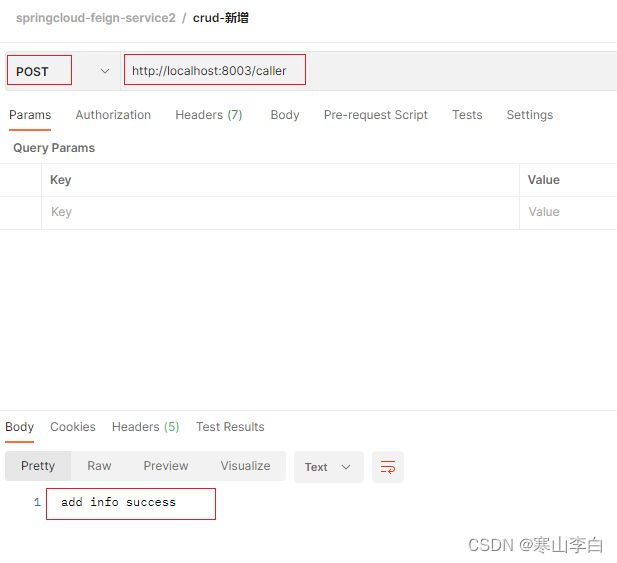
依次启动eureka服务,service1服务,service2服务
使用postman进行接口调用
http://localhost:8003/caller
3. 拓展(feign传递对象参数的解决)
对于远程调用的接口含有对象传参情况,有两种方式处理
- 将对象拆分成多个简单类型参数,每个参数前加@RequestParam注解
- 使用Map代替对象参数,Map前加@RequestParam注解
到此spring cloud整合feign功能就完成了,可以将其应用在需要的服务中。
