【Npm】如何发布一个npm包?
前端日常开发经常会通过
npm install安装一些包,那这些包都是怎么发布的呢?
接下来让我们动手发布一个自己的npm 包。
windows系统下演示:
步骤一、注册npm账号
步骤二、登录
打开windows命令行,输入npm adduser:
C:\Users\hp>npm adduser
根据提示输入之前注册的Username、Password和Email:
Username:
Password:
Email: (this IS public)
这一步如果出现以下报错:
npm ERR! code E403
npm ERR! 403 403 Forbidden - PUT https://registry.npmmirror.com/-/user/org.couchdb.user:lynnhg - [FORBIDDEN] Public registration is not allowed
npm ERR! 403 In most cases, you or one of your dependencies are requesting
npm ERR! 403 a package version that is forbidden by your security policy, or
npm ERR! 403 on a server you do not have access to.
这是由于我们的npm镜像源设置有问题。
查看npm镜像信息:
C:\Users\hp>npm config get registry
https://registry.nlark.com/
我们通过nrm将npm镜像还原:
C:\Users\hp>nrm ls

  npm ---------- https://registry.npmjs.org/
  yarn --------- https://registry.yarnpkg.com/
  tencent ------ https://mirrors.cloud.tencent.com/npm/
  cnpm --------- https://r.cnpmjs.org/
  taobao ------- https://registry.nlark.com/
  npmMirror ---- https://skimdb.npmjs.com/registry/
C:\Users\hp>nrm use npm


   Registry has been set to: https://registry.npmjs.org/


C:\Users\hp>npm config get registry
https://registry.npmjs.org/
或者可以通过npm config set registry https://registry.npmjs.org直接设置。
设置好镜像源后,我们再次执行之前的命令npm adduser:
C:\Users\hp>npm adduser
npm notice Log in on https://registry.npmjs.org/
Username: lynnhg
Password:
Email: (this IS public) ***
Enter one-time password from your authenticator app: ******
Logged in as lynnhg on https://registry.npmjs.org/.
输入邮箱后,将邮箱收到的验证码填入Enter one-time password from your authenticator app一栏,即登录成功。
步骤三、创建npm项目
我们创建一个名为hello的文件夹,在该文件夹下创建一个package.json文件,并在package.json文件中写入必要的信息:
{
  "name": "@lynnhg/hello",
  "version": "1.0.0"
}
其中name和version字段是必需的。
步骤四、发布
内容填好好后,我们发布该npm项目,输入npm publish:
E:\wlh\Front-End\my-npm\hello> npm publish
npm notice
npm notice   @lynnhg/[email protected]
npm notice === Tarball Contents ===
npm notice 56B package.json
npm notice === Tarball Details ===
npm notice name:          @lynnhg/hello
npm notice version:       1.0.0
npm notice filename:      @lynnhg/hello-1.0.0.tgz
npm notice package size:  152 B
npm notice unpacked size: 56 B
npm notice shasum:        ****
npm notice integrity:     ****
npm notice total files:   1
npm notice
npm ERR! code E402
npm ERR! 402 Payment Required - PUT https://registry.npmjs.org/@lynnhg%2fhello - You must sign up for private packages
这里遇到了报错,我们只需改变下指令来告诉npm 我们想让这个模块是公开的 — 不要把它锁进 npm 的保险库中。所以我们执行如下指令:
npm config set access public
再次发布:
npm publish
成功啦!!!
+ @lynnhg/[email protected]
虽然我们发布了我们的npm包,但这个包里面似乎没有任何内容,接下来我们为它添加一些内容。
在项目根目录下新建一个index.js文件:
module.exports = function hello() {
  return "hello! This is my first npm package...";
};
并修改package.json文件:
{
  "name": "@lynnhg/hello",
  "version": "1.0.0",
  "description": "Say hello to you",
  "license": "MIT",
  "repository": "lynnhg/hello",
  "main": "index.js",
  "keywords": [
    "hello",
    "npm",
    "package",
    "lynnhg"
  ]
}
解释一下:
description:包的简介repository:适合写上GitHub地址 — 所以你可以写成这种格式 lynnhg/hellolicense:MIT认证main:包的入口文件,位置在文件夹的根目录keywords:添加一些关键词更容易让包被检索到
好了,内容都添加完成后我们使用npm version命令来升级下包的版本:
E:\wlh\Front-End\my-npm\hello> npm version major
输出:
v2.0.0
接下来再次发布我们的包:
E:\wlh\Front-End\my-npm\hello> npm publish
发布成功!
+ @lynnhg/[email protected]
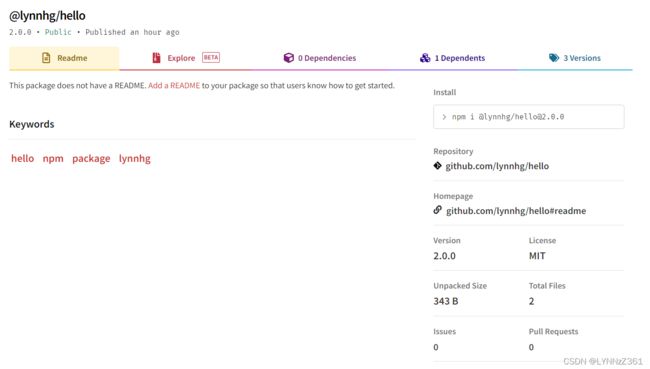
在这里查看发布的第二个版本。

我们发现代码仓库 Repository中的github.com/lynnhg/hello其实还没有任何东西。
接下来我们可以将npm项目的代码放到GitHub上去,并写好README文件,方便其他人员安装使用:

给我们刚刚创建的包来颗 star 吧:
⭐https://github.com/LynnHg…
参考
- [译] 创建并发布一个小而美的 npm 包,没你想的那么难!
- NPM Publish Error 402 Payment Required – You must sign up for private packages

