PowerJob容器的今生,容器是如何部署到Worker上,并正常运行的
这仅仅是一篇PowerJob源码分析的文章,但是也有一些java基础知识,在实践中学习效果更好,感兴趣就留下来交流一下吧。
上回书说到,这个powerjob容器是如何生成模板,如何上传到服务器上去,本回主要总结的是,worker是如何部署执行容器的。其实我在寻找部署的入口的时候,还是费了一番功夫的,因为这个部署按钮,他居然不在containerController里面,而是在另外一个类里面,害我一顿好找,差一点就放弃了。
一切的开始:容器的部署
这个部署的入口,居然使用的是websocket,在server.web.websocket包下的ContainerDeployServerEndpoint类中,当你点击前台页面中某个容器的部署按钮时,就会触发该类下面的onOpen方法,调用ContainerService的deploy方法。
调用deploy方法之后,前面已经讲过,会向worker的WorkerActor发送一条命令,让其对容器进行部署,当然worker是一个列表。
WorkerActor接到命令之后,操作的步骤如下:
1. 判断是否是重复部署
Long containerId = request.getContainerId();
String containerName = request.getContainerName();
String version = request.getVersion();

OmsContainer oldContainer = CARGO.get(containerId);
if (oldContainer != null && version.equals(oldContainer.getVersion())) {
    return;
}
2. 如果不是重复部署,创建容器jar包
String filePath = CONTAINER_DIR + containerId + "/" + version + ".jar";
File jarFile = new File(filePath);
3.判断jar包文件是否存在,如果不存在,则从server端下载jar包
if (!jarFile.exists()) {
    FileUtils.forceMkdirParent(jarFile);
    FileUtils.copyURLToFile(new URL(request.getDownloadURL()), jarFile, 5000, 300000);
    log.info("[OmsContainer-{}] download jar successfully, path={}", containerId, jarFile.getPath());
}
4.创建新容器
OmsContainer newContainer = new OmsJarContainer(containerId, containerName, version, jarFile);
newContainer.init();
初始化里面,需要自定义一个类加载器
public class OhMyClassLoader extends URLClassLoader
通过解析下载jar包中的配置文件“oms-worker-container.properties”获取jar包的路径,通过路径和自定义的类加载器的合作,将容器的类进行一个动态加载
// 解析 Properties
Properties properties = new Properties();
try (InputStream propertiesURLStream = containerClassLoader.getResourceAsStream(ContainerConstant.CONTAINER_PROPERTIES_FILE_NAME)) {

    if (propertiesURLStream == null) {
        log.error("[OmsJarContainer-{}] can't find {} in jar {}.", containerId, ContainerConstant.CONTAINER_PROPERTIES_FILE_NAME, localJarFile.getPath());
        throw new PowerJobException("invalid jar file because of no " + ContainerConstant.CONTAINER_PROPERTIES_FILE_NAME);
    }

    properties.load(propertiesURLStream);
    log.info("[OmsJarContainer-{}] load container properties successfully: {}", containerId, properties);
}
String packageName = properties.getProperty(ContainerConstant.CONTAINER_PACKAGE_NAME_KEY);
if (StringUtils.isEmpty(packageName)) {
    log.error("[OmsJarContainer-{}] get package name failed, developer should't modify the properties file!", containerId);
    throw new PowerJobException("invalid jar file");
}

// 加载用户类
containerClassLoader.load(packageName);
通过spring的IOC容器将类进行加载
ClassLoader oldCL = Thread.currentThread().getContextClassLoader();
Thread.currentThread().setContextClassLoader(containerClassLoader);
try {
    this.container = new ClassPathXmlApplicationContext(new String[]{ContainerConstant.SPRING_CONTEXT_FILE_NAME}, false);
    this.container.setClassLoader(containerClassLoader);
    this.container.refresh();
}finally {
    Thread.currentThread().setContextClassLoader(oldCL);
}
5. 将新的容器保存在内存中
CARGO.put(containerId, newContainer);
6. 将旧的容器销毁
if (oldContainer != null) {
    // 销毁旧容器
    oldContainer.destroy();
}
到这里,容器的部署就算是结束了。
平淡无奇:容器的执行
讲过本篇文章和上一篇文章,在经历了容器模板的生成下载,容器的开发与上传,容器的部署之后,容器就可以正常使用了,这个时候就需要在任务管理里面添加任务了!
![]()
![]()
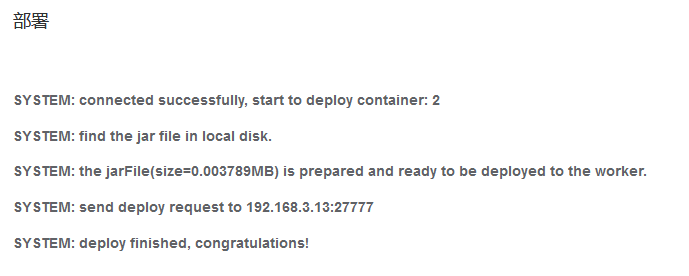
需要将执行配置添加好,容器ID#加全限定名,添加好了之后,点击运行,进入任务实例界面查看运行结果!
![]()
总结
至此,容器的前世今生就全部结束了,不知道看完了这些之后,你是否会有所收获,我最大的收获就是,当我的某个流程或者系统需要新增功能时,完全可以用到这里面的思想,不过这个东西不宜过多使用,否则会因为添加的容器过多,而不好管理。