SLAM实战项目(1) — ORB-SLAM2稠密地图重建
目录
1 整体思路
2 功能实现
3 结果运行
(1) TUM数据集下载
(2) associate.py用于RGB和Depth匹配
(3) 运行数据集
4 CMakeLists.txt文件修改
5 完整PointCloudMapping.h和PointCloudMapping.cc
6 报错分析
7 思考扩展
文章参考部分开源代码和报错文章
1 整体思路
- 利用RGB图和Depth图创建稠密点云,在深度值有效的条件下生成点云。
- 利用跟踪线程的关键帧,利用关键帧生成的点云变换到世界坐标系保存为全局点云地图。
- 在闭环线程中全局BA后用更新的位姿调整全局点云地图。
- 在可视化线程显示全局点云地图 。
- 在主线程中进行全局点云地图的关闭和保存。
2 功能实现
(1) 在PointCloudMapping.cc中创建构造函数,在构造函数中,定义存储稠密点云的mpGlobalCloud,设置滤波参数,创建可视化线程mptViewerThread
    PointCloudMapping::PointCloudMapping()
    {
        std::cout << "Point cloud mapping has structed. " << std::endl;
        mpGlobalCloud = boost::make_shared< PointCloud >( );

        //体素滤波
        //voxel.setLeafSize(resolution, resolution, resolution);

        //RadiusOutlierRemoval滤波器
        voxel.setMeanK (60);        //设置在进行统计时考虑查询点临近点数
        voxel.setStddevMulThresh (0.6);

        mptViewerThread = make_shared(bind(&PointCloudMapping::Viewer, this));
    }
在PointCloudMapping.h中进行声明
typedef pcl::PointXYZRGBA PointT;
typedef pcl::PointCloud PointCloud;

//构造函数
PointCloudMapping();
//创建RadiusOutlierRemoval滤波器对象
pcl::StatisticalOutlierRemoval voxel;
//声明稠密点云
PointCloud::Ptr mpGlobalCloud;
(2) 在PointCloudMapping.cc中创建InsertKeyFrame函数
    void PointCloudMapping::InsertKeyFrame(KeyFrame* kf, cv::Mat &color_img, cv::Mat &depth_img)
    {
        cout << "recieve a keyframe, id = " << kf->mnId << endl;
        unique_lock lck(mmKeyFrameMutex);
        mvKeyFrames.push_back(kf);
        GeneratePointCloud(kf, color_img, depth_img);
    }
在PointCloudMapping.h中进行声明
//对mutex进行声明
mutex mmKeyFrameMutex;
//声明mvKeyFrames用于存储关键帧
vector mvKeyFrames;
思考:在什么地方mpPointCloudMapping->InsertKeyFrame?
在Tracking中插入mpPointCloudMapping->InsertKeyFrame
void Tracking::CreateNewKeyFrame()
{
    ...
    mpLocalMapper->InsertKeyFrame(pKF);

    // 点云地图插入关键帧
    mpPointCloudMapping->InsertKeyFrame(pKF, mImRGB, mImDepth);

    mpLocalMapper->SetNotStop(false);
    mnLastKeyFrameId = mCurrentFrame.mnId;
    mpLastKeyFrame = pKF;
}
思考:如何见PointCloudMapping传入到Tracking和LoopClosing?
在Tracking.cc和LoopClosing.cc构造函数中传入
Tracking::Tracking(System *pSys, ORBVocabulary* pVoc, FrameDrawer *pFrameDrawer, MapDrawer *pMapDrawer, Map *pMap,shared_ptr pPointCloud,
    KeyFrameDatabase* pKFDB, const string &strSettingPath, const int sensor): mState(NO_IMAGES_YET), mSensor(sensor), mbOnlyTracking(false), mbVO(false), mpORBVocabulary(pVoc),mpPointCloudMapping(pPointCloud),
    mpKeyFrameDB(pKFDB), mpInitializer(static_cast(NULL)), mpSystem(pSys), mpViewer(NULL), mpFrameDrawer(pFrameDrawer), mpMapDrawer(pMapDrawer), mpMap(pMap), mnLastRelocFrameId(0)
{}
在Tracking.h和LoopClosing.h中声明
shared_ptr mpPointCloudMapping; 思考:在什么地方传入RGB和Depth?
Tracking线程中有传入imRGB和imD,直接利用RGB和Depth比较方便
cv::Mat Tracking::GrabImageRGBD(const cv::Mat &imRGB,const cv::Mat &imD, const double ×tamp)
{
    mImGray = imRGB;
    mImRGB = imRGB;
    mImDepth = imD;
    ...
}
(3) 在PointCloudMapping.cc中创建:GeneratePointCloud函数
    void PointCloudMapping::GeneratePointCloud(KeyFrame* kf, cv::Mat &color_img, cv::Mat &depth_img)
    {
        // cv::imshow("color img", color_img);
        // cv::imshow("depth img", depth_img);
        PointCloud::Ptr tmp (new PointCloud());
        for ( int m=0; m(m)[n];
                if (d < 0.01 || d>5)
                    continue;
                PointT p;
                p.z = d;
                p.x = ( n - kf->cx) * p.z / kf->fx;
                p.y = ( m - kf->cy) * p.z / kf->fy;

                p.b = color_img.ptr(m)[n*3];
                p.g = color_img.ptr(m)[n*3+1];
                p.r = color_img.ptr(m)[n*3+2];

                // cout << p.x << " " << p.y << " " << p.z << endl;

                tmp->points.push_back(p);
            }
        }

        cout << "The keyframe has point clouds: " << tmp->points.size() << endl;
        kf->mptrPointCloud = tmp;
    }
(4) 在PointCloudMapping.cc中创建UpdateCloud函数
    void PointCloudMapping::UpdateCloud()
    {
        unique_lock lck(mmCloudeUpdateMutex);
        mbLoopBusy = true;
        cout << endl << endl << "start loop map point." << endl << endl;
        PointCloud::Ptr tmp(new PointCloud);

        for(int i = 0; i < mvKeyFrames.size(); i++)
        {
            if(!mvKeyFrames[i]->isBad())
            {
                PointCloud::Ptr cloud(new PointCloud);
                pcl::transformPointCloud( *(mvKeyFrames[i]->mptrPointCloud), *cloud, Converter::toMatrix4d(mvKeyFrames[i]->GetPoseInverse()));
                *tmp += *cloud;
            }
        }

        cout << "finsh loop map" << endl;
        //voxel.setInputCloud(tmp);
        //voxel.filter(*mpGlobalCloud);
        mbLoopBusy = false;
    }
在PointCloudMapping.h中进行声明
//全局BA后更新关键帧的位姿来调整地图点
void UpdateCloud();
//对mutex和bool进行声明
mutex mmCloudeUpdateMutex;
mutex mmShutDownMutex;
bool mbLoopBusy = false;
思考:在什么地方UpdateCloud()?
在全局BA后更新点云,全局BA后的点云经过优化,位姿最优
void LoopClosing::RunGlobalBundleAdjustment(unsigned long nLoopKF)
{
    ...
    mpMap->InformNewBigChange();
    mpLocalMapper->Release();
    //在全局BA后更新点云
    mpPointCloudMapping->UpdateCloud();
}
(5) 在PointCloudMapping.cc中创建Viewer函数
   void PointCloudMapping::Viewer()
    {
        pcl::visualization::CloudViewer viewer("Dense map viewer");
        while(1)
        {
            size_t N = 0;
            {
                unique_lock lck(mmKeyFrameMutex);
                if(mbLoopBusy)
                {
                    continue;
                }
                {
                    unique_lock lck_shut_down(mmShutDownMutex);
                    if(mbShutDownFlag)
                    {
                        cout << "Viewer has break " << endl;
                        break;
                    }
                }

                N = mvKeyFrames.size();
                if(N == mnLastKeyFrameId)
                {
                    continue;
                }
                else
                {
                    unique_lock lck_(mmCloudeUpdateMutex);
                    for(size_t i = mnLastKeyFrameId; i < N; i++)
                    {
                        PointCloud::Ptr p (new PointCloud);
                        pcl::transformPointCloud( *(mvKeyFrames[i]->mptrPointCloud), *p, Converter::toMatrix4d(mvKeyFrames[i]->GetPoseInverse()));
                        //cout<<"处理好第i个点云"<swap(*tmp);

                    mnLastKeyFrameId = N;
                    cout << "Total has point clouds: " << mpGlobalCloud->points.size() << endl;
                }
            }
            viewer.showCloud(mpGlobalCloud);
        }
    }
在PointCloudMapping.h中进行声明
//可视化
void Viewer();

//声明mutex和其他变量
mutex mmShutDownMutex;
bool mbShutDownFlag = false;
size_t mnLastKeyFrameId = 0;
mutex mmCloudeUpdateMutex;
(6) 在PointCloudMapping.cc中创建SaveCloud函数
    void PointCloudMapping::SaveCloud()
    {
        pcl::io::savePCDFile("result.pcd",*mpGlobalCloud);
        cout << "global cloud save finished !" << endl;
    }
思考:在什么地方SaveCloud?
在rgbd_tum.cc文件是整个系统的主函数,在主函数运行结束时SaveCloud
int main(int argc, char **argv)
{
    //保存点云
    SLAM.save();
    SLAM.Shutdown();

    // Stop all threads
    return 0;
}
(7) 在PointCloudMapping.cc中创建InsertKeyFrame函数
    void PointCloudMapping::ShutDown()
    {
        {
            unique_lock lck(mmShutDownMutex);
            mbShutDownFlag = true;
        }
        mptViewerThread->join();
        cout << "Point cloud mapping has shut down! " << endl;
    }
思考:在什么地方ShutDown?
void System::Shutdown()
{
    mpLocalMapper->RequestFinish();
    mpLoopCloser->RequestFinish();
    mpPointCloudMapping->ShutDown();
    ...
}
3 结果运行
(1) TUM数据集下载
TUM数据集下载地址:Computer Vision Group - Dataset Download
(2) associate.py用于RGB和Depth匹配
#!/usr/bin/python
# Software License Agreement (BSD License)
#
# Copyright (c) 2013, Juergen Sturm, TUM
# All rights reserved.
#
# Redistribution and use in source and binary forms, with or without
# modification, are permitted provided that the following conditions
# are met:
#
#  * Redistributions of source code must retain the above copyright
#    notice, this list of conditions and the following disclaimer.
#  * Redistributions in binary form must reproduce the above
#    copyright notice, this list of conditions and the following
#    disclaimer in the documentation and/or other materials provided
#    with the distribution.
#  * Neither the name of TUM nor the names of its
#    contributors may be used to endorse or promote products derived
#    from this software without specific prior written permission.
#
# THIS SOFTWARE IS PROVIDED BY THE COPYRIGHT HOLDERS AND CONTRIBUTORS
# "AS IS" AND ANY EXPRESS OR IMPLIED WARRANTIES, INCLUDING, BUT NOT
# LIMITED TO, THE IMPLIED WARRANTIES OF MERCHANTABILITY AND FITNESS
# FOR A PARTICULAR PURPOSE ARE DISCLAIMED. IN NO EVENT SHALL THE
# COPYRIGHT OWNER OR CONTRIBUTORS BE LIABLE FOR ANY DIRECT, INDIRECT,
# INCIDENTAL, SPECIAL, EXEMPLARY, OR CONSEQUENTIAL DAMAGES (INCLUDING,
# BUT NOT LIMITED TO, PROCUREMENT OF SUBSTITUTE GOODS OR SERVICES;
# LOSS OF USE, DATA, OR PROFITS; OR BUSINESS INTERRUPTION) HOWEVER
# CAUSED AND ON ANY THEORY OF LIABILITY, WHETHER IN CONTRACT, STRICT
# LIABILITY, OR TORT (INCLUDING NEGLIGENCE OR OTHERWISE) ARISING IN
# ANY WAY OUT OF THE USE OF THIS SOFTWARE, EVEN IF ADVISED OF THE
# POSSIBILITY OF SUCH DAMAGE.
#
# Requirements:
# sudo apt-get install python-argparse

"""
The Kinect provides the color and depth images in an un-synchronized way. This means that the set of time stamps from the color images do not intersect with those of the depth images. Therefore, we need some way of associating color images to depth images.

For this purpose, you can use the ''associate.py'' script. It reads the time stamps from the rgb.txt file and the depth.txt file, and joins them by finding the best matches.
"""

import argparse
import sys
import os
import numpy


def read_file_list(filename):
    """
    Reads a trajectory from a text file.

    File format:
    The file format is "stamp d1 d2 d3 ...", where stamp denotes the time stamp (to be matched)
    and "d1 d2 d3.." is arbitary data (e.g., a 3D position and 3D orientation) associated to this timestamp.

    Input:
    filename -- File name

    Output:
    dict -- dictionary of (stamp,data) tuples

    """
    file = open(filename)
    data = file.read()
    lines = data.replace(","," ").replace("\t"," ").split("\n")
    list = [[v.strip() for v in line.split(" ") if v.strip()!=""] for line in lines if len(line)>0 and line[0]!="#"]
    list = [(float(l[0]),l[1:]) for l in list if len(l)>1]
    return dict(list)

def associate(first_list, second_list,offset,max_difference):
    """
    Associate two dictionaries of (stamp,data). As the time stamps never match exactly, we aim
    to find the closest match for every input tuple.

    Input:
    first_list -- first dictionary of (stamp,data) tuples
    second_list -- second dictionary of (stamp,data) tuples
    offset -- time offset between both dictionaries (e.g., to model the delay between the sensors)
    max_difference -- search radius for candidate generation

    Output:
    matches -- list of matched tuples ((stamp1,data1),(stamp2,data2))

    """
    //python2
    first_keys = first_list.keys()
    second_keys = second_list.keys()

    //python3
    //first_keys = list(first_list.keys())
    //second_keys = list(second_list.keys())
    potential_matches = [(abs(a - (b + offset)), a, b)
                         for a in first_keys
                         for b in second_keys
                         if abs(a - (b + offset)) < max_difference]
    potential_matches.sort()
    matches = []
    for diff, a, b in potential_matches:
        if a in first_keys and b in second_keys:
            first_keys.remove(a)
            second_keys.remove(b)
            matches.append((a, b))

    matches.sort()
    return matches

if __name__ == '__main__':

    # parse command line
    parser = argparse.ArgumentParser(description='''
    This script takes two data files with timestamps and associates them
    ''')
    parser.add_argument('first_file', help='first text file (format: timestamp data)')
    parser.add_argument('second_file', help='second text file (format: timestamp data)')
    parser.add_argument('--first_only', help='only output associated lines from first file', action='store_true')
    parser.add_argument('--offset', help='time offset added to the timestamps of the second file (default: 0.0)',default=0.0)
    parser.add_argument('--max_difference', help='maximally allowed time difference for matching entries (default: 0.02)',default=0.02)
    args = parser.parse_args()

    first_list = read_file_list(args.first_file)
    second_list = read_file_list(args.second_file)

    matches = associate(first_list, second_list,float(args.offset),float(args.max_difference))

    if args.first_only:
        for a,b in matches:
            print("%f %s"%(a," ".join(first_list[a])))
    else:
        for a,b in matches:
            print("%f %s %f %s"%(a," ".join(first_list[a]),b-float(args.offset)," ".join(second_list[b])))
由于Python2和python3语法的差别,需要将associate.py中第86行87行的
first_keys = first_list.keys()
second_keys = second_list.keys()
改为
first_keys = list(first_list.keys())
second_keys = list(second_list.keys())
(3) 运行数据集
rgbd_dataset_freiburg3_long_office_household替换为自己的数据集名称,rgbd_dataset_freiburg3_long_office_household放在orb-slam2下,放在其他文件及路径要对应更改。
./Examples/RGB-D/rgbd_tum Vocabulary/ORBvoc.txt ./Examples/RGB-D/TUM1.yaml rgbd_dataset_freiburg3_long_office_household rgbd_dataset_freiburg3_long_office_household/associations.txt
4 CMakeLists.txt文件修改
cmake_minimum_required(VERSION 2.8)	#设定cmake最小版本号
project(ORB_SLAM2)			#指定项目工程
set(CMAKE_CXX_STANDARD 14)		#C++版本可能会报错

#编译的类型(debug;release)
IF(NOT CMAKE_BUILD_TYPE)
  SET(CMAKE_BUILD_TYPE Release)
ENDIF()

#输出消息:"Build type: Release"(打印调试信息)
MESSAGE("Build type: " ${CMAKE_BUILD_TYPE})

#cmake_c_flags用来设置编译选项 如 -g -wall(不展示警告);-march=native,GCC会自动检测你的CPU支持的指令集
#set(CMAKE_C_FLAGS "${CMAKE_C_FLAGS}  -Wall  -O3 -march=native ")
#set(CMAKE_CXX_FLAGS "${CMAKE_CXX_FLAGS} -Wall   -O3 -march=native")

set(CMAKE_C_FLAGS "${CMAKE_C_FLAGS}  -Wall  -O3 ")
set(CMAKE_CXX_FLAGS "${CMAKE_CXX_FLAGS} -Wall   -O3 ")

#set(CMAKE_C_FLAGS "${CMAKE_C_FLAGS}  -Wall  -O3 ")
#set(CMAKE_CXX_FLAGS "${CMAKE_CXX_FLAGS} -Wall   -O3 ")

#include:从文件或模块加载并运行CMake代码 ;CheckCXXCompilerFlag: 检查CXX编译器是否支持给定标志
include(CheckCXXCompilerFlag)

# Check C++11 or C++0x support
#以下代码都用于自动判断系统编译器是否支持c++11标准;
CHECK_CXX_COMPILER_FLAG("-std=c++11" COMPILER_SUPPORTS_CXX11)
CHECK_CXX_COMPILER_FLAG("-std=c++0x" COMPILER_SUPPORTS_CXX0X)
if(COMPILER_SUPPORTS_CXX11)
   set(CMAKE_CXX_FLAGS "${CMAKE_CXX_FLAGS} -std=c++11")
   add_definitions(-DCOMPILEDWITHC11)
   message(STATUS "Using flag -std=c++11.")
elseif(COMPILER_SUPPORTS_CXX0X)
   set(CMAKE_CXX_FLAGS "${CMAKE_CXX_FLAGS} -std=c++0x")
   add_definitions(-DCOMPILEDWITHC0X)
   message(STATUS "Using flag -std=c++0x.")
else()
   message(FATAL_ERROR "The compiler ${CMAKE_CXX_COMPILER} has no C++11 support. Please use a different C++ compiler.")
endif()


#list(APPEND  [ ...])  添加新element到list中
LIST(APPEND CMAKE_MODULE_PATH ${PROJECT_SOURCE_DIR}/cmake_modules)

#设置OpenCV的目录
find_package(OpenCV 3.0 QUIET)
if(NOT OpenCV_FOUND)
   find_package(OpenCV 2.4.3 QUIET)
   if(NOT OpenCV_FOUND)
      message(FATAL_ERROR "OpenCV > 2.4.3 not found.")
   endif()
endif()


#找到各种头文件以及源码
find_package(Eigen3 REQUIRED NO_MODULE)
find_package(Pangolin REQUIRED)
find_package(PCL 1.10 REQUIRED)

include_directories(
${PROJECT_SOURCE_DIR}
${PROJECT_SOURCE_DIR}/include
${EIGEN3_INCLUDE_DIR}
${Pangolin_INCLUDE_DIRS}
${PCL_INCLUDE_DIRS}
)

#设置变量到工程lib下,构建时将所有LIBRARY目标放置的位置
set(CMAKE_LIBRARY_OUTPUT_DIRECTORY ${PROJECT_SOURCE_DIR}/lib)

#建立共享库
add_library(${PROJECT_NAME} SHARED
src/System.cc
src/Tracking.cc
src/LocalMapping.cc
src/LoopClosing.cc
src/ORBextractor.cc
src/ORBmatcher.cc
src/FrameDrawer.cc
src/Converter.cc
src/MapPoint.cc
src/KeyFrame.cc
src/Map.cc
src/MapDrawer.cc
src/Optimizer.cc
src/PnPsolver.cc
src/Frame.cc
src/KeyFrameDatabase.cc
src/Sim3Solver.cc
src/Initializer.cc
src/Viewer.cc
src/PointCloudMapping.cc
)


#该指令的作用为将目标文件与库文件进行链接
target_link_libraries(${PROJECT_NAME}
${OpenCV_LIBS}
${EIGEN3_LIBS}
${Pangolin_LIBRARIES}
${PCL_LIBRARIES}
${PROJECT_SOURCE_DIR}/Thirdparty/DBoW2/lib/libDBoW2.so
${PROJECT_SOURCE_DIR}/Thirdparty/g2o/lib/libg2o.so
)

# Build examples

#指定可执行文件的输出位置,CMAKE_RUNTIME_OUTPUT_DIRECTORY: 构建RUNTIME目标文件的输出目
set(CMAKE_RUNTIME_OUTPUT_DIRECTORY ${PROJECT_SOURCE_DIR}/Examples/RGB-D)

#使用指定的源文件将可执行文件添加到项目中
add_executable(rgbd_tum
Examples/RGB-D/rgbd_tum.cc)
target_link_libraries(rgbd_tum ${PROJECT_NAME})

set(CMAKE_RUNTIME_OUTPUT_DIRECTORY ${PROJECT_SOURCE_DIR}/Examples/Stereo)

add_executable(stereo_kitti
Examples/Stereo/stereo_kitti.cc)
target_link_libraries(stereo_kitti ${PROJECT_NAME})

add_executable(stereo_euroc
Examples/Stereo/stereo_euroc.cc)
target_link_libraries(stereo_euroc ${PROJECT_NAME})


set(CMAKE_RUNTIME_OUTPUT_DIRECTORY ${PROJECT_SOURCE_DIR}/Examples/Monocular)

add_executable(mono_tum
Examples/Monocular/mono_tum.cc)
target_link_libraries(mono_tum ${PROJECT_NAME})

add_executable(mono_kitti
Examples/Monocular/mono_kitti.cc)
target_link_libraries(mono_kitti ${PROJECT_NAME})

add_executable(mono_euroc
Examples/Monocular/mono_euroc.cc)
target_link_libraries(mono_euroc ${PROJECT_NAME})
5 完整PointCloudMapping.h和PointCloudMapping.cc
#ifndef POINTCLOUDMAPPING_H
#define POINTCLOUDMAPPING_H

#include "System.h"
#include
#include
#include
#include
#include
#include

namespace ORB_SLAM2
{
class PointCloudMapping
{
public:
    //构造函数
    PointCloudMapping();
    //将Tracking线程得到的关键帧传入到稠密建图中,并开始稠密建图
    void InsertKeyFrame(KeyFrame* kf, cv::Mat& color_img, cv::Mat& depth_img);
    //通过RGB图、深度图构建该关键帧在相机坐标下的稠密点云
    void GeneratePointCloud(KeyFrame* kf, cv::Mat& color_img, cv::Mat& depth_img);
    //全局BA后更新关键帧的位姿来调整地图点
    void UpdateCloud();
    //可视化
    void Viewer();
    void SaveCloud();
    void ShutDown();

    typedef pcl::PointXYZRGBA PointT;
    typedef pcl::PointCloud PointCloud;

    PointCloud::Ptr mpGlobalCloud;
    shared_ptr mptViewerThread;
    vector mvKeyFrames;
    size_t mnLastKeyFrameId = 0;
    mutex mmKeyFrameMutex;
    mutex mmCloudeUpdateMutex;
    mutex mmShutDownMutex;

    bool mbLoopBusy = false;
    bool mbShutDownFlag = false;

    double resolution = 0.04;
    //pcl::VoxelGrid voxel;
    pcl::StatisticalOutlierRemoval voxel;
};

}

#endif // POINTCLOUDMAPPING_H
#include "PointCloudMapping.h"
#include "Converter.h"


namespace ORB_SLAM2
{
    PointCloudMapping::PointCloudMapping()
    {
        std::cout << "Point cloud mapping has structed. " << std::endl;
        mpGlobalCloud = boost::make_shared< PointCloud >( );

        //体素滤波
        //voxel.setLeafSize(resolution, resolution, resolution);

        //RadiusOutlierRemoval滤波器
        //voxel.setMeanK (60);        //设置在进行统计时考虑查询点临近点数
        //voxel.setStddevMulThresh (0.6);

        mptViewerThread = make_shared(bind(&PointCloudMapping::Viewer, this));
    }

    void PointCloudMapping::InsertKeyFrame(KeyFrame* kf, cv::Mat &color_img, cv::Mat &depth_img)
    {
        cout << "recieve a keyframe, id = " << kf->mnId << endl;
        unique_lock lck(mmKeyFrameMutex);
        mvKeyFrames.push_back(kf);
        GeneratePointCloud(kf, color_img, depth_img);

    }

    void PointCloudMapping::GeneratePointCloud(KeyFrame* kf, cv::Mat &color_img, cv::Mat &depth_img)
    {

        // cv::imshow("color img", color_img);
        // cv::imshow("depth img", depth_img);
        PointCloud::Ptr tmp (new PointCloud());
        for ( int m=0; m(m)[n];
                if (d < 0.01 || d>5)
                    continue;
                PointT p;
                p.z = d;
                p.x = ( n - kf->cx) * p.z / kf->fx;
                p.y = ( m - kf->cy) * p.z / kf->fy;

                p.b = color_img.ptr(m)[n*3];
                p.g = color_img.ptr(m)[n*3+1];
                p.r = color_img.ptr(m)[n*3+2];

                // cout << p.x << " " << p.y << " " << p.z << endl;

                tmp->points.push_back(p);
            }
        }

        cout << "The keyframe has point clouds: " << tmp->points.size() << endl;
        kf->mptrPointCloud = tmp;
    }

    void PointCloudMapping::UpdateCloud()
    {
        unique_lock lck(mmCloudeUpdateMutex);
        mbLoopBusy = true;
        cout << endl << endl << "start loop map point." << endl << endl;
        PointCloud::Ptr tmp(new PointCloud);

        for(int i = 0; i < mvKeyFrames.size(); i++)
        {
            if(!mvKeyFrames[i]->isBad())
            {
                PointCloud::Ptr cloud(new PointCloud);
                pcl::transformPointCloud( *(mvKeyFrames[i]->mptrPointCloud), *cloud, Converter::toMatrix4d(mvKeyFrames[i]->GetPoseInverse()));
                *tmp += *cloud;
            }
        }

        cout << "finsh loop map" << endl;
        //voxel.setInputCloud(tmp);
        //voxel.filter(*mpGlobalCloud);
        mbLoopBusy = false;
    }

    void PointCloudMapping::Viewer()
    {
        pcl::visualization::CloudViewer viewer("Dense map viewer");
        while(1)
        {
            size_t N = 0;
            {
                unique_lock lck(mmKeyFrameMutex);
                if(mbLoopBusy)
                {
                    continue;
                }
                {
                    unique_lock lck_shut_down(mmShutDownMutex);
                    if(mbShutDownFlag)
                    {
                        cout << "Viewer has break " << endl;
                        break;
                    }
                }

                N = mvKeyFrames.size();
                if(N == mnLastKeyFrameId)
                {
                    continue;
                }
                else
                {
                    unique_lock lck_(mmCloudeUpdateMutex);
                    for(size_t i = mnLastKeyFrameId; i < N; i++)
                    {
                        PointCloud::Ptr p (new PointCloud);
                        pcl::transformPointCloud( *(mvKeyFrames[i]->mptrPointCloud), *p, Converter::toMatrix4d(mvKeyFrames[i]->GetPoseInverse()));
                        //cout<<"处理好第i个点云"<swap(*tmp);

                    mnLastKeyFrameId = N;
                    cout << "Total has point clouds: " << mpGlobalCloud->points.size() << endl;
                }
            }
            viewer.showCloud(mpGlobalCloud);
        }
    }

    void PointCloudMapping::SaveCloud()
    {
        pcl::io::savePCDFile("result.pcd",*mpGlobalCloud);
        cout << "global cloud save finished !" << endl;
    }

    void PointCloudMapping::ShutDown()
    {
        {
            unique_lock lck(mmShutDownMutex);
            mbShutDownFlag = true;
        }
        mptViewerThread->join();
        cout << "Point cloud mapping has shut down! " << endl;
    }
}
6 报错分析
(1) 编译出现参数未声明问题,参考代码中有些未在头文件中声明,要完整声明才能正确编译。
(2) 运行数据集时出现段错误,出现可视化界面后闪退
ORB Extractor Parameters:
- Number of Features: 1000
- Scale Levels: 8
- Scale Factor: 1.2
- Initial Fast Threshold: 20
- Minimum Fast Threshold: 7

Depth Threshold (Close/Far Points): 2.98842

-------
Start processing sequence ...
Images in the sequence: 2488

New map created with 891 points
recieve a keyframe, id =1
段错误 (核心已转储)
后面搜寻各种解决办法:
解决办法1:主文件和Thirdparty/g2o文件中的CMakeList.txt,将-march=native删除,仍未解决。
#set(CMAKE_C_FLAGS "${CMAKE_C_FLAGS}  -Wall  -O3 -march=native ")
#set(CMAKE_CXX_FLAGS "${CMAKE_CXX_FLAGS} -Wall   -O3 -march=native")

set(CMAKE_C_FLAGS "${CMAKE_C_FLAGS}  -Wall  -O3 ")
set(CMAKE_CXX_FLAGS "${CMAKE_CXX_FLAGS} -Wall -O3 ")解决办法2:尝试将Eigen版本降低为Eigen-3.1.0,同样也没有解决
解决办法3:后面尝试运行提供的参考代码成功运行,定位错误的原因为代码问题,System.cc文件没有声明:
mpPointCloudMapping = make_shared(); (3) 数据运行结果,自己运行和参考代码运行存在明显不同,存在重复错乱的问题

解决办法:对比运行数据发现,点云数明显不同,思考显示和运行数据判断,可能是RGB图和深度信息不匹配的情况,没有有效提取特征点。
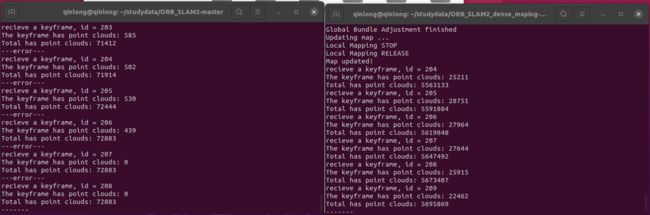
定位问题在mImDepth名称在其他地方没有同步更改,更改后稠密建图正常。
cv::Mat Tracking::GrabImageRGBD(const cv::Mat &imRGB,const cv::Mat &imD, const double ×tamp)
{
    mImGray = imRGB;
    mImRGB = imRGB;
    mImDepth = imD;

    // mImGray、mImRGB、mImDepth在后面出现的地方同步更改
}
(4) 编译时修改代码后好像会延续上次的错误,删除编译文件后解决。

7 思考扩展
(1) 跟踪线程和局部建图线程中插入 mpPointCloudMapping->InsertKeyFrame 函数的优缺点
跟踪线程插入
- 优点:跟踪线程中InsertKeyFrame进行稠密建图,可以很好的利用RGB和Depth
- 缺点:会占用个跟踪线程的时间
局部建图线程中插入
- 优点:不会占用跟踪线程的时间,更好的满足实时性的要求,在局部建图后的关键帧是经过优化后的位姿,同时可以在局部建图后建立稠密点云地图,效果会更好。
- 缺点:利用RGB和Depth没有跟踪线程方便