Qt+QtWebApp开发笔记(四):http服务器使用Session和Cookie实现用户密码登录和注销功能
若该文为原创文章,转载请注明原文出处
本文章博客地址:https://hpzwl.blog.csdn.net/article/details/130921152
红胖子网络科技博文大全:开发技术集合(包含Qt实用技术、树莓派、三维、OpenCV、OpenGL、ffmpeg、OSG、单片机、软硬结合等等)持续更新中…
Qt开发专栏:三方库开发技术
上一篇:《Qt+QtWebApp开发笔记(三):http服务器动态html连接跳转基础交互》
下一篇:《Qt+QtWebApp开发笔记(五):http服务器html中使用json触发ajax与后台交互实现数据更新传递》
前言
前面实现了基础的跳转,那么动态交互中登录是常用功能。
本篇实现一个动态交互的简单登录和注销功能,在Qt中使用Session和Cookie技术。
Demo
下载地址
链接:https://pan.baidu.com/s/1nkmsHgr-11Khe9k6Ntyf_g?pwd=1234
Html处理用户输入Session与Cookie
表单登录submit
Web应用程序通常处理用户输入。将开发一个登录表单,看看进展如何。
创建一个名为LoginController的新类。同样,它是从HttpRequestHandl派生的
logincontroller.h:
#ifndef LOGINCONTROLLER_H
#define LOGINCONTROLLER_H

#include "httprequesthandler.h"

using namespace stefanfrings;

class LoginController : public HttpRequestHandler {
    Q_OBJECT
public:
    LoginController(QObject* parent=0);
    void service(HttpRequest& request, HttpResponse& response);
};

#endif // LOGINCONTROLLER_H
logincontroller.cpp:
#include "logincontroller.h"
LoginController::LoginController(QObject* parent)
:HttpRequestHandler(parent) {
// empty
}
void LoginController::service(HttpRequest &request, HttpResponse &response) {
QByteArray username=request.getParameter("username");
QByteArray password=request.getParameter("password");
qDebug("username=%s",username.constData());
qDebug("password=%s",password.constData());
response.setHeader("Content-Type", "text/html; charset=UTF-8");
response.write("");
if (username=="test" and password=="hello") {
response.write("Yes, correct");
}
else {
response.write(");
if (!username.isEmpty()) {
response.write("No, that was wrong!
");
}
response.write("Please log in:
");
response.write("Name:
");
response.write("Password:
");
response.write("");
response.write(");
}
response.write("",true);
}
(PS:html代表是提交表单)
将这个新控制器添加到请求映射器中,修改requestmapper.h:
#ifndef REQUESTMAPPER_H
#define REQUESTMAPPER_H

#include "httprequesthandler.h"
#include "helloworldcontroller.h"
#include "listdatacontroller.h"
#include "logincontroller.h"

class RequestMapper : public HttpRequestHandler {
    Q_OBJECT
public:
    RequestMapper(QObject* parent=0);
    void service(HttpRequest& request, HttpResponse& response);
private:
    HelloWorldController helloWorldController;
    ListDataController listDataController;
    LoginController loginController;
};

#endif // REQUESTMAPPER_H
修改requestmapper.cpp(切入了/login,调用loginController):
#include "requestmapper.h"

RequestMapper::RequestMapper(QObject* parent)
    : HttpRequestHandler(parent) {
    // empty
}

void RequestMapper::service(HttpRequest& request, HttpResponse& response) {
    QByteArray path=request.getPath();
    qDebug("RequestMapper: path=%s",path.data());

    if (path=="/" || path=="/hello") {
        helloWorldController.service(request, response);
    }
    else if (path=="/list") {
        listDataController.service(request, response);
    }
    else if (path=="/login") {
        loginController.service(request, response);
    }
    else {
        response.setStatus(404,"Not found");
        response.write("The URL is wrong, no such document.");
    }

    qDebug("RequestMapper: finished request");
}
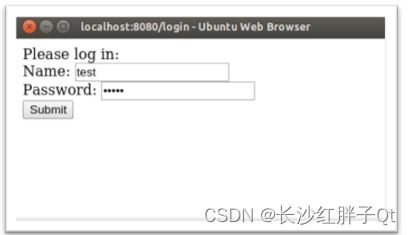
运行程序并打开URLhttp://localhost:8080/login.将看到以下表格:
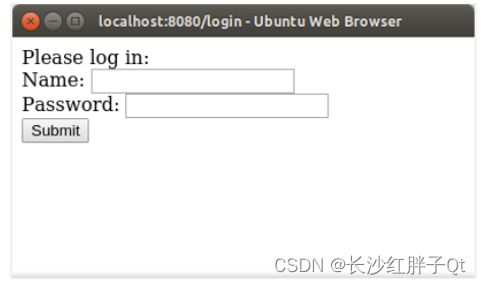
尝试使用错误的名称和密码登录。然后浏览器显示错误消息“That was wrong”,并提示重试。如果输入了正确的凭据(用户名“test”和密码“hello”),则会收到成功消息。
HTML表单定义了两个名为“username”和“password”的输入字段。控制器使用request.getParameter()来获取这些值。
当参数为空或传入的HTTP请求中没有这样的参数时,Request.getParameter() 返回一个空的QByteArray。后一种情况发生在打开URL时http://localhost:8080/login开始只有当用户单击提交按钮时,表单字段才会从web浏览器发送到web服务器。
如果需要区分空字段和缺失字段,那么可以使用request.getParameterMap(),然后检查所需参数是否在返回的映射中。
作为表单的替代方案,参数也可以作为URL的一部分进行传输。例如,也可以通过打开URL登录http://localhost:8080/login?username=test&password=hello.
在URL中使用某些特殊字符时,必须将其编码为转义序列。例如,如果用户名是“Stefan Frings”,那么必须写http://localhost:8080/login?username=Stefan%20Frings&password=hello.HttpRequest类会自动将其解码回原始形式“Stefan Frings”。
如果需要将字符串编码为URL格式,可以使用QUrl类。
服务器本地会话session
(PS:session和cookie是一起搭配使用的,cookie存在本地 session可以拿到cookie来判断是否登录了,等一些已有的状态)
下一个合乎逻辑的步骤是处理会话数据。这意味着,将当前用户的数据保存在某个地方,并在后续请求中使用这些数据。将存储的第一个数据是用户的姓名和登录时间。
QtWebApp使用隐藏的cookie来识别用户。
必须在控制会话存储类的配置文件webapp1.ini中添加一个新的部分:
[sessions]
expirationTime=3600000
cookieName=sessionid
;cookieDomain=mydomain.com
cookiePath=/
cookieComment=Identifies the user
过期时间定义从内存中删除未使用的会话后的毫秒数。当用户在该时间之后返回时,他的会话将丢失,因此他必须再次登录。
- expirationTime:保存时间,实际上从后面的cookie截图可以看到是3600000ms,则是3600秒一小时的时间过期,这个保存后的默认过期时间。
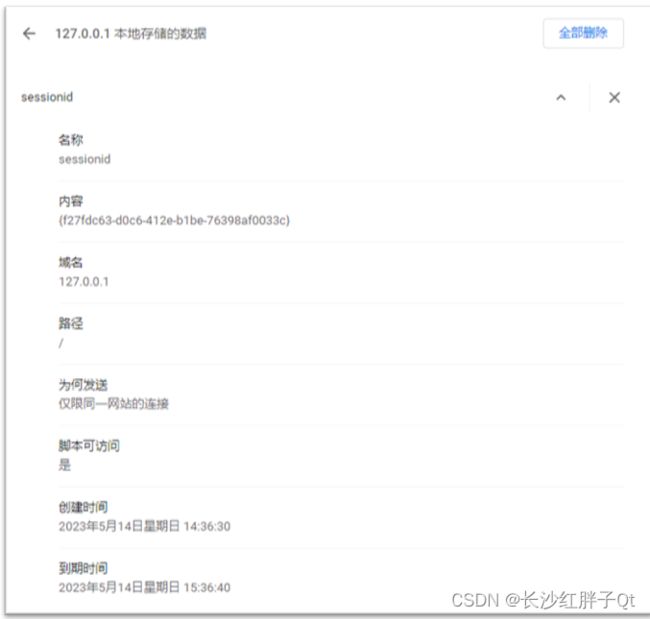
- sessionid:cookie名称可以是任意名称,但通常使用名称“sessionid”。有些负载均衡器依赖于这个名称,所以除非有充分的理由,否则不应该更改它。
- cookieDomain:每个cookie总是绑定到一个域。由google.com生成的cookie只发送到该域上的服务器。如果将cookieDomain参数留空或将其注释掉,则该参数将由web浏览器自动设置。可以指定另一个域名,但不知道男人为什么要这么做。所以,除非知道自己在做什么,否则就把它空着。
- cookiePath:cookie路径可用于将cookie限制在的域的一部分。如果将cookiePath更改为/my/very/cool/online/shop,则浏览器将仅针对以该路径开头的页面将cookie发送到的服务器。默认值为“/”,这意味着cookie对域中的所有网站都有效。
- cookieComment:cookieComment是一些网络浏览器在cookie管理屏幕中显示的文本。
需要HttpSessionStore类的一个实例,整个程序都可以访问该实例,因此可以在全局空间中访问。因此,创建了两个新文件,第一个是global.h:
#ifndef GLOBAL_H
#define GLOBAL_H

#include "httpsessionstore.h"

using namespace stefanfrings;

extern HttpSessionStore* sessionStore;

#endif // GLOBAL_H
global.cpp:
#include "global.h"

HttpSessionStore* sessionStore;
现在有了一个名为“sessionStore”的全局静态指针,整个程序可以通过包含global.h文件来访问该指针。让加载新的配置设置并初始化sessionStore。
main.cpp中的更改:
#include "global.h"

int main(int argc, char *argv[])
{
    QCoreApplication app(argc, argv);
    QString configFileName=searchConfigFile();

    // Session store
    QSettings* sessionSettings=new QSettings(configFileName,QSettings::IniFormat,&app);
    sessionSettings->beginGroup("sessions");
    sessionStore=new HttpSessionStore(sessionSettings,&app);

    // HTTP server
    QSettings* listenerSettings=new QSettings(configFileName,QSettings::IniFormat,&app);
    listenerSettings->beginGroup("listener");
    new HttpListener(listenerSettings,new RequestMapper(&app),&app);

    return app.exec();
}
请注意,main.cpp现在加载配置文件两次。sessionSettings对象选择“sessions”部分,而listenerSettings选择“listener”部分。对于每个部分,需要一个单独的QSettings实例,否则这些部分可能会混淆。
既然已经为会话数据创建了一个存储,就可以开始使用它了。添加到logincontroller.cpp:
#include
");
response.write("Your name is: "+username+"
");
response.write("You logged in at: "+logintime.toString("HH:mm:ss")+"
");
}
else {
if (username=="test" and password=="hello") {
response.write("Yes, correct");
session.set("username",username);
session.set("logintime",QTime::currentTime());
}
else {
response.write(");
if (!username.isEmpty()) {
response.write("No, that was wrong!
");
}
response.write("Please log in:
");
response.write("Name:
");
response.write("Password:
");
response.write("");
response.write(");
}
}
response.write("",true);
}
在这里,重要的是在第一次调用response.write()之前调用sessionStore->getSession(),因为它创建或刷新会话cookie,从技术上讲,它是一个HTTP头。并且所有HTTP标头都必须在HTML文档之前发送。
通过打开来运行和测试程序http://localhost:8080/login.
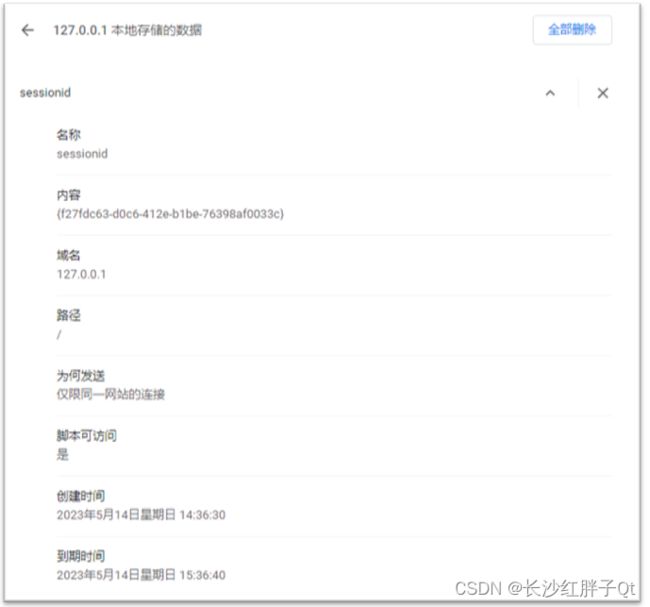
现在查看web服务器的控制台窗口时,看到一个cookie和一个会话是用一个唯一的id创建的,这个id是一个长的随机十六进制数。
从Chromium浏览器中截取了以下截图,可以在其中看到cookie:
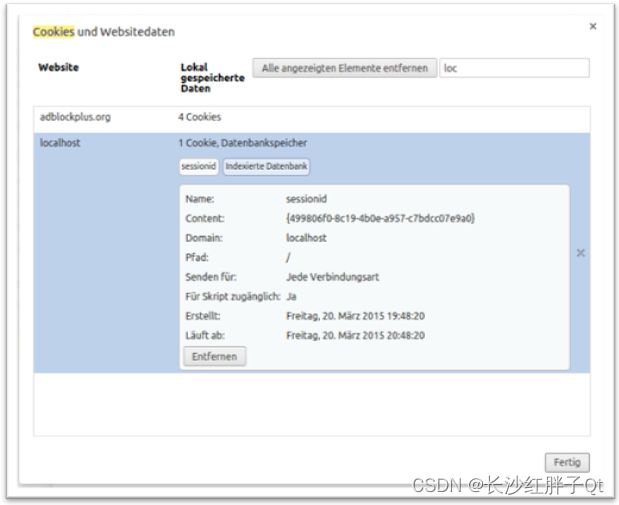
用户会话最初为空。它只是存在,并且有一个唯一的id号。没有别的。输入用户名“test”和密码“hello”。然后会得到预期的确认。
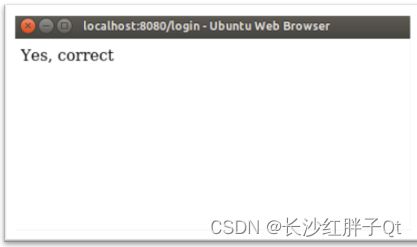
在确认登录成功的同时,服务器将用户名和登录时间输入到用户会话中。可以将任何对象放入QVariant支持的会话中。当将一个对象放入会话时,会给它一个符号名称,以便以后访问。
现在再次打开URLhttp://localhost:8080/login.然后会看到所有这些工作的结果:
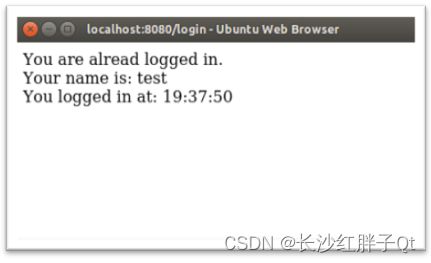
因此,在成功验证用户名和密码后,服务器使用会话来记住该用户的数据。
会话存储保存在内存中。重新启动web服务器时,会话存储中的所有数据都会丢失。因此,只将其用于一些临时数据。持久性数据属于一个数据库。
用户本地终端的存储cookies
作为会话存储的替代方案,也可以在cookie中存储少量数据。Cookie存储在web浏览器的客户端,而不是服务器端。Cookie只能存储8位的文本,并且只能保证4 KB的容量。此外,每个域的cookie数量是有限的,因此请保留使用它们。
为了尝试这一点,添加一个名为CookieTestController的新控制器类,并将其绑定到路径“/cookie”。
cookietestcontroller.cpp:
#include "cookietestcontroller.h"

CookieTestController::CookieTestController(QObject* parent)
    : HttpRequestHandler(parent) {
    // empty
}

void CookieTestController::service(HttpRequest &request, HttpResponse &response) {

    QByteArray cookie=request.getCookie("testcookie");
    if (!cookie.isEmpty()) {
        response.write("Found cookie with value: "+cookie,true);
    }
    else {
        HttpCookie cookie("testcookie","123456789",60);
        response.setCookie(cookie);
        response.write("A new cookie has been created.",true);
    }

}
cookie的名称为“testcookie”,其值为“123456789”。60是以秒为单位的有效时间。 此cookie在创建一分钟后过期。这段短暂的时间来看看cookie过期后会发生什么。通常会使用更大的时间,可能是几天。
Request.getCookie()只返回cookie的值,而不是整个HttpCookie对象。这是出于性能原因。
运行程序并打开http://localhost:8080/cookie.

Cookie存储在网络浏览器中,并随每个HTTP请求一起发送到网络服务器。除了会话数据之外,如果重新启动服务器,cookie不会丢失,因为cookie存储在客户端。
Chromium浏览器的屏幕截图:
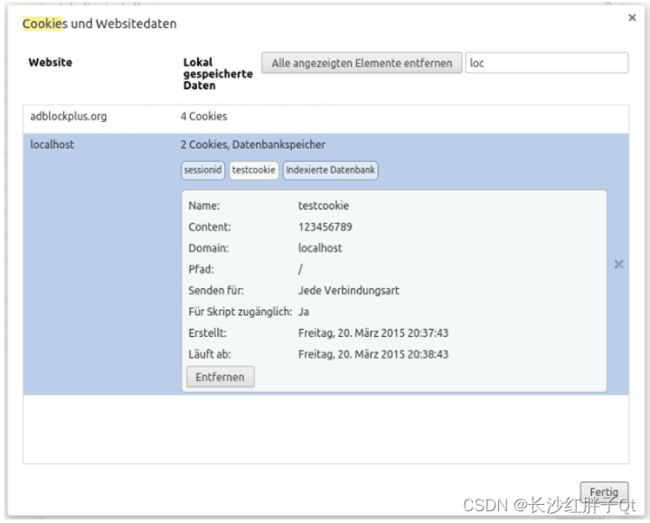
在这里,可以看到会话cookie仍然存在。现在有两个本地主机域的cookie。
如果等待两分钟,然后再次加载http://localhost:8080/cookie将看到测试cookie已过期。服务器会创建一个新的。
如果想防止cookie在用户处于活动状态时过期,那么必须在每次请求时重新创建cookie。然后,浏览器会为每个请求计算一个新的截止日期。
Demo增量:实战用户登录
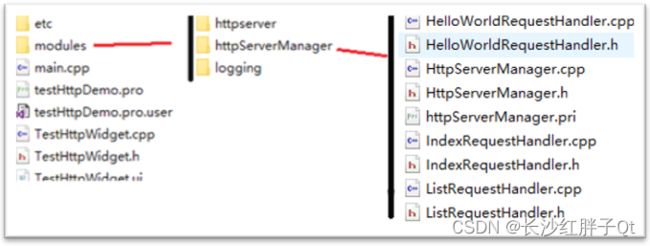
步骤一:准备代码模板
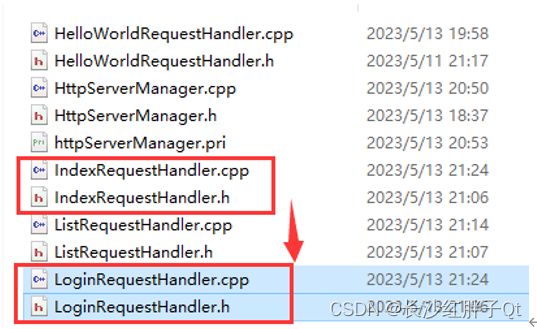
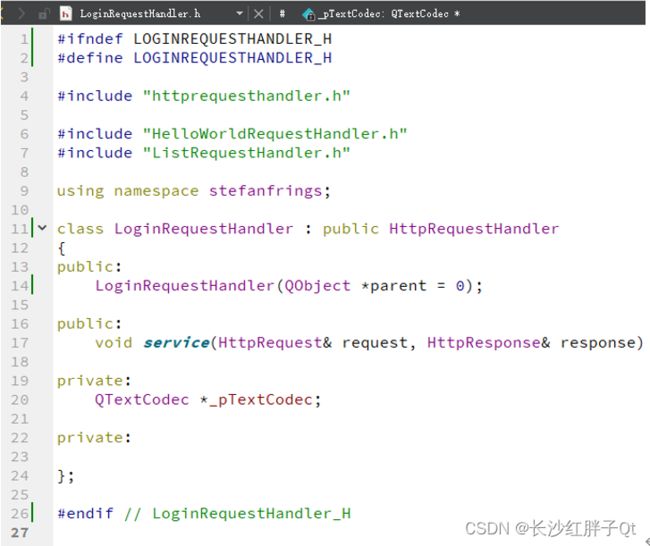
步骤二:新增登录入口处理LoginRequestHandler
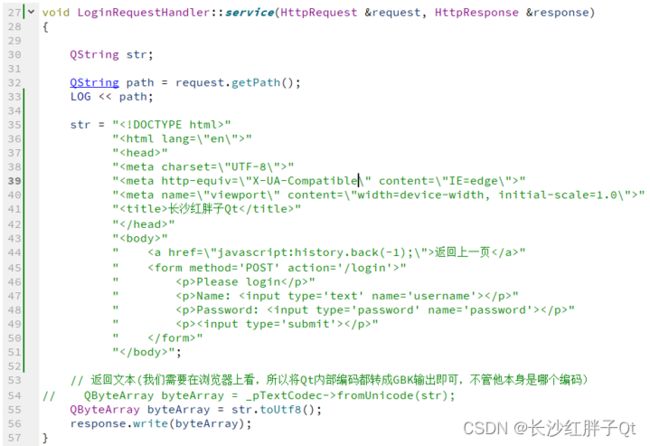
步骤三:将登录界面的html的添加进登录入口
void LoginRequestHandler::service(HttpRequest &request, HttpResponse &response)
{
QString str;
QString path = request.getPath();
LOG << path;
str = ""
""
""
""
""
""
"长沙红胖子Qt "
""
""
" 返回上一页"
"
" Please login
"
" Name:
"
" Password:
"
" "
" "
"";
// 返回文本(需要在浏览器上看,所以将Qt内部编码都转成GBK输出即可,不管他本身是哪个编码)
// QByteArray byteArray = _pTextCodec->fromUnicode(str);
QByteArray byteArray = str.toUtf8();
response.write(byteArray);
}
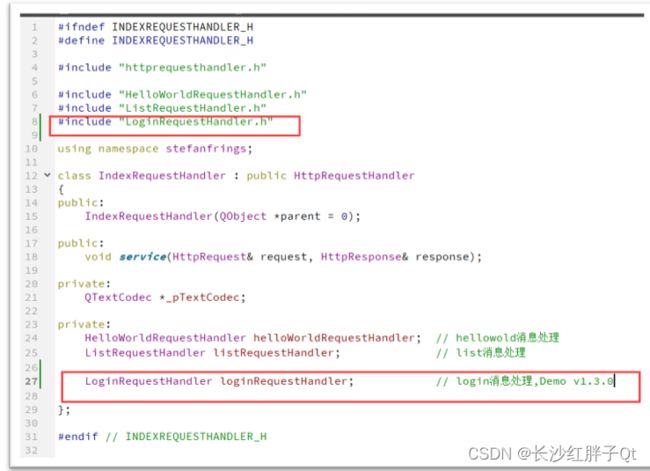
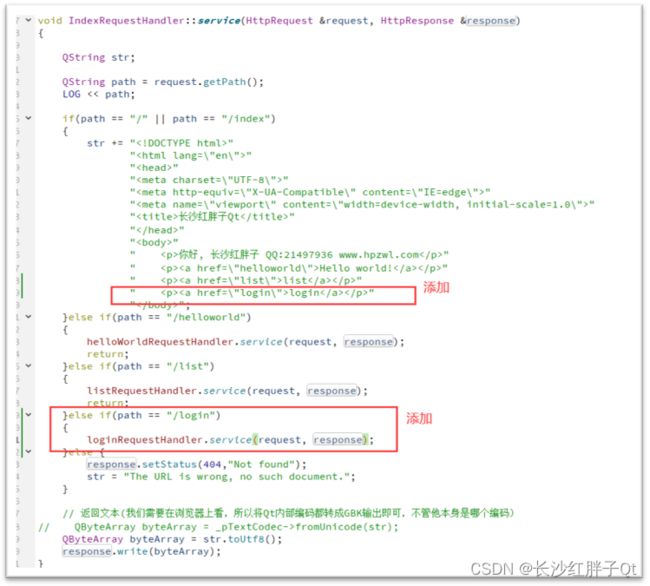
步骤四:在原来Index上新增一个连接地址跳转登录
这个时候是可以跳转了。
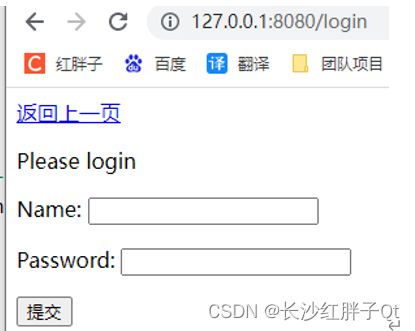
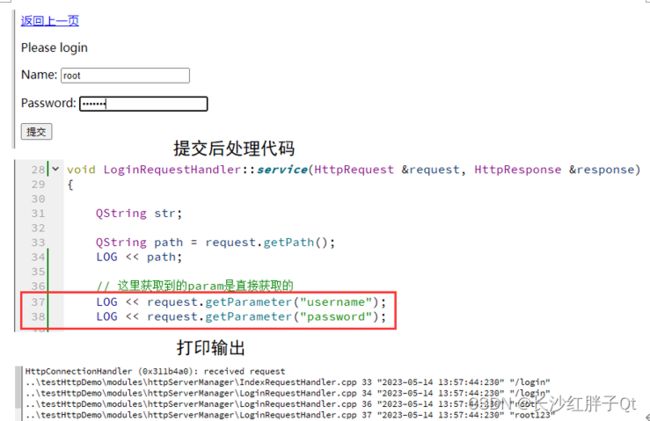
此时,登录打印:

可以,其路径提交也是触发了一次进入login的service,这时候就需要通过Session的变量来判断是第一次进入还是提交登录。
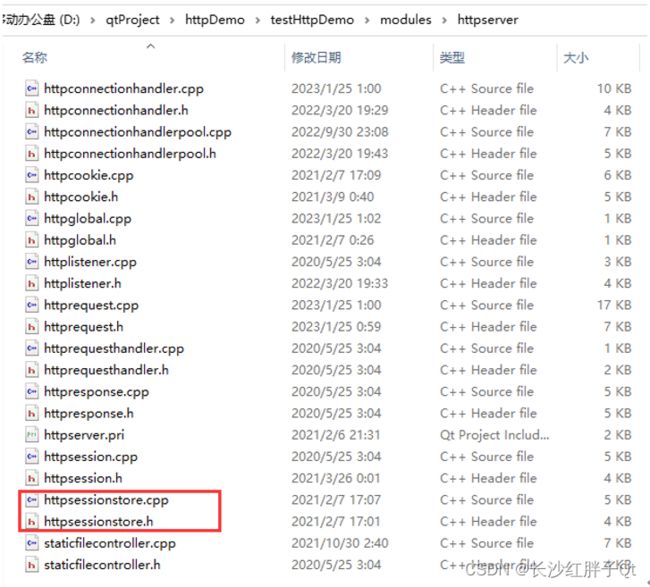
步骤五:添加sessionStore头文件
SessionStore头文件在httpserver模块中。
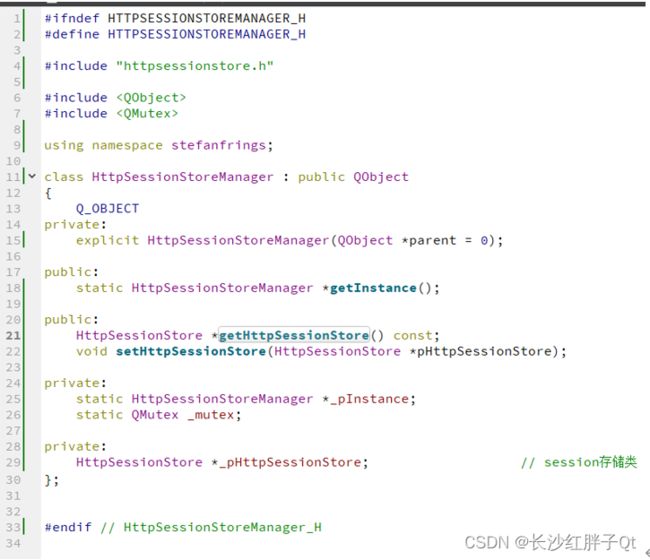
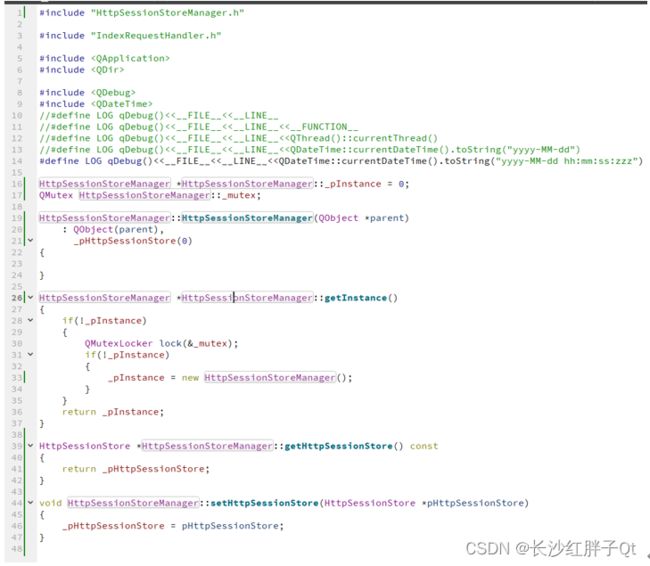
步骤六:添加唯一实例类sessionStore,封装session存储类
步骤七:添加配置文件
[sessions]
expirationTime=3600000
cookieName=sessionid
;cookieDomain=mydomain.com
cookiePath=/
cookieComment=Identifies the user
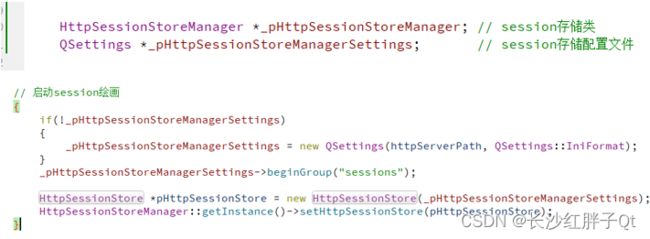
步骤八:添加session加载配置代码
步骤九:通过session判断
添加session判断后:
void LoginRequestHandler::service(HttpRequest &request, HttpResponse &response)
{
QString str;
QString path = request.getPath();
LOG << path;
// 这里获取到的param是直接获取的
QString userName = request.getParameter("username");
QString password = request.getParameter("password");
LOG << userName << password;
// 获取session(单例模式封装后的全局获取)
HttpSession httpSession =
HttpSessionStoreManager::getInstance()->getHttpSessionStore()->getSession(request,response,true);
// 先判断是否session能获取到
if(!httpSession.contains("username"))
{
// 这里没有cookie,提交登录则是可以保存本地cookie
if(userName == "root" && password == "root123456")
{
httpSession.set("username" , userName);
httpSession.set("logintime", QTime::currentTime());
httpSession.set("timeout" , 60);
QString username = httpSession.get("username").toString();
QTime logintime = httpSession.get("logintime").toTime();
int timeout = httpSession.get("timeout").toInt();
str = QString(""
""
""
""
""
""
"长沙红胖子Qt "
""
""
" 注销登录"
" 登录账户:%1
"
" 登录时间:%2
"
" 超时时间:%3
"
"")
.arg(username)
.arg(logintime.toString("hh:mm:ss:zzz"))
.arg(timeout);
}else{
str = ""
""
""
""
""
""
"长沙红胖子Qt "
""
""
" 返回上一页"
"
" Please login
"
" Name:
"
" Password:
"
" "
" "
"";
}
}else {
// 之前已经登录过了
QString username = httpSession.get("username").toString();
QTime logintime = httpSession.get("logintime").toTime();
int timeout = httpSession.get("timeout").toInt();
str = QString(""
""
""
""
""
""
"长沙红胖子Qt "
""
""
" 注销登录"
" 登录账户:%1
"
" 登录时间:%2
"
" 超时时间:%3
"
"")
.arg(username)
.arg(logintime.toString("hh:mm:ss:zzz"))
.arg(timeout);
}
// 返回文本(需要在浏览器上看,所以将Qt内部编码都转成GBK输出即可,不管他本身是哪个编码)
// QByteArray byteArray = _pTextCodec->fromUnicode(str);
QByteArray byteArray = str.toUtf8();
response.write(byteArray);
}
步骤十:添加一个“注销登录”
// 注销,清空session
if(path == "/login/out")
{
    HttpSession httpSession =
            HttpSessionStoreManager::getInstance()->getHttpSessionStore()->getSession(request,response,true);

    HttpSessionStoreManager::getInstance()->getHttpSessionStore()->removeSession(httpSession);
}
Demo源码
LoginRequestHandler.h
#ifndef LOGINREQUESTHANDLER_H
#define LOGINREQUESTHANDLER_H

#include "httprequesthandler.h"

#include "HelloWorldRequestHandler.h"
#include "ListRequestHandler.h"

using namespace stefanfrings;

class LoginRequestHandler : public HttpRequestHandler
{
public:
    LoginRequestHandler(QObject *parent = 0);

public:
    void service(HttpRequest& request, HttpResponse& response);

private:
    QTextCodec *_pTextCodec;

private:

};
#endif // LoginRequestHandler_H
LoginRequestHandler.cpp
#include "LoginRequestHandler.h"
#include "ListRequestHandler.h"
#include "HttpSessionStoreManager.h"
#include
//#define LOG qDebug()<<__FILE__<<__LINE__<
#define LOG qDebug()<<__FILE__<<__LINE__<<QDateTime::currentDateTime().toString("yyyy-MM-dd hh:mm:ss:zzz")
using namespace stefanfrings;
LoginRequestHandler::LoginRequestHandler(QObject *parent)
: HttpRequestHandler(parent)
{
// 返回文本(需要在浏览器上看,所以将Qt内部编码都转成GBK输出即可,不管他本身是哪个编码)
// WINDOWS: GBK GB2312
// LINUX : urf-8
// _pTextCodec = QTextCodec::codecForName("utf-8");
_pTextCodec = QTextCodec::codecForName("GBK");
}
void LoginRequestHandler::service(HttpRequest &request, HttpResponse &response)
{
QString str;
QString path = request.getPath();
LOG << path;
// 这里获取到的param是直接获取的
QString userName = request.getParameter("username");
QString password = request.getParameter("password");
LOG << userName << password;
// 注销,清空session
if(path == "/login/out")
{
HttpSession httpSession =
HttpSessionStoreManager::getInstance()->getHttpSessionStore()->getSession(request,response,true);
HttpSessionStoreManager::getInstance()->getHttpSessionStore()->removeSession(httpSession);
}
// 获取session(单例模式封装后的全局获取)
HttpSession httpSession =
HttpSessionStoreManager::getInstance()->getHttpSessionStore()->getSession(request,response,true);
// 先判断是否session能获取到
if(!httpSession.contains("username"))
{
// 这里没有cookie,提交登录则是可以保存本地cookie
if(userName == "root" && password == "root123456")
{
httpSession.set("username" , userName);
httpSession.set("logindatetime", QDateTime::currentDateTime());
httpSession.set("timeout" , 60);
QString username = httpSession.get("username").toString();
QDateTime logindatetime = httpSession.get("logindatetime").toDateTime();
int timeout = httpSession.get("timeout").toInt();
str = QString(""
""
""
""
""
""
"长沙红胖子Qt "
""
""
" "
" 登录账户:%1
"
" 登录时间:%2
"
" 超时时间:%3
"
"")
.arg(username)
.arg(logindatetime.toString("yyyy-MM-dd hh:mm:ss:zzz"))
.arg(timeout);
}else{
str = ""
""
""
""
""
""
"长沙红胖子Qt "
""
""
" 返回上一页"
"
" Please login
"
" Name:
"
" Password:
"
" "
" "
"";
}
}else {
// 之前已经登录过了
QString username = httpSession.get("username").toString();
QDateTime logindatetime = httpSession.get("logindatetime").toDateTime();
int timeout = httpSession.get("timeout").toInt();
str = QString(""
""
""
""
""
""
"长沙红胖子Qt "
""
""
" "
" 登录账户:%1
"
" 登录时间:%2
"
" 超时时间:%3
"
"")
.arg(username)
.arg(logindatetime.toString("yyyy-MM-dd hh:mm:ss:zzz"))
.arg(timeout);
}
// 返回文本(需要在浏览器上看,所以将Qt内部编码都转成GBK输出即可,不管他本身是哪个编码)
// QByteArray byteArray = _pTextCodec->fromUnicode(str);
QByteArray byteArray = str.toUtf8();
response.write(byteArray);
}
工程模板v1.3.0
上一篇:《Qt+QtWebApp开发笔记(三):http服务器动态html连接跳转基础交互》
下一篇:《Qt+QtWebApp开发笔记(五):http服务器html中使用json触发ajax与后台交互实现数据更新传递》
若该文为原创文章,转载请注明原文出处
本文章博客地址:https://hpzwl.blog.csdn.net/article/details/130921152


