vmware虚拟机搭建k8s集群
vmware虚拟机搭建k8s集群
一、下载软件
vmware软件下载,有条件推荐正版。只搭建单机的话使用VMware的player版本即可。网上找到一个,仅供参考.
ubuntu镜像下载:
直接去阿里或者清华的iso镜像源中获取。
二、安装ubuntu
vmware和的安装过程没啥好说的。网上很多,题主这里就不赘述了。
注意:
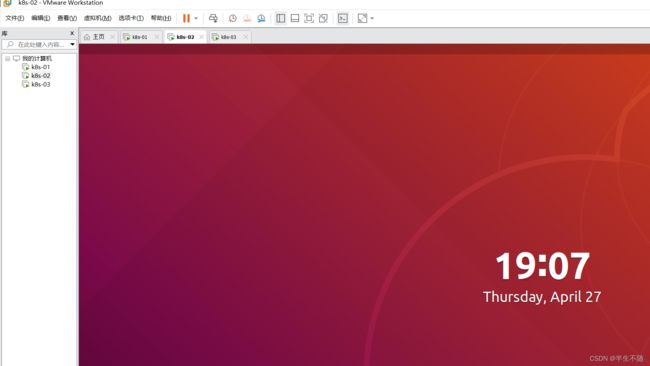
我是直接创建了三个虚拟机。避免后面配置网络的麻烦。大家也可以使用vmware的拷贝功能,创建好一个后直接拷贝,在打开虚拟机时候选择"拷贝"即可。
三、相关准备
1、切换root账号
直接切换会报错:
btg@ubuntu:~$ su root
Password:
su: Authentication failure
原因是初始化时候,Ubuntu系统会在每次进入系统时候随机给root一个密码。
故先修改root密码再切换。
btg@ubuntu:~$ sudo passwd root
[sudo] password for btg:
Enter new UNIX password:
Retype new UNIX password:
passwd: password updated successfully
切换成功
btg@ubuntu:~$ su root
Password:
root@ubuntu:/home/btg#
2、安装必要的基础软件
1)配置apt源
刚开始连vim,curl等都没有。故需要配置。
root@ubuntu:/home/btg# vi /etc/apt/sources.list
将原有的源注释或者直接删除,改为如下:
deb http://mirrors.aliyun.com/ubuntu/ bionic main restricted universe multiverse
deb-src http://mirrors.aliyun.com/ubuntu/ bionic main restricted universe multiverse
deb http://mirrors.aliyun.com/ubuntu/ bionic-security main restricted universe multiverse
deb-src http://mirrors.aliyun.com/ubuntu/ bionic-security main restricted universe multiverse
deb http://mirrors.aliyun.com/ubuntu/ bionic-updates main restricted universe multiverse
deb-src http://mirrors.aliyun.com/ubuntu/ bionic-updates main restricted universe multiverse
deb http://mirrors.aliyun.com/ubuntu/ bionic-backports main restricted universe multiverse
deb-src http://mirrors.aliyun.com/ubuntu/ bionic-backports main restricted universe multiverse
deb http://mirrors.aliyun.com/ubuntu/ bionic-proposed main restricted universe multiverse
deb-src http://mirrors.aliyun.com/ubuntu/ bionic-proposed main restricted universe multiverse
更新apt软件列表
apt-get update
安装vim,curl测试
root@ubuntu:/home/btg# apt-get install vim
Reading package lists... Done
Building dependency tree
Reading state information... Done
The following additional packages will be installed:
  vim-common vim-runtime vim-tiny
Suggested packages:
 ...
Processing triggers for man-db (2.8.3-2ubuntu0.1) ...
root@ubuntu:/home/btg#
2)使用xshell链接此台电脑
【ubuntu侧操作】
安装ssh:
root@ubuntu:/home/btg# apt install openssh-server
Reading package lists... Done
Building dependency tree
Reading state information... Done
...
Processing triggers for man-db (2.8.3-2ubuntu0.1) ...
Processing triggers for ufw (0.36-0ubuntu0.18.04.1) ...
Processing triggers for ureadahead (0.100.0-21) ...
Processing triggers for systemd (237-3ubuntu10.52) ...
root@ubuntu:/home/btg#
设置开机启动
root@ubuntu:/home/btg# systemctl start sshd
允许root远程登录
root@ubuntu:/home/btg# vim /etc/ssh/sshd_config
修改内容PermitRootLogin为yes
...
# Authentication:

#LoginGraceTime 2m
PermitRootLogin yes
#StrictModes yes
#MaxAuthTries 6
#MaxSessions 10
...
重启ssh
root@ubuntu:/home/btg# /etc/init.d/ssh restart
[ ok ] Restarting ssh (via systemctl): ssh.service.
root@ubuntu:/home/btg#
获取该虚拟机ip
root@ubuntu:/home/btg# ip a
...
2: ens33: <BROADCAST,MULTICAST,UP,LOWER_UP> mtu 1500 qdisc fq_codel state UP group default qlen 1000
    link/ether 00:0c:29:c6:4e:03 brd ff:ff:ff:ff:ff:ff
    inet 192.168.144.129/24 brd 192.168.144.255 scope global dynamic noprefixroute ens33
...
root@ubuntu:/home/btg#
【windows侧操作】
1、安装xshell
这个就不写了,大家网上找找教程。
2、成功后显示登录成功:
Connecting to 192.168.144.129:22...
Connection established.
To escape to local shell, press 'Ctrl+Alt+]'.

Welcome to Ubuntu 18.04.6 LTS (GNU/Linux 5.4.0-84-generic x86_64)

 * Documentation:  https://help.ubuntu.com
 * Management:     https://landscape.canonical.com
 * Support:        https://ubuntu.com/advantage

315 updates can be applied immediately.
266 of these updates are standard security updates.
To see these additional updates run: apt list --upgradable

Your Hardware Enablement Stack (HWE) is supported until April 2023.

The programs included with the Ubuntu system are free software;
the exact distribution terms for each program are described in the
individual files in /usr/share/doc/*/copyright.

Ubuntu comes with ABSOLUTELY NO WARRANTY, to the extent permitted by
applicable law.

btg@ubuntu:~$ su root
Password:
root@ubuntu:/home/btg#
root@ubuntu:/home/btg#
3)安装go(选做)
(1)下载
下载go(注意:最好1.19及其以上版本)
(2)安装
上传到Linux服务器目录下,解压:
tar -C /usr/local -xzf go1.xxx.linux-amd64.tar.gz
添加环境变量:
vim /etc/profile
#添加如下内容
export GOPATH=/usr/workspace/go
export GOROOT=/usr/local/go
export PATH=$PATH:$GOROOT/bin:$GOPATH/bin
#配置代理
export GOPROXY=https://goproxy.io,direct
执行:
source /etc/profile
即可生效。
(3)检查
若能够查看到go的版本,则表示安装成功。
root@ubuntu:/home/btg# go version
go version go1.20.3 linux/amd64
4)修改主机名称
临时修改
root@ubuntu:/home/btg# hostname k8s-02
永久修改
root@ubuntu:/home/btg# vim /etc/hostname
root@ubuntu:/home/btg# cat /etc/hostname
k8s-02
检查
新开窗口显示如下:
Connecting to 192.168.144.129:22...
Connection established.
To escape to local shell, press 'Ctrl+Alt+]'.

Welcome to Ubuntu 18.04.6 LTS (GNU/Linux 5.4.0-84-generic x86_64)

 * Documentation:  https://help.ubuntu.com
 * Management:     https://landscape.canonical.com
 * Support:        https://ubuntu.com/advantage

315 updates can be applied immediately.
266 of these updates are standard security updates.
To see these additional updates run: apt list --upgradable

New release '20.04.6 LTS' available.
Run 'do-release-upgrade' to upgrade to it.

Your Hardware Enablement Stack (HWE) is supported until April 2023.
Last login: Fri Apr 21 02:15:02 2023 from 192.168.144.1
btg@k8s-02:~$ su root
Password:
root@k8s-02:/home/btg#
修改成功
四、使用sealos安装k8s
1、安装前准备
1)确认主机名名称和密码
主机名称必需唯一,密码一致。
2)配置hosts文件
操作如下:
root@k8s-01:/home/test# vim /etc/hosts

127.0.0.1       localhost k8s-01
127.0.1.1       k8s-01

# The following lines are desirable for IPv6 capable hosts
::1     ip6-localhost ip6-loopback
fe00::0 ip6-localnet
ff00::0 ip6-mcastprefix
ff02::1 ip6-allnodes
ff02::2 ip6-allrouters

192.168.144.129 k8s-02
192.168.144.128 k8s-01
确保两台之间能够相互ping通
root@k8s-02:/home/btg# ping k8s-02
PING localhost (127.0.0.1) 56(84) bytes of data.
64 bytes from localhost (127.0.0.1): icmp_seq=1 ttl=64 time=0.114 ms
64 bytes from localhost (127.0.0.1): icmp_seq=2 ttl=64 time=0.024 ms
^C
--- localhost ping statistics ---
2 packets transmitted, 2 received, 0% packet loss, time 1021ms
rtt min/avg/max/mdev = 0.024/0.069/0.114/0.045 ms
root@k8s-02:/home/btg# ping k8s-01
PING k8s-01 (192.168.144.128) 56(84) bytes of data.
64 bytes from k8s-01 (192.168.144.128): icmp_seq=1 ttl=64 time=0.609 ms
64 bytes from k8s-01 (192.168.144.128): icmp_seq=2 ttl=64 time=0.223 ms
^C
--- k8s-01 ping statistics ---
2 packets transmitted, 2 received, 0% packet loss, time 1019ms
rtt min/avg/max/mdev = 0.223/0.416/0.609/0.193 ms
root@k8s-02:/home/btg#
3)其他检查项目
- 集群内主机间配置ssh免密登录
- 务必同步服务器时间
- master节点CPU必须2C以上
- 网卡名称如果是不常见的,建议修改成规范的网卡名称, 如(eth.|en.|em.*)
4)下载sealos
wget -c https://sealyun-home.oss-cn-beijing.aliyuncs.com/sealos/latest/sealos && chmod +x sealos
2、开始安装
# 安装一个三master的kubernetes集群
## 如已设ssh免密登录可以不需要--passwd参数
## --podcidr 配置pod网段
## --svccidr 配置clusterip网段
## --network  机器网卡名,CNI网卡发现用
./sealos init --master 192.168.144.128 --node 192.168.144.129 --pkg-url /home/test/kube1.19.16.tar.gz --version v1.19.16 --passwd huawei@123
安装成功后,检查安装情况:
root@k8s-01:/home/test# kubectl get pod -A
NAMESPACE     NAME                                       READY   STATUS    RESTARTS   AGE
kube-system   calico-kube-controllers-7f4f5bf95d-gbjfs   1/1     Running   0          73s
kube-system   calico-node-nggmz                          1/1     Running   0          65s
kube-system   calico-node-r9mqn                          1/1     Running   0          73s
kube-system   coredns-f9fd979d6-7gjrs                    1/1     Running   0          73s
kube-system   coredns-f9fd979d6-gcgvt                    1/1     Running   0          73s
kube-system   etcd-k8s-01                                1/1     Running   0          82s
kube-system   kube-apiserver-k8s-01                      1/1     Running   0          82s
kube-system   kube-controller-manager-k8s-01             0/1     Running   0          82s
kube-system   kube-proxy-4cpfk                           1/1     Running   0          65s
kube-system   kube-proxy-hxs54                           1/1     Running   0          73s
kube-system   kube-scheduler-k8s-01                      1/1     Running   0          82s
kube-system   kube-sealyun-lvscare-k8s-02                1/1     Running   0          64s
至此搭建完成。
五、参考
sealos3安装高可用k8s集群
