Linux:DNS服务(bind)
目录
环境
主服务器和从服务器的配置环境
主服务器
从服务器
主DNS配置文件
dns从服务器配置
环境
如果你只需要主dns服务器那么你只需要挑着主dns服务器配置看即可
我这里使用了4台虚拟机,你也可以不使用这么多根据你的电脑性能去调整
他们必须要在同一个网段,我这几个都在192.168.254.0/24网段
1——Windows server 2016 web服务器 ip为: 192.168.254.4
2——Windows10 通过域名访问网站,ip为:192.168.254.3
3——Linux centos 7 从DNS服务器 ip为:192.168.254.2
4——Linux centos 7 主DNS服务器 ip 为:192.168.254.1
主服务器和从服务器的配置环境
主服务器
关闭防火墙和selinux
systemctl stop firewalld
setenforce 0
修改主机名
hostnamectl set-hostname dns1.tarro.com
# hostnamectl set-hostname 你要修改的主机名
# 这个是dns1.tarro.com
# 从服务器我就给他命名为 dns2.tarro.com
修改本机dns配置文件
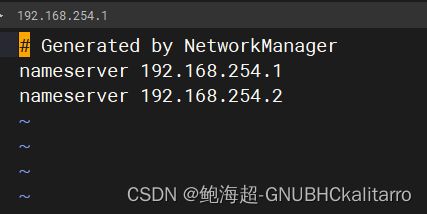
vi /etc/resolv.conf
写入
nameserver 192.168.254.1
nameserver 192.168.254.2# 主dns服务器和从服务器的ip
修改hosts文件 追加以下内容
vim /etc/hosts
192.168.254.1 dns1.tarro.com ns1
192.168.254.2 dns2.tarro.com ns2

yum安装bind软件(我这里使用的离线yum库)
Linux:rpm查询安装 && yum安装_鲍海超-GNUBHCkalitarro的博客-CSDN博客
yum -y install bind*
从服务器
关闭防火墙和selinux
systemctl stop firewalld
setenforce 0
修改主机名
hostnamectl set-hostname dns2.tarro.com
修改本机dns配置文件
vi /etc/resolv.conf
写入
nameserver 192.168.254.1
nameserver 192.168.254.2# 主dns服务器和从服务器的ip
修改hosts文件 追加以下内容
vim /etc/hosts
192.168.254.1 dns1.tarro.com ns1
192.168.254.2 dns2.tarro.com ns2
yum安装bind
yum -y install bind*
主DNS配置文件
vim /etc/named.conf
listen-on port 53 { 本机ip; };
allow-query { 那个ip或者网段可以复制; };

zone "tarro.com" IN {
type master;
file "tarro.com.zone";
allow-transfer {192.168.254.2;};};
zone "254.168.192.in-addr.arpa" IN {
type master;
file "192.168.254.arpa";
allow-transfer {192.168.254.2;};};

//
// named.conf
//
// Provided by Red Hat bind package to configure the ISC BIND named(8) DNS
// server as a caching only nameserver (as a localhost DNS resolver only).
//
// See /usr/share/doc/bind*/sample/ for example named configuration files.
//
// See the BIND Administrator's Reference Manual (ARM) for details about the
// configuration located in /usr/share/doc/bind-{version}/Bv9ARM.html

options {
	listen-on port 53 { 192.168.254.1; };
	listen-on-v6 port 53 { ::1; };
	directory 	"/var/named";
	dump-file 	"/var/named/data/cache_dump.db";
	statistics-file "/var/named/data/named_stats.txt";
	memstatistics-file "/var/named/data/named_mem_stats.txt";
	recursing-file  "/var/named/data/named.recursing";
	secroots-file   "/var/named/data/named.secroots";
	allow-query     { 192.168.254.0/24; };

	/*
	 - If you are building an AUTHORITATIVE DNS server, do NOT enable recursion.
	 - If you are building a RECURSIVE (caching) DNS server, you need to enable
	   recursion.
	 - If your recursive DNS server has a public IP address, you MUST enable access
	   control to limit queries to your legitimate users. Failing to do so will
	   cause your server to become part of large scale DNS amplification
	   attacks. Implementing BCP38 within your network would greatly
	   reduce such attack surface
	*/
	recursion yes;

	dnssec-enable yes;
	dnssec-validation yes;

	/* Path to ISC DLV key */
	bindkeys-file "/etc/named.root.key";

	managed-keys-directory "/var/named/dynamic";

	pid-file "/run/named/named.pid";
	session-keyfile "/run/named/session.key";
};

logging {
        channel default_debug {
                file "data/named.run";
                severity dynamic;
        };
};

zone "." IN {
	type hint;
	file "named.ca";
};

zone "tarro.com" IN {
        type master;
        file "tarro.com.zone";
        allow-transfer {192.168.254.2;};

};

zone "254.168.192.in-addr.arpa" IN {
        type master;
        file "192.168.254.arpa";
        allow-transfer {192.168.254.2;};

};


include "/etc/named.rfc1912.zones";
include "/etc/named.root.key";
配置正向文件
vim /var/named/tarro.com.zone
$TTL    86400
@               IN SOA  tarro.com.      root.tarro.com. (
        2014032900
        3H
        15M
        1W
        1D )
@       IN      NS      dns1.tarro.com.
        IN      NS      dns2.tarro.com.
ns1     IN      A       192.168.254.1
ns2     IN      A       192.168.254.2
www     IN      A       192.168.254.4
*       IN      A       192.168.254.4
配置反向文件
vim /var/named/192.168.254.arpa
$TTL    86400
@               IN SOA  tarro.com.      root.tarro.com. (
        2014032900
        3H
        15M
        1W
        1D )
        IN      NS      dns1.tarro.com.
        IN      NS      dns2.tarro.com.
1       IN      NS      dns1.tarro.com.
2       IN      NS      dns2.tarro.com.
4       IN      NS      www.tarro.com.
文件检测
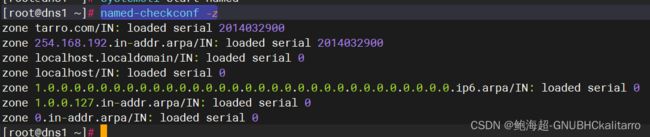
named-checkconf -z
chown :named tarro.com.zone
chown :named 192.168.254.arpa
都没问题
可以开启服务 systemctl start named
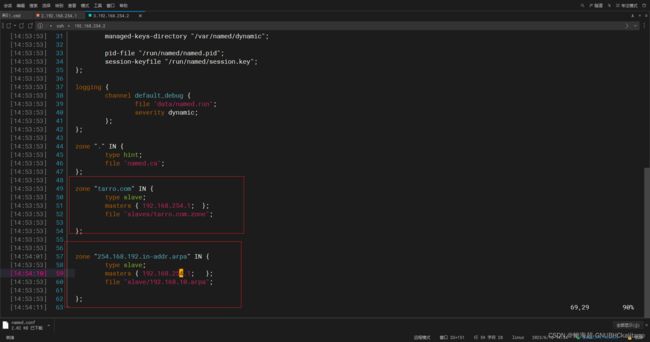
dns从服务器配置
vim /etc/named.conf

然后开启服务就会同步过来了
cd /var/named/slaves/
查看里边同步配置来的文件