Maven学习笔记(SSM 整合伪分布式案例)
目录
第一节 创建工程,引入依赖
1 创建工程
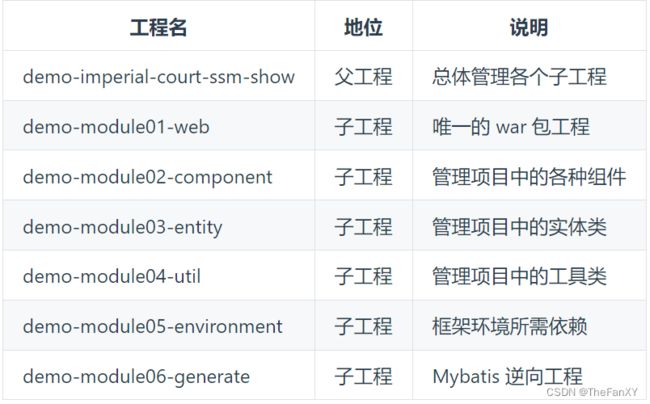
①工程清单
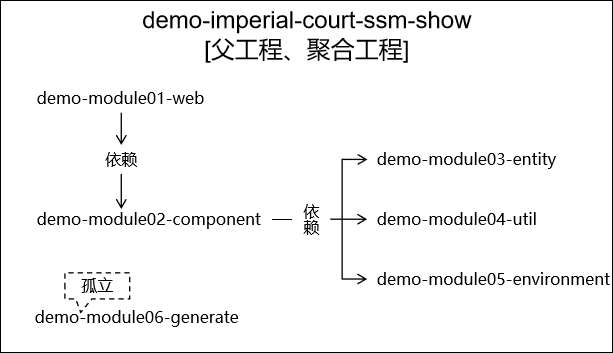
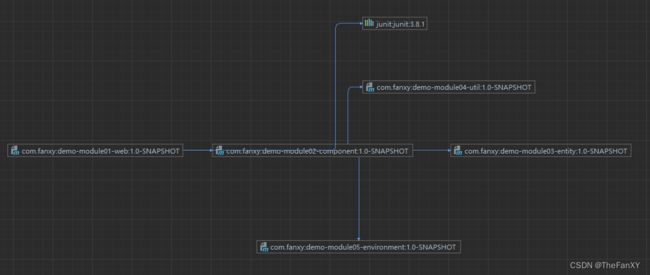
②工程间关系
2、各工程 POM 配置
①父工程
②Mybatis 逆向工程
③环境依赖工程
④工具类工程
⑤实体类工程
⑥组件工程
⑦Web 工程
第二节 搭建环境:持久化层
1、物理建模
2、Mybatis 逆向工程
①generatorConfig.xml
②执行逆向生成
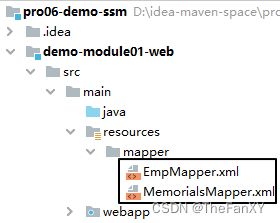
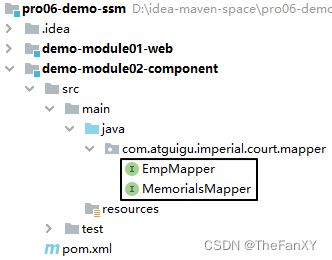
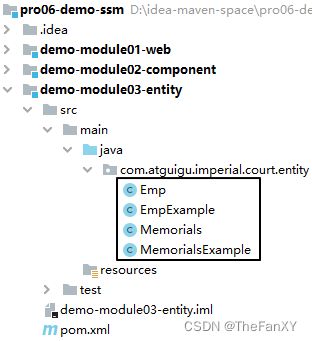
③资源归位
3、建立数据库连接
①数据库连接信息
②配置数据源
③测试
4、Spring 整合 Mybatis
①配置 SqlSessionFactoryBean
②扫描 Mapper 接口
③测试
第三节 搭建环境:事务控制
1、声明式事务配置
2、注解写法
①查询操作
②增删改操作
第四节 搭建环境:表述层
1、设定 Web 工程
2、web.xml 配置
①配置 ContextLoaderListener
②配置 DispatcherServlet
③配置 CharacterEncodingFilter
3、显示首页
①配置 SpringMVC
②配置 view-controller 访问首页
③创建首页模板文件
第五节 搭建环境:辅助功能
1、登录失败异常
2、常量类
3、MD5 工具
4、日志配置文件
第六节 业务功能:登录
1、AuthController
2、EmpService
3、target.html
第一节 创建工程,引入依赖
1 创建工程
①工程清单
②工程间关系
需要手动去pom.xml文件进行修改。
2、各工程 POM 配置
①父工程
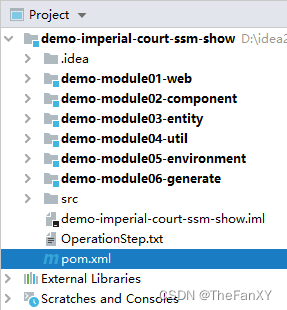
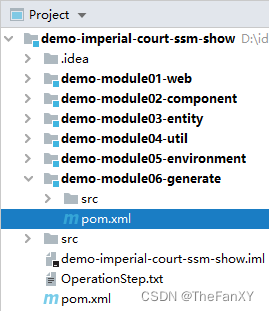
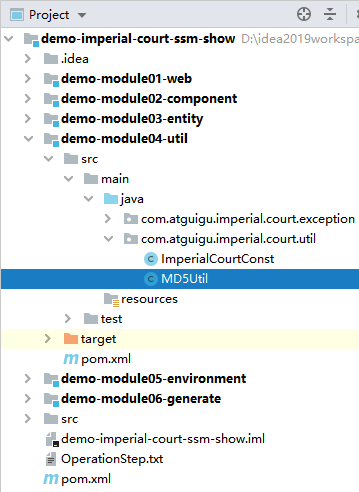
POM 位置如下:
各子工程创建好之后就会有下面配置,不需要手动编辑:
com.atguigu
demo-imperial-court-ssm-show
pom
1.0-SNAPSHOT

    demo-module01-web
    demo-module02-component
    demo-module03-entity
    demo-module04-util
    demo-module05-environment
    demo-module06-generate
②Mybatis 逆向工程
POM 位置如下:
这里导入Mybatis主要和逆向工程无关,可以直接用插件生成,但是不导入Mybatis很多注解会报错,很难受,就导入了。
        org.mybatis
        mybatis
        3.5.7


            org.mybatis.generator
            mybatis-generator-maven-plugin
            1.3.0


                    org.mybatis.generator
                    mybatis-generator-core
                    1.3.2


                    com.mchange
                    c3p0
                    0.9.2


                    mysql
                    mysql-connector-java
                    5.1.8
③环境依赖工程
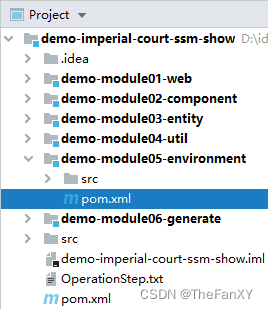
POM 位置如下:
    org.springframework
    spring-webmvc
    5.3.1


    org.springframework
    spring-orm
    5.3.1


    ch.qos.logback
    logback-classic
    1.2.3


    org.thymeleaf
    thymeleaf-spring5
    3.0.12.RELEASE


    org.mybatis
    mybatis-spring
    2.0.6


    org.mybatis
    mybatis
    3.5.7


    mysql
    mysql-connector-java
    5.1.3


    com.alibaba
    druid
    1.0.31
④工具类工程
无配置。
⑤实体类工程
无配置。
⑥组件工程
POM 位置如下:
    com.atguigu
    demo-module03-entity
    1.0-SNAPSHOT


    com.atguigu
    demo-module04-util
    1.0-SNAPSHOT


    com.atguigu
    demo-module05-environment
    1.0-SNAPSHOT


    javax.servlet
    javax.servlet-api
    3.1.0
    provided
⑦Web 工程
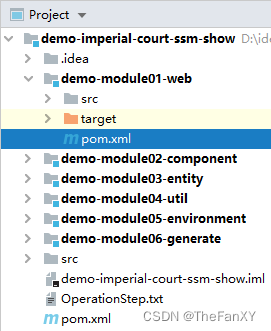
POM 位置如下:
        org.junit.jupiter
        junit-jupiter-api
        5.7.0
        test


        org.springframework
        spring-test
        5.3.1
        test


        com.fanxy
        demo-module02-component
        1.0-SNAPSHOT
第二节 搭建环境:持久化层
1、物理建模
我们仍然继续使用《第六章 单一架构案例》中创建的数据库和表。
2、Mybatis 逆向工程
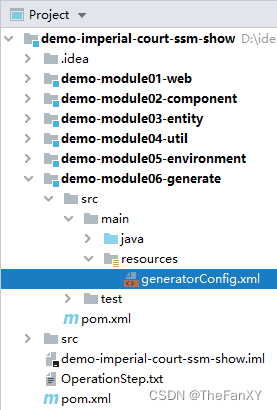
①generatorConfig.xml
②执行逆向生成
③资源归位
下面罗列各种资源应该存放的位置,排名不分先后:
[1]Mapper 配置文件
[2]Mapper 接口
[3]实体类
Mybatis 逆向工程生成的实体类只有字段和 get、set 方法,我们可以自己添加无参构造器、有参构造器、toString() 方法。
3、建立数据库连接
①数据库连接信息
dev.driverClassName=com.mysql.jdbc.Driver
dev.url=jdbc:mysql://localhost:13306/db_imperial_court
dev.username=root
dev.password=xxxxxxx
dev.initialSize=10
dev.maxActive=20
dev.maxWait=10000
②配置数据源
③测试
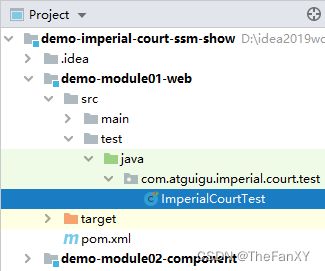
@SpringJUnitConfig(locations = "classpath:spring-persist.xml")
也可以写上面的,下面的类似junit4的加载,所以更好记忆
//@SpringJUnitConfig(locations = "classpath:spring-persist.xml")
//也可以写上面的,下面的类似junit4的加载,所以更好记忆
@ExtendWith(SpringExtension.class)
@ContextConfiguration(value = {"classpath:spring-persist.xml"})
public class ImperialCourtTest {

    @Autowired
    private DataSource dataSource;

    private Logger logger = LoggerFactory.getLogger(ImperialCourtTest.class);

    @Test
    public void testConnection() throws SQLException {
        Connection connection = dataSource.getConnection();
        logger.debug(connection.toString());
    }

}
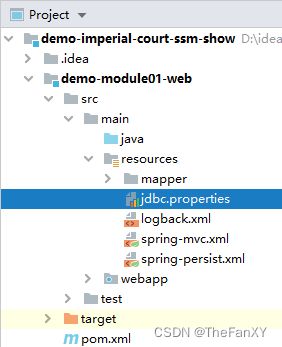
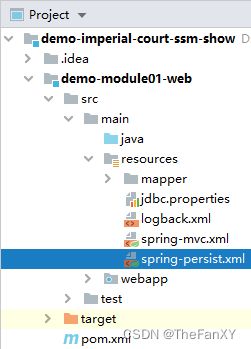
配置文件为什么要放到 Web 工程里面?
- Web 工程将来生成 war 包。
- war 包直接部署到 Tomcat 运行。
- Tomcat 从 war 包(解压目录)查找配置文件最直接。
- 如果不是把配置文件放在 Web 工程,而是放在 Java 工程,那就等于将配置文件放在了 war 包内的 jar 包中。
- 配置文件在 jar 包中读取相对困难。
4、Spring 整合 Mybatis
①配置 SqlSessionFactoryBean
目的1:装配数据源
目的2:指定 Mapper 配置文件的位置
②扫描 Mapper 接口
spring的官方bean版
mybatis命名空间版
③测试
@Autowired
private EmpMapper empMapper;

@Test
public void testEmpMapper() {
    List empList = empMapper.selectByExample(new EmpExample());
    for (Emp emp : empList) {
        System.out.println("emp = " + emp);
    }
}
第三节 搭建环境:事务控制
1、声明式事务配置
事务注解驱动的命名空间,导包一定要选择tx下的,导错了就报错了,很难排查
2、注解写法
①查询操作
@Transactional(readOnly = true)
②增删改操作
@Transactional(propagation = Propagation.REQUIRES_NEW, readOnly = false)
在具体代码开发中可能会将相同设置的 @Transactional 注解提取到 Service 类上。
第四节 搭建环境:表述层
1、设定 Web 工程
传送门(opens new window)
2、web.xml 配置
①配置 ContextLoaderListener
    contextConfigLocation
    classpath:spring-persist.xml


    org.springframework.web.context.ContextLoaderListener
②配置 DispatcherServlet
    dispatcherServlet
    org.springframework.web.servlet.DispatcherServlet

        contextConfigLocation
        classpath:spring-mvc.xml

    1


    dispatcherServlet
    /
③配置 CharacterEncodingFilter
    characterEncodingFilter
    org.springframework.web.filter.CharacterEncodingFilter

        encoding
        UTF-8


        forceRequestEncoding
        true


        forceResponseEncoding
        true


    characterEncodingFilter
    /*
④配置 HiddenHttpMethodFilter
    hiddenHttpMethodFilter
    org.springframework.web.filter.HiddenHttpMethodFilter


    hiddenHttpMethodFilter
    /*
3、显示首页
①配置 SpringMVC
[1]标配
老师写的mvn,但是这里写mvc也行,之前学整合的时候也是这么写的,也不能那个算错,mvn也写成mvc就行,不然得导入两个一样的schema
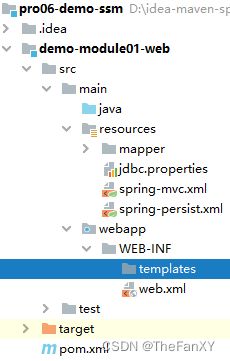
[2]配置视图解析相关
注意:需要我们自己手动创建 templates 目录。
[3]配置自动扫描的包
②配置 view-controller 访问首页
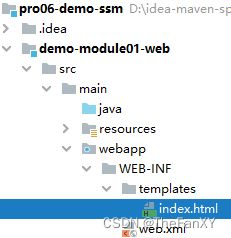
③创建首页模板文件
首页
第五节 搭建环境:辅助功能
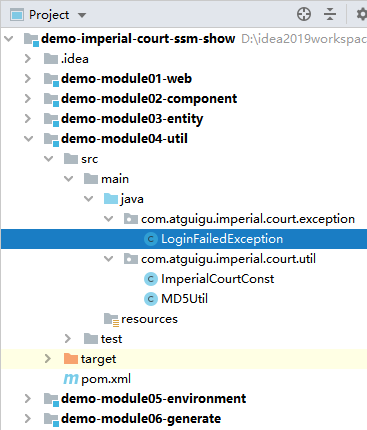
1、登录失败异常
public class LoginFailedException extends RuntimeException {

    public LoginFailedException() {
    }

    public LoginFailedException(String message) {
        super(message);
    }

    public LoginFailedException(String message, Throwable cause) {
        super(message, cause);
    }

    public LoginFailedException(Throwable cause) {
        super(cause);
    }

    public LoginFailedException(String message, Throwable cause, boolean enableSuppression, boolean writableStackTrace) {
        super(message, cause, enableSuppression, writableStackTrace);
    }
}
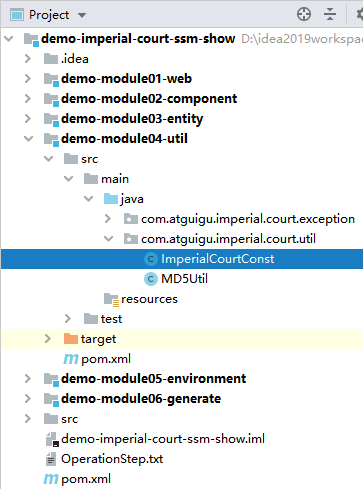
2、常量类
public class ImperialCourtConst {

    public static final String LOGIN_FAILED_MESSAGE = "账号、密码错误,不可进宫!";
    public static final String ACCESS_DENIED_MESSAGE = "宫闱禁地,不得擅入!";
    public static final String LOGIN_EMP_ATTR_NAME = "loginInfo";

}
3、MD5 工具
public class MD5Util {

    /**
     * 针对明文字符串执行MD5加密
     * @param source
     * @return
     */
    public static String encode(String source) {

        // 1.判断明文字符串是否有效
        if (source == null || "".equals(source)) {
            throw new RuntimeException("用于加密的明文不可为空");
        }

        // 2.声明算法名称
        String algorithm = "md5";

        // 3.获取MessageDigest对象
        MessageDigest messageDigest = null;
        try {
            messageDigest = MessageDigest.getInstance(algorithm);
        } catch (NoSuchAlgorithmException e) {
            e.printStackTrace();
        }

        // 4.获取明文字符串对应的字节数组
        byte[] input = source.getBytes();

        // 5.执行加密
        byte[] output = messageDigest.digest(input);

        // 6.创建BigInteger对象
        int signum = 1;
        BigInteger bigInteger = new BigInteger(signum, output);

        // 7.按照16进制将bigInteger的值转换为字符串
        int radix = 16;
        String encoded = bigInteger.toString(radix).toUpperCase();

        return encoded;
    }

}
4、日志配置文件
            [%d{HH:mm:ss.SSS}] [%-5level] [%thread] [%logger] [%msg]%n
            UTF-8
第六节 业务功能:登录
1、AuthController
@Controller
public class AuthController {

    @Autowired
    private EmpService empService;

    @RequestMapping("/auth/login")
    public String doLogin(
            @RequestParam("loginAccount") String loginAccount,
            @RequestParam("loginPassword") String loginPassword,
            HttpSession session,
            Model model
    ) {

        // 1、尝试查询登录信息
        Emp emp = empService.getEmpByLogin(loginAccount, loginPassword);

        // 2、判断登录是否成功
        if (emp == null) {

            // 3、如果登录失败则回到登录页面显示提示消息
            model.addAttribute("message", ImperialCourtConst.LOGIN_FAILED_MESSAGE);

            return "index";

        } else {

            // 4、如果登录成功则将登录信息存入 Session 域
            session.setAttribute("loginInfo", emp);

            return "target";
        }
    }

}
2、EmpService
@Service
@Transactional(readOnly = true)
public class EmpServiceImpl implements EmpService {

    @Autowired
    private EmpMapper empMapper;


    @Override
    public Emp getEmpByLogin(String loginAccount, String loginPassword) {

        // 1、密码加密
        String encodedLoginPassword = MD5Util.encode(loginPassword);

        // 2、通过 QBC 查询方式封装查询条件
        EmpExample example = new EmpExample();

        EmpExample.Criteria criteria = example.createCriteria();

        criteria.andLoginAccountEqualTo(loginAccount).andLoginPasswordEqualTo(encodedLoginPassword);

        List empList = empMapper.selectByExample(example);

        if (empList != null && empList.size() > 0) {

            // 3、返回查询结果
            return empList.get(0);
        }

        return null;
    }
}
3、target.html
Title
