Ubuntu22.04 安装 mysql8,redis7,MongoDB6
服务器的准备
- 我的服务器是在腾讯云租的,所以服务器的apt源都是默认配好的,没配好的自行网上查找apt源配置。
- 本文同样适用于Ubuntu 22,20。Ubuntu18亦可参考。
- 云服务器一般防火墙未开放端口访问,请自行配置,否则后续远程访问不了:
mysql:3306 redis:6379 MongoDB:27017
更新所有源
sudo apt-get clean all
sudo apt-get update
sudo apt upgrade -y  // 这一步按需。会将所有依赖包都更新到最新,慎重
最后再最好reboot一下
修改一个进程可以拥有的VMA(虚拟内存区域)的数量(mongodb 需要)
查看当前值
sudo sysctl -a|grep vm.max_map_count
修改:
sudo vim /etc/sysctl.conf
在下面添加一行:
vm.max_map_count=262144
重新加载配置:
sudo sysctl -p
查看是否生效
sudo sysctl -a|grep vm.max_map_count
安装MySQL8
参考文章:https://blog.csdn.net/weixin_927326/article/details/127654545
sudo apt install -y mysql-server
设置开机自启动:
sudo systemctl enable mysql
设置mysql账号密码以及远程访问权限
进入mysql
sudo mysql -uroot
设置root用户密码:
alter user 'root'@'localhost' identified with mysql_native_password by '你的密码';
然后退出mysql:exit,重新登录mysql: mysql -u root -p
选择数据库:
use mysql;
select user,host from user;

# 修改root的host为% 即无论在哪台主机上都能够登陆
update user set host='%' where user='root' and host='localhost';

# 修改加密规则
alter user 'root'@'%' identified with mysql_native_password by '你的密码';

# 刷新权限
flush privileges;

退出mysql:exit


# 开启远程连接
sudo vim /etc/mysql/mysql.conf.d/mysqld.cnf
#找到下面这个参数,注释掉或者改为0.0.0.0
# bind-address = 127.0.0.1

# 退出重启
sudo systemctl restart mysql #重启mysql服务
安装redis7
由于Ubuntu软件库默认只包括redis5,所以安装时麻烦点,不能直接安装。
需要添加下载库,下面的命令把所有步骤都包含了,全部复制就可以安装:
来源官方文档: https://redis.io/docs/getting-started/installation/install-redis-on-linux/
下面是官网搬来的内容,直接全部复制运行即可:
curl -fsSL https://packages.redis.io/gpg | sudo gpg --dearmor -o /usr/share/keyrings/redis-archive-keyring.gpg

echo "deb [signed-by=/usr/share/keyrings/redis-archive-keyring.gpg] https://packages.redis.io/deb $(lsb_release -cs) main" | sudo tee /etc/apt/sources.list.d/redis.list

sudo apt-get update
sudo apt-get install redis
启动redis:
sudo systemctl start redis-server
这里可能会报错:
// redis服务被隐藏
Failed to start redis.service: Unit redis.service is masked.
解除隐藏:
sudo systemctl unmask redis-server.service
然后重新启动:
sudo systemctl start redis-server
sudo systemctl status redis-server
状态正常则安装成功。
设置开机自启动:
sudo systemctl enable redis-server
启动远程访问和访问控制
编辑配置文件
sudo vim /etc/redis/redis.conf
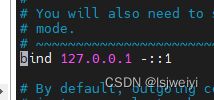
将地址改成如下
bind 0.0.0.0 -::1
按esc退出编辑,继续搜索/requirepass,操作同上,找到如下:

后面的是密码
requirepass 你的密码
然后保存退出。
重启redis使配置生效:
sudo systemctl restart redis-server
sudo systemctl status redis-server
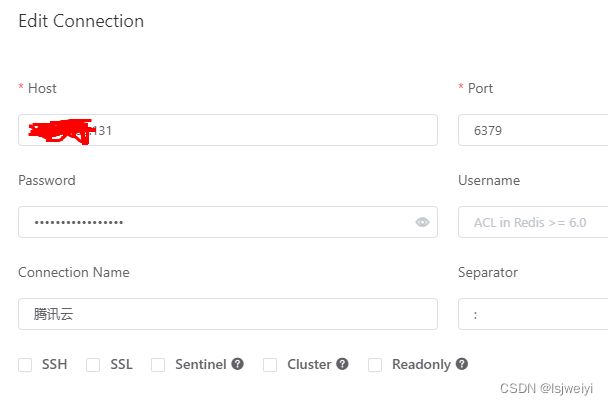
然后用远程客户端连接试试看(我用的another redis desktop manager):

连接成功则安装完成。
MongoDB 安装
参考资料,官方文档:
安装mongo :https://www.mongodb.com/docs/manual/tutorial/install-mongodb-on-ubuntu/
添加秘钥,正常会返回ok:
wget -qO - https://www.mongodb.org/static/pgp/server-6.0.asc | sudo apt-key add -
创建列表文件:
注意区分系统版本
// Ubuntu 22.0
echo "deb [ arch=amd64,arm64 ] https://repo.mongodb.org/apt/ubuntu jammy/mongodb-org/6.0 multiverse" | sudo tee /etc/apt/sources.list.d/mongodb-org-6.0.list

// Ubuntu 20.0
echo "deb [ arch=amd64,arm64 ] https://repo.mongodb.org/apt/ubuntu focal/mongodb-org/6.0 multiverse" | sudo tee /etc/apt/sources.list.d/mongodb-org-6.0.list

// Ubuntu18.0
echo "deb [ arch=amd64,arm64 ] https://repo.mongodb.org/apt/ubuntu bionic/mongodb-org/6.0 multiverse" | sudo tee /etc/apt/sources.list.d/mongodb-org-6.0.list
重新加载本地包数据,并安装MongoDB社区版:
sudo apt-get update;
sudo apt-get install -y mongodb-org
启动MongoDB并验证是否成功:
sudo systemctl start mongod
sudo systemctl status mongod
设置开机自启动:
sudo systemctl enable mongod
启动密码访问
参考文档:https://www.mongodb.com/docs/manual/tutorial/configure-scram-client-authentication/
进入mongo
mongosh
切换数据库
use admin
创建一个有密码的管理员角色
db.createUser(
  {
    user: "myUserAdmin",
    pwd: "你的密码",
    roles: [
      { role: "userAdminAnyDatabase", db: "admin" },
      { role: "readWriteAnyDatabase", db: "admin" }
    ]
  }
)
输入exit退出mongo,然后编辑mongo的配置文件,启用权限控制:
sudo vim /etc/mongod.conf
找到security,去掉#号,并添加authorization: enabled:
security:
    authorization: enabled
将#号去掉,然后保存退出。
重启mongo使配置生效,并验证:
sudo systemctl restart mongod
sudo systemctl status mongod
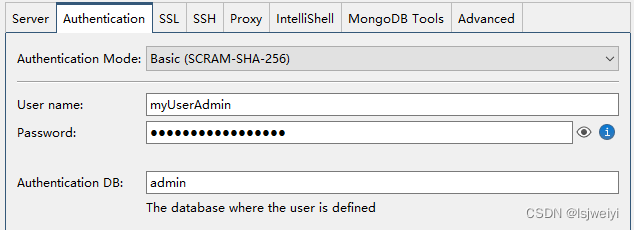
使用账号密码登录测试:
mongosh --authenticationDatabase "admin" -u "myUserAdmin" -p
PS:服务器中,即使设置了密码,依然能使用mongosh直接进入数据库。不过使用账号密码也能正常登录,就说明是成功开启了密码验证。
启动远程连接
默认只允许本地连接
编辑mongo的配置文件,启用权限控制:
sudo vim /etc/mongod.conf
ip改成如下即可。
net:
  port: 27017
  bindIp: 0.0.0.0
重启mongo使配置生效,并验证:
sudo systemctl restart mongod
sudo systemctl status mongod

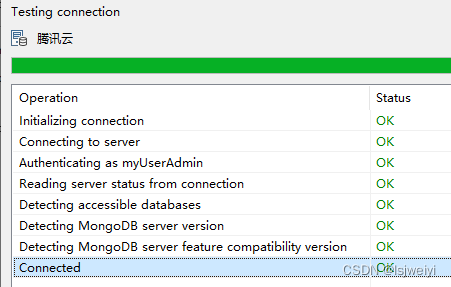
点击左下角“Test connection”

表示成功,至此mongo安装完成。
PS:再某些时候,重启mongo服务会起不来,报错中会提示到这个文件:/tmp/mongodb-27017.sock,具体的问题没有截图下来。如果遇到该问题,可以直接删除改文件再次启动服务:
sudo rm /tmp/mongodb-27017.sock


