【Unity3D】屏幕深度和法线纹理简介
1 前言
1)深度纹理和法线纹理的含义
深度纹理本质是一张图片,图片中每个像素反应了屏幕中该像素位置对应的顶点 z 值相反数(观察坐标系),之所以用 “反应了” 而不是 “等于”(或 “对应” ),因为深度纹理中颜色的值域是 [0, 1],而顶点 z 值相反数不一定在该区间,另外顶点 z 值相反数与深度纹理不是线性关系(透视投影引起的)。
法线纹理本质也是一张图片,图片中每个像素的 R、G 值对应该点法线向量的 x、y 值(观察空间),z 值通过公式 z = sqrt(x * x + y * y) 计算得到。
2)深度纹理和法线纹理的作用
深度纹理和法线纹理可以用于边缘检测特效、全局雾化特效、激光雷达特效等场景。
2 顶点映射
1)顶点映射过程
在空间和变换中,讲述了顶点是如何从模型空间逐步映射到屏幕上的像素点。这里再简单描述下顶点映射过程,模型中的顶点先后经历了模型变换、观察变换、投影变换、齐次除法(或透视除法)、屏幕映射,逐步映射到屏幕空间。
![]()
2)顶点映射的线性阶段和非线性阶段
光栅化发生在投影变换和齐次除法(或透视除法)之间,它是顶点映射的一个重大转折点,主要体现在以下两点:
- 光栅化对三角形内部进行线性插值,使得光栅化后的顶点数远大于光栅化前的顶点数;
- 光栅化及之前的变换都是线性变换,光栅化之后进行了齐次除法(或透视除法),使得顶点映射不再保有线性性质(这主要是相机的透视效果引起的)。
3)顶点映射各阶段值域
在空间和变换中,介绍了每次变换后顶点的各个分量的值域,这里再简单描述下:经过投影变换后,顶点 x、y、z 坐标都映射在区间 [-w, w];经过齐次除法后,顶点 x、y、z 坐标都映射在区间 [-1, 1](DirectX 平台上 z 坐标映射在区间 [0, 1]),该空间被称为归一化的设备空间(Normalized Device Coordinates, NDC);经过屏幕映射后,x、y 坐标分别映射在区间 [0, pixelWidth]、 [0, pixelHeight],z 坐标保持不变。
4)NDC 到深度纹理
归一化的设备空间中顶点坐标 z 分量值域是 [-1, 1],而颜色 R、G、B、A 分量值域都是 [0,1],因此需要进行以下映射,其中 z 为 NDC 空间中顶点坐标 z 值,c 为映射的深度纹理的 R 通道值。
3 深度纹理和法线纹理的来源
1)前向渲染生成深度和法线纹理
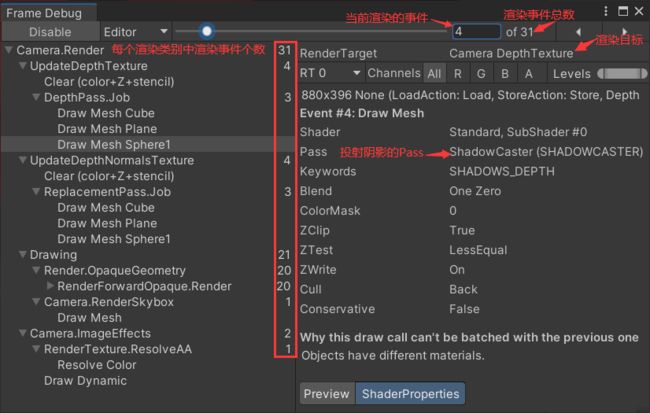
当使用前向渲染(Forward Rendering)路径时,Unity 会选取所有不透明物体(RenderType 为 Opaque,Queue 为 Background、Geometry 或 AlphaTest,即 Queue <= 2500)生成深度和法线纹理。对于深度纹理,Unity 使用着色器替换技术,在 FallBack 中寻找 LightMode 为 ShadowCast 的 Pass 进行阴影投射(详见阴影原理及应用),同时生成深度纹理;对于法线纹理,Unity 底层会使用一个单独的 Pass 把整个场景再渲染一遍,生成法线纹理(Camera-DepthNormalTexture.shader)。
2)延时渲染生成深度和法线纹理
当使用延时渲染(Deferred Rendering)路径时,Unity 会将深度和法线信息渲染到 G-buffer(Geometric Buffer,几何缓冲区)中。
3)深度&法线纹理编码
用户可以设置只生成深度纹理还是生成深度&法线纹理(深度和法线信息编码在一张纹理中),当设置深度&法线纹理时,Unity 会创建一张和屏幕分辨率相同、精度为 32 位(每个通道 8 位)的纹理,其中观察空间下的法线信息会被编码进 R、G 通道,深度信息会被编码进 B 和 A 通道。
4 深度值和法线向量的获取
4.1 设置深度纹理模式
在 C# 脚本中可以设置深度纹理模式,DepthTextureMode.Depth 模式下会生成一张深度纹理,在 Shader 中可以通过 _CameraDepthTexture 变量获取;DepthTextureMode.DepthNormals 模式下会生成一张深度&法线纹理,在 Shader 中可以通过 _CameraDepthNormalsTexture 变量获取。
camera.depthTextureMode = DepthTextureMode.None; // 不渲染深度纹理和法线纹理
camera.depthTextureMode = DepthTextureMode.Depth; // 渲染深度纹理
camera.depthTextureMode = DepthTextureMode.DepthNormals; // 渲染深度&法线纹理
// 渲染两张纹理, 一张深度纹理, 一张深度&法线纹理
camera.depthTextureMode |= DepthTextureMode.Depth;
camera.depthTextureMode |= DepthTextureMode.DepthNormals;
在 Inspector 面板相机组件的最下方可以看到设置的属性,如下:
4.2 从 _CameraDepthTexture 中获取深度
如果生成了深度纹理,深度纹理会保存在内置变量 _CameraDepthTexture 中。
1)深度纹理采样
// 非线性的深度(即计算的深度值与实际深度值不是线性关系)
float depth = SAMPLE_DEPTH_TEXTURE(_CameraDepthTexture, i.uv); // tex2D(_CameraDepthTexture, i.uv).r
// 观察空间中的线性的深度, 值域: [Near, Far], 公式: 1.0 / (_ZBufferParams.z * depth + _ZBufferParams.w)
float linearDepth = LinearEyeDepth(depth);
// 观察空间中的线性且归一化的深度, 值域: [0, 1], 公式: 1.0 / (_ZBufferParams.x * depth + _ZBufferParams.y)
float linear01Depth = Linear01Depth(depth);
SAMPLE_DEPTH_TEXTURE 内部使用 tex2D 进行采样,类似的宏还有 SAMPLE_DEPTH_TEXTURE_PROJ、SAMPLE_DEPTH_TEXTURE_LOD,它们在 HLSLSupport.cgin 文件中有定义,如下:
# define SAMPLE_DEPTH_TEXTURE(sampler, uv) (tex2D(sampler, uv).r)
# define SAMPLE_DEPTH_TEXTURE_PROJ(sampler, uv) (tex2Dproj(sampler, uv).r)
# define SAMPLE_DEPTH_TEXTURE_LOD(sampler, uv) (tex2Dlod(sampler, uv).r)

float4 tex2Dproj(sampler2D s, in float3 t) { return tex2D(s, t.xy / t.z); }
float4 tex2Dproj(sampler2D s, in float4 t) { return tex2D(s, t.xy / t.w); }
float4 tex2Dlod(sampler2D x, in float4 t) { return x.t.SampleLevel(x.s, t.xy, t.w); }
说明: SAMPLE_DEPTH_TEXTURE 得到的深度不是线性的深度,即 SAMPLE_DEPTH_TEXTURE 返回的深度值与实践的深度值不是线性关系。
2)LinearEyeDepth 函数源码分析
LinearEyeDepth 函数源码(见 UnityCG.cgin 文件)如下,_ZBufferParams.z = (Near - Far) / (Near · Far),_ZBufferParams.w = 1 / Near(_ZBufferParams 为内置变量,详见→Shader常量、变量、结构体、函数,Near、Far 分别为近裁剪平面和远裁剪平面离相机的距离),因此 LinearEyeDepth 内部实现等价于注释部分。
// 公式: Near * Far / ((Near - Far) * z + Far), 值域: [Near, Far]
inline float LinearEyeDepth(float z)
{ // 观察空间中的线性的深度, z为纹理采样的非线性的深度
    return 1.0 / (_ZBufferParams.z * z + _ZBufferParams.w);
}
通过第 2 节顶点映射过程,我们可以得出以下方程组关系,其中,z1 为观察空间中顶点坐标 z 值,z2、w2 分别为裁剪空间中顶点坐标 z 值和 w 值,z3 为归一化的设备空间(NDC)中顶点坐标 z 值,z4 为纹理空间中顶点坐标 z 值,depth 为观察空间中顶点的深度值,公式 1 和公式 2 由空间和变换中透视投影得到,公式 3 是齐次除法(或透视除法)(z3 值域为 [-1, 1]),公式 4 是归一化处理(z4 值域为 [0, 1]),公式 5 是将深度值取正(观察空间中顶点坐标都是负值,取反后使得深度值为正)。
进一步计算得到 z4 与 depth 的关系如下:
计算反函数得到 depth 与 z4 的关系如下,结果与代码中注释一致。
3)Linear01Depth 函数源码分析
Linear01Depth 函数源码(见 UnityCG.cgin 文件)如下,_ZBufferParams.x = (Near - Far) / Near,_ZBufferParams.y = Far / Near (_ZBufferParams 为内置变量,详见→Shader常量、变量、结构体、函数,Near、Far 分别为近裁剪平面和远裁剪平面离相机的距离),因此 Linear01Depth 内部实现等价于注释部分。
// 公式: Near / ((Near - Far) * z + Far), 值域: [0, 1]
inline float Linear01Depth(float z)
{ // 观察空间中的线性且归一化的深度, z为纹理采样的非线性的深度
    return 1.0 / (_ZBufferParams.x * z + _ZBufferParams.y);
}
本节继续沿用 2)中变量,假设归一化的线性深度为 depth01,depth 的值域为 [Near, Far],depth01 的值域为 [0, 1],因此 depth01 = (depth - Near) / (Far - Near),由于 Near 一般取值较小(Unity 中默认值为 0.3)、Far 取值较大(Unity 中默认值为 1000),depth01 和 depth 的关系可以简化为:depth01 = depth / Far,进一步计算得到 depth 与 z4 的关系如下,结果与代码中注释一致。
说明:Linear01Depth 归一化的结果是一个近似结果,即值域并不是 [0,1],而是 [Near / Far, 1],由于 Near 一般取值较小(Unity 中默认值为 0.3)、Far 取值较大(Unity 中默认值为 1000),Near / Far 近似为 0。
4.3 从 _CameraDepthNormalsTexture 中获取深度和法线
如果生成了深度&法线纹理,深度&法线纹理会保存在 _CameraDepthNormalsTexture 中。
1)深度&法线纹理采样
inline void DecodeDepthNormal(float4 enc, out float depth, out float3 normal)
{ // 深度&法线采样, enc为tex2D采样结果, depth、normal为解码后的深度和法线
    depth = DecodeFloatRG(enc.zw); // 观察空间中的线性且归一化的深度
    normal = DecodeViewNormalStereo(enc); // 观察空间中的法线向量
}
2)DecodeFloatRG 函数源码
inline float DecodeFloatRG(float2 enc)
{
    float2 kDecodeDot = float2(1.0, 1 / 255.0);
    return dot(enc, kDecodeDot);
}
3)DecodeViewNormalStereo 函数源码
inline float3 DecodeViewNormalStereo(float4 enc4)
{
    float kScale = 1.7777;
    float3 nn = enc4.xyz * float3(2 * kScale, 2 * kScale, 0) + float3(-kScale, -kScale, 1);
    float g = 2.0 / dot(nn.xyz, nn.xyz);
    float3 n;
    n.xy = g * nn.xy;
    n.z = g - 1;
    return n;
}
5 查看深度纹理和法线纹理
为了不让深度值映射到一个比较小的区域(接近 0 或接近 1),使得深度纹理图呈现黑色或白色,需要调整远裁剪平面的值。
5.1 帧调试器查看深度纹理和法线纹理
1)设置深度纹理模式
DepthNormalTest.cs
using UnityEngine;

[ExecuteInEditMode] // 编辑态可以查看脚本运行效果
public class DepthNormalTest : MonoBehaviour {
	private void OnEnable() {
		GetComponent().depthTextureMode |= DepthTextureMode.Depth;
		GetComponent().depthTextureMode |= DepthTextureMode.DepthNormals;
	}
}
说明:DepthNormalTest 脚本组件需要挂在相机上。
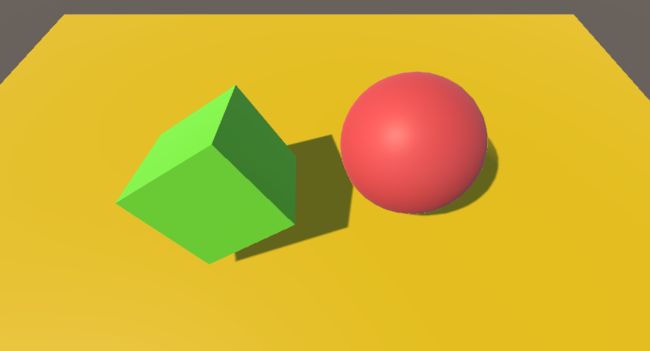
场景渲染如下:
2)查看深度纹理
通过 Window → Analysis → Frame Debug 打开帧调试器,单击 Enable 按钮开始调试,如下:
深度纹理如下:
3)查看深度&法线纹理
在帧调试器中调整帧渲染事件,找到最后一个渲染目标为 Camera DepthNormalsTexture 的事件,显示深度&法线纹理如下:
5.2 代码查看线性的深度和法线纹理
1)设置深度纹理模式和材质的 Shader
LinearDepthNormalsTexture.cs
using UnityEngine;

[ExecuteInEditMode] // 编辑态可以查看脚本运行效果
[RequireComponent(typeof(Camera))] // 需要相机组件
public class LinearDepthNormalsTexture : MonoBehaviour {
    private Material material = null; // 材质

    private void Start() {
        material = new Material(Shader.Find("MyShader/LinearDepthNormalsTexture"));
        material.hideFlags = HideFlags.DontSave;
    }

    private void OnEnable() {
        GetComponent().depthTextureMode |= DepthTextureMode.Depth;
        GetComponent().depthTextureMode |= DepthTextureMode.DepthNormals;
    }

    private void OnRenderImage(RenderTexture src, RenderTexture dest) {
		if (material != null) {
			Graphics.Blit(null, dest, material);
        }
		else {
			Graphics.Blit(src, dest);
		}
	}
}
2)基于 _CameraDepthTexture 的深度纹理
LinearDepthNormalsTexture.shader
Shader "MyShader/LinearDepthNormalsTexture" { // 线性深度和法线纹理

	SubShader{
		Pass {
			// 深度测试始终通过, 关闭深度写入
			ZTest Always ZWrite Off

			CGPROGRAM

			#include "UnityCG.cginc"

			#pragma vertex vert_img // 使用内置的vert_img顶点着色器
			#pragma fragment frag

			sampler2D _CameraDepthTexture; // 深度纹理

			fixed4 frag(v2f_img i) : SV_Target{ // v2f_img为内置结构体, 里面只包含pos和uv
				float depth = SAMPLE_DEPTH_TEXTURE(_CameraDepthTexture, i.uv); // 非线性的深度(即计算的深度值与实际深度值不是线性关系)
				float linear01Depth = Linear01Depth(depth); // 观察空间中的线性且归一化的深度
				return fixed4(linear01Depth, 0, 0, 1);
			}

			ENDCG
		}
	}

	FallBack off
}
运行后效果如下:
3)基于 _CameraDepthNormalsTexture 的深度纹理
LinearDepthNormalsTexture.shader
Shader "MyShader/LinearDepthNormalsTexture" { // 线性深度和法线纹理

	SubShader{
		Pass {
			// 深度测试始终通过, 关闭深度写入
			ZTest Always ZWrite Off

			CGPROGRAM

			#include "UnityCG.cginc"

			#pragma vertex vert_img // 使用内置的vert_img顶点着色器
			#pragma fragment frag

			sampler2D _CameraDepthNormalsTexture; // 深度&法线纹理

			fixed4 frag(v2f_img i) : SV_Target{ // v2f_img为内置结构体, 里面只包含pos和uv
				fixed4 tex = tex2D(_CameraDepthNormalsTexture, i.uv);
				float depth = DecodeFloatRG(tex.zw); // 观察空间中的线性且归一化的深度
				return fixed4(depth, 0, 0, 1);
			}

			ENDCG
		}
	}

	FallBack off
}
运行后效果同第 2)节。
4)基于 _CameraDepthNormalsTexture 的法线纹理
LinearDepthNormalsTexture.shader
Shader "MyShader/LinearDepthNormalsTexture" { // 线性深度和法线纹理

	SubShader{
		Pass {
			// 深度测试始终通过, 关闭深度写入
			ZTest Always ZWrite Off

			CGPROGRAM

			#include "UnityCG.cginc"

			#pragma vertex vert_img // 使用内置的vert_img顶点着色器
			#pragma fragment frag

			sampler2D _CameraDepthNormalsTexture; // 深度&法线纹理

			fixed4 frag(v2f_img i) : SV_Target{ // v2f_img为内置结构体, 里面只包含pos和uv
				fixed4 tex = tex2D(_CameraDepthNormalsTexture, i.uv);
				float3 normal = DecodeViewNormalStereo(tex); // 观察空间中的法线向量
				return fixed4(normal * 0.5 + 0.5, 1);
			}

			ENDCG
		}
	}

	FallBack off
}
运行效果如下:
5)基于 _CameraDepthNormalsTexture 的深度&法线纹理
LinearDepthNormalsTexture.shader
Shader "MyShader/LinearDepthNormalsTexture" { // 线性深度和法线纹理

	SubShader{
		Pass {
			// 深度测试始终通过, 关闭深度写入
			ZTest Always ZWrite Off

			CGPROGRAM

			#include "UnityCG.cginc"

			#pragma vertex vert_img // 使用内置的vert_img顶点着色器
			#pragma fragment frag

			sampler2D _CameraDepthNormalsTexture; // 深度&法线纹理

			fixed4 frag(v2f_img i) : SV_Target{ // v2f_img为内置结构体, 里面只包含pos和uv
				return tex2D(_CameraDepthNormalsTexture, i.uv);
			}

			ENDCG
		}
	}

	FallBack off
}
运行效果如下:


